DIY at Two Thirty Five Designs

Hellooooo, blog friends!  I’d like to introduce you to Allison from

Two Thirty-Five Designs
You might already know her. She’s been featured at quite a few of our favorite spots but not without good cause. She has some amazing DIY projects going on. Click the links below to see the details on her original post. 
I love this…so simple to do but what a statement. 
Would you believe those are posterboard circles, mdf board, trim and paint?
 
Love the sheen…
Allison was this chair’s fairy Godmother…
Before
Cinderella lives happily ever after…
Stunning!
I love the bright colors, bold patterns…
Not only is Allison a Stella & Dot rep, Etsy shop owner, painter, creative DIY’er and crafter, but they buy and fix up houses.  I don’t know how she does it all.  They took this kitchen…
Before
And with a really, really tight budget, turned it into this…
Unbelievable. 
Pop over to Two Thirty-Five Designs to see more! While you’re there, enter for a chance to win a beautiful gift for yourself, stocking stuffers or to check off a pretty gift idea for your accessory loving friend.

Pin It

Organizing Your Pantry ~ My Happy House

Molly from

My Happy House
always has some great cleaning, organizational tips and DIY.  With holiday cooking and baking on the agenda, I thought you’d enjoy some helpful tips:


Up until just a few days ago, on a good day, my pantry used to look like this:

Before: 

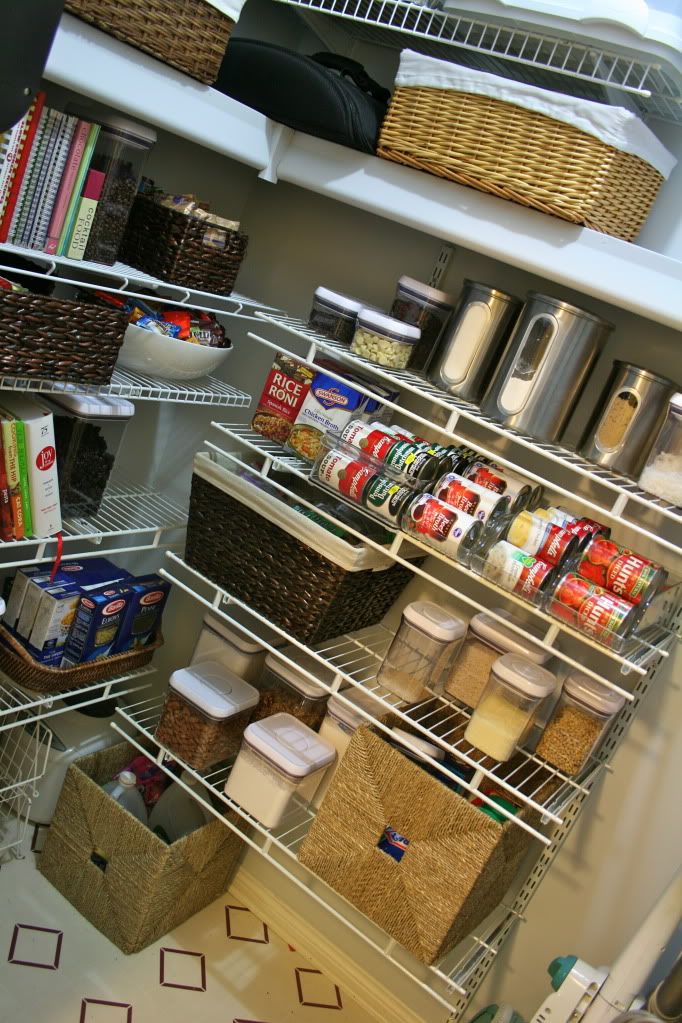
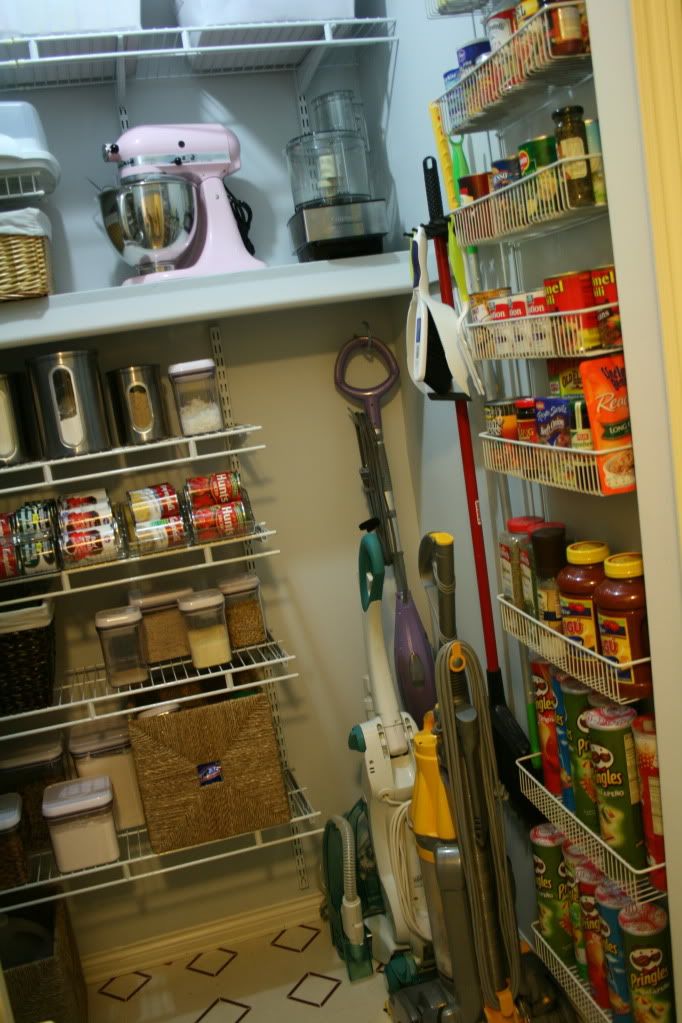
Maximizing the pantry is key. Oh and I want it to look pretty, am I asking too much? Perhaps, but that didn’t stop me from trying. See the tips at the bottom of this post. 

 
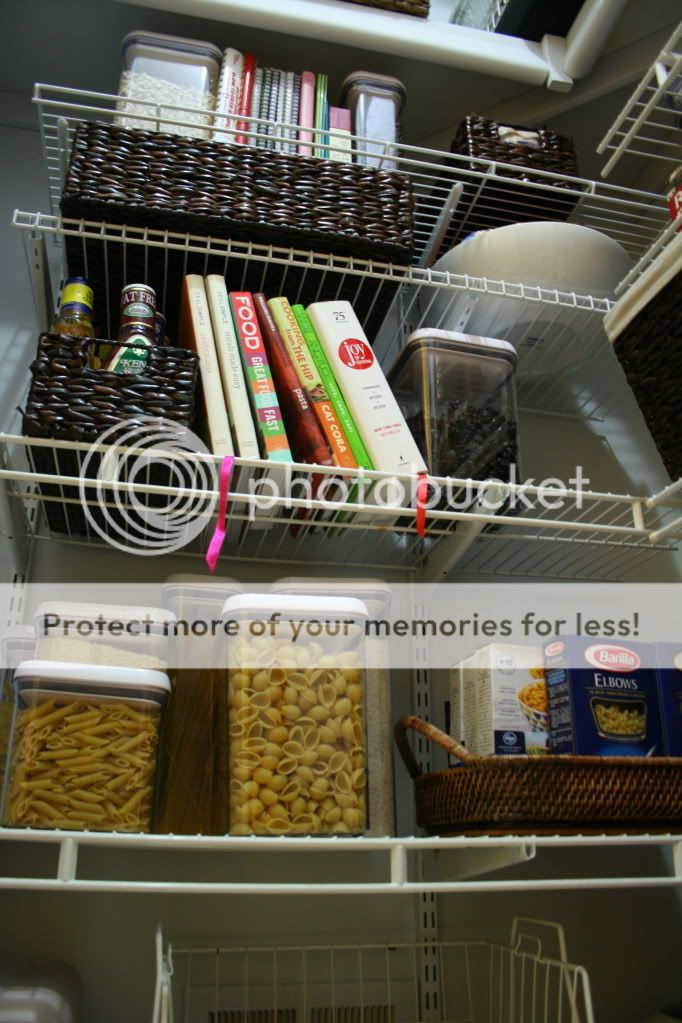
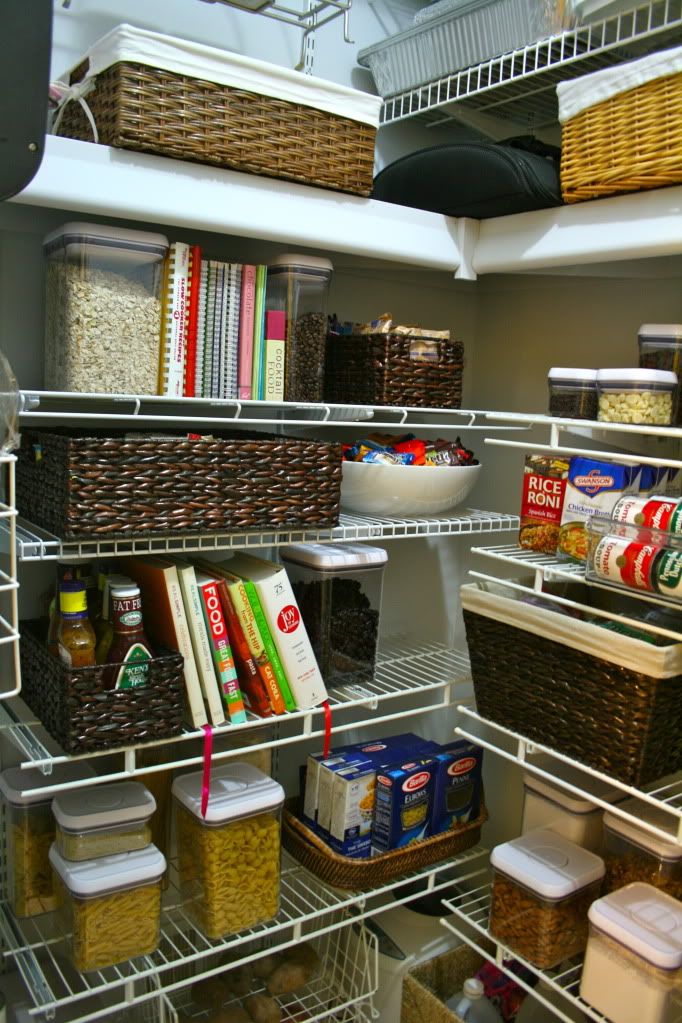
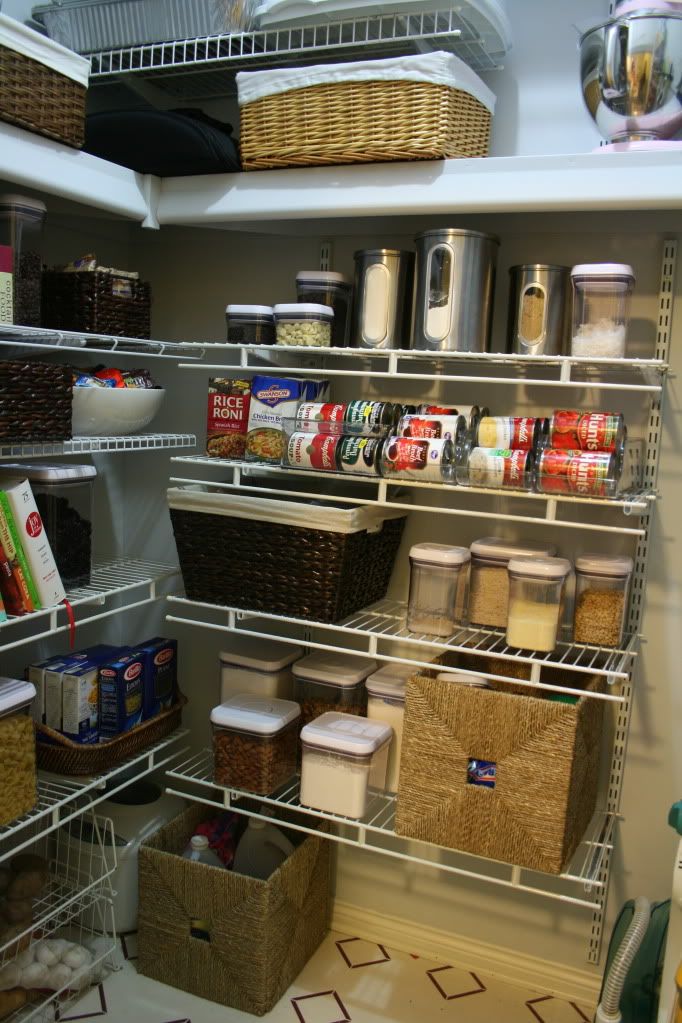
After: 

How to achieve the pantry of my your dreams:

  1. Really only stock the items you need. I ditched a few things I really didn’t need and have a pile of stuff to donate.
  2. Visually break up the shelves. A nice balance of baskets, containers, cookbooks, and serving platters helps big time!
  3. Uniformity is somewhat key. I wasn’t about to drop $$$$ on new baskets when I had quite a few I could repurpose. I actually like the variety there, but I wanted to have all the same containers for the most part. So I spent some money on those.
  4. The wire rack on the side wall was one way to house can goods, but I needed a better solution for items I keep in bulk (diced tomatoes, chicken broth, etc.). Fridge bins work great for this! They are clear, so they go with whatever theme you have and are the perfect size since they are for soda cans.
  5. Don’t overfill the shelves. This one was hard for me to do because I really do need all the space in there, but I’ll show you something I did later that really helped with this!
  6. Make sure to use all the vertical space! The way the pantry was originally set up, there was a good couple feet above the shelf that wasn’t used because I just didn’t have that many tall items. We added the wire shelf up top, instant space. And notice on the left, where I have some serving pieces, those little “S” hooks. Again, vertical space. It still looks aesthetically pleasing by not looking crowded, but without those hooks, I’d lose an entire space for a basket.
  7. When using that top vertical space, be smart about it. I kept all the canvas baskets at the very top light in weight. Linens, chips, cereal, etc. are easy to get down without fear I’ll knock myself unconscious when I need to get them down.
  8. Keep the color scheme light. The paint we chose was some paint we had bought and weren’t able to use the perfect paint for the little closet space with no natural light. (Platinum by Ace) However, I’m pretty sure any paint would have been an upgrade from builder grade beige, and especially so seeing as the ceiling white came about 2 feet down the wall with a jagged line to finish it. Seriously builders?
Thanks so much for sharing your great tips, Molly! Perfect timing! I know that not only with the holidays do we do more cooking and baking, but with cold winter weather and shorter days, there are more home cooked meals, more comfort foods and having everything organized feels so good! 
 
You can see more from Molly at 
 

This Messy Business – Bathroom Reveal

Welcome Monday!  Of course I only say that when it’s a short work week!  Today I’d like to introduce you to Meaghan, a young, poor, obsessed with decorating DIY’er redoing her first place and documenting her experiences and DIY at her blog, 


Photobucket

Meaghan just recently completed an amazing bathroom makeover.  Take a look:


BEFORE

“The walls were a weird pinkish beige and the old light fixtures made the room HOT. So hot in fact they had burned spots onto the ceiling. Awesome. The towel rack was in a weird spot  and the accessories were kinda childish.”

“Here was the bathroom shower area. It wasn’t very pretty for sure. Crappy towel rack, ugly paint, weird door sticker… I didn’t enjoy spending time in the bathroom really.”


“There were several things that had to be done and I soon found that my list from above was getting longer… and longer… and longer. First step though was to have my Dad help me with the wall repair. Which we thought was only going to take a couple hours when really ended up consuming the whole day.

Here’s Meagan’s DIY Checklist:< /span>
And here’s the beautiful AFTER…

< br />

 “The goal of the entire reno: storage and function.”


Before:

Now the after:

“Here’s another glimpse of all the different angles of the room. From the entry to the bathroom to each vanity I have touched every surface (except the counter tops) with a paint brush or a new look. Top to bottom the space is absolutely nothing like it was when I bought it back in 2008.” 


Here’s the comparison:

Isn’t it amazing?  Want more details or have questions?  See the Meaghan’s original post with more information at 
This Messy Business


Pin It