Kitchen French Door Trim Update

The trim around our french door was a more modern/inexpensive mitered jobby like this…
The rest of the door trim in the kitchen is original to the farmhouse…it might not be a big deal. Not really. We have mismatched trim throughout the entire house. But then Mr. DIY wanted one of these:
Ryobi Doorman Door Closer - DM85D
He HATES when the door is not shut quickly.  Ask anyone in our family his infamous naggiest lecture and they’ll holler:  “YOU’RE LETTING THE BUGS IN!”
::eye roll::
(actually…bugs = bad.  they bite. kitty destroys house getting them. take back ::eye roll::)
Since we’re remodeling the kitchen 
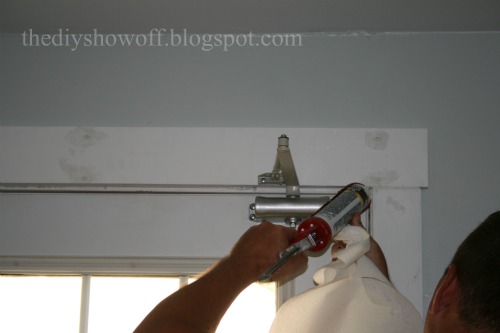
AND he wants an automatic door shutter-upper (also known as the Mr. DIY shutter upper! hehehehe) which needs a wider trim, we decided to change out the skinny trim for something chunky and matching the original.
You can see the skinny trim in the background of this picture: SEE IT THERE? And the bug destroyer in the foreground? I have a bent curtain – rod victim of bug destroyer’s determination.

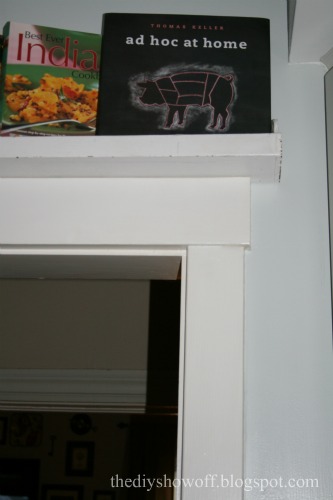
Original trim throughout the kitchen. Wide. Pretty.

How we matched it:

We used three 3 1/2″ by 1″ boards.  Set up the vertical sides first from floor to top of door frame.  Mark to just the top of the vertical door frame and cut. I love this look and it’s so easy to frame doors and windows this way.  Mitering is a lot more complicated!
The top horizontal board sits on top of the cut vertical boards to complete the frame.  Ours overlaps each side by 1/2″. Mark 1/2″ past the vertical side and cut. 

Prime with a latex primer such as Kilz.

We then used Dutch Boy’s Trim & Cabinet paint (Ultra White).  One coat before hanging.

Place and secure with finishing nails, countersinking them.

Fill nail holes with wood filler.
Use caulk were needed (side/seams).
Lightly sand where needed.

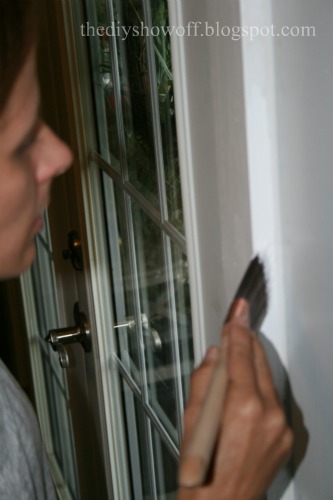
I always use my Purdy paint brush for trim. I gave the trim a second coat of paint. We use a satin or semi-gloss finish on trim.  Much easier to wipe finger prints (this door especially is in the path from kitchen to grill and my cook never sees his black fingerprints but you can’t miss them).  


All done. Stand back and admire, be reassured that the door closes automatically and exit quickly to avoid the push and letting bugs in!  🙂
Next up – framing that window and baseboard trim!  I do love that the door trim now matches the rest of our old home’s character.  

DIY Project Parade and Powder Room Decorative Details

Can you pick out the differences in these pictures?

Here’s a hint:  we used these products:
Flexible Dentil Molding
Thanks to Rockler, Gorilla Glue and Dischangers, I love this little cubby area in our powder room a little more.  Sometimes it’s about the minor details that give me a little peace of mind. 🙂
(See the full powder room yucky before & pretty after here
I have another little project in here coming up too!)

See what we did this weekend. the details and transformation post at The DIY Club.

What have you been up to?

The DIY Show Off


If you’d like to link YOUR DIY project post to The DIY Show Off Project Parade:


1. You must use the button above (ADD BUTTON HTML CODE FROM SIDE BAR TO YOUR POST) and link to this post to share the linky love.

2.Include your name or blog name and project title. Add your permalink (not your blog url, but your DIY project post url). Feel free to link a Past Post, just invite your readers in a current post with a quick note.

3.Or email your link to thediyshowoff@gmail.com and I will add it for you.

4.If you notice your link has disappeared -please add the link back to The DIY Show Off to your post today, a button or a quick note to your readers about the party and try again! I love when everyone participates and readers check out everyone’s links, but I think the return favor of linking back is the nice thing to do so everyone plays fair and enjoys all of the projects and links. Also – this blog party is for DIY projects only. Links not related to DIY will be deleted.

5.  NOW you can “like” the links!  What a fun idea!  Most liked links may be included in a post of DIY Project Parade highlights later in the week!  🙂

DIY Project Parade & French Door Trim Update

When we installed French doors in the kitchen in place of a single door, we put up inexpensive mitered skinny trim. You can see it in the back ground here:
The original trim in this old farmhouse is wide and chunky.  Here’s a picture of the pantry door in the kitchen:
Since we’re remodeling the kitchen,
We changed out the skinny door trim for a wider/matching look using Dutch Boy’s Trim & Cabinet paint (Ultra White) and a Purdy paint brush.
*
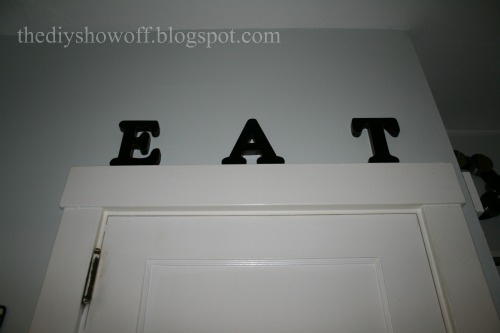
Now it has the same look as the rest of the original farmhouse trim.  
 
See that automatic door closer?  You can find one here: Ryobi Doorman Door Closer – found at Rockler.
Next up – framing that window and baseboard trim!  I do love that the door trim now matches the rest of our old home’s character.  What do you think?

See how we did it at The DIY Club.

Let’s see what you’ve been up to!
The DIY Show Off


If you’d like to link YOUR DIY project post to The DIY Show Off Project Parade:


1. You must use the button above (ADD BUTTON HTML CODE FROM SIDE BAR TO YOUR POST) and link to this post to share the linky love.

2.Include your name or blog name and project title. Add your permalink (not your blog url, but your DIY project post url). Feel free to link a Past Post, just invite your readers in a current post with a quick note.

3.Or email your link to thediyshowoff@gmail.com and I will add it for you.

4.If you notice your link has disappeared -please add the link back to The DIY Show Off to your post today, a button or a quick note to your readers about the party and try again! I love when everyone participates and readers check out everyone’s links, but I think the return favor of linking back is the nice thing to do so everyone plays fair and enjoys all of the projects and links. Also – this blog party is for DIY projects only. Links not related to DIY will be deleted.

5.  NOW you can “like” the links!  What a fun idea!  Most liked links may be included in a post of DIY Project Parade highlights later in the week!  🙂


Enter the HomeTalk $100 Target Gift Card Giveaway too (HERE).