DIY Fall Festival Friday!

I’ve actually been spring cleaning in the fall (a car full of junk donated and more space feels soooo good) and preparing for guests but Bri and I did manage to decoupage some pumpkins. Have to fit a fun craft project in there somewhere to break up the work, right? It’s not an original project but results are always original.
After seeing the beautiful scrapbook paper from Canvas Corp
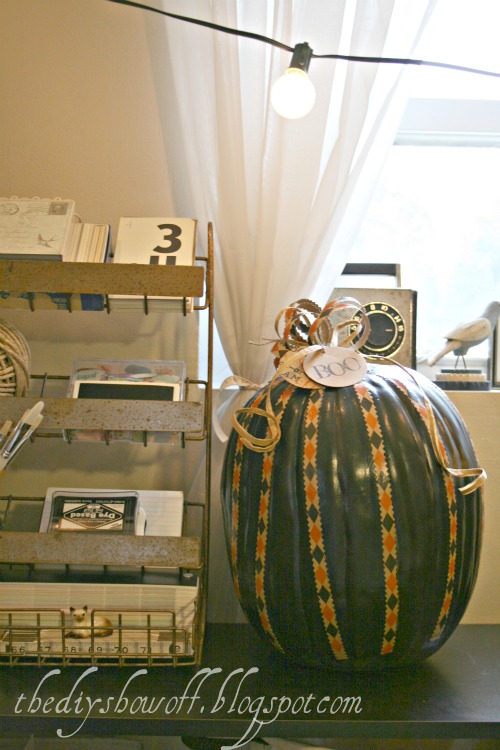
I chose to give my black pumpkin a new look to make my craft room a little more festive (I still have to do a reveal of my craft room ,don’t I? Enjoy the sneak peek!)…

Deco Art’s Decoupage is so much fun to work with and results are a beautiful gloss or matte finish. See my  decoupage pumpkin tutorial at the DIY Club.

Here’s the pumpkin I decoupaged a few years ago…completely different.

Bri’s decoupaged pumpkins:

Have you given this a shot?

Speaking of pumpkins!  Check out Pumpkins and Power Tools – a  great TV segment that aired this week featuring Ken Collier from RDA’s The Family Handyman. The segment was inspired by the October issue of TFH and touches on DIYers and using power tools to spice up your pumpkins for Halloween.


Let’s see what you’ve been up to! 

The DIY Show Off

Rules:

•Create a blog post about an Autumn/Fall project that YOU HAVE CREATED. Feel free to include a past link, however please make a note on a recent post about the DIY Fall Festival to invite everyone over to join in or to search the collection of fall inspired ideas.

•Add your project title to Linky party below.  (example: House # Pumpkins)

•Type in the permalink address, not your basic blog address. A permalink is the address that links directly to your specific post. (example: http://thediyshowoff.blogspot.com/2009/08/house-number-pumpkins)

•Please add the DIY button or link to the party in your post to share the party with your readers.

•Although a tutorial is helpful, it’s not required. It just must be your project.  Please only link up same project once to one party.

•If you notice that you’re link disappeared, please make the correction according to the rules above and re-link!

• By adding your link, you give the DIY Show Off permission to highlight your project in a future post. Enjoy and be inspired!


See more of my projects at

Pin It

DIY Project Parade


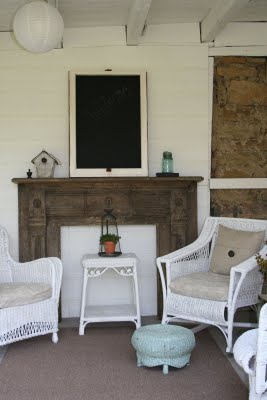
Remember when I found this old mantel in the barn?

 I‘m guessing it’s original to the house. 


It got a good scrubbing and sat propped up against the back wall of our barn patio for a while but I knew I wanted to bring it back into the house. 

But I wanted to be able to move it around, not secure it to the wall. I love to rearrange.  Right now I love having it in the dining room but what if I want it in the family room or a bedroom someday?

Enter True Value Hardware. Three pine 1x4s, a few L-brackets
Aleco 477502 Replacement L-Bracket, Alum, for 4PLT3
and some spray paint to blend it in (I haven’t had the heart to paint the original mantel yet but perhaps someday).


Boxing it makes it stand alone and movable!

I changed my fall mantel up a bit…
Before…
< span class="Apple-style-span" style="font-size: x-large;">Now…

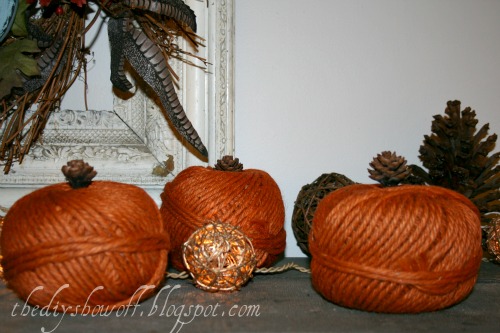
 Yarn pumpkins with pinecone stems…

 Fall monogram wreath…

 Pinecone votives on pedestals…


It’ll probably look different before next week’s DIY Project Parade! 🙂

The DIY Show Off
Let’s see what you’ve been up to!

1. You must use the button above (ADD BUTTON HTML CODE FROM SIDE BAR TO YOUR POST) and link to this post to share the linky love.

2.Include your name or blog name and project title. Add your permalink (not your blog url, but your DIY project post url). Feel free to link a Past Post, just invite your readers in a current post with a quick note.

3.Or email your link to thediyshowoff@gmail.com and I will add it for you.

4.If you notice your link has disappeared -please add the link back to The DIY Show Off to your post today, a button or a quick note to your readers about the party and try again! I love when everyone participates and readers check out everyone’s links, but I think the return favor of linking back is the nice thing to do so everyone plays fair and enjoys all of the projects and links. Also – this blog party is for DIY projects only. Links not related to DIY will be deleted.

5.  NOW you can “like” the links!  What a fun idea!  Most liked links may be
included in a post of DIY Project Parade highlights later in the week!


Pin It

*~*~*~*~*~*~*~*~*~*~*~*~*~*~*~*~*~*~*~
I was one of the bloggers selected by True Value to work on the DIY Squad. I have been compensated for my time commitment to the program as well as my writing about my experience. I have also been compensated for the materials needed for my DIY project. However, my opinions are entirely my own and I have not been paid to publish positive comments.
~*~*~*~*~

DIY Fall Festival

Meet: Suzy from The Better Decorating Bible. She’s hosting today’s DIY Show Off Fall Festival and sharing her super easy, nearly free fall DIY decorating tip this week. Suzy is an interior decorating and fashion enthusiast who is obsessed with everything luxury, unique, glamorous and most importantly – on an amazing budget.  I love her style, her blog and her projects.  Here’s Suzy with two chic and easy DIY fall projects:

Take advantage of the fall colored leaves this season, and put them to use! Here are two easy fall DIY project to do this weekend:

How to Frame Your Leaves

1) Prep your leaves BEFORE the weekend – pick your favorite colored leaves from your backyard and press them into a heavy book (telephone book is great). Stack more books on top to weigh it down for a few days till the leaves dry.

2) Choose a frame that’s proportional to the size of your leaves and arrange them onto a background of your choice. Use a bit a craft glue to set them into place and put together your frame. Enjoy!


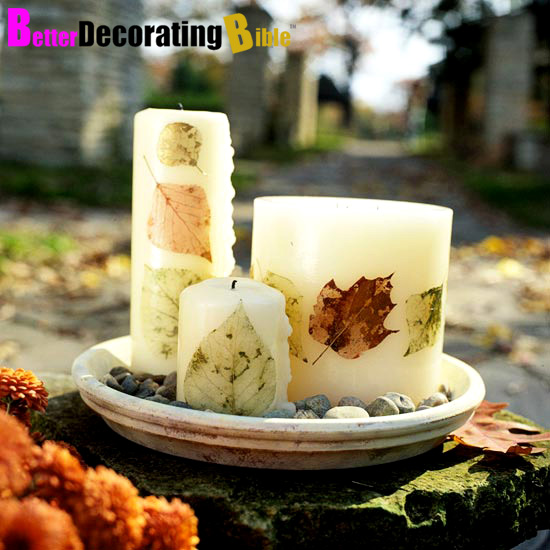
How to Make Fall Candles with Pressed Leaves

1) Set your leaves on a flat surface and brush a thin layer of craft glue (or Mod Podge) onto each leaf.

2) Press the leaves onto pillar candles and brush another layer of glue (or Mod Podge) over them. Set them to dry.

3) Scatter loose leaves or rocks around your candles for decoration, and Voila!

DIY Friday: Pressed Leaves Art
Better Homes and Gardens

See more great ideas, beautiful decorating and inspiration at


Now it’s your turn!  Let’s see your DIY Fall Related project!  


The DIY Show Off


Rules:

•Create a blog post about an Autumn/Fall project that YOU HAVE CREATED. Feel free to include a past link, however please make a note on a recent post about the DIY Fall Festival to invite everyone over to join in or to search the collection of fall inspired ideas.

•Add your project title to Linky party below.  (example: House # Pumpkins)

•Type in the permalink address, not your basic blog address. A permalink is the address that links directly to your specific post. (example: http://thediyshowoff.blogspot.com/2009/08/house-number-pumpkins)

•Please add the DIY button or link to the party in your post to share the party with your readers.

•Although a tutorial is helpful, it’s not required. It just must be your project.  Please only link up same project once to one party.

•If you notice that you’re link disappeared, please make the correction according to the rules above and re-link!

• By adding your link, you give the DIY Show Off permission to highlight your project in a future post. Enjoy and be inspired!

Reminder: Today’s the last day to link up your kitchen in the Roomspiration Kitchen series!  I’m still going through the links so if I haven’t visited you yet … I’ll be seeing you soon!   


Pin It