Industrial Milk Can turned Side Table

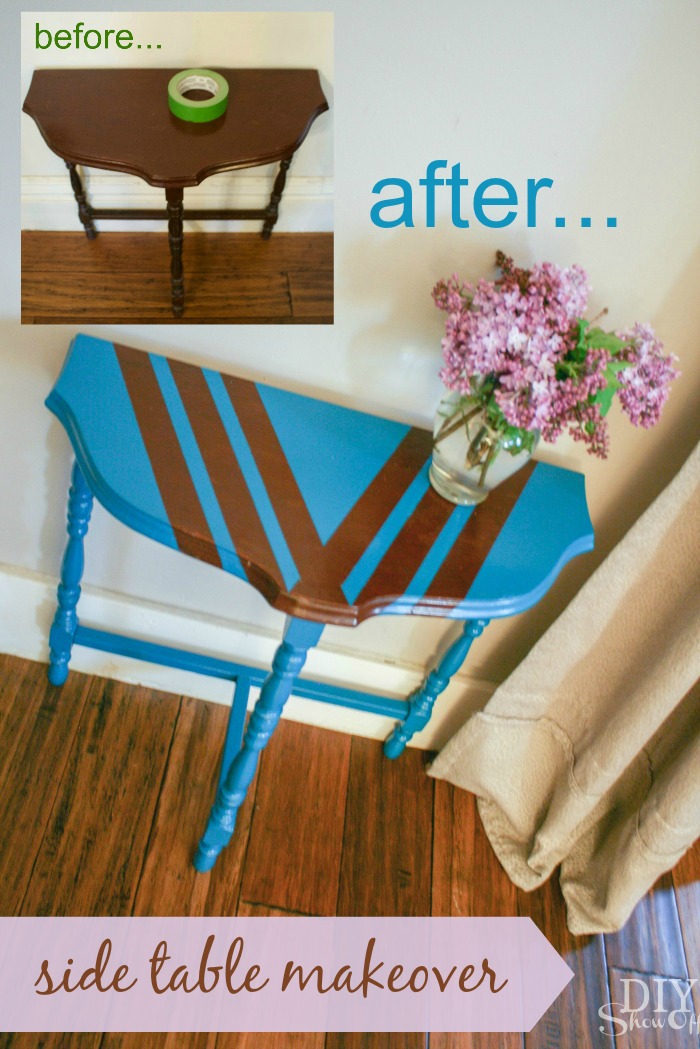
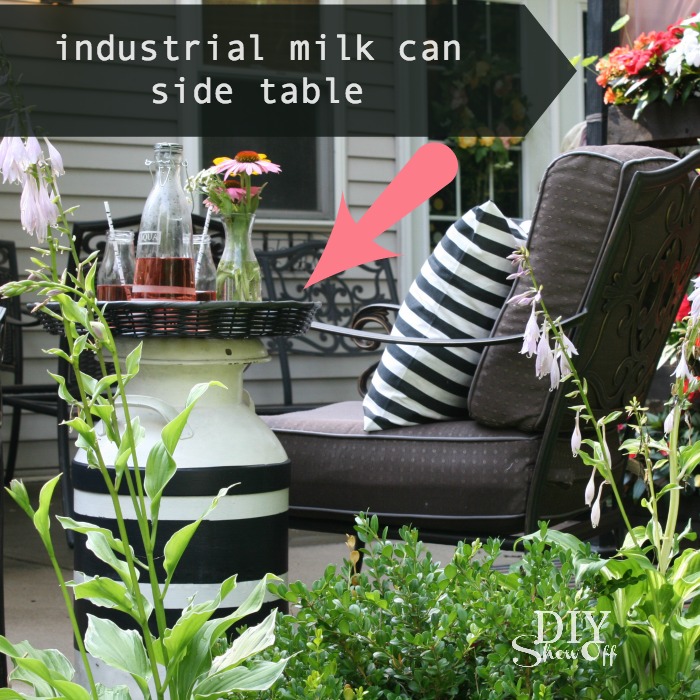
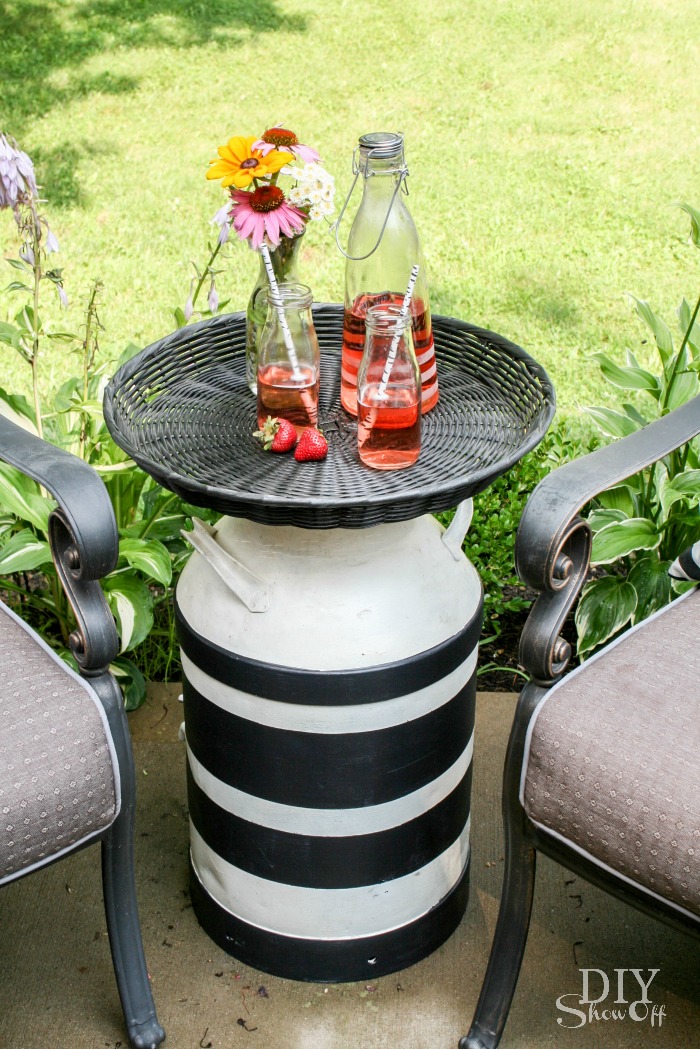
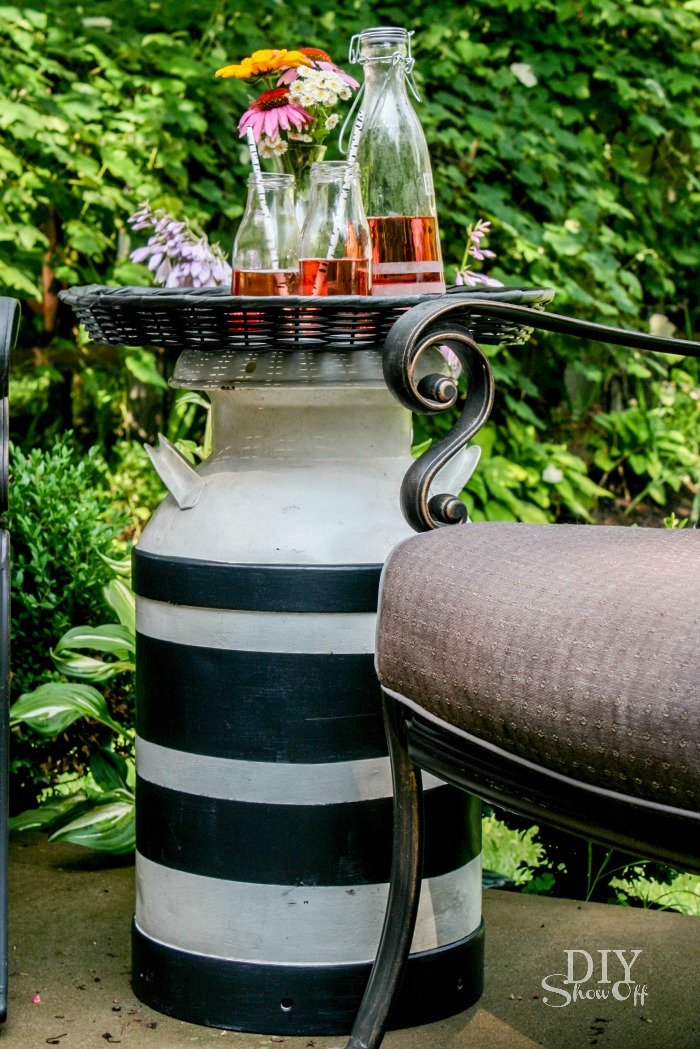
I’ve had old industrial milk can laying around, collecting dust (cobwebs too) just waiting for a fun DIY and repurposing it for a fun side table to add some charm to the patio seemed like just the right idea. 

DIY industrial milkman side table @diyshowoff summer patio

Materials I used:

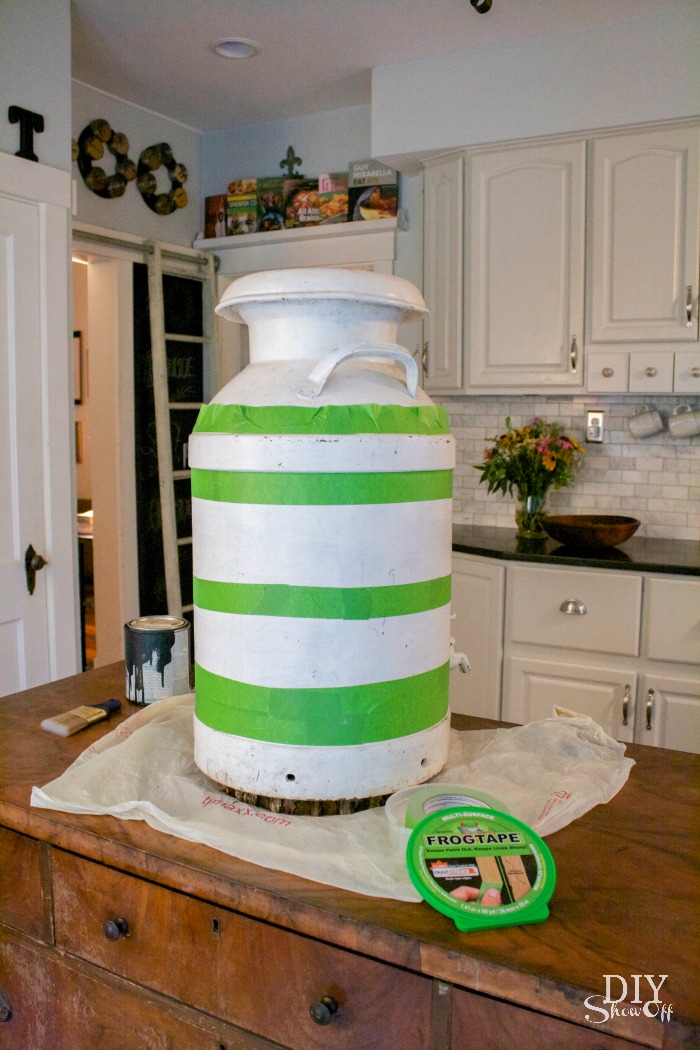
  • found industrial milk can
  • black paint + primer in one
  • FrogTape® MultiSurface
  • round wicker-like tray (also found…thrift store, I think) 

What I did: 

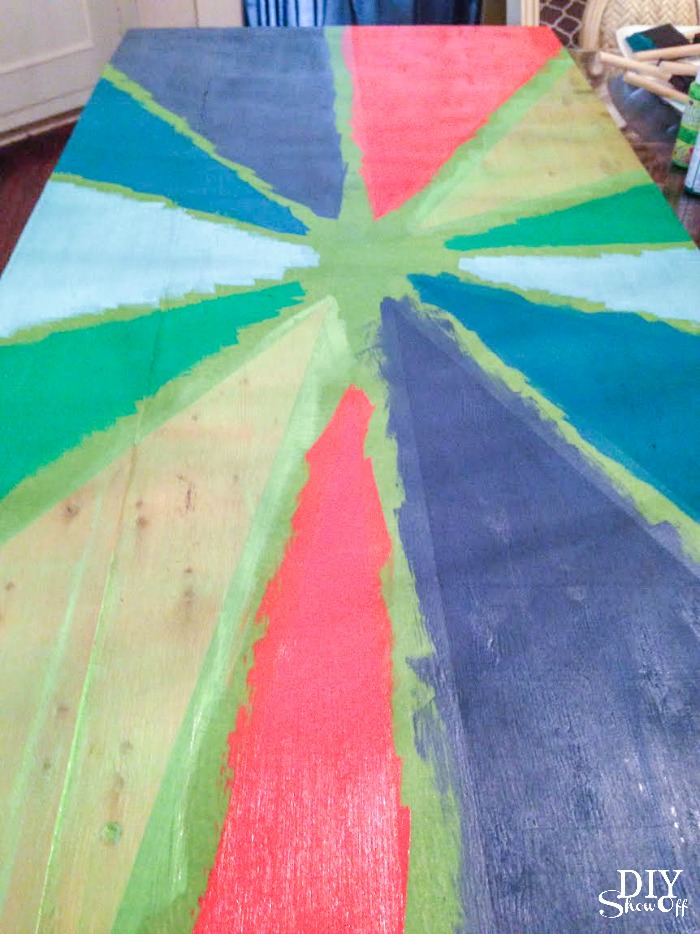
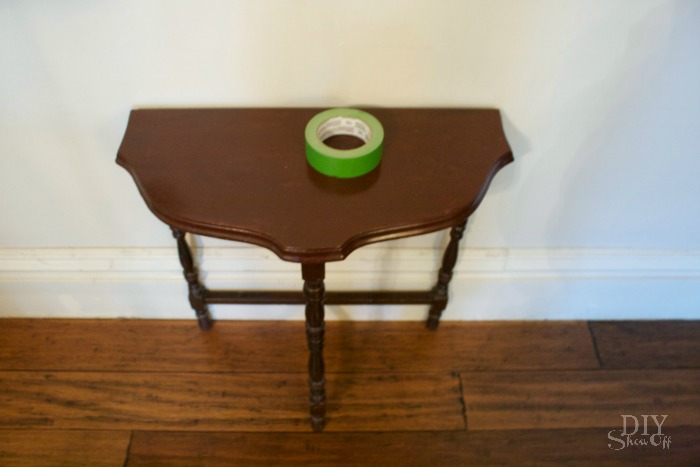
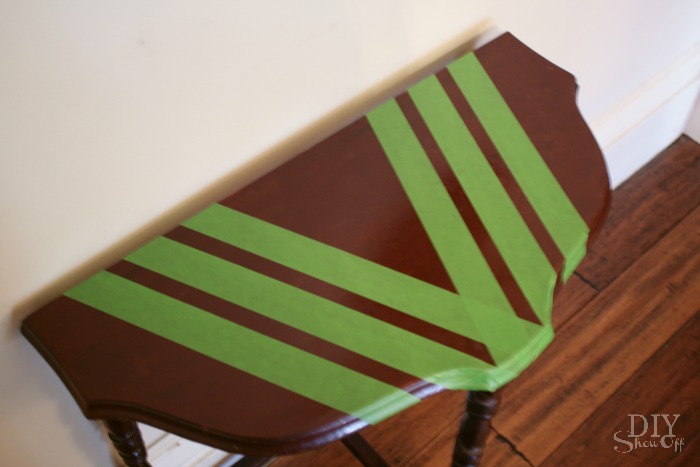
I like the distressed/dinged up paint finish but it needed a little pizazz. I gave it a good cleaning, then using FrogTape, I added some bold stripes. 

DIY industrial milkman side table @diyshowoff summer patio

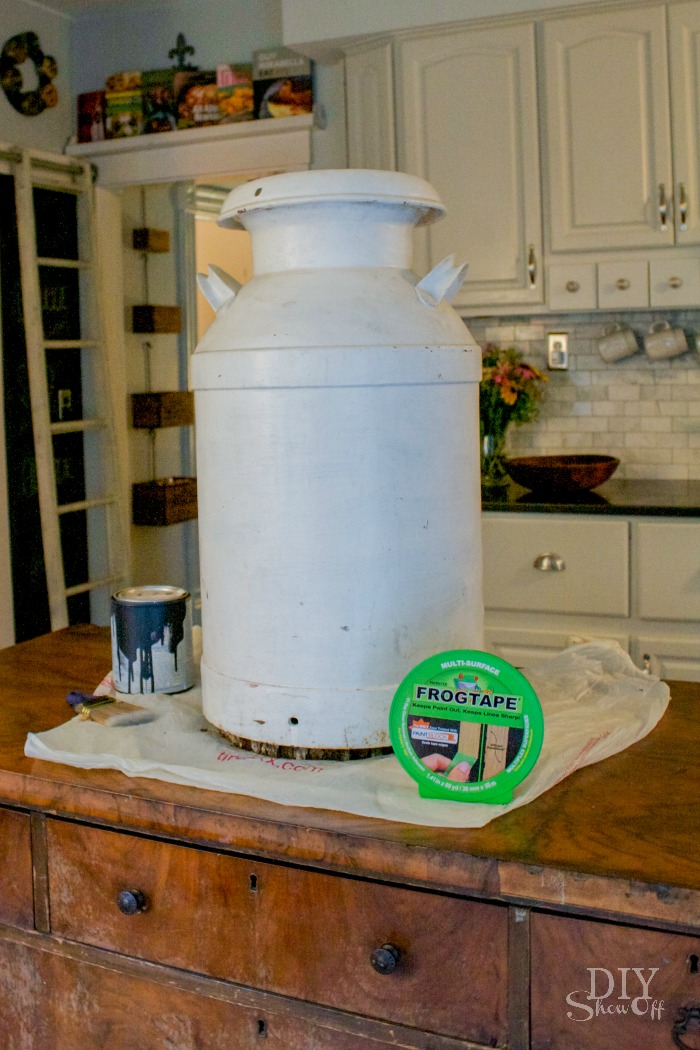
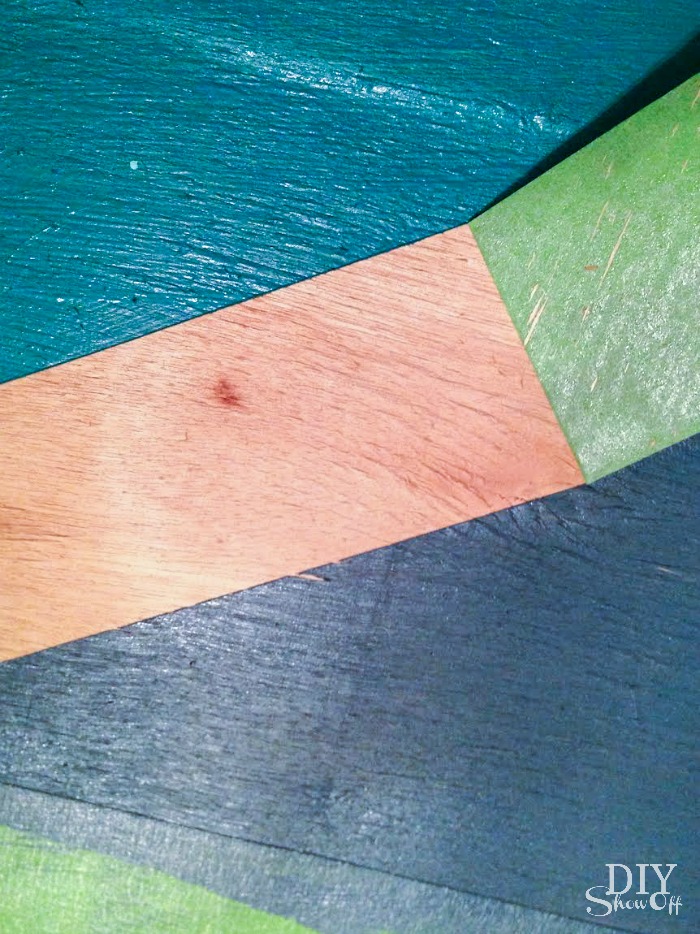
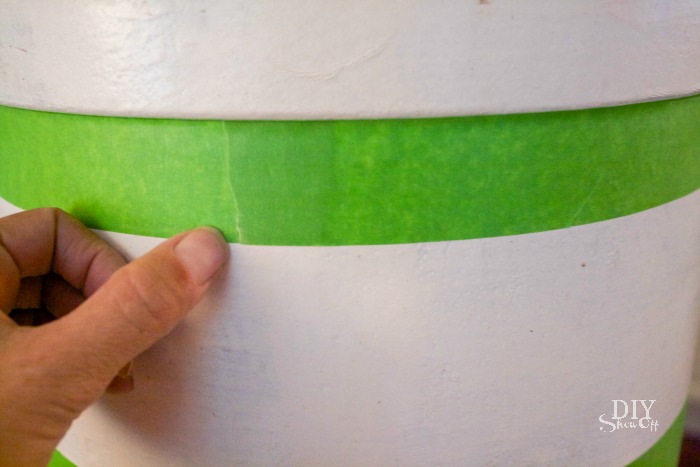
A spider crawled out of that hole too! Yikes! Once that was taken care of, using my thumbnail, I burnished the edges of the FrogTape to ensure crisp clean stripes.

DIY industrial milkman side table @diyshowoff summer patio DIY industrial milkman side table @diyshowoff summer patio

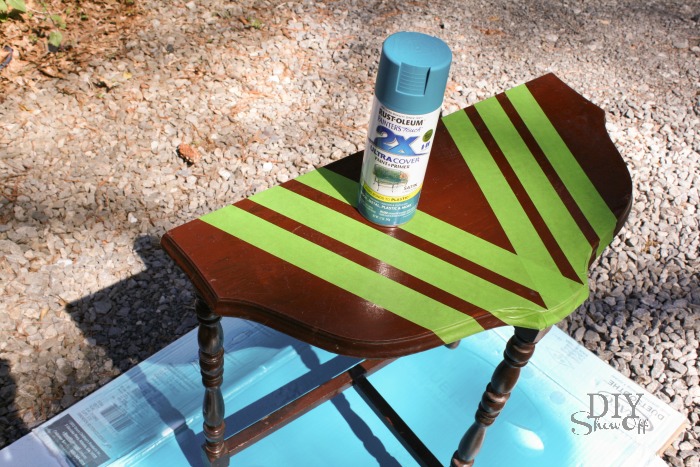
I applied two coats of black paint. Paint. Dry. Paint. 

DIY industrial milkman side table @diyshowoff summer patio

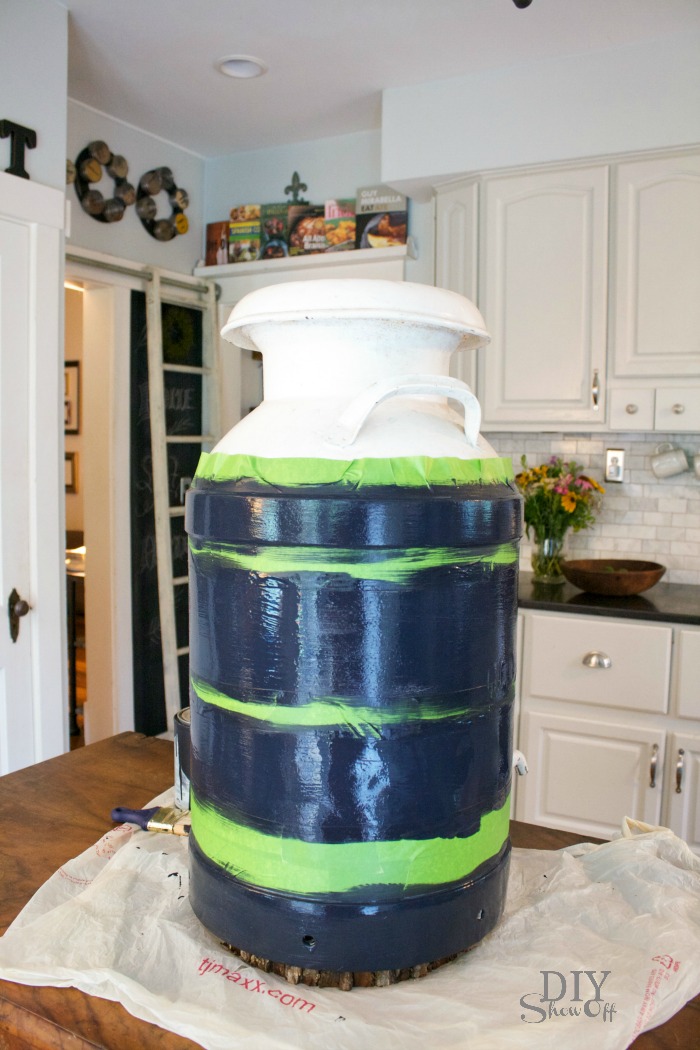
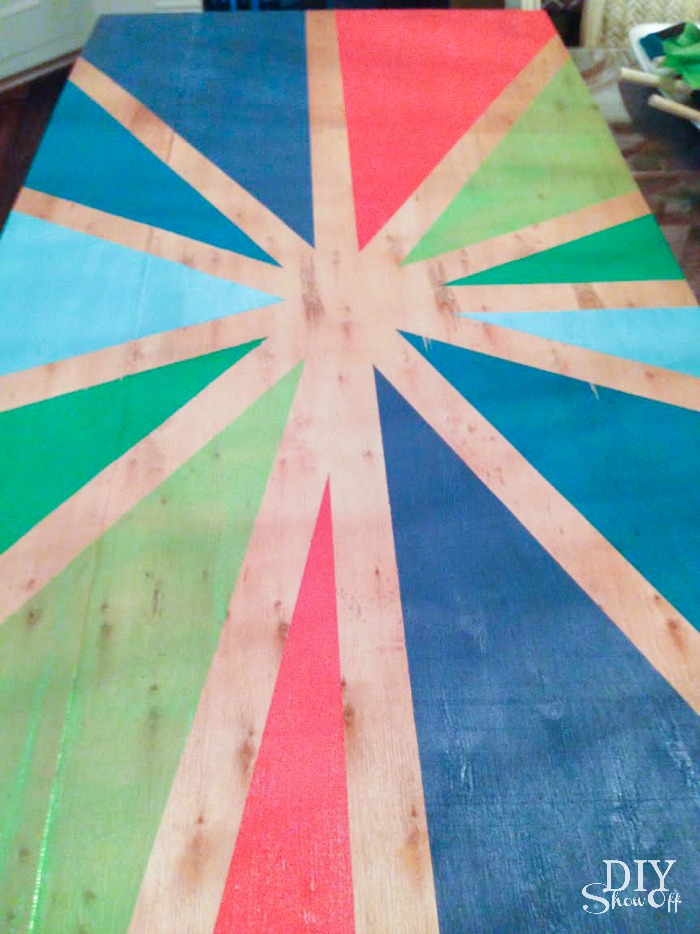
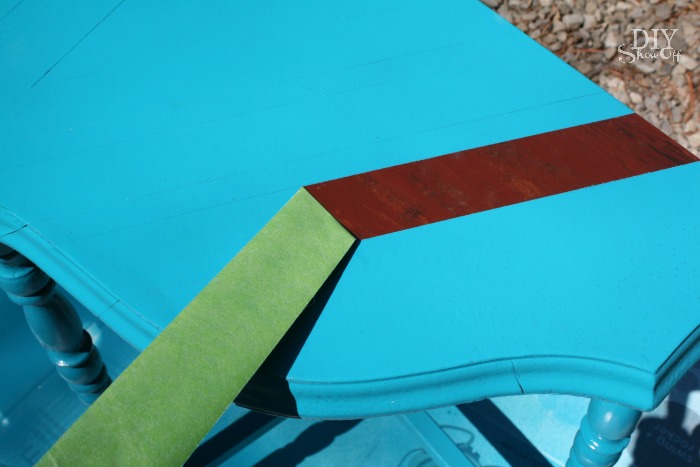
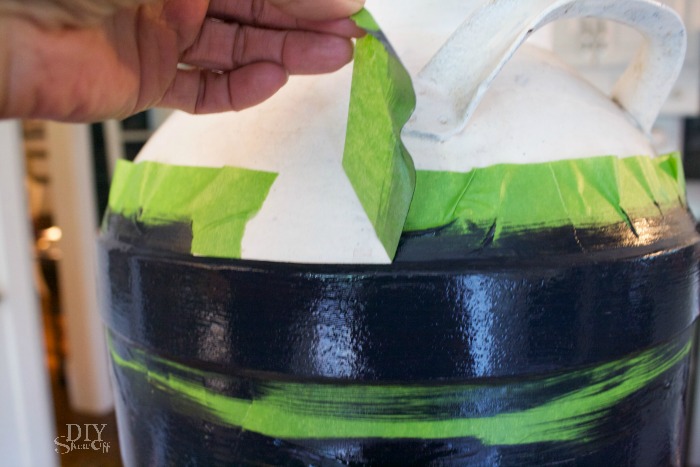
Right after I applied the second coat, while the paint was still wet, I carefully removed the FrogTape then let the paint dry. 

DIY industrial milkman side table @diyshowoff summer patio

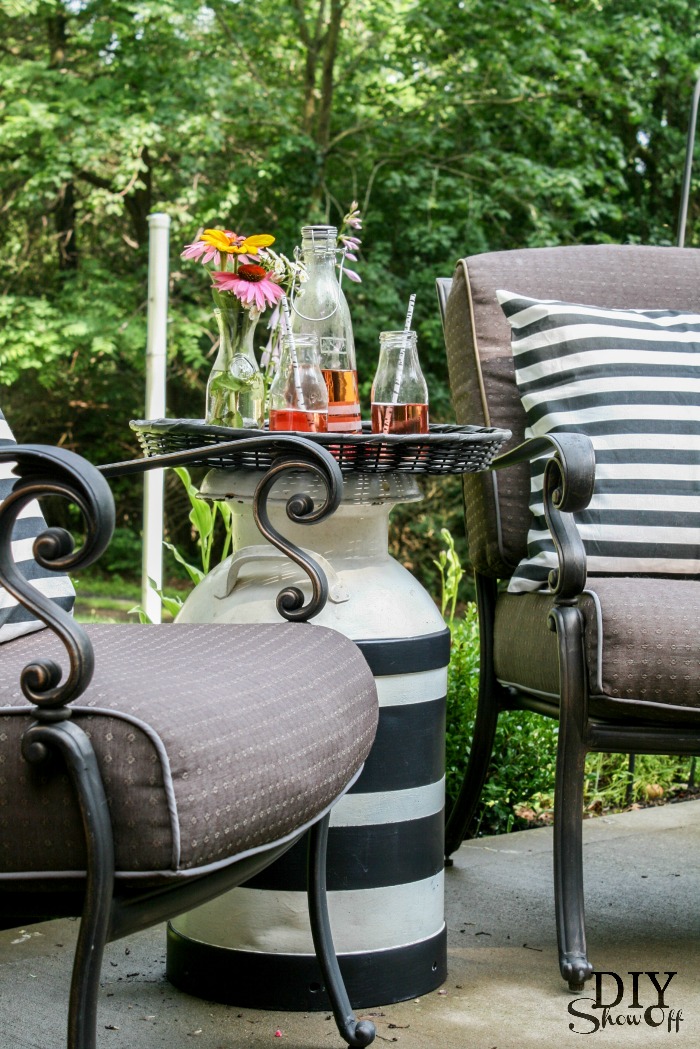
Secure a tray using whatever method you find best (glue and clamps, screws, etc.), (a round wooden table top or an old clock would be cool too) and ta-da! A fun side table for our patio: 

DIY industrial milkman side table @diyshowoff summer patio DIY industrial milkman side table @diyshowoff summer patio

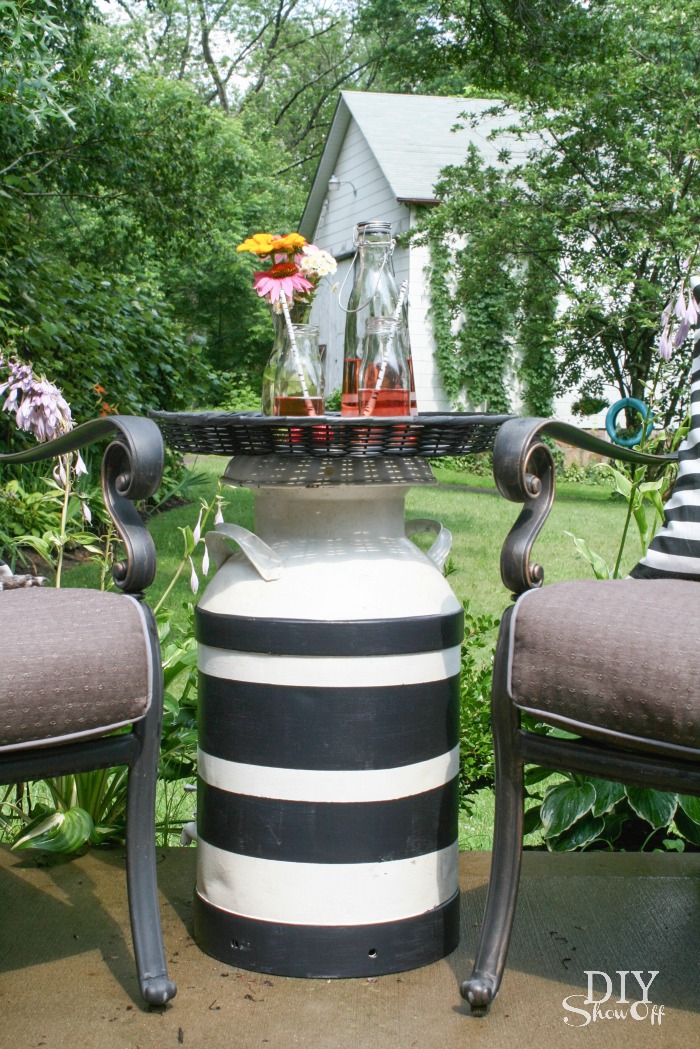
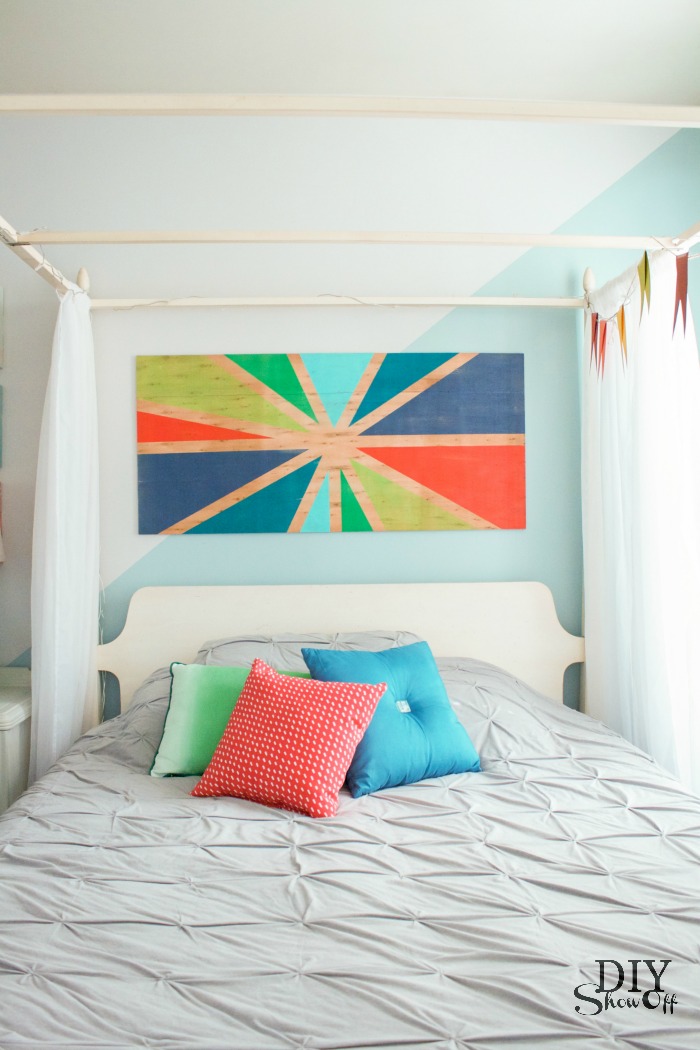
I added in some coordinating accent pillows and I have a fun new look to a usually neutral area. The old industrial milk can is a great conversation starter too. DIY industrial milkman side table @diyshowoff summer patio DIY industrial milkman side table @diyshowoff summer patio DIY industrial milkman side table @diyshowoff summer patio DIY industrial milkman side table @diyshowoff summer patio

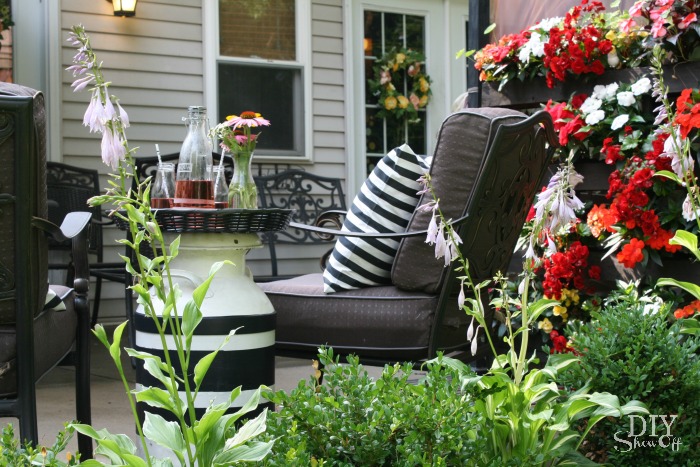
LOVE IT! Have you added any fun elements to your outdoor areas this summer? 

*I received compensation to complete this project for using FrogTape® products. All opinions, projects and ideas are based on my own experience.

 FrogTape Blog Squad

Colorblock Art

The area above the bed in the guest room was in need of a little something…

Guest Room/Nursery reveal @diyshowoff

I didn’t photograph the area in my guest room/nursery reveal closely because it was bare. But not anymore…

DIY color block sunburst wall art tutorial @diyshowoffI grabbed:

  • 48 x 22 inch plyboard (recycled from shipping packaging but available at the hardware store too)
  • FrogTape® MultiSurface
  • paint

Since my board was stored in the basement, I cleaned away the dust. 

Then measured and marked the center of my board. 

DIY color block sunburst wall art tutorial @diyshowoff

Next I applied FrogTape to create a sunburst design, starting from the center marking. I just placed my pieces randomly. 

Using a gift card, I burnished the edges of the tape to get clean crisp lines. 

DIY color block sunburst wall art tutorial @diyshowoff

Then painted each area, applying paint in the direction of the wood grain with a foam brush. 

DIY color block sunburst wall art tutorial @diyshowoff

While paint was still wet, I carefully removed the Frogtape then let my painting dry. 

DIY color block sunburst wall art tutorial @diyshowoffDIY color block sunburst wall art tutorial @diyshowoff

Add picture hanging hardware or use velcro hangers to display the masterpiece! It fills the space nicely and adds pops of color. Fun! A great way to add a big statement for little cost. 

DIY color block sunburst wall art tutorial @diyshowoffDIY color block sunburst wall art tutorial @diyshowoffDIY color block sunburst wall art tutorial @diyshowoff

{notice the photobomber? lol!}

I’m not very “artistic” when it comes to painting but a geometric pattern is something anyone can do. Coordinate colors with your existing decor, make a big statement without breaking the bank. 

See more details on the diagonal wall paint, the chevron/colorblock door and guest room/nursery makeover

easy diagonal wall paint design tutorial @diyshowoffcolor block door makeover @diyshowoffcombined guest room nursery reveal @diyshowoff 

*I received compensation to complete this project for using FrogTape® products. All opinions, projects and ideas are based on my own experience.

 FrogTape Blog Squad

Side Table Makeover

Spring cleaning always inspires a bit of decorating and freshening up around the house. Today, an old side table gets a fun new look and a pop of color for the reading nook. Side table makeover:

diyshowoff side table makeover

What I used:

  • side table
  • FrogTape® Multi-Surface
  • spray paint

What I did: 

I cleaned an old side table with a damp cloth and let it dry. 

diyshowoff side table makeover

Then using my FrogTape, I taped off a design onto the table top. 

diyshowoff side table makeover

Using my thumbnail, I burned the edges of the tape in order to get crisp clean lines. 

diyshowoff side table makeover

Next, I toted it outside and applied a couple of even light coats of spray paint. 

diyshowoff side table makeover diyshowoff side table makeover

Before the paint dried, I removed the FrogTape then let the paint dry. 

diyshowoff side table makeover

The side table adds a pop of color to our reading nook and will sit between two chairs. 

diyshowoff side table makeover

Do you have an old piece of furniture that needs an update? 

diyshowoff side table makeover diyshowoff side table makeover

*This post is sponsored by FrogTape.

 FrogTape Blog Squad