


Materials:
- Chandelier (try Craigs List, Ebay, thrift stores, yard sales)
- Terra cotta pots and saucers (The same number as the “arms” of your chandelier. Ours all had 5.) Plastic pots would also work. Get creative! Try your own spin!
- Outdoor-rated spray paint
- Waterproof glue: Elmer’s Probond is perfect for gluing porous (pots) to metal (chandelier)
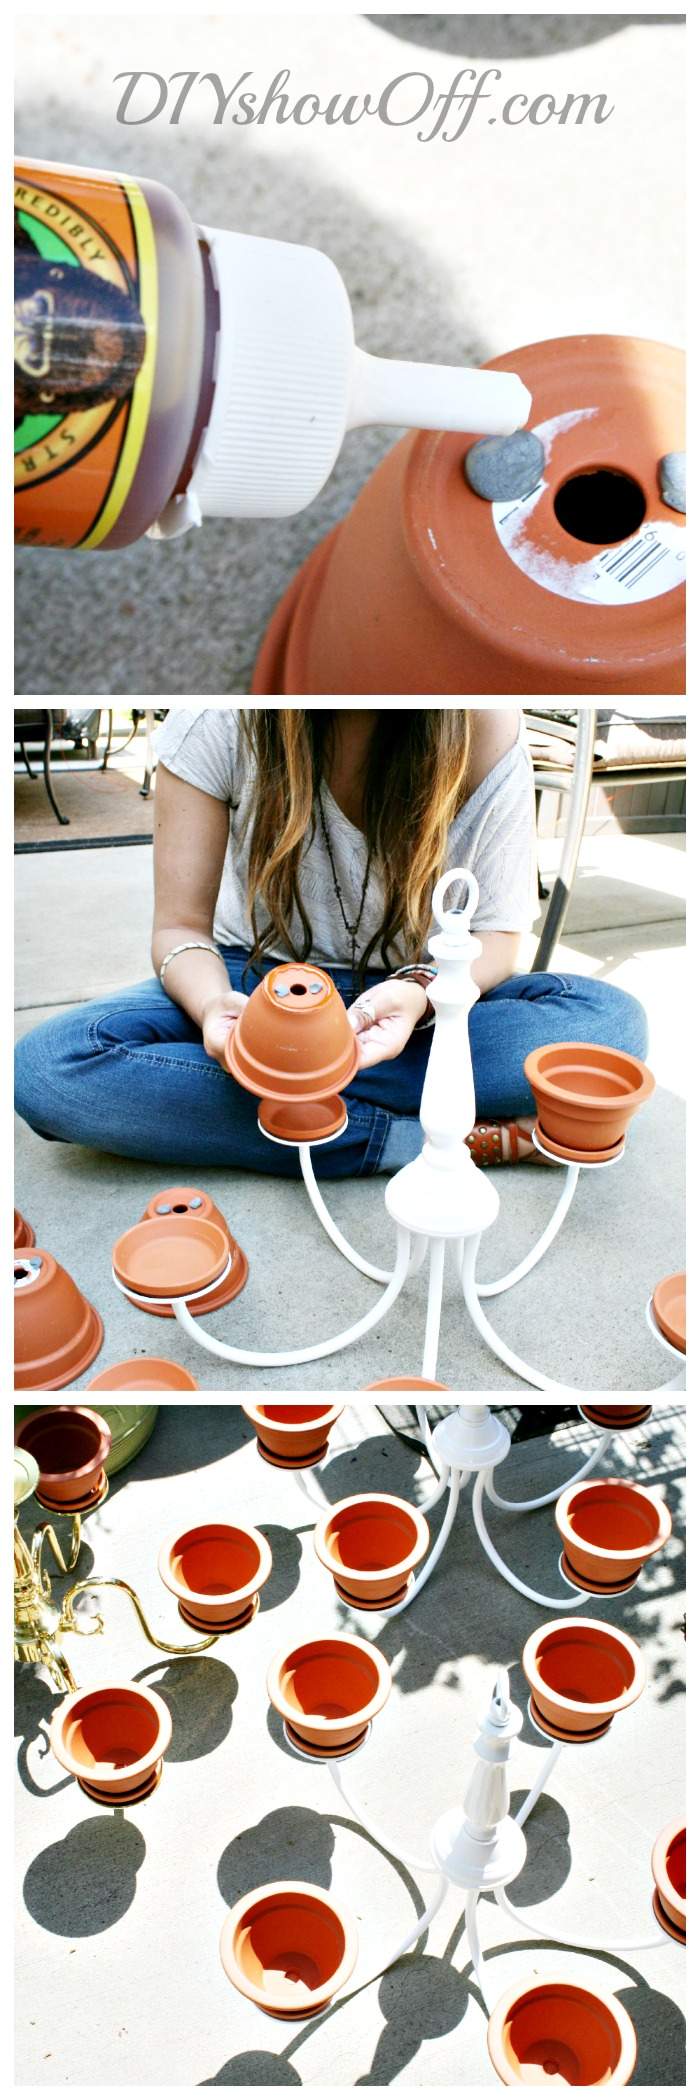
- Plumber’s epoxy putty – I used this to help create an elevation for draining (optional)
- Flowers, plants
- Moisture Control Potting Mix
- “S” hook for hanging (and the chain that comes with the chandelier if needed)
Tools:
- Wire cutters
- Garden trowel
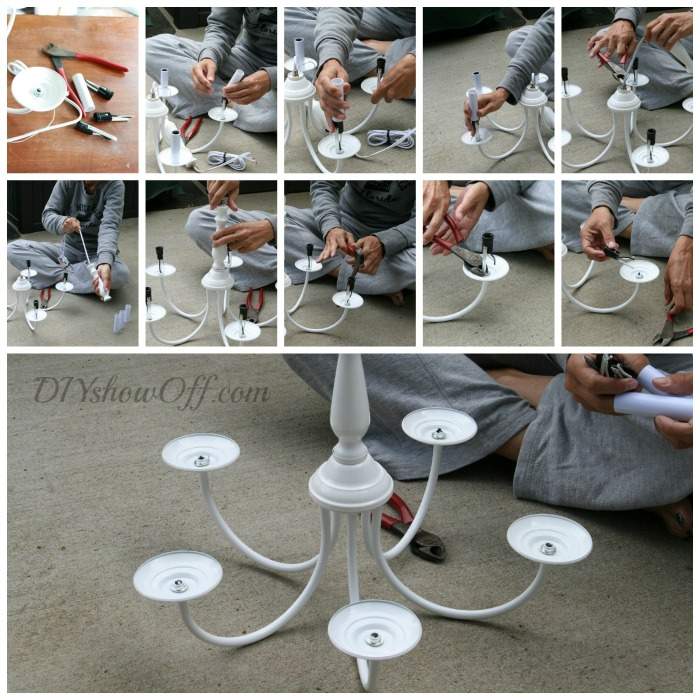
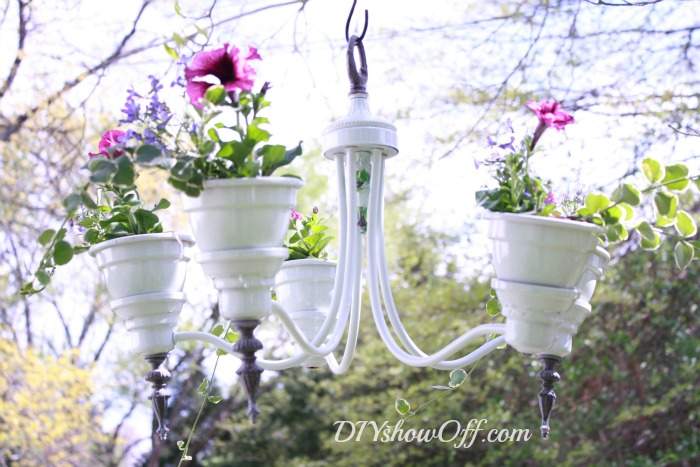
1. Slide off the plastic ‘candle’ holders and remove all electrical/wiring from the chandelier using the wire cutters.
2. Attach terra cotta saucers using epoxy putty and glue. The epoxy putty helped to keep the things in place since clamping isn’t possible as well as raise the pot a bit for draining.
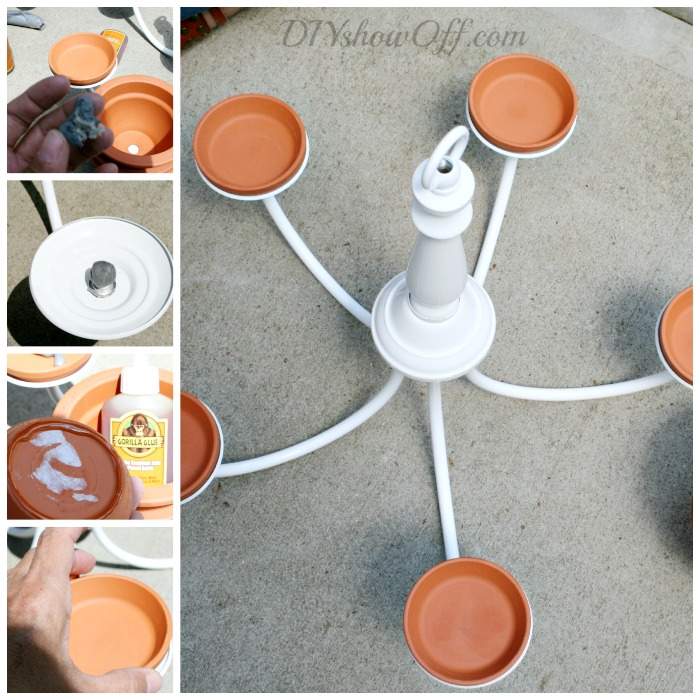
Repeat for attaching the pots. I let the glue dry 1-2 hours before spray painting and allowed it to cure several days before planting.
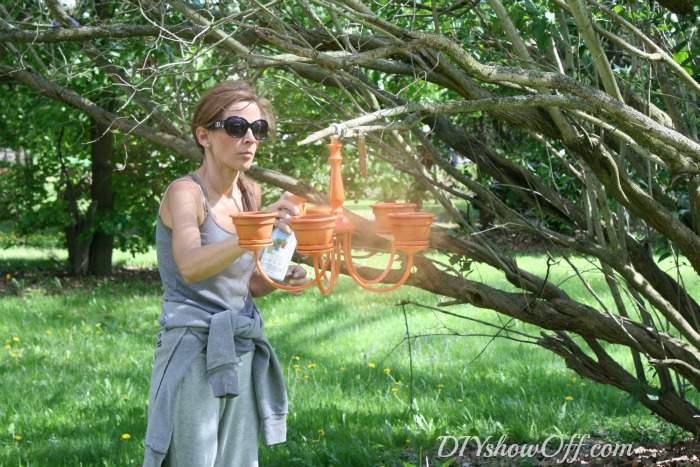
3. Spray paint the entire thing (even your chain if you’ll be using it). I found that hanging the chandelier from a low tree branch to be the easiest spray painting process (especially if the chandelier’s shape doesn’t sit level) but you could also do a 2-step process (position upside down on drop cloth/cardboard, spray paint, dry, flip and the spray from top and let dry). Some parts of the chandelier’s design may also be removable (simply unscrew) and can be taken apart for spray painting if needed. Wear a mask if you’re working under poorly ventilated conditions or breezy weather and eye protection.
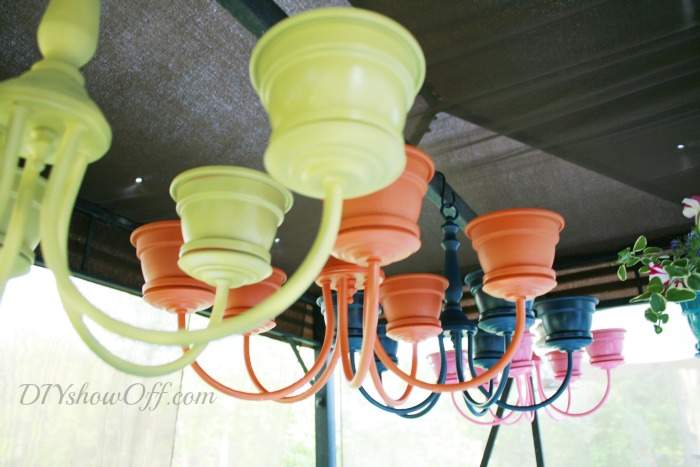
4. Dry. Since I worked in advance, the chandeliers had several days to dry/cure. The glue did expand and become visible. And a little scratching of the paint happened in places as well. But as we say around here, “imperfection adds character” and those things are not something you pick out and focus on when the project is complete (any imperfections stand out in the completed project below?… nope!) You could lightly sand and spray a base primer on your chandelier as well.
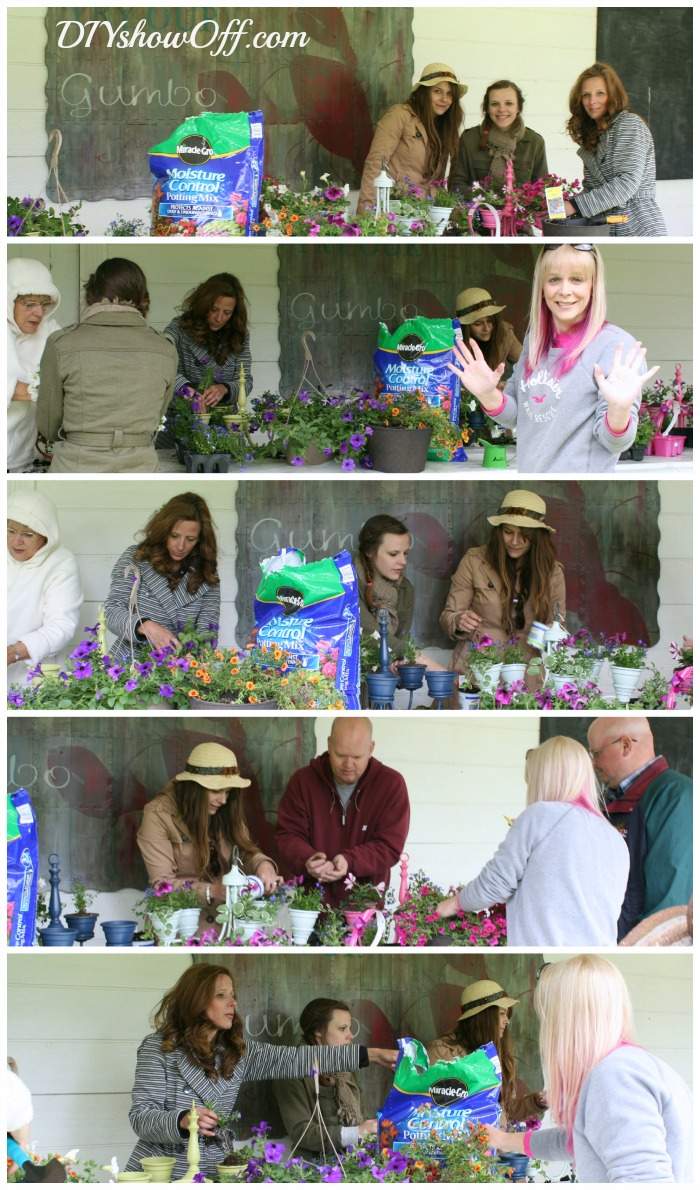
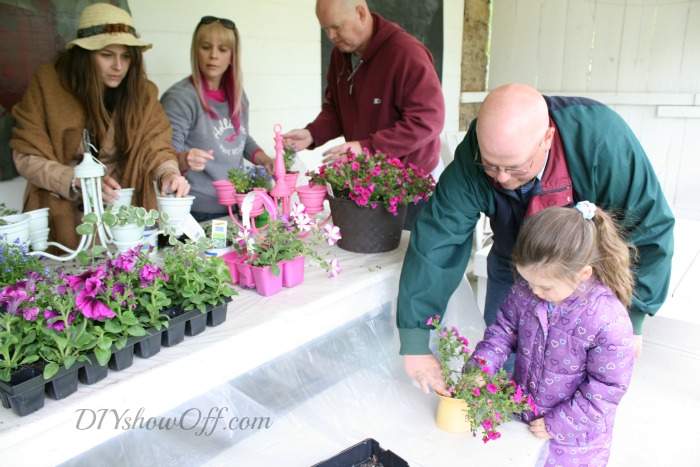
5. Plant! We had several color coordinated flower options on hand as well as some ivy and used Miracle-Gro Moisture Control Potting Soil – perfect for container gardens. I set up the ‘planting station’ on our barn patio to escape the windy conditions.
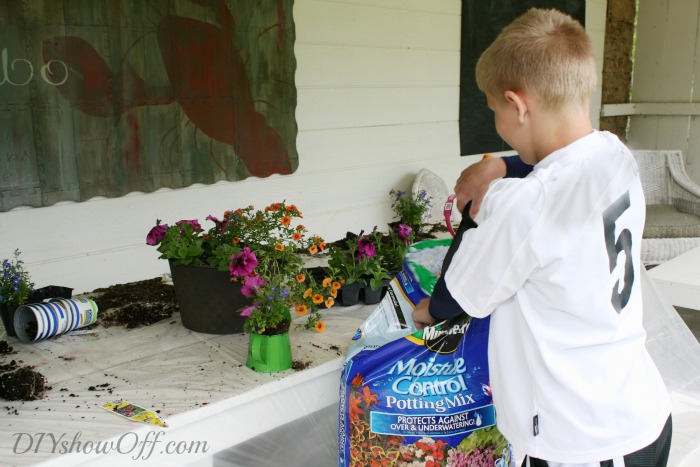
Even the little ones had fun planting flowers for mom in little watering cans from the dollar store…

6. Water according to plant instructions. NOTE: The Miracle-Gro Moisture Control Potting Mix protects against over & under watering. Virtually fool-proof if you do not possess a green thumb. Be sure to water your plants daily!
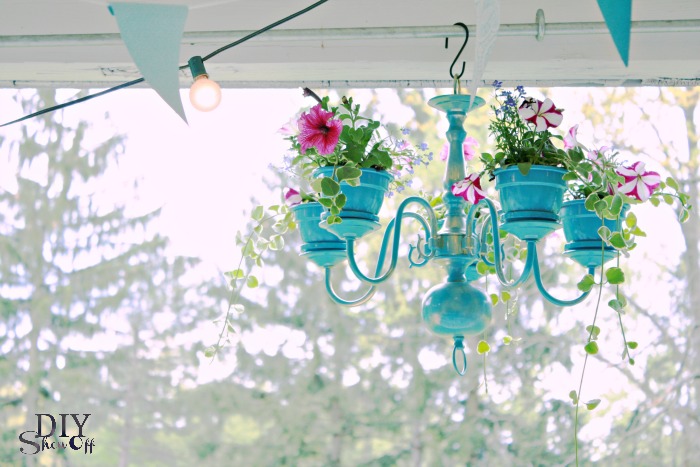
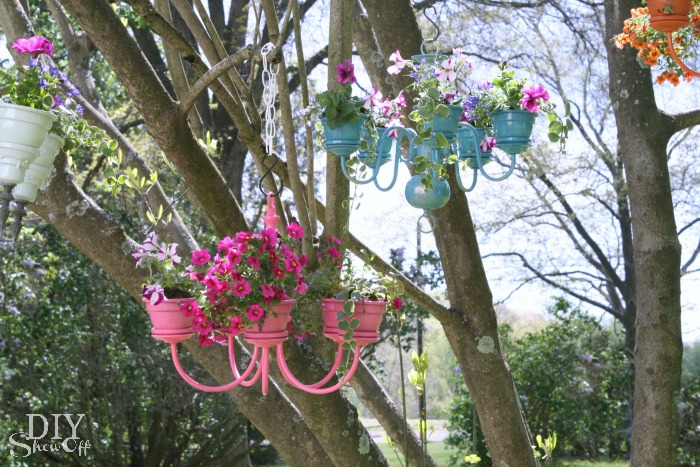
7. Hang! Ta-da…
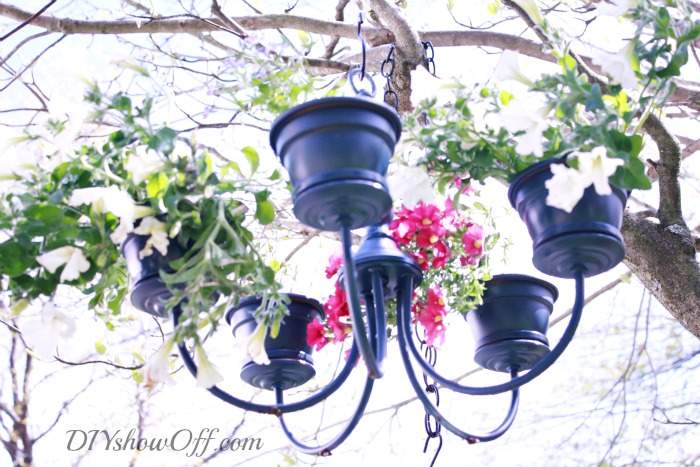
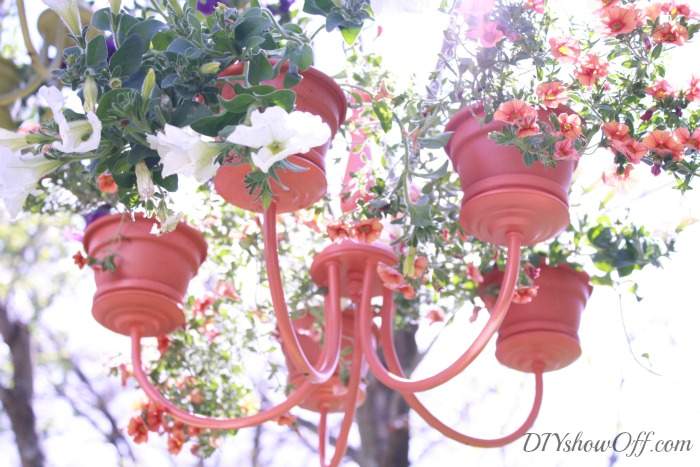
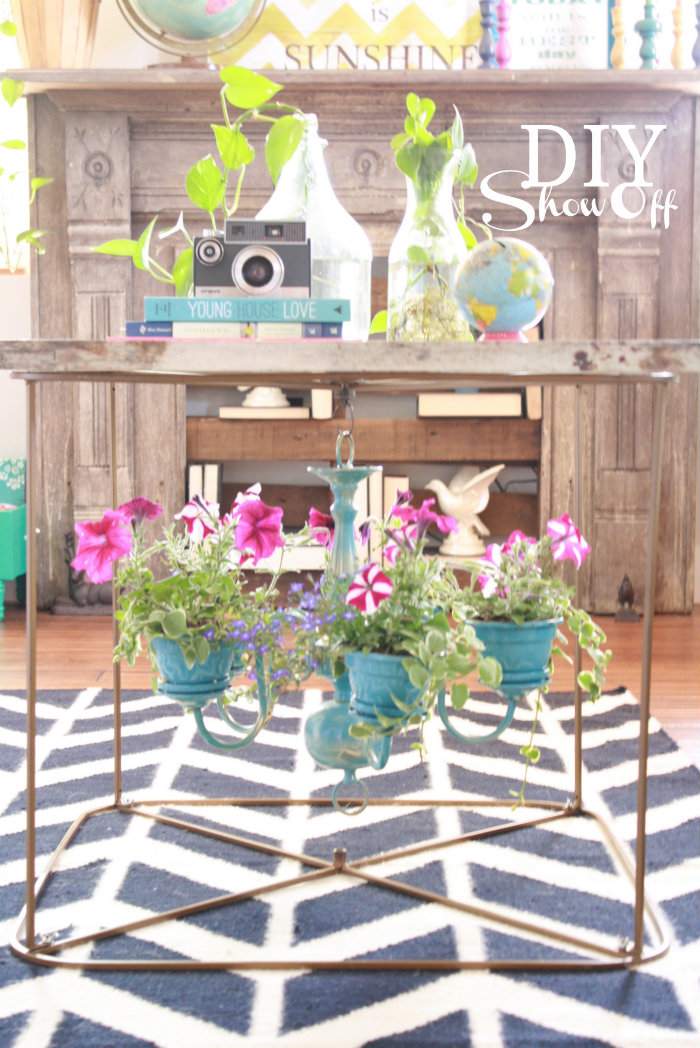
Note: My chandelier planter is hanging from a plant hook on our patio. Sunlight and watering are not an issue. The design of some of the chandeliers posted above also allow for table top display. I only ‘display’ my chandelier planter like a ‘chandelier’ on our covered patio as party decorating (a few hours then back to the hook). Also, drainage is limited due to the glue however, I water daily and the Miracle Gro Moisture Control Potting Soil contributes to a healthy balance.
You may have spied my chandelier planter used indoors at our Summer Home Tour too…
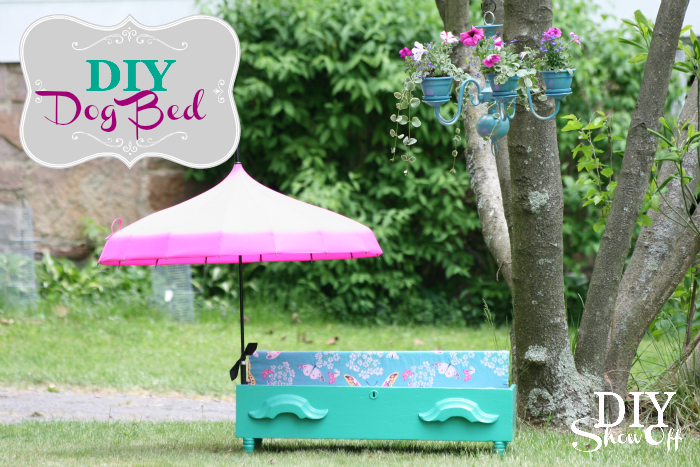
and hanging in the tree as a photo prop for the easy shaded DIY DOG BED…
For more planting tips and inspiration:
- Visit Miracle-Gro online to access their expansive library of articles and videos full of expert gardening tips for beginners and professionals alike as well as online tools to help growers solve common garden problems and find the right products to to maintain a healthy and beautiful garden.
- This is a Sponsored post written by me on behalf of Miracle-Gro for SocialSpark. All opinions are 100% mine. See the planning and source to my inspiration here.
You might find these tutorials interesting too:


This post is sponsored by my Young Living business. Check out my essential oils page for more information on how you can get these amazing oils in your hands too along with helpful freebies, a gift from me, and tons of support:

All of these are just beautiful… I am a huge fan of Miracle Grow
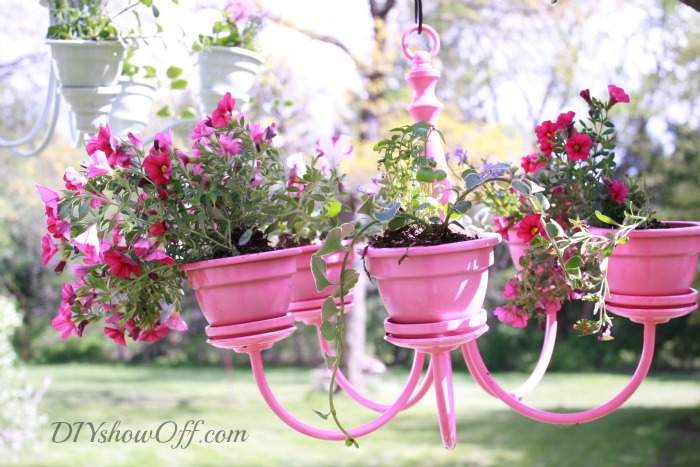
I love the colorful chandelier planters. Such a sweet idea.
Love it! Maybe I’ll do this to my old chandy. Love the flowers spilling over.
Love it! I have an old brass chandelier in the attic that may be getting a makeover!
Oh goodness Roeshel, those are the cutest!! I have a couple sitting waiting for an idea… Thank you!!! ~ Lori
These are super cute! Love the one hung under the table 😉
Absolutely beautiful! I saw one of these brass chandeliers at my local Goodwill and I didn’t get it … boo 🙁 Now, I am going to be on the prowl for 1 or more of these ugly chandeliers .. LOL. You did a great job!
I think perhaps it would have been better to leave the saucers off, so that the water could drain out of the pots.
Yes, you can alter the design to fit your needs. However, I use Miracle Gro Moisture Control Potting soil and there is a hole in the bottom of the terracotta planters. Water does drain. My flowers are thriving. 🙂
How cute!! Love it.
Beautiful! I’m pinning this one.
Absolutely gorgeous! Might have to find me an old chandelier. Thank you for sharing.
Testing comments. 🙂
Testing comments in Chrome.
Nice Post! Great colors, first time I ever saw anyone paint lookin so cool! lol
Testing comments logged out!
Well I guess I will be making some of these for my friends and 1 for me. CUTE! CUTE!
Awesome, Anna! I hope you’ll share a picture! Let me know if you have any questions!
This is SO fun!! I would love it if you would link up at my {Work It Wednesday} linky party!!
xo
amy
http://theblissfulbee.com/work-it-wednesday-linky-party/
I love the idea and the colour combination you chose. The blue one is really lovely. I’m keeping the idea in mind for when I’ll have a pretty pergola above a pretty patio…
Your chandelier garden pots are the cutest!
Love this idea, Roeshel- the planters are just beautiful. Now I want to replace my hanging basket on the front porch with one of these.
Testing comments…again!
Roeshel,
I’ve said it before and I’ll say it again. I LOVE your flower chandys! It was love at first sight; the sheer brilliance of the project, the bright, fun color choices and all the beautiful flowers too. But now that I’ve read how you did it for Mother’s Day and saw the wonderful photos of everyone getting so into it. My gosh! I HAVE TO make one now. I really want one. Now just to decide that color. 😉 Thanks for such cool DIY.
Cheers to you and yours,
Therese
Love how these turned out! And is that your mom that I spied in one picture? Maybe not but I love how everyone got to plant one. They look great grouped together.
Thanks, Kim! Yes! That’s my mom beside me with her hood up. lol It was chilly on Mother’s Day!
Oh my gosh! This would be great for my garden party next year!! Thanks for sharing!
This is a super fun idea! Thank you for sharing each step too! Why all the MIRACLE GRO plugs? Personally, I can’t get behind their products, which contain chemicals and synthetics… not to mention they are in bed with Monsanto. Just saying
Such a cute idea!! I’m looking for an old chandy now!
I love this! I’m gonna have to try to make one soon, thanks for the great idea! Rebecca
I would have never thought of such a great use for a chandelier. I love it!
What a great idea..Any tips on how to water once they are hanging?
Thanks! I just reach up with a watering can. 🙂
I cant wait to make one….im gonna go to some thrift stores to find a chandy…looking forward to some other ideas….thanks…Christina
Did u use terracotta clay poys or terracotta colored plastic pots? Are the chandeliers strong enough to hold all those clay pots filled with dirt?
Love the idea., can’t wait to make some.. one just wouldn’t be enough 🙂
Hi Lesley. I used terra-cotta clay pots because that’s all I could find but plastic ones would be a great option too! And yes, the chandelier is strong enough. And I know! We made several that day but I only have 1. I couldn’t get a good picture that day but I’d love several hanging from the tree in our yard or from our grape arbor/gazebo. I plan to make more too! Good luck!
Thank you very helpful
This is incredible! Love it 🙂
I am really in love with these chandeliers…I’m going to do at least one…
Thanks!
Hi, this was shared on Facebook. Thank you so much for your creativity!!! I can’t wait to go thrifting and find some chandeliers!!
Thanks, Loretta! I can’t wait for winter to be over to put it back on display. What a tease yesterday’s weather was – near 70 degrees and sunny. Now back to cold and snow. Ugh! Enjoy! I hope you’ll share a picture! xo
Genius! Two of my favorite things- re-purposing and flowers! I love this idea! BTW, I voted for your project on BHG!!! Good Luck!
Thanks so much, CD! And thanks for the vote too! xo
So cute and totally do-able. Thanks for such great instructions.
I love this! 🙂 I looked on ebay! Very expensive. Tried Craigslist in St. Louis too. How do you find a cheap chandelier??
Hi! I found several of mine in thrift stores. Also check estate sales, yard sales, flea markets, etc. Do you have a Habitat Restore near you? I found this one on ebay: http://www.ebay.com/itm/Vintage-Antique-PEWTER-hanging-CHANDELIER-EXQUISITE-/291102295775?pt=LH_DefaultDomain_0&hash=item43c70c86df and this one is a little more but really pretty: http://www.ebay.com/itm/like/111101812060?lpid=82. Hope that helps! Sometimes even putting a “wanted” ad on your local CL might motivate someone to dig an old one out of their garage. We also have a local Facebook flea market group – see if you have one of those!
I’m looking for chandeliers and am having a hard time finding any for less than $50. Where did you find/buy yours?
Hi Anissa! I found 2 of mine at thrift stores, 1 at an estate sale and the other 3 (around $20) on ebay. Check Craig’s List, your local area’s Facebook flea market page if you have one, flea markets, yard sales, Habitat Restore. Hope that helps! Good luck!
Hi,
Where did you find the task paint? I’ve looked everywhere including Hibby Lobby.
Hi Jen. I’m not sure what you mean by task paint. ??
Opps! I meant teal paint. Sorry.
I found this on Pinterest and fell in love this DIY project! What a clever idea. Thank you for sharing! I can’t wait to try it. : )
Thanks, Evelin! Good luck! xo
I know I dreamed this!!!! Looking for a chandelier. Gorgeous!
This is one of the most crazy, wonderful projects I’ve ever seen. So glad you are so creative to come up with this. I won’t be walking by the chandeliers anymore. Thanks for the inspiration 🙂
Sheila
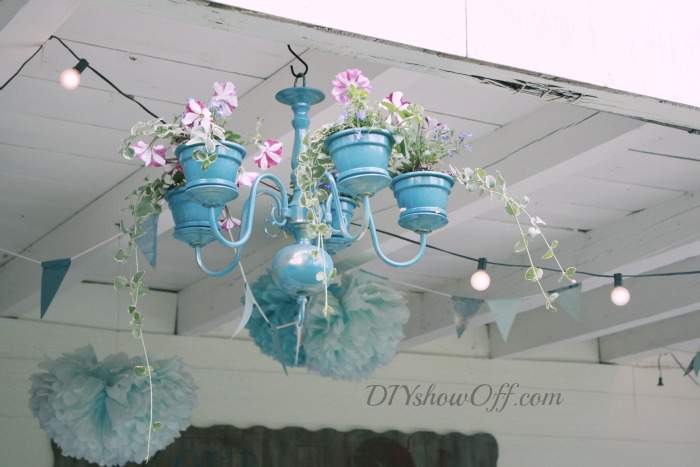
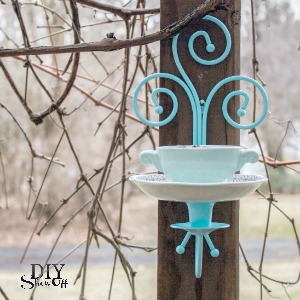
Hi , could you tell me what spray paint you used for the blue chandelier ? It’s gorgeous !
Thank you !
Hi Helene! I believe it’s Valspar Tropical Oasis! Hope that helps!
Ps. I did a light coat to let the gold show through.
Thank you so much. I have an old chandelier , almost like yours, and my first DIY project for my new condo will be an herb garden in blue Tropical Oasis containers. Thank you again for à beautiful idea !
This is so gorgeous! I will be linking to this at 4:00 (CST) this afternoon on my Facebook page, so pretty! https://www.facebook.com/CraftsbyAmanda
It’s so adorable Roeshel!
Wonderful idea….I recently made a candlelier for outside….now I know what I am doing for my next DIY!
Thanks so much for sharing it!!
I simply love the chandelier planter, but I have never seen a used chandelier at any thrift store, and I have been to many. How in the world did you find so many? It is a great idea, but we have to be able to find an old chandelier. I was hoping you were actually making the chandelier from used items.
Out of the six, three were found at thrift stores. Maybe try a Habitat Restore if there’s one near you? Three others are brand new and found on ebay.
Ive made this, theyre beautiful. Mine is white with yellow pots, planted with lobelia and petunia 🙂
Love this project so much… I am featuring you tomorrow!
I don’t have a website but I happened across your terra cotta pot chandelier on TheWHoot . I receive info from that site all the time. I have been hanging on to a couple of old chandeliers that I purchased to turn them into candle holders. On seeing the idea from you, I am changing to planters for the garden. I love the idea of painting the whole thing the same. You did a fantastic job. Thank you.
Thanks so much, Susan! I’d love to see your version! I’m so glad you stopped by! xo
Where did u get all the same kind of chandeliers? I want to do this and hang them in my trees
Hi Kate! I purchases a few at thrift shops/yard sales and a few of the same ones from ebay. Hope that helps! I know…we made several that day and they were so pretty hanging in a tree before everyone took theirs home.
This is absolutely the most fabulously brilliant idea I have ever seen!
I’d like to be added to your newsletter list!
Where did you find your pots and saucers?
Hi Leslie! I found mine at Michaels. xo
Hi!! J was just wondering, on the bottom of the terra cotta trays and on either side of the hole on the bottom of the pots, you use something in which to create a gap and then glue THAT down to the chandelier/terra cotta trays….. what is the thing you use? Is it stones or “pads” made of epoxy?
Mine are little balls of epoxy, Jes and holding up well a couple of years later! I don’t even think you’d need to create drainage though. The pots are so small with such a small amount of soil, that they do dry out fast (must be watered everyday). Hope that helps! Good luck!
This is one of the most creative projects I’ve seen in a quite a while! I have the perfect spot on my porch for this! You are so clever. I’m off to check Craigslist now.
*Seen on Roadkill Rescue.
trying to get the flower chandelier tutorial – keeps looping and will not display how to make it
Sorry it’s giving you a problem, Deb. Here’s a link to the tutorial portion: https://diyshowoff.com/2013/06/11/chandelier-planter-tutorial-2/2/
Hope that helps! Good luck!
I need more information of tutirial for my home. Thanks!
Hi Maria, you can find more information here: https://diyshowoff.com/2013/06/11/chandelier-planter-tutorial-2/2/
I just found a chandelier on a local website. I feel kind of bad that it is in complete working order and I will be de-electrifying. Just not bad enough not to try making the planter!. Will be spraying it bright white and using bright red geraniums. Can’t wait to get it done. Thanks for the detailed instructions.
You are brilliant what a wonderful idea, they look absolutely gorgeous thank you I’m going to make some as soon as I find some chandeliers.
What size flower pots do you prefer. I’m in the process of creating a chandelier planter and I’m worried about not having enough room for the roots.
I’m not sure what size. 4″ maybe? They are small, so small plants are best. And it does require watering nearly daily but it’s my 3rd or 4th year using it! 🙂
Love this! Saw chandeliers at garage sales for so cheap, now I will be on the lookout so I can do this project!
Roeshel which spray paint do you usually use?
I used ValSpar Outdoor spray paint for this project. Hope that helps!
I just finished this but it is really heavy and I don’t think my tree branch is capable of holding it. I also done have any low hanging eaves to hold it. Is there anything you recommend? I’m willing to try and build something.
Hi Heidi!
Hmmm…we utilized mature low hanging branches that could accommodate the weight. Is using a thicker branch higher up with a lower hanging chain an option? If not, maybe a plant hook in the ceiling of a porch? We also moved it around sometimes and used an “S” hook to hang on our gazebo. Or a wall mounted plant hanger on a porch post? A free standing but very secure shepherd’s style garden hook? Hope those ideas help!