How do Painted Faucets Hold Up?

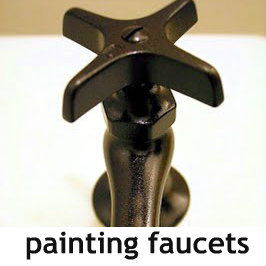
Nearly four years ago, I painted the faucets in our budget friendly guest bathroom makeover. You can see how I painted them here

painting-bathroom-faucets

Do I regret it? Not one bit. Has it held up? For the most part. Here is how they look four years later…

painted faucet durability

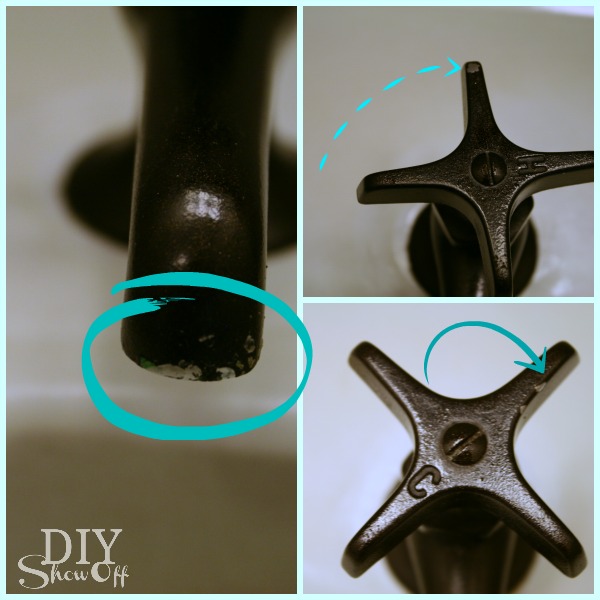
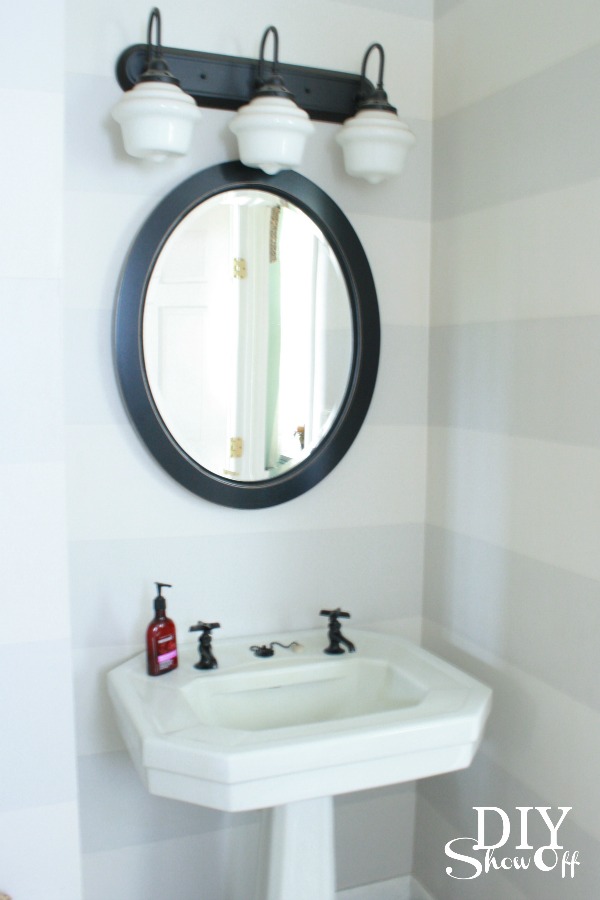
These faucets are in a guest bathroom that gets used every day however it’s not heavy use. And I learned after taking this picture that the spout was even less chipped than shown. That’s mostly dried toothpaste. Oops. 

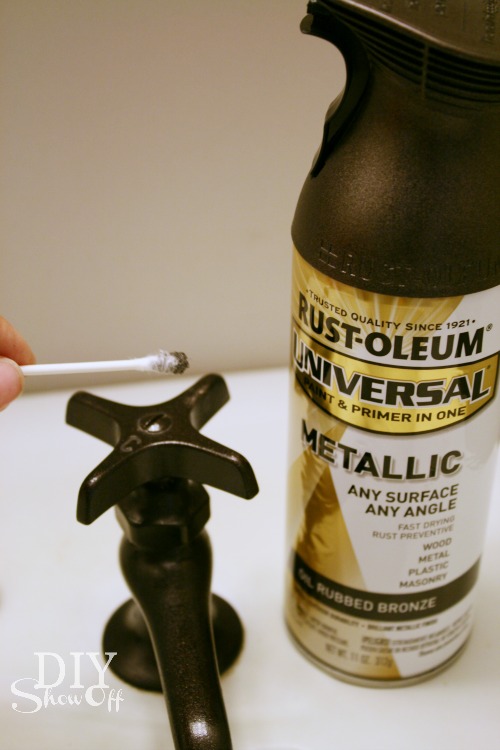
The fix: Since my paint is not flaking, I sprayed Rustoleum’s Metallic Oil Rubbed Bronze onto a styrofoam plate (until I got a “puddle” of paint). Then I used a Q-Tip to touch up the paint.

painted faucet touch up

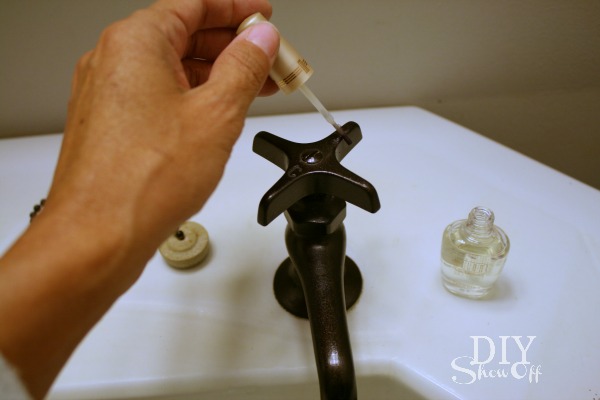
Once that was dry (a few hours), I sealed the touch ups with clear nail polish.

touching up painted faucets

Good as new!

DIY painted faucets 

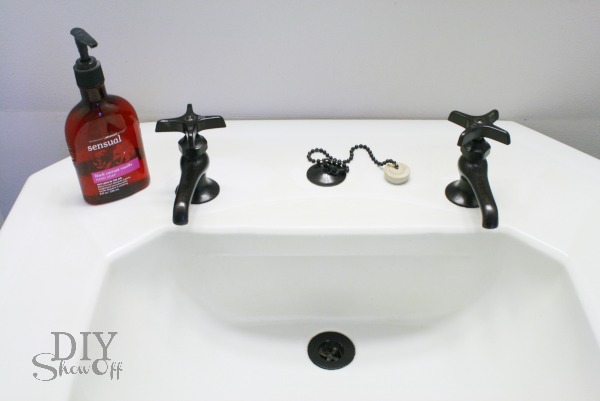
Guest ready once again…

painted faucets

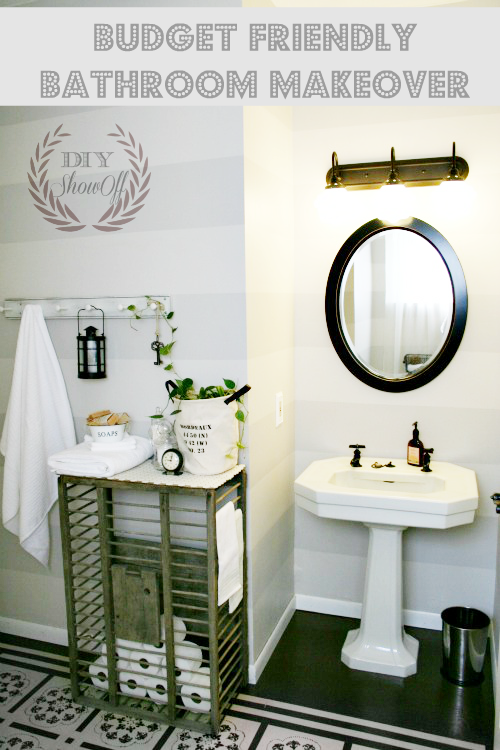
For us, painting the faucets updated the old vintage pedestal sink and kept the cost of our bathroom makeover down. Finding separate hot and cold faucets with their own spout was a challenge so painting the faucets worked for us. I do have to say…it’s rather odd having one spout for cold and one spout for hot. There’s no dilly-dallying washing hands under the hot spigot…ouch! Filling the sink is the only option for “warm” water. Strange, isn’t it?

And in case you’re wondering, the painted floor has held up well too!guest bathroom

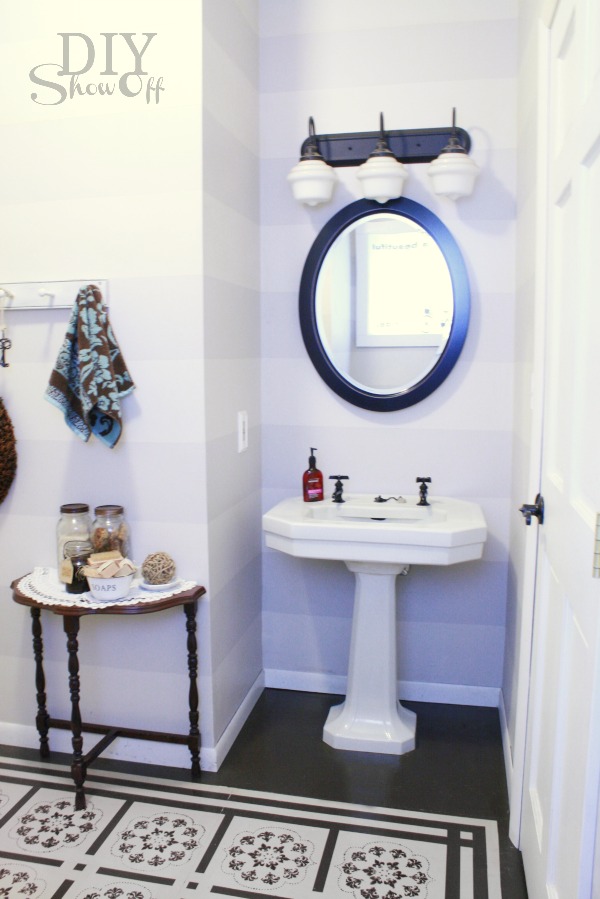
See the entire before and after: Bathroom Reveal.

Full painting faucets tutorial: painting-bathroom-faucets

DIY Show Off – Main Bathroom Before and After Reveal {Shades of Gray}

Main Bathroom Transformation:

budget-friendly-bathroom-makeover

Featured in THIS OLD HOUSE MARCH 2011
There’s even a photo of our precious little Niski and it fills our hearts with joy even more.
(click photos to enlarge)
Here is the estimated cost breakdown for my bathroom makeover:
Ceiling paint, primer and trim & door paint – free (we already had this from previous projects)
Lighting (Washington Collection) from Lighting Direct $220.80
Paint supplies and tape approximately $20 (I used some supplies that we already had.)
Wall paint (BM light pewter and nimbus color matched in Valspar’s Signature paint) $62 total
Valspar Porch and Floor paint (color = Journey) $25
Floor paint for design on painted rug (already had BM Smoke Embers) $0
Elegant Bracket Stencils (2 of the same one) $15
Minwax water based polyurethane $16 (this WILL yellow light colored paint)
Oval Vanity Mirror (Lowe’s) $75
Rustoleum spray primer, oil rubbed bronze spray paint and spray lacquer (for faucets) $25
Oil rubbed bronze shower curtain hooks ($9) and rod $29
______________
Total $512.88
~*~*~*~
Our Main Floor Bathroom before…

Now: I love the shades of gray!

Sink

Before:

Now:

Before:

Now:

Tips on painting horizontal stripes.

Ceiling light before:

Ceiling light now:
(schoolhouse ceiling mount)
New vanity light (the biggest splurge in the room)

Floor before:

Floor now:

A little more accessorizing (neutral and DIY) coming after the holidays.
This .50 coat rack:

Became this towel rack. I did a little dry brush technique with left over paint and some sanding:

And now I have this:

Updated pictures:

painted floor after 2 years is still holding up…
DIY bath 5 cents sign
DIY bathroom sign

Facebook
DIY Show Off - FacebookDIY Show Off - TwitterDIY Show Off - PinterestDIY Show Off - FeedDIY Show Off - HomeTalkDIY Show Off - G+