Good Bye Old Floor!

Guess what’s going on at our house?  Take a peek:

Before: It’s decent and doesn’t look too bad from a distance…

Change in Progress:
We opted for no DIY other than the demo.  For installation, we’ve hired a professional.  We have a contractor installing our floors. We just weren’t comfortable to DIY in this case. In areas where a project becomes a major investment, we’re a little less confident and a little less risky. Strand bamboo floors are HARD and strong.  However, you know how much home improvement fascinates me.  I promise I wasn’t in the way, but I did hang out from this vantage point a lot of the time watching the process:

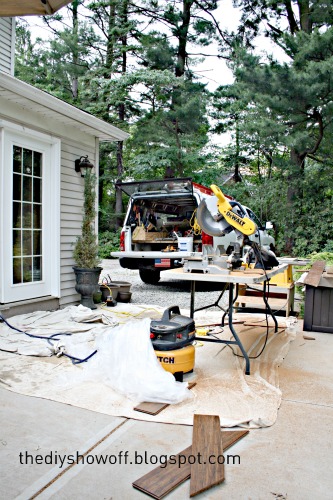
Don’t worry – I resisted the temptation to crawl inside that truck to have a look around at all of those tools!

It’s advised that you never hire a contractor without reading reviews/researching the company. For that reason, we’re adding our experience with our contractor in the event a Google search helps introduce someone locally to our favorite contractor.  Meet: Gary Stone.  A word of mouth recommendation from a friend is the best compliment/review. Our experience has been extremely satisfactory.  We were so impressed with his knowledge and understanding of so many projects, his friendly service and his patience in describing/teaching steps and tips, providing education- should we attempt the bamboo flooring installation ourselves throughout the rest of the house (although we’ve had a very positive experience working with Gary and look forward to working with him again on future projects if needed). We enjoyed hearing his suggestions and professional advice for changing small things for the best results. We love the quality work and would highly recommend him to anyone local looking for professional contractor services.

STONE
General Construction & Project Management 
 Cabot, PA
gstone@zoominternet.net

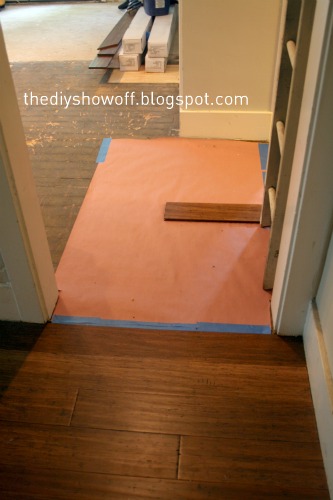
Gary’s Tip for bamboo flooring installation for DIY readers:  Using nails like these ones from Maze make the “drive” of the nail easier as they’re double hot dipped zinc. They also come in a variety of colors.
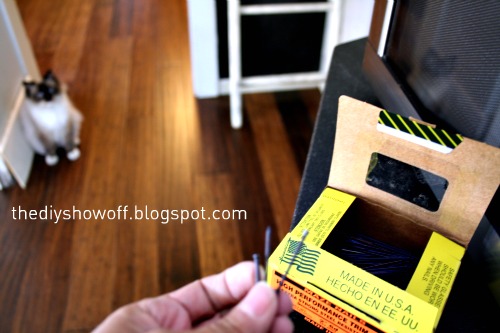
  • Hardwood trim nails
  • Made from high-carbon steel to ensure good driving into oak, birch, walnut, and other hardwoods
  • Many more nails per pound than ordinary finish nails
  • Made in the USA
  • Fewer wood splits

I tried to convince him to do a guest blog post.  He has so many helpful/useful DIY tips he’s learned from years in the home improvement field. Maybe he’ll consider it when he has a slow schedule or start his own website/blog with handy tips.

—–

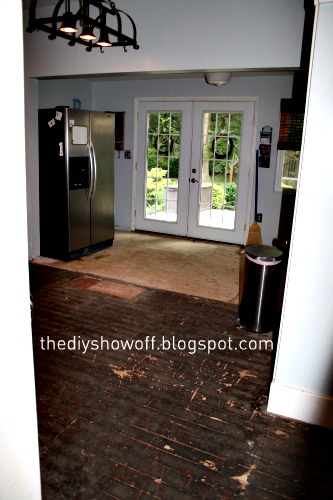
When we moved in, we removed the carpet and refinished original pine floors. It was an improvement but there were bad patch jobs throughout the house.  The pine had gaps that pinched Mr. DIY’s feet in certain areas.

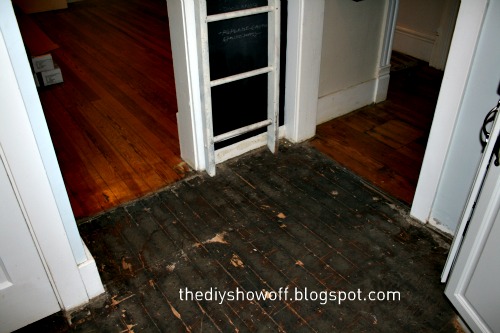
Then during the kitchen remodel, we removed the vinyl and plywood base and exposed the original pinewood.  Part of the kitchen floor is 1927 (pine) and the other half is 1999 (plywood) and was covered with another layer of plywood covered with vinyl.  That’s all gone:

But the floors are uneven and don’t quite match up.  Mr. DIY has laid Pergo floors in a previous home but when it comes to the bamboo and condition of the floor underneath, we just felt safer having a professional do these three areas:  kitchen, dining room, future open pantry/hall.  Once we have the money to do the rest of the first floor with the bamboo we chose, we may give it a DIY shot…now that we’ve had a few priceless tips  from a professional.  
‘Before’ view from outside into the kitchen…
We chose Antique Java Fossilized™ Strand Wide Plank .  It’s distressed and unlike engineered wood, every piece is different. It’s handscraped. There are different distressed patterns, the bamboo strands make each piece unique and color varies (LOVE that part).  The distressing shows “black” and is so random.  It’s beautiful.  For more information on our bamboo floors, visit Cali Bamboo. Know what I love about them? The light, the dark and all of that gorgeous distressing but most of the durability and strength!


Antique Java Wide Plank Fossilized Strand™ Bamboo Flooring
  
Our reasons for choosing this bamboo:

  • Durability.  Strand bamboo Janka (hardness) rating is 3000-5000. Strongest in the world!  Maple (our original choice) is 1450. My husband does the cooking. I like hardwood in the kitchen but he’s not so careful.  We also have a cat with claws intact. So scratches on the maple would have broken my heart!  lol  Especially after such a large investment (our entire main floor eventually).
  • We chose a distressed finish.  If scratches do occur, they add to the character. It’s also a look that fits with our farmhouse style. 
  • Bamboo is the most environmentally sustainable wood on earth!
  • I love that it had a reasonably priced wide plank option.  I love the wide planks.
  • I love the variation in color.  I love dark floors but I’ve read people regretting their decision because it shows every speck of dust, etc. This product has dark and medium tones. No two pieces are the same. 
  • It can also be refinished years down the road if needed.
So, just a sneak peek, a description of our experience and products. Reveal coming soon!  I’ll be out-of-town tomorrow (more about that soon!) so when I return – the floor will be completed!  I can’t wait to see it!

Disclaimer:  We were not compensated by our contractor, Maze or Cali Bamboo. This is our own unpaid review of our opinions and experience with the products we used. 

Painting a Bathroom Floor (a DIY painted rug)

A temporary bathroom floor makeover (temp likely meaning a few years) until bigger renovation with tile is in the budget can make a HUGE difference. Look at the transformation, using paint. I love it! I may never want to tile this floor!
When we bought our old farmhouse, there was carpet in the bathroom (gross!). So we immediately tore it out before moving in. But that’s as far as we got (so many projects, only so much $ and time). We have big plans for this bathroom. It sits between my office/guest room and the family room so even though there is a powder room on the first floor too, this bathroom gets used just as often by guests and family. It needed SOMETHING!
Before

I filled in the cracks/seams with wood filler.

Sanded. (It’s not completely smooth and perfect, but we were okay with imperfections. It is an old farmhouse, after all.) You could also lay down a fresh new base but we were cutting corners.
2 coats of Zinsser Primer

2 coats of Valspar Porch and Floor paint. I chose a color called Journey. It’s a nice dark chocolate brown.

Then, a lot of measuring to create a painted rug base. I used Frog Tape. It is amazing and really cuts down on touch ups. Actually when I used it on the walls, NO touch ups were needed. I did need to do a bit with the floors though. Anyway, I also used the Frog Tape to create a border by covering up some of the base.
I painted my ‘rug’ color twice using Benjamin Moore (eggshell finish) in Smoke Embers.

Then immediately pulled off the tape, pulling away from the paint (some of the tape was completely covered though so fingers do get paint-y). I had newspaper laid out near by so I could throw the wet-painted tape on it (pushing into a garbage bag = bigger sticky mess).

Once that was dry, I continued with measuring, taping and using a stencil to complete my design.

My big center area is 3 x6, so using a pencil, I drew a grid with 12″ squares in order to keep everything symmetrical. I learned that a Magic Eraser is quick and easy for erasing pencil! But, when all was said and done, most of the penciled area was covered by paint and what wasn
‘t, I painted over when doing my final touch ups. I considered using a chalk line, but intimidation got the better of me. I’ve never used one and with me being down on the floor…I was worried I’d smear it all.

I even painted over the gray area one time because despite drawing some ideas on paper, I didn’t like the first design. It’s just paint and it really doesn’t take too long. Right under this room is a wood stove, so the floor is warm and helps to speed up drying time.

I did use acrylic craft paint for the stencil (that happens to match the dark brown perfectly) because it is thicker consistency than the brown floor paint I used. Also – my stenciled areas “bled” a little – anyone know how to get a perfect stencil? Anyway – it actually gave it more character and I like the effect of “fuzzy” edges with the stencil rather than “clean edges”. It really does give it more of a “rug-look”. And honestly – can you really tell? Not unless your nose is 6 inches from it. 🙂

(It’s not a pretty job – painter’s butt! And since I can’t stop once I get started, dark circles.)


Ta-da!

Next, a couple of coats of water-based polyurethane to seal and protect. I used Minwax Water Based Polyurethane. I’m applying 3 coats by using a brush along the border and against the wall and a foam roller for the rest of it. Now it’s waterproof and protected.


Last part coming up! Replacing the baseboard trim, re-installing the pedestal sink and then the fun part – decorating! I know everyone wouldn’t pair the striped walls with a doily-designed painted floor but the best part about decorating for yourself is doing what you love, right? I promise I won’t hang a polka-dotted shower curtain and crazy wall art. 😉
See DIY and bathroom progress in our
DIY farmhouse

Materials: {affiliate links}

Large Wall Damask Stencil Faux Mural Design #1015 5″ x 7 3/8″
Large Wall Damask Stencil Faux Mural Design #1012 9″ x 7 7/8″
FrogTape 1358463 Multi-Surface Painting Tape, Green, 0.94-Inch Wide by 60 Yards Long
Flower Stencil Zinnia Grande size Med – Reusable wall stencils better than wall decals
Shur-Line 4-Inch Foam Mini Roller Refills, 2-Pack #04940C
Minwax 63333 Satin Polycrylic Protective Finishes, 1 Quart