Adorable Kids' Bathroom Makeover by Loving Your Space

Elyse from 

just shared her most recent makeover and it’s ADORABLE!  Take a look:

Before

Everything in this bathroom was builder standard. 
The bathroom itself was is great shape, but it definitely needed some pick me up.
And the after…
Aww, much better!
This bathroom was done on an amazing budget. The big cost was the beadboard and paint but everything else was pretty inexpensive. She shows how she framed the mirror here which only cost $10!
She’s still on the hunt for the perfect light fixture. 
She created the prints in photoshop and the Ikea frames totaled $6.
The shower curtain and rug came from target.
On the opposite wall is a “boats” sign that she got from Tai Pan. It was all the wrong colors, but she loved it so much that she painted over it with diluted white paint and navy blue craft paint then lightly sanded over it to give it a bit of a distressed look.
She made the hooded towels following this tutorial. 
My favorite project in her room are the towel hooks. Arent’ they cute?  
The faucet handles came from Ace hardware for $2.50 a piece. They were red but she spray painted them orange. I think they are so fun and add a lot of character to a kids space!
and lastly she used up the extra orange spray paint for the kids step stool to match.
I love it, Elyse!  See more DIY projects at

Pin It

Guest Bedroom Details – Sheers, Wall Art and a bonus entry in the giveaway

Welcome to Monday!  It’s going to be a great week, right? Yes! Yesterday, I moved the furniture around in the guest room (I promise there won’t be too many more posts about it!). It looks like my first thoughts on furniture layout are the best option so I moved the furniture back into place. Ugh! I know we still need curtains and I’m thinking along the lines of DIY since I’ll need at least 8 panels.  

Since the furniture is pretty much where it’s going to stay, I decided to start putting up some of my thrift store, garage sale and flea market finds – a little gold glam, tacky medallion, basket texture, distressed sunny yellow, Van Gogh print, blues, quote printed from TLC and the pretty DIY brooch wreath but it all comes together for an interesting display.

Nothing matches.  Nothing is new, just junk things and prints I’ve picked up and had lying around, definitely collected over time and I love how it looks grouped together. 
Still a few spots to fill in. More thrift shopping! 
blank wall before
now…
 The walls won’t be bare for long!  
Lalka has a few words to say… “I looooove this princess bed.” (She does love the bed but she loves following me around too. Or maybe she loves being in pictures?)
before

But I think something’s missing.

Me: When I was shopping at WalMart and picking up my Better Homes & Gardens products, I decided to browse around and look at other BHG products too. I actually saw a lot of pretty things.  I spied these sheers with gold swirls. 84″ long panels for $4.97!  What a great price!
Now how to get them to work with the canopy?  I cut off the tags and used the 2nd seam of the sheer panel as a folding guide and sewed a straight line to create a larger pocket. I didn’t measure anything but after one panel, I remembered to check to be sure the length would work and luck was on my side! 
I simply unscrewed the finial, lifted the beam and slid on panels.
I love the way it softens the posts and adds a little luxury. Wouldn’t filling in the whole thing be fun? Just like a big luxurious sheer fort.  Dreamy. For now, I’ll be a grown up and live with it this way. 😉 
Do you like how it’s coming along? I promise you won’t here a squeak or peep from me about the guest room for the rest of this week. I’ll be busy trying to catch up with each link from the parties last week ~ so many friends to visit!
Hope to pop in to see you!
Giveaway Bonus Entry:  Copy and paste this bold text on your Facebook page: “sheering” the @BHGLiveBetter giveaway at @DIYShowOff” for another entry for the $100 BHG/WalMart shopping spree.  Then paste the same in the comment section of the giveaway at:  http://thediyshowoff.blogspot.com/2011/10/guest-bedroom-reveal-and-100-bhg.html.
Sharing my updates at

Don’t forget – Starting today, I’ll be over at True Value’s Ask the Blog Squad on Facebook. I’ll be hanging out there all week long.  Head over, “like” them, visit me and feel free to ask DIY questions this week and I’ll do what I can to help!  🙂

Thanks so much to The Saturday Evening Pot for featuring my Christmas centerpiece in her 100 day Christmas Countdown (oh my…is it getting that close already?)!

Pin It 

Roomspiration – Kitchen Edition

Roomspiration Blog Hop

If you’ve been following the Roomspiration series, you’ve seen beautiful and inspiring do-it-yourself entryways, livingrooms, bathrooms, guest rooms, craft rooms, dining rooms, kids’ bedrooms, nurseries, master bedrooms, closets and nooks, laundry rooms and mud rooms and now…welcome to the Kitchen Edition. 


Welcome to our kitchen makeover!

We’ve been working on remodeling our kitchen for almost a year and we’re almost done!  I had hoped to be completely ready for a true reveal but it’s still a work in progress. We’re still working on plans for the kitchen island, still have to finish baseboard trim, framing a window and the tin backsplash behind the stove but…take a look at how far we’ve come:

First thing we did was swap out single door…
Before

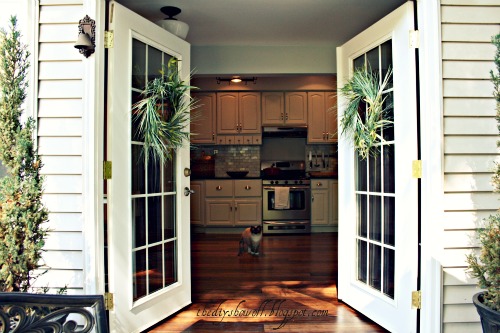
Now:  French doors
(sorry – it’s so bright, I can’t get a good picture)

When we bought our home the kitchen had orange-oak cabinets, blue laminate countertops, dirty white walls and old worn vinyl flooring.

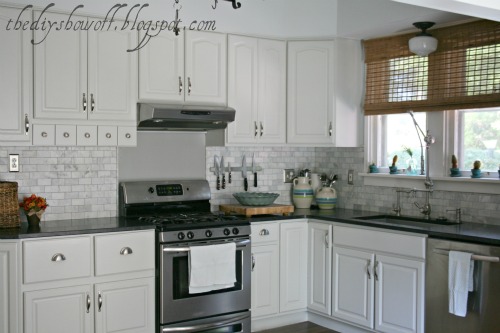
Now:


What we did:
  • Swapped out old single door for French doors
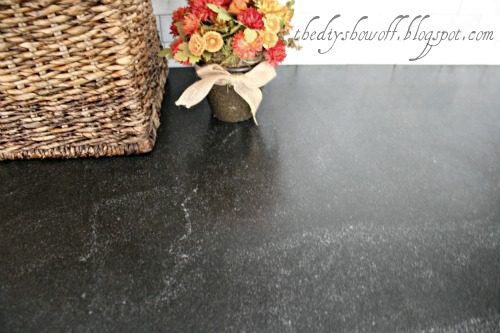
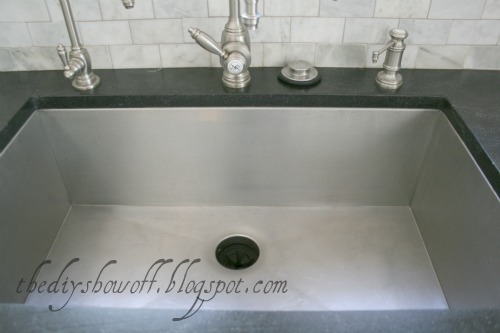
  • Granite countertops (Virginia Jet Mist)
(honed finish)
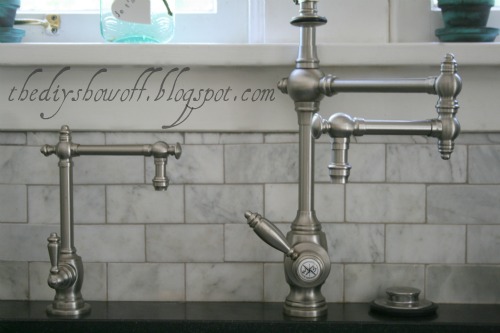
  • New instant hot water dispenser, articulating/sprayer and soap dispenser


  • Zero radius sink
Antique Distressed Java

  • Installed recess lighting, $5 thrift find – pot rack, new semi-flush mounts and dimmer switch.
  • Painted (True Value Easy Care Platinum/Color = Old Fashioned)
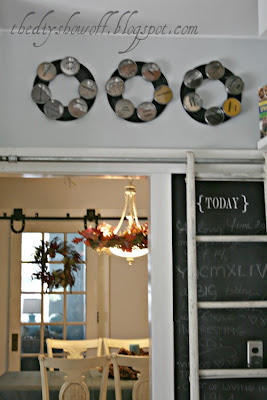
  • Pantry Door Clock tutorial


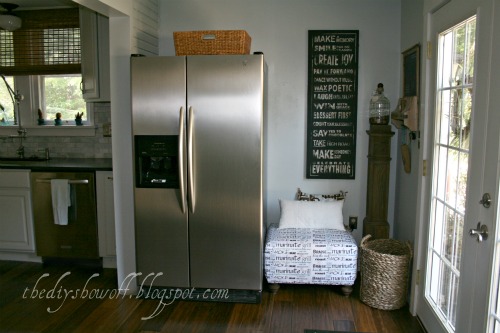
  • Entryway – this is where we enter our home for now. When we have a new front entry and when a new stand alone refrigerator and stand alone freezer are in the budget, this area will go away.  

(See the original house siding and where the kitchen was doubled in size sometime in the past by previous owners?)
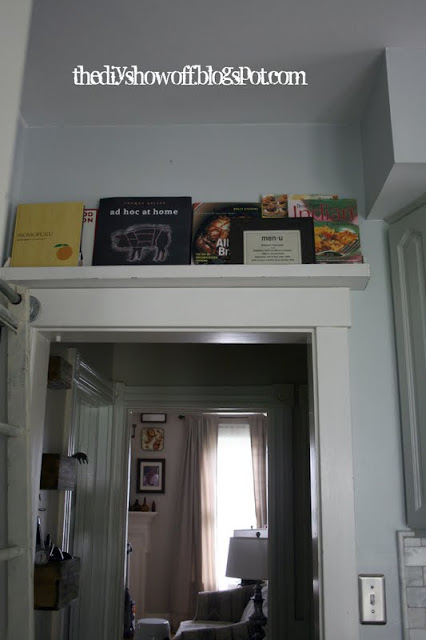
  • Storage


Hopefully by the end of the year, it will be complete.  In the meantime, we love the changes we’ve made. 

Now it’s your turn to show off your kitchen!
Please follow these rules for joining in:
  1. Link up your kitchen below. If linking an old post, add the button to the most recent stating you’re participating in Roomspiration-Kitchens today or add it to your side bar for the next week. 
  2. All Roomspiration linky parties stay open through October 14th. 
  3. Follow the DIY Show Off and visit some of the links.
  4. Don’t forget! 
    Enter the $100 Better Homes & Gardens/WalMart gift card giveaway here!
  5. Copy and past the button code into your post or on your side bar to share Roomspiration – Kitchens with your readers.


Roomspiration Blog Hop


If reading through your email subscription, click here to link
up or visit all of the links to beautiful kitchens.


Here’s the full Roomspiration schedule:

I had so much fun getting to know these talented ladies and their beautiful homes:
abode love: a man\View Along the Way

  Involving Color
{ All Things Bright and Beautiful }  Touch of Gray

The Blooming Hydrangea  The Mustard Ceiling

 The DIY Show OffAs you can tell, it’s been a very busy week so I’ll be taking this beautiful warm, sunny Saturday off from blogging and see you Sunday at the DIY Project Parade. Enjoy the weekend!


Happy to make a new friend this week!  I’m joining the party at
http://cottageandvine.blogspot.com/< /span>
Redoux


Like it? Pin It!  🙂