Bees Knees Bungalow

Jeanne at Bees Knees Bungalow is all about DIY, paint and the awesome things it can do to refresh and improve a room.  They’ve done their whole home themselves including a wrap-around porch.  Here are a few of the transformations you can find at 
{Bees Knees Bungalow} 
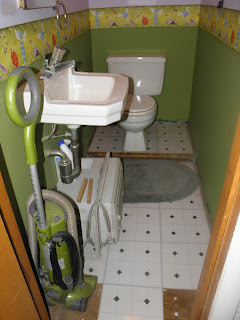
Powder room before…
Is beautiful now (love the soft colors and the awesome floor)!

See more details and pictures at 

Small Bathroom – BIG Change

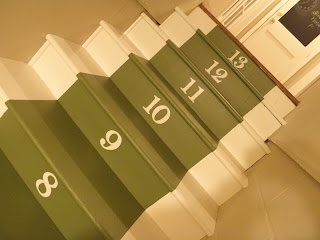
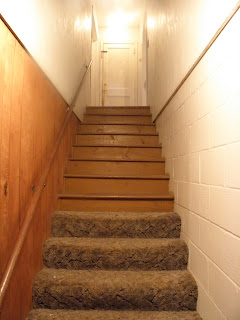
I have a thing for numbered stairs and Jeanne’s basement staircase is super cute…
Before, not so much…
And the door at the top of the stairs?
Now looks like this…
Love it!
See how she did it at 
One more!  Here is her kitchen when they bought their home…
Yikes – she says that’s wood-grained carpet!
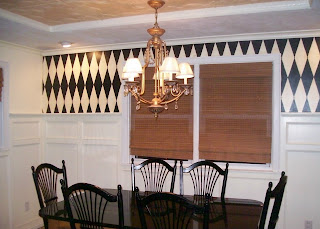
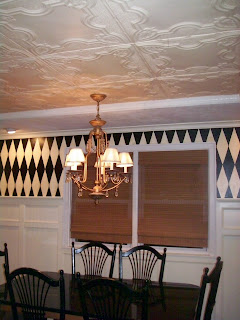
Now though, it’s an eating space full of personality with a pretty tin ceiling, wainscoting and painted diamond wallpaper-look! I see that same design at Ballard Designs!
Thanks so much for sharing your home, Jeanne!  I love what you’ve done!

Bambina Babe Nursery

I thought I had featured this but looking back, it never published. My apologies to Nealy from Bambina Babe (her awesome kitchen featured back in June) because I had the best of intentions.  Hopefully better late than never applies. This nursery is the things inspiration is made of. (You can see all of her inspiration at Nursery Part I and she does a fantastic job of making her own version every bit as beautiful and special.)

Nursery before…


And after:


Walls are Benjamin Moore Beacon Gray and the (faux) Roman shades are DIY!


I love that she calls it a compilation of junk and spray paint. HAHA! The result is beautiful and fun. 


Love this art. She doesn’t say it’s definitely a do-able DIY project…


The bedding is MILDI (mother-in-law-did-it), sewing together a hodge podge of Amy Butler fabrics.  It’s gorgeous!


Hot glue + pink pom pom trim = pretty touch to a plain lampshade.


The little lampstand/table is another thrifty find painted pink.


DIY name art (dischangers would be a great way to prepare these for hanging).


DIY lighting – she spray painted an old fixture from their dining room and added crystals with the help of her mom.


Isn’t it darling?  Beautiful results using a little DIY and thrifty finds!


Thanks so much for sharing, Nealy!  You did an amazing job on a small budget with great results! I love it!


See more of Nealy’s DIY talent and beautiful photography at 
 

Closet Office – More than Rubies

With a new baby on the way and a craft room turning nursery, Amber from More than Rubies was looking for a place to organize her craft supplies and create an office space.  After a lot of research, they decided to turn the guest room closet into an office. Here are some pictures of her inspiration:


From blisstree.com


from dwellerswithoutdecorators

First, they cleaned out the closet (before):

Second step was to re-vamp an old computer desk (a GoodWill find).
They used 7ft piece of plywood to extend the desk top to fill the closet.


Sanding, priming, and painting.


After getting the painted desk and desktop into the closet, they added some side shelving for additional storage…


As a finishing touch, they added a piece of molding to the front of the desk so that the plywood addition wasn’t so obvious. It worked out perfectly!


Now, they have an fun space for Amber’s craft supplies and a small organized office area!  


< br />

The total cost of the closet re-model was about $100 dollars. Amber plans to find curtains to cover the opening for when it’s not in use.  


Creative use of space, Amber – I love that it’s so organized/out of the way!  Thank you so much for sharing your hard work!

For more of Amber’s DIY projects, visit her blog at MORE THAN RUBIES.