DIY Chalkboard

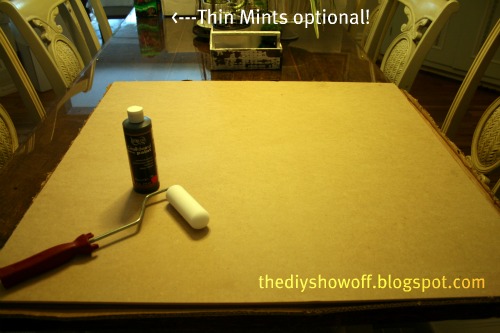
I’ve been hoarding saving an approx. 3’x3′ smooth chipboard that was packaging/support trash in a furniture box.  I just can’t part with certain ‘trash’, being a DIY-girl, frugal and all. If you’re here browsing DIY ideas…you know what I mean. Don’t deny it. I’m not the only one with a stash of trash for DIY, am I?  I knew that I’d have an idea for it someday.  That day has arrived!  My nephew, Austin, is getting a personalized chalkboard for his birthday.
Materials:

Recycled chipboard (Could also be directly applied to smooth walls with taping off a blackboard shape), Decor Art Americana Chalkboard Paint, Cutting Edge Stencil foam rollerDischangers x 2, Gorilla Glue tape – Handy 1″ Roll, Vinyl decals, Chalk and eraser
Personalized Chalkboard Tutorial:
1.  Apply 1 coat of chalkboard paint rolling one direction (vertically) with a foam roller and let dry 1 hour.

2.  Apply 2nd coat of chalkboard paint.  Roll in the opposite direction (horizontally). Let cure for 24 hours.
3.  Flip board and attach Dishangers.  Wet finger and apply water to activate glue.  Dischangers aren’t only for plates – they work with wood too!  I applied a Dischanger to each corner.  

Smooth and let dry 24 hours. 

 4.  Because this chalkboard is for a boy and hanging on a wall, I added STRONG Gorilla Glue tape to help with keeping the Dischangers extra secure (and to keep destructive little fingers from peeling off the Dischangers…just in case – you can never over-do caution.)

5.  Flip the board back over.  Apply vinyl decals.  

6.  Rub the side of a piece of chalk over the entire chalkboard area.

7.  Erase. (Back up eraser on stand by!)
I think my nephew is going to LOVE this!  I’ll add a “Happy Birthday” message and be sporting this gift to Chuck E. Cheese next week!  Those with boys – do you think he’ll love it?  (I’m mother of 2 girls, so sometimes I’m clueless with boys’ gifts!) 
My other DIY chalkboard used the same paint technique but was applied directly to the wall in our kitchen…

Before:
After (except right now the kitchen is undergoing some changes so the ladder and chalkboard wall look the same but the other parts don’t.  Reveal coming…someday! Hopefully soon.):

Join me in linking up your chalkboard project and checking out the great chalkboard ideas at Chalk Talk.

Big Boy Room Reveal at Tulip & Turnip

One of the most creative little boys rooms I’ve ever seen is this one designed and DIY’ed by Amy at Tulip & Turnip

I don’t know how she does it, being a working mom to 3 little ones (4-year-old twins and a 2-year-old). She must have superwoman powers! Here was the room before the transformation took place:


Not wanting to stick to a themey-theme, she decided to go with a fun camp vibe.  Take a look at this fun little guys’ room now…

I LOVE her creativity.  Check out these cutest little DIY details…

Pottery Barn-inspired oars

So special! Pop-Pop’s Boy Scout badges framed…

Another sweet family treasure.  Great grandpa’s tackle box:


Board Game collage…


A lamp from an old metal jug in the works…

Adorable sticks with styrofoam marshmallows…

Many more pictures with links to her DIY details in the original post 
Amazing!  Thank you so much for sharing your awesome little boy’s room and all of your hard work, Amy. It’s so sweet!
~*~*~*~
I‘ve seen some pretty amazing boys’ rooms in the DIY Project Parade this week linked by  my blog friend, Lisa, from Moore Minutes. I love that they’re personalized to her boys’ interests. Head over to get some more fun ideas and talented DIY projects for your little guy’s room…
~*~*~*~

It's Just Paint…

“It’s Just Paint”.  That’s the mantra over at W Design, along with “Love Where You Live”.  Great advice from Susie, blogger at W Design.  That is exactly how I feel about our home…do what we love, make our home ours.  


Susie does just that.  Take a look (click the links for more details and pictures!).

Kitchen Before:
Notice the paint can on the counter. The cabinets were about to be rescued!


So much wood crying out to be painted!


Kitchen After:


Oh for the love of painted cabinets.  Everyone is doing it (including me!) but I never get tired of seeing the transformation.  It’s lovely. Every.time. And Susie’s kitchen is no exception.  What a beautiful brighter difference!


Susie’s little girls’ room got a makeover too.  It’s beautiful before and it’s stunning after…

Girls’ Room Makeover

Before (so sweet!)


But two daughters became three daughters and more room was needed. The closet went from looking like this:


to looking like this:


WOW!


Next, she added some character to the room with painted wallpaper by making her own stencil. Trace, paint, repeat. LOVE!


Hours and days later, the walls were finished.


$10 Goodwill desk is perfect for her girls…


Susie’s father-in-law finished a bunk bed system they designed for the room.  Perfect for three girls in one room.  It is beautiful!  The entire room is just so sweet, isn’t it? Awesome bunk beds!


What a fun girls’ room!  More details to come!

There’s more to see at W Design – including her fun basement!


See more at It’s Showtime!

Susie – every single project, every detail is so amazing!  Way to transform a space or two or three! Thank you so much for ‘showing off’!

~*~*~*~
Don’t forget to enter the $50UncommonGoods.com giveaway!
Unique gifts, decor and DIY!