A Little Bit of Everything…before & afters

Roberta’s blog, A Little Bit of Everything,
Alternative Name
has a little bit of everything we love seeing…awesome before and after pictures of her beautiful home. Here are some peeks. Head over to say hi and to see more.

1/2 bathroom before and aftermy favorite parts are the beautiful vanity & sink and the Benjamin Moore “Little Falls” color on the walls which seems to change color in different lighting. So pretty, Roberta!
Before and After

Stairway before and after…beautiful wood floors!

The finished look….

The back stairs were added after the fact and required constructing a wall in the garage thus incorporating one of the garage windows into the design of the stairwell. This resulted in a rather unique back hallway. Everything in the photo below was part of the garage originally.

In the first design we used carpeting on the stairs which we later replaced with hardwood to match the rest of the house and a coat of Benjamin Moore “Whitestone”.

KitchenI love the new cherry cabinets and fresh white trim!

Before and After

Before and After

Before and After


Master bath remodel
a beautiful soothing remodel.

Before and After

Before and after

Before and after…

Warming up the sun room

Before..
and after

Before and after family roomso cozy. It looks bigger brighter. I’d love relaxing here!

Before and After

Before and After

Pretty guest bathroom transformationlove every detail!

Before and After

Before and After

Roberta, thank you so much for sharing your home tour. You have a beautiful, inviting and comfortable home!

Decorating Obsessed

I can’t thank Ashley from Decorating Obsessed enough for sharing so many of her before and after DIY projects. I can’t decide which I love more. They’re all awesome. Here, see what I mean then click her button above to visit her blog – and see the rest of her beautiful home!

My Buffet

I have a couple of touch-ups to do, but other than that – my buffet is done! Now I just need to buy some white candles. 🙂 Before: After: Painting furniture is actually really easy. I have been painting furniture since I was a kid (Yes, seriously. I could never decide what color or pattern my dresser should be – so paint became my friend at an early age). The Process My best tip is to find furniture that is structurally in good condition, and the rest can be altered easily. I do a light sanding on whatever I’m painting (just rough it up), and then a thorough sanding to the top of the piece (that’s the area that usually receives the most wear). Once all the sand dust is off your furniture – paint away. I’m a no primer and no oil-based paint kind of girl myself. Oil-based paint definitely has it place, especially when painting tile, but other than that I would prefer something less smelly. Plus, latex is just so much easier to work with. Primer also does have it’s place. I would recommend using primer if you are going from black to white (or any other extreme changes), because it will save you time in the end. Paint anywhere you have to use a small brush first, then do whatever rolling is needed. Doing it the other way, can start altering your rolling pattern and look sloppy. Paint For the buffet, I used Glidden’s Black Onyx. This is the first time I’ve used Glidden, and I thought it covered wonderfully. My best tip for picking paint is to keep it all the same. No matter how many coats you do, at some point paint will chip – and you want to know exactly what you used, so you can just do touch ups, and not an entire new coat. This also makes it easier, when you find additional things to paint. That way there’s no confusion later on. Everything that is black is just one color. Finish There really isn’t a wrong answer for what type of finish to use. I personally prefer satin, because that’s the shine most store-bought furniture has. Her Entryway: The painting is done! Now I just need to clean the floors in there. Before: After:Bathroom Makeover: Well, it’s not 100% done, but it’s done for now. Here it is: Before:

After:


The wall color is Behr’s Grass Cloth.

Close Ups: The “before” hinges crack me up – it looks like they have little wings on them. I have the same hinges in the half bath – I can’t wait to get rid of them.

I finally have art for the bathroom. This was a Christmas present from my parents, and I absolutely love it.
Stairs Transformation: I had a simple plan for today – tear out the carpet on the hallway stairs. Then voila – hardwood floors to enjoy. Here’s what I didn’t know, when I started this project: – This carpet runner, is nothing but scraps. Each stair is its own piece of carpet, which equals 3 tac strips per step and at least 50 staples per stair. – While I pulled on some carpet to make sure the wood was okay, apparently the spot I looked at was a fluke – the wood is unfinished. – The unfinished wood is blessed with random paint spots all over it. So you can witness the joy: Because of the extreme amount of staples, each stair is taking about an hour to do. My hands are swollen and hurt to move – I am so done for the night. This is how far Brent and I got. So, the new plan (which hopefully includes having this mofo done by our housewarming party on the 21st): – Tear off the rest of the carpet and de-staple the stairs (Monday and Tuesday) – Sand the stairs – this will help the paint situation I have going on and it will also rough up the finished paint of the stairs (Wednesday) – Stain the stairs (Friday night) – Paint the back of the stairs white (Sunday) I have never stained anything before, and I have to admit that I’m slightly terrified. But I guess if it’s terrible, it can always be sanded done again. Overall, I think it turned out really well. Before: After:
My tips… – Spend the extra $10 and buy the conditioner. This helps limit the blotchiness that can happen while staining. – When staining and using the polyurethane – move quickly. Both these products change consistency quickly when they start to dry, making them more difficult to work with. Because of this, I felt more comfortable using a smaller brush, because I had more control of it – so I could be fast and not so sloppy. – Second coats doesn’t necessarily make things darker – time is the biggest factor. It’s better to do 1 15-minute coat instead of 2 10-minute coats. Projects for later… – Paint the handrail – Tear out the carpet in the hallway and stain away.

Great job on EVERYthing Ashley and thanks so much for sharing! First, how cute are those dogs?! I love the way the painted doors brighten up the entryway. The stairs look amazing! The bathroom is GORGEOUS. The color and accessories are so fun. The buffet is stunning!

This post is brought to you by Simply Radiators, horizontal and vertical radiators at great prices.

A Trip to the Beach (Powder Room Makeover)

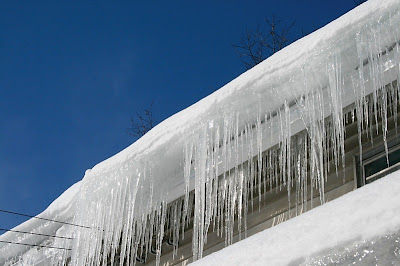
I love pretty, soothing spa-like rooms. I picture vacation resorts and sunny skies. Especially when this is what my weather forecast predicts this:
and my gutters look like this:


Check out the change Jessica from Vanilla Bean made to her powder room. Feel the sunshine?

Before
After

The vessel sink, faucet and tiles all came from Home Depot. The total cost ended up being more than I anticipated, with a majority of it being the sink and faucet. I’ve been wanting a sink like this for ages, so I’m not complaining!

We primed the vanity with Kilz before putting on two coats of black paint. Once it was dry, I took my handsander to the edges. Just a bit of white paint and the original wood now show through.
While we splurged on the vanity, we saved on the decor. This frame is from the Goodwill. I got it for $1 and spray painted it black.

The starfish is from Hawaii, where J we got
married. Look familiar? We used it for this photo of our wedding rings.

The framed photos are from a trip we took to Destin.

My shabby oar finally found the perfect home! I picked it up from The White Rabbit a couple of years ago for $35. The vase was previously in the kitchen, but fits perfectly here now!
I think my favorite part is the color. It is Tropical Lagoon from Glidden. It is like a Tiffany/Robin’s Egg blue. Simply perfect!

I’d feel like I was at the beach every time I stepped in here. The black distressed vanity is so pretty. I’m a fan of vessel sinks too – it reminds me of vintage wash basins. The tile is awesome and the wall color is so soothing. I love the decor too! The oar is so fun. Art with vacation memories and the starfish with a special meaning are such a great idea. Great job, Jessica! Thanks for sharing!

This ice and snow jellyfish is the closest thing we’ll have to the beach. 🙁