Vintage Window Mirror and the DIY Project Parade

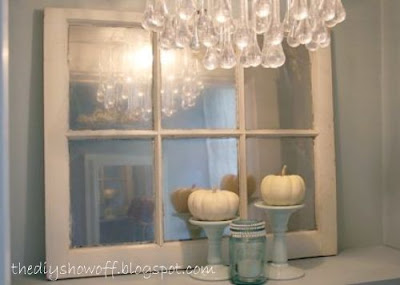
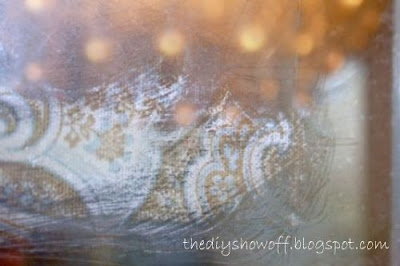
It’s been a week and I can’t wait to see what you’ve been DIY-ing!  This week, I created an acid-look vintage window mirror using an old window, Krylon Looking Glass Mirror-Like paint, Gorilla Glue and left over fabric.  Super easy! 

1.  It seems there is rumor that Krylon was going to discontinue Looking Glass paint.  Myth!  Krylon states there is no plan to discontinue Looking Glass paint.

2.   They also said that the main retailer for the looking glass is Michaels.  I would also try other crafting stores. The product rep gave me this Web site as well. They said they usually refer people to it to find more products:
Ace Hotline

Read the full tutorial with more pictures at The DIY Club!

 
Let’s see what you’ve been up to!


The DIY Show Off
If you’d like to link YOUR DIY project post to The DIY Show Off Project Parade:
1.You must use the button above and link to this post to share the linky love.
2.Include your name or blog name and project title. Add your permalink (not your blog url, but your DIY project post url). Feel free to link a Past Post, just invite your readers in a current post with a quick note.
3.Or email your link to thediyshowoff@gmail.com and I will add it for you.
4.If you notice your link has disappeared -please add the link back to The DIY Show Off to your post today, a button or a quick note to your readers about the party and try again! I love when everyone participates and readers check out everyone’s links, but I think the return favor of linking back is the nice thing to do so everyone plays fair and enjoys all of the projects and links. Also – this blog party is for DIY projects only. Links not related to DIY will be deleted.

Linking to:

HookingupwithHoH

Coat Closet Before and After and DIY Project Parade

We’re further along in the closet. Hurray! Here is it now…

Here was the chaos before without purpose or organization.  Pretty bad, huh?

Just baseboard trim and lighting to go.  Full details at the DIY Club coming tomorrow.

Mr. DIY also installed a new exterior door and storm door this weekend.

We’re working in the dining room too and sanded and installed half of the trim/molding for another doorway we’re working on. More coming soon on that project. AND I de-cluttered my blog.  🙂

Don’t forget! Wed. is the DIY Holiday Highlights. I’m not even started but I’m so excited about Christmas.  So, the annual DIY Show Off holiday party starts Wed.  With a freshly painted living room and new dining room look this year – I need your inspiration and festive ideas! There’s a holiday giveaway to kick off the season too!

Did you DIY this weekend?

The DIY Show Off

read more, link up or see TONs of DIY projects

Let’s see what you’ve been up to!

The DIY Show Off

If you’d like to link YOUR DIY project post to The DIY Show Off Project Parade:

1.You must use the button above and link to this post to share the linky love.

2.Include your name or blog name and project title. Add your permalink (not your blog url, but your DIY project post url). Feel free to link a Past Post, just invite your readers in a current post with a quick note.

3.Or email your link to thediyshowoff@gmail.com and I will add it for you.

4.If you notice your link has disappeared -please add the link back to The DIY Show Off to your post today, a button or a quick note to your readers about the party and try again! I love when everyone participates and readers check out everyone’s links, but I think the return favor of linking back is the nice thing to do so everyone plays fair and enjoys all of the projects and links. Also – this blog party is for DIY projects only. Links not related to DIY will be deleted.

Have you used any products from these sponsors in your DIY project:
Gorilla Glue, Krylon, Cutting Edge Stencils, Mythic paint, Purdy paintbrushes, Deco Art Orchid Ceramics, PK Glitz, Design Divas, Moo, Rockler, Dremel…

Then head over to the DIY Club and link up to the DIY Monthly Project Party too!

DIY Club

I’m linking up to

”DIY

Tennis Party Favor

t’s pretty hard to find favors for tennis so I made some using leftover Moo Mini Cards that I received to make my mosaic stool. for a tennis themed party.  It’s a tennis ball filled with candy.  Easy.  Cheap. Perfect.

I made these cute tennis party favors for the end-of-season tennis banquet for my daughter’s tennis team and finished them off with left over Moo Mini Cards. Here’s how I did it:

Materials: Tennis balls, candy, cardboard paper towel tube, favor bags, ribbon and Moo Mini Cards.

Tools: A circle to trace (a shot glass is a good size), pen, utility knife, scissors

1.  Trace a circle onto the surface of the tennis ball. I used a shot glass.

2.  Using an utility knife, cut out the circle traced. 

Did you ever wonder what the inside looked like?  It’s black rubber and a little dirty.  Wipe out the inside.

3.  Fill tennis ball with candy.

4.  Cut a ring off the end of a cardboard paper towel tube to use to keep the ball standing up.

5.  Finishing touches:  Place the stand and ball filled with candy inside of a cellophane favor bag, tie with a ribbon and add a Moo Mini Card tag…

These were a big hit with the girls’ tennis team!