I love this blog day at the DIY Show Off! I finished up the bi-fold doors. Finally! Only they’re not bi-fold doors anymore! Woo hoo!
The doors before:
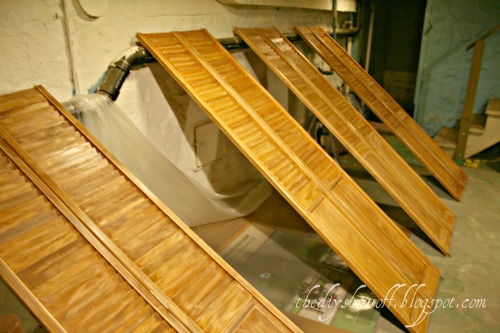
The doors after (see tips on painting shuttered doors here):
But they were still functioning as bi-fold doors. Bi-fold doors are a great space saver in hallways or for laundry rooms, but not necessary in a bedroom. I wanted them to function as French doors. Super easy to do!
(Dressing Room Sneak Peek!)
Closets Before had curtains for a few years – I hated that wood tone that much!
BIFOLD CLOSET DOORS become FRENCH DOORS…
How to:
The doors were installed as usual in the outer corners. (My doors only have an upper track, the bottom is held in place with a bracket in the corners on the floor – no slider on the floor.)
Remove plastic that keeps the door on track from the upper inner corner. (The upper outer one near the wall will stay in the original track, remove the other top inner plastic.) Mine look like this:
Measure where the door closes and magnetic hardware will need to be place for doors to close and catch.
Start with pilot holes.
Install metal cupboard door hardware (the ‘catch’ piece) onto the track itself, so it hangs down to meet where the magnetic piece is going to be placed on the actual door.
Attach the other piece of the magnetic cupboard door hardware to the door itself, making sure that it lines up with the metal piece on the track so it will catch and stay closed. (Mark and drill pilot holes first.)
These are perfect for keeping the closet doors closed and so easy. Best of all – it doesn’t alter the door itself so if the day comes when you want bi-fold doors again, no problem. Repeat for all doors (4 in our case).
Three on each door near the top, in the middle and on the bottom.
Mark.
Drill pilot holes.
Attach.
Now the doors don’t fold anymore – but can be easily turned back to bi-fold doors. Permanent for only as long as you want them to be permanent.
Door knobs are from Hobby Lobby (1/2 off of $5.99 each!!!)
Since this is my dressing room, I liked the freedom to get creative.
“S” hooks make belts/scarves and accessories easy to find. {Don’t you hate forgetting what you actually do own because you can’t see it or find it?}
I love that they open out, instead of fold. I love the new paint job and pretty knobs. And I love that my cat no longer snoozes on my sweaters, covering them in fur!
What do you think?
Similar ‘S’ hooks:
Dressing Room Reveal coming soon with tons of pictures and a few more details on how my clothing and accessories went from being crammed and sharing space with ‘boy’ clothes to having a room all their own.
Ps. We’re leaving for vacation but I’ve scheduled posts to publish along with some guest posts from some of my creative blog buddies. Please stop by to give these ladies some DIY Show Off love while I’m away and know that if you comment, ask questions, submit features or email me…I may not get back to you right away but I’d still love to hear from you and we’ll catch up when I return (I’ve been working on another room transformation this past week and can’t wait to share it with you!)
Now – Let’s see your latest DIY project!
1. You must use the button above (ADD BUTTON HTML CODE FROM SIDE BAR TO YOUR POST) and link to this post to share the linky love. You post must be recent, shared at one DIY Project Parade only (not continuously) and be DIY related.
2.Include your name or blog name and project title. Add your permalink (not your blog url, but your DIY project post url). Feel free to link a Past Post, just invite your readers in a current post with a quick note.
3.Or email your link to thediyshowoff@gmail.com and I will add it for you.
4.If you notice your link has disappeared -please add the link back to The DIY Show Off
to your post today, a button or a quick note to your readers about the party and try again! I love when everyone participates and readers check out everyone’s links, but I think the return favor of linking back is the nice thing to do so everyone plays fair and enjoys all of the projects and links. Also – this blog party is for DIY projects only. Links not related to DIY will be deleted. Please share your link one week only.
6. If you have a Holiday link to share, feel free to link up to here too!
7. NOW you can “like” the links! What a fun idea! Most liked links may be included in a post of DIY Project Parade highlights later in the week.
8. Visit a few other links to make some new friends, get some creative ideas and feel free to leave me a comment. I’m likely sitting here on the computer and could use a happy distraction!
*~*~*~*~*~*~*~*~*~*~*~*~*~*~*~*~*~*~*~
I was one of the bloggers selected by True Value to work on the DIY Squad. I have been compensated for my time commitment to the program as well as my writing about my experience. I have also been compensated for the materials needed for my DIY project. However, my opinions are entirely my own and I have not been paid to publish positive comments.
Coming up early January 2012…share your best projects of 2011…
12 Bloggers
12 Colors
12 Days of Holiday DIY
Pin It
