A Sense of Design

Good morning, DIY friend!

I‘d like to introduce you to Gina of

A sense of design
A new creative DIY blog started just a few months ago but already showing some great DIY projects under her label appropriately titled DIY tutorials. My favorite is the stenciled wall tutorial
Isn’t it pretty?  It’s the same stencil I used for my daughter’s room so I might be a little biased.  Here is Gina’s beautiful result…
She also has some fabulous furniture features!
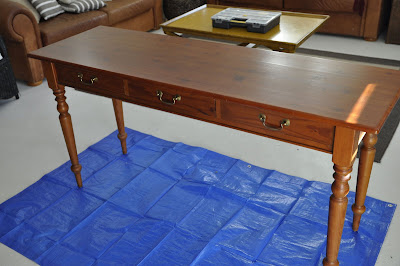
Desk before
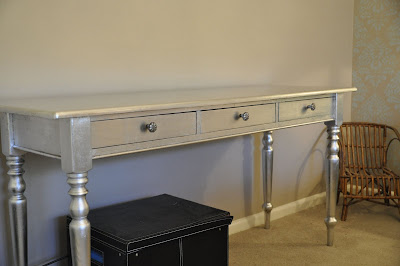
Gilded desk now – gorgeous!

Gina is not only DIY creative, she’s blog-creative too.  I LOVE this ongoing series of hers…

You’ll have to visit A Sense of Design to read the posts. I know you’ll enjoy it as much as I have reading back through them!

Wait! Are you still here or did you head over already? There’s more to see too!  One of our favorite topics, HOMES – before and after!  Here’s a sneak peek of Gina’s house.
Kitchen After
(drool!)
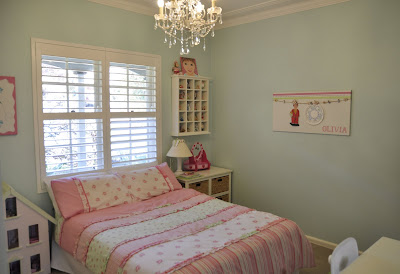
Sweetest Girl’s Room
Gina, welcome to blogging!  You’re off to an awesome start!  I can’t wait to catch up on your posts and follow along to see more! Thanks so much for showing off today! 😉

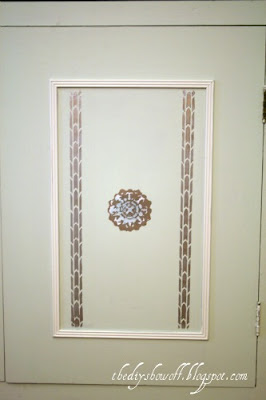
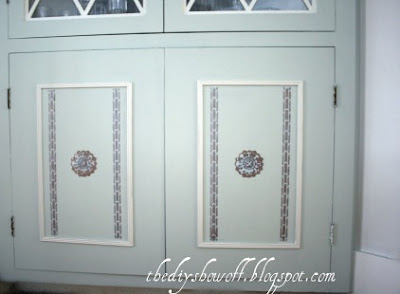
The DIY Project Parade – my stenciled cabinet doors

Remember when we added picture frame molding to the doors on our built-in dining room cabinets? I couldn’t just leave their blank slate alone.

Using Cutting Edge Stencils and Mythic paint, I added some detail.

See what I did at the DIY Club.

DIY Club

I‘m joining the party at


Did you have a productive DIY weekend or DIY something recently you’d like to share?

I‘d love to see what you’ve been up to!

The DIY Show Off

If you’d like to link YOUR DIY project post to The DIY Show Off Project Parade:

1.You must use the button above and link to this post to share the linky love.

2.Include your name or blog name and project title. Add your permalink (not your blog url, but your DIY project post url). Feel free to link a Past Post, just invite your readers in a current post with a quick note.

3.Or email your link to thediyshowoff@gmail.com and I will add it for you.

4.If you notice your link has disappeared -please add the link back to The DIY Show Off to your post today, a button or a quick note to your readers about the party and try again! I love when everyone participates and readers check out everyone’s links, but I think the return favor of linking back is the nice thing to do so everyone plays fair and enjoys all of the projects and links. Also – this blog party is for DIY projects only. Links not related to DIY will be deleted.

The winner of the Black & Decker giveaway is…

Lucy said…
I’m a long-time RSS subscriber. That way, I don’t miss a thing!
January 13, 2011 5:57 AM

Congratulations, Lucy!

Stenciled Walls

Closet before:  
Now with beautiful new color thanks to Dutch Boy Refresh paint.  It’s a light blue called Fountain of Youth. The perfect backdrop for a fresh new look.  Speaking of fresh!  Not only is Dutch Boy Refresh paint zero VOC, check out the key features:
  • Exceptional hide and durability
  • Gives mildew-resistant coating
  • ZeroVOC / Greenguard® Indoor Air Quality Certified

Tools needed:
  1. Cutting Edge Stencil’s “Whispering Elm Wall Pattern Stencil
  2. 3 different colors of paint (I used less than 1/2 a quart for the closet.  It doesn’t take much.) Our stencil was made using Mythic Paints in Woodbury and Bleached linen for the pattern.
  3. 3 foam rollers
  4. Paper towels
  5. Paint tray or foam plate
  6. 3 pieces of painter’s tape
The stencil comes with very easy to read directions, tips and tricks.  At first, I felt overwhelmed with placement and where to start.  I chose the right top corner of the wall since this is the most viewed side of the closet.  No measuring required.  Once I developed a pattern (eyeballing stencil placement), the rhythm and pace sped up.
1. Place the stencil on the wall (secure with a piece of painter’s tape).
2.  Roll the foam roller into the paint, covering the roller.  Then roll on folded paper towels to evenly coat the roller.
3.  Roll over the open areas of the stencil. 
4.  Repeat until entire wall is covered in the 1st stencil pattern.
5.  Repeat with Steps 1-4 for Stencil #2 and then with Stencil #3.
6.  Clean stencils by laying them in the utility sink under running water and rubbing with a sponge.  Hang to dry.
Tips:  Use a clean foam roller for each color/stencil. After coating the roller with paint and rolling on the paper towel, roller is good for about 3 turns with the stencil. Again – no measuring required.  It’s magic.  Okay, maybe not but the pattern works out and imperfections aren’t noticeable.
Here is closet after with the look of painted wallpaper.  No ripped or torn wallpaper in the future, no wallpaper removal. There is no lighting yet in the closet so colors are off a little in pictures.  

 “I love wallpaper patterns but after tons of wallpaper scraping in our old farmhouse, I will never apply wallpaper.  Scraping wallpaper is my least favorite DIY project.  Using the cutting edge stencil was the super easy. Little prep, little clean up and once I got a rhythm going, it went quickly. I love that it looks like wallpaper but I chose the colors, it was so much less expensive and I did it myself!”


Closet now.