Easter Succulent Garden

Take a moment to gather your thoughts, count your blessings and start the holiday weekend with a grateful heart.
 
But God demonstrates his own love for us in this: While we were still sinners, Christ died for us. ~Romans 5:8
 
Blessings to all this Good Friday.

Remember that one time last year when I made a wire cloche for a succulent terrarium/garden? It’s a miracle! I haven’t managed to kill the plants! I love that succulents are so hardy, nearly fool-proof. Well, for Easter, I’ve done a little re-arranging in my little succulent garden. 

DIY wire succulent garden

{DIY wire cloche for succulent garden}

It’s still alive and thriving but it was looking a bit neglected and sad (okay, so some of the plants didn’t make it) but I took a few minutes to freshen it up for spring, trying to make up for my non-green thumb. I saw something similar somewhere one time but for the life of me, can’t find it now to properly credit that glimpse of inspiration. Here’s what I did: 

Easter succulent garden at diyshowoff.com

  • I added water so the soil was wet. I broke up the compacted soil with a fork then added half of an empty toilet paper roll. I covered it with soil and pebbles then added a rock to the side…just like Jesus’ tomb. 
  • Using twigs from my yard and scrap floral wire, I created 3 little stick crosses and tucked them near the back. 

succulent garden for Easter at diyshowoff.comEaster succulent terrarium at diyshowoff.comEaster succulent garden - diyshowoff.comHe is Risen succulent garden at diyshowoff.com

When Easter decorating becomes bunnies, eggs, chicks and candy overload (which I do love too, don’t get me wrong!). However, it’s important to have a sweet reminder of the true reason for celebrating Easter. He is risen! 

Jesus' tomb succulent garden at diyshowoff.com

 He is Risen, indeed. xo 

He is Risen! succulent garden at diyshowoff.com

 Update: Here are links to some more (thanks for sharing, Graziela!)

This post is sponsored by my Young Living business! Check out my essential oils page for more information on how you can get these amazing oils in your hands too along with helpful freebies, a gift from me, and tons of support:

April 2019:

Hello April DIYShowOff welcome bundle 2019

DIY Alphabet Burlap Cork Board Message Center

Hello DIY friends! One of my favorite stores is Michaels – although it’s one of those stores that I can’t run in for just one thing because I end up with a cart full of the cutest decorative accents and more materials for my craft stash. You too, right? Well, Michaels just announced the addition of pre-cut craft fabric to the thousands of creative products available in its stores, providing us with one-stop shopping for DIY projects. This is BIG HUGE news when you live in a smaller city with only one local fabric store! While I was there, I also discovered that Michaels sells a complete line of sewing supplies as well…this cuts my shopping time in half. One store instead of two. Bonus!

DIY burlap message center

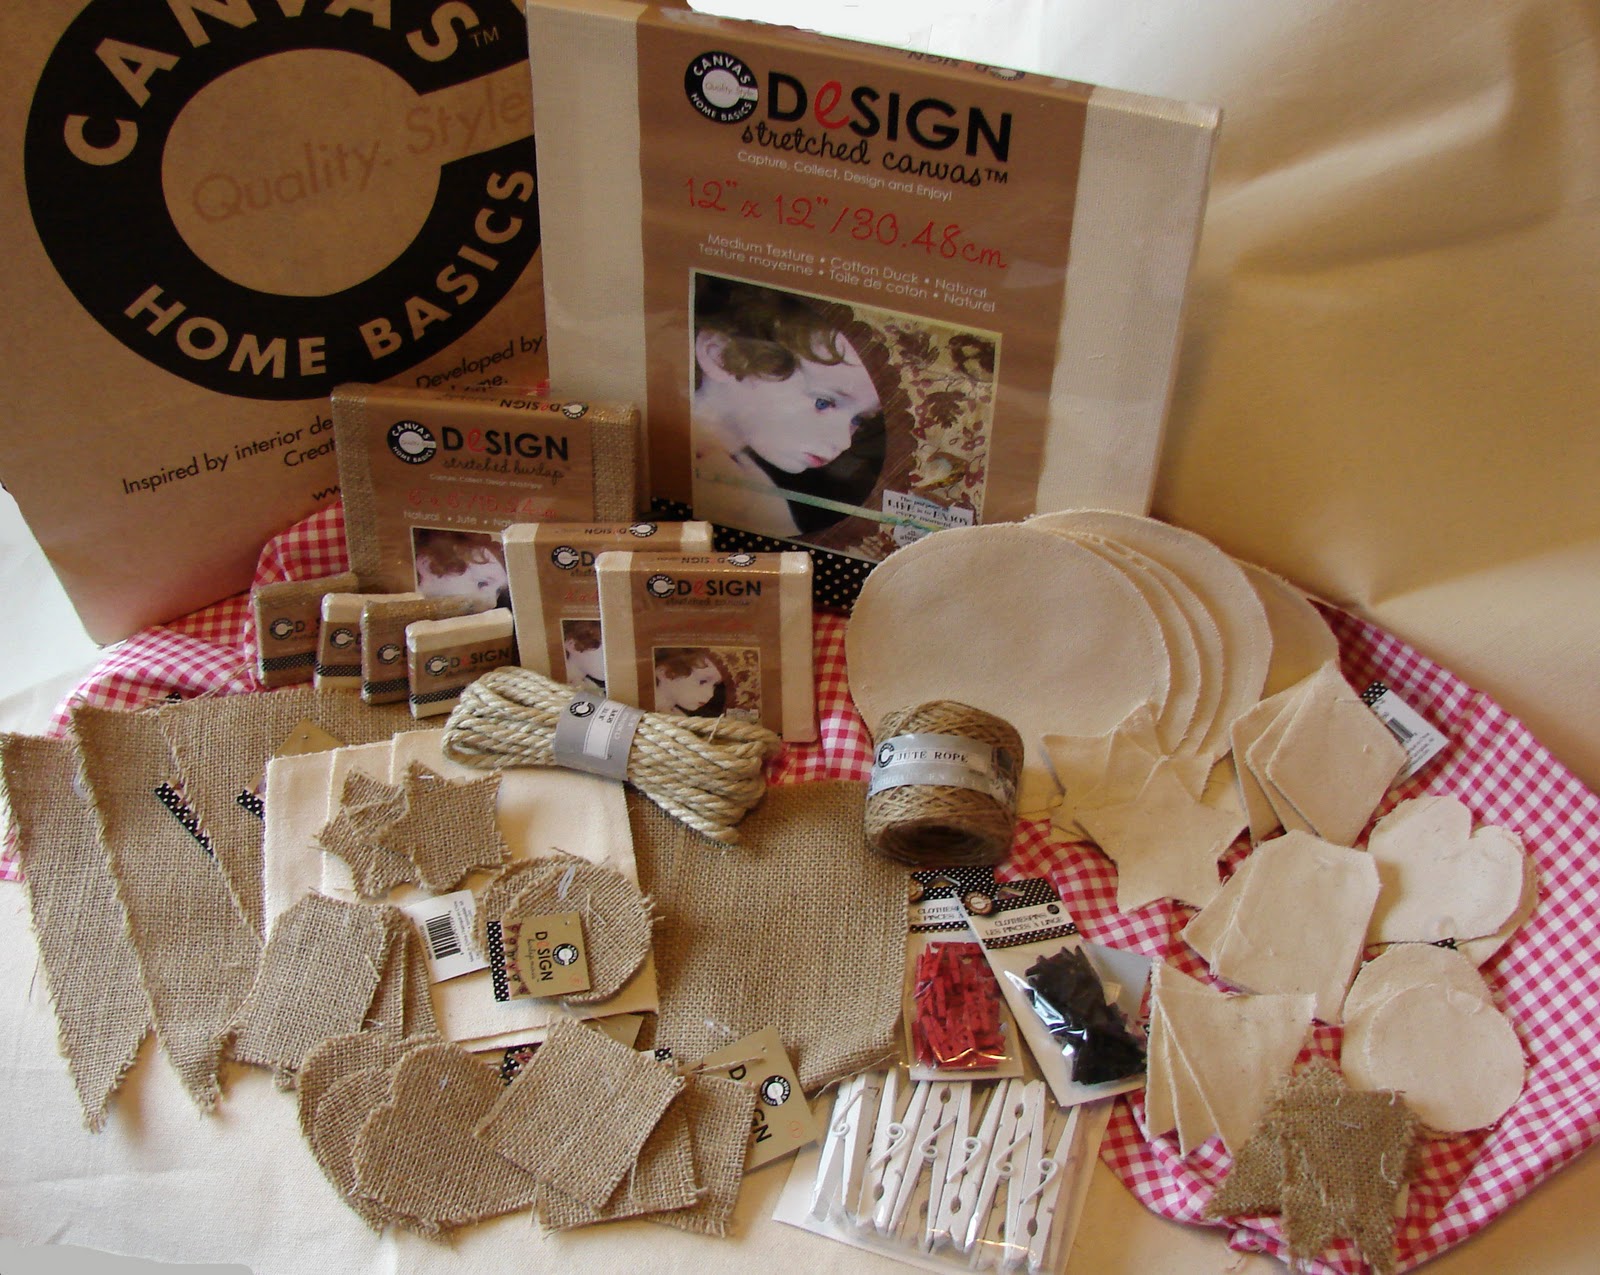
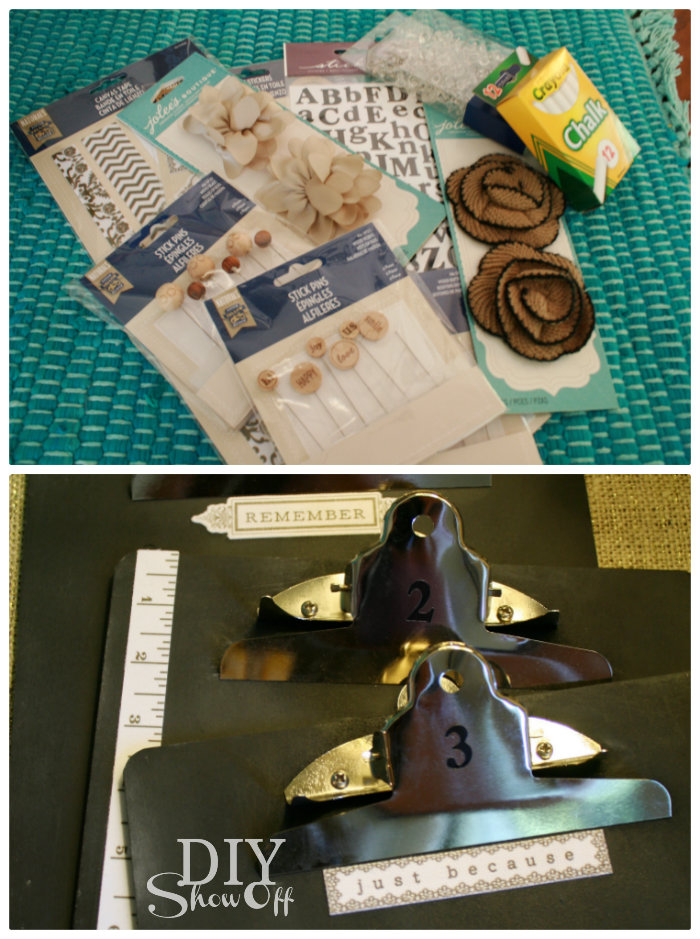
Michaels supplied me with this awesome stash of fabric as a part of a promotion for their new line of home decor fabric. Isn’t it darling? 

Michaels fabric line

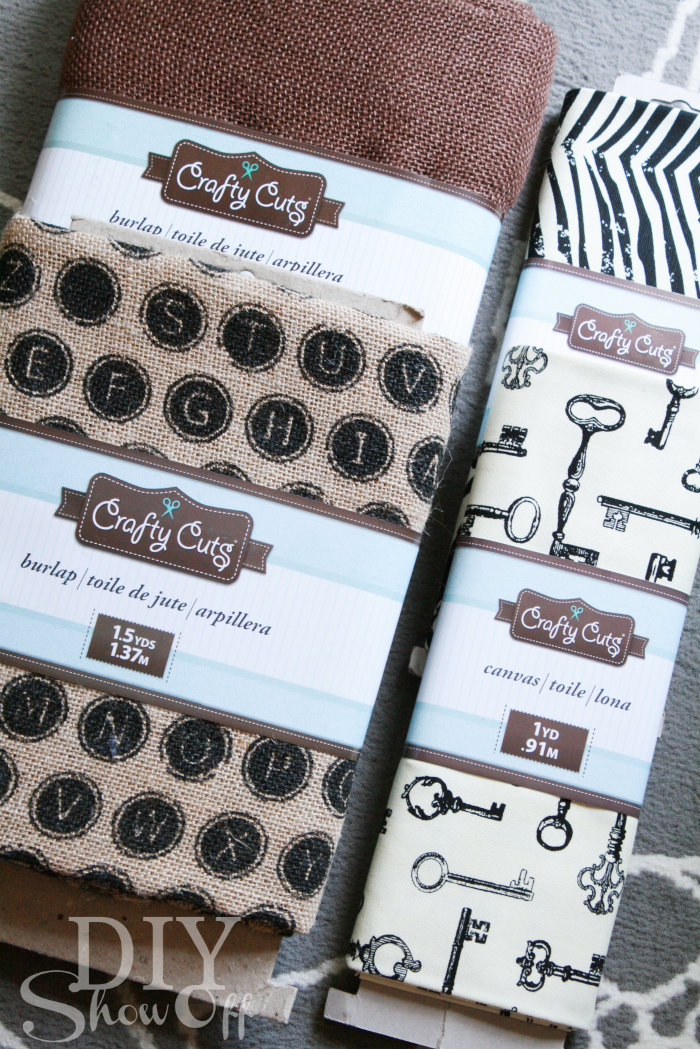
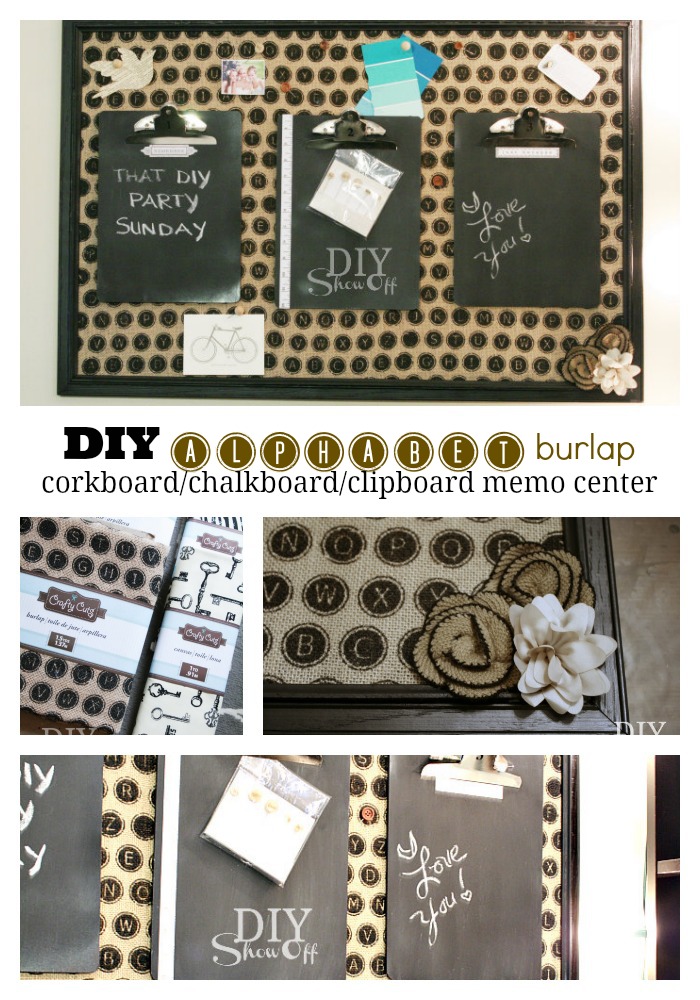
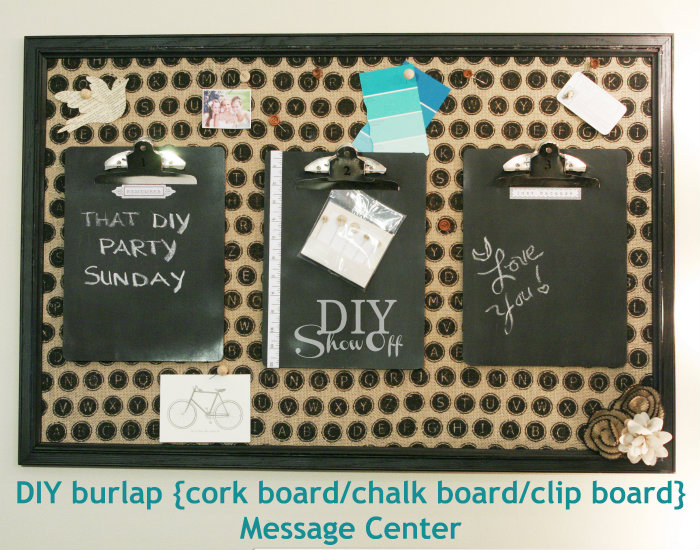
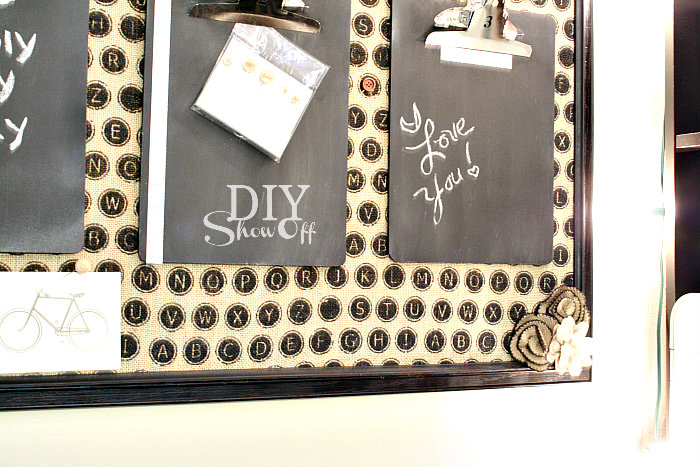
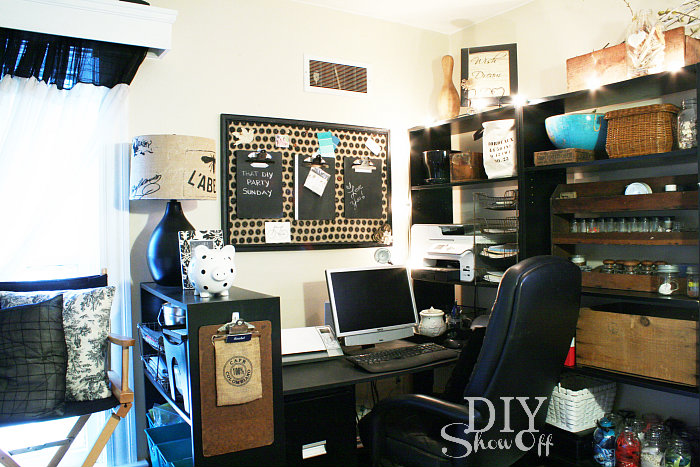
The alphabet burlap is ADORABLE! and a perfect match for my craft room so I decided I would make myself a burlap covered corkboard message center to help keep me organized. Cork board, Chalk board, Clip board AND burlap? That’s what I’m talking about! A fun combo!

Materials:

  • 36″ x 24″ framed corkboard
  • Crafty Cuts alphabet burlap
  • 4 pieces of thin wood trim (Michael’s also sells a small miter box & saw)
  • Black spray paint (or you could probably get away with one can of chalkboard spray paint)
  • Spray adhesive
  • 3 clipboards
  • Chalkboard spray paint
  • Hot glue (and hot glue gun)
  • Embellishments
  • Push pins

Corkboard/Chalkboad/Clipboard Message Center Tutorial:

DIY message center

1. Measure and (miter) cut small trim pieces to fit inside of the corkboard’s frame. 

DIY burlap covered cork board

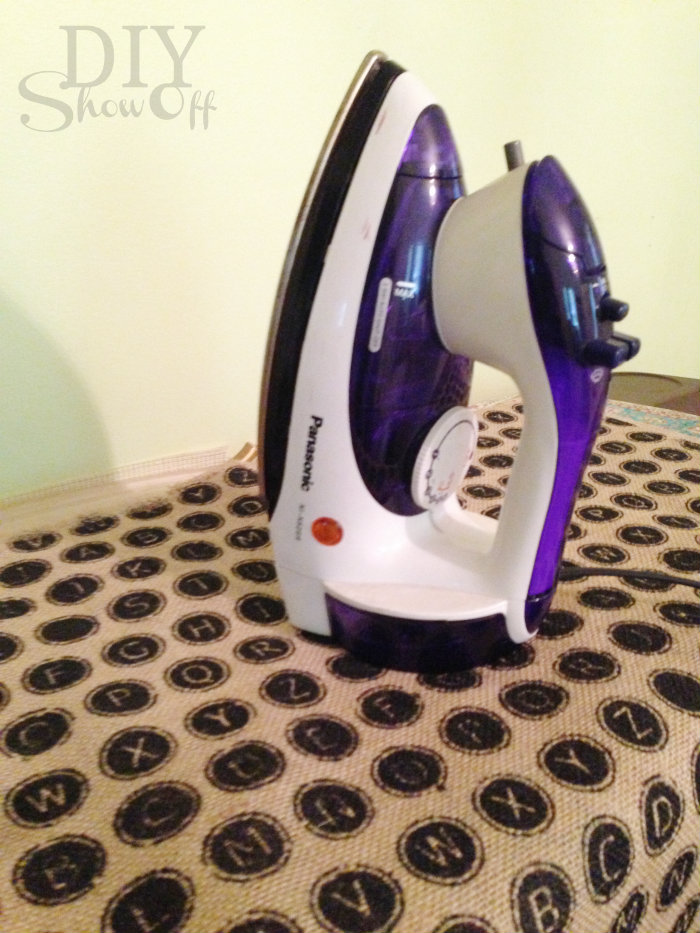
2. Iron burlap. I used my iron’s highest setting and sprayed water (not steamed) to get out wrinkles. Iron both sides. 

ironing burlap

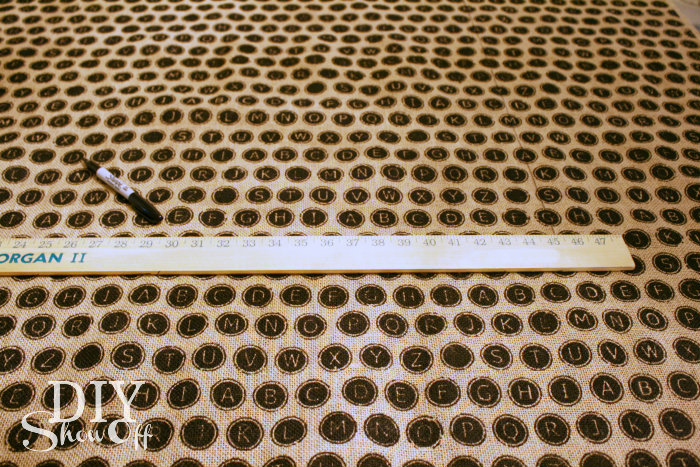
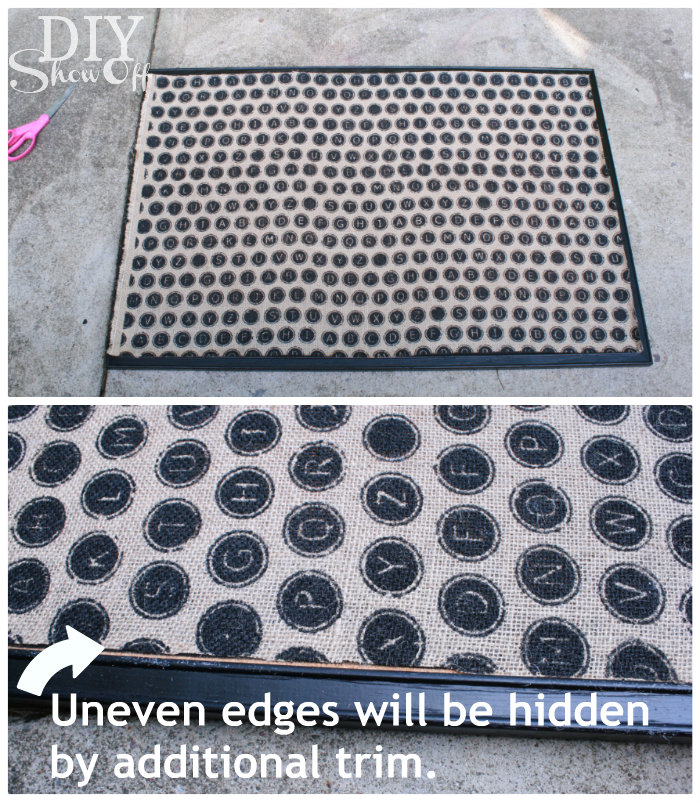
3. Measure inside of corkboard frame and cut a piece of the burlap to those measurements (mine was 34.5″ x 22.5″). If you subtract 1/4″, it will save you from having to trim the fit later. If it’s a smidge small, it’s okay (and actually better) and will be hidden by the added wood trim later. Set fabric piece aside. 

alphabet burlap

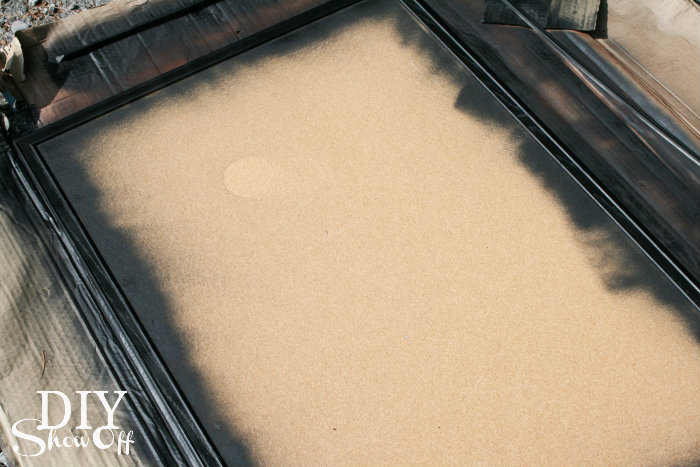
4. Spray paint the corkboard frame and trim pieces black. I was okay with imperfect coverage for a distressed look. (You could also sand edges when dry.) No need to tape the corkboard since it’ll be covered later. Let paint dry. 

DIY burlap corkboard message center

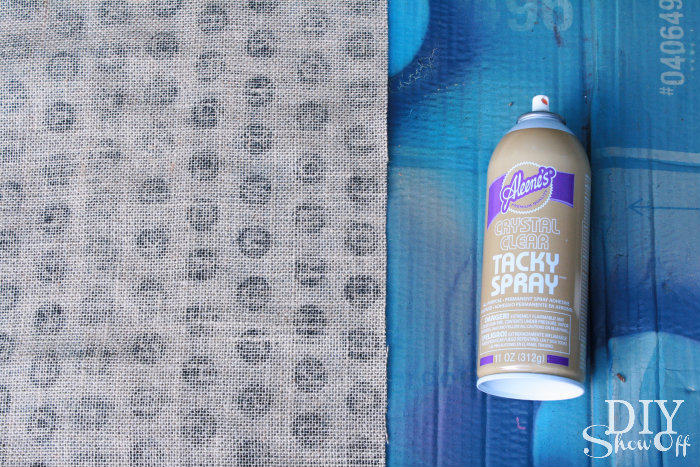
5. Give the cut burlap piece a coat of spray adhesive on the back side.  (I do this outside because of the overspray but be mindful of the wind direction blowing the adhesive spray mist as well as when picking up the sticky burlap, not to touch/fold which mine did but easily quickly pulled apart.) Immediately move to step 6.

DIY burlap covered cork board message center

6. Working from the middle out, smooth the burlap over the corkboard (inside the frame). It’ll be reposition-able right away if needed. 

DIY burlap covered cork board

7. Next I used hot glue to attach my small mitered trim pieces over the burlap edges, right next to the inside of the corkboard frame. This covers the edge of the burlap.

DIY burlap covered cork board

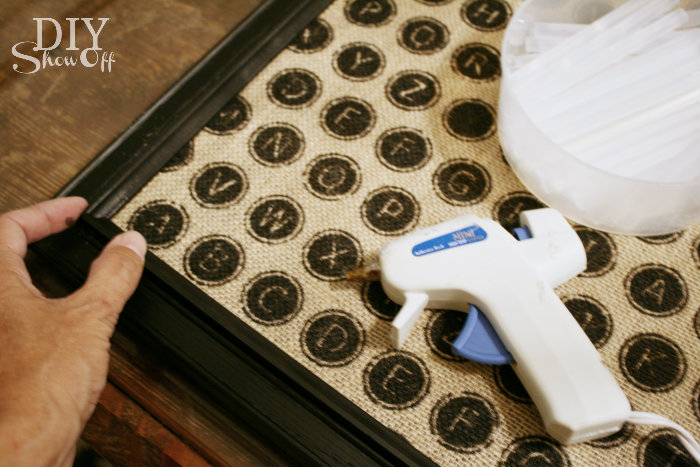
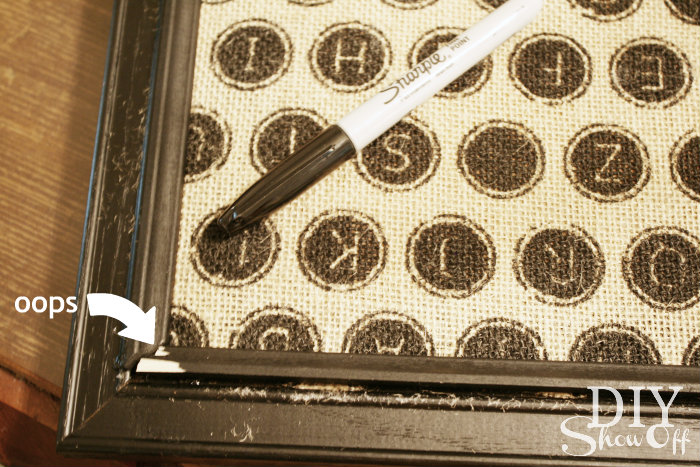
If you need to re-cut a mitered piece or accidentally scratch the black paint finish, simply fix it with a black Sharpie.

DIY burlap covered cork message center

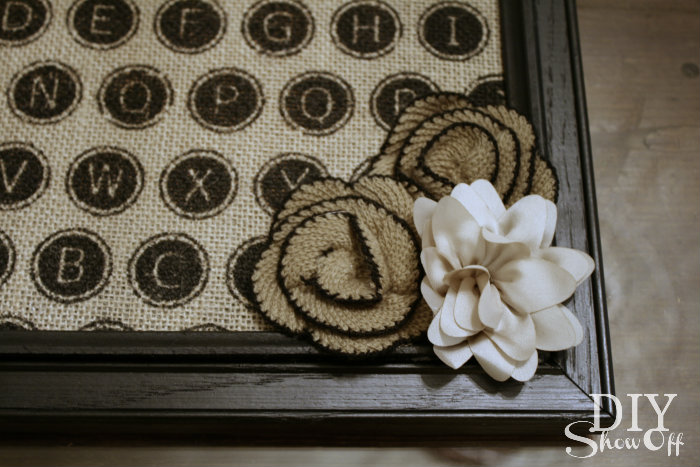
8. Embellish as desired. My mitered edges surprisingly were a great fit after the mitered cut fix above, but these adorable flower embellishments attached with hot glue would work for covering a not so professional {tricky cuts!} mitered fit too. 

flower embellishments

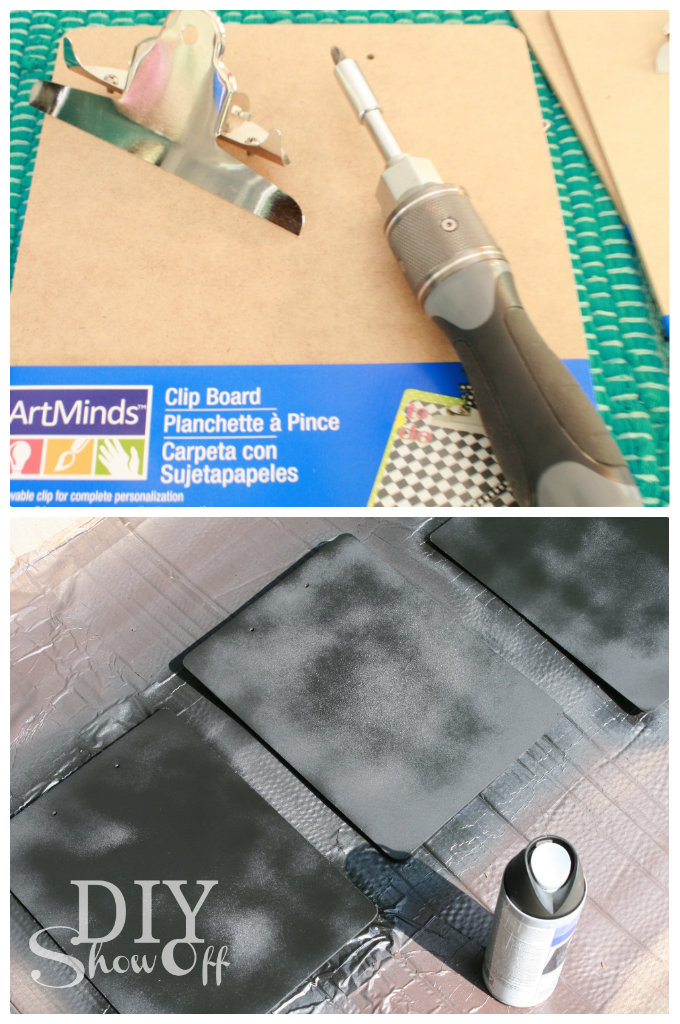
9. Clipboards: Remove metal clip hardware, coat with chalkboard paint, let dry and repeat a second coat and let dry. 

chalkboard clipboard

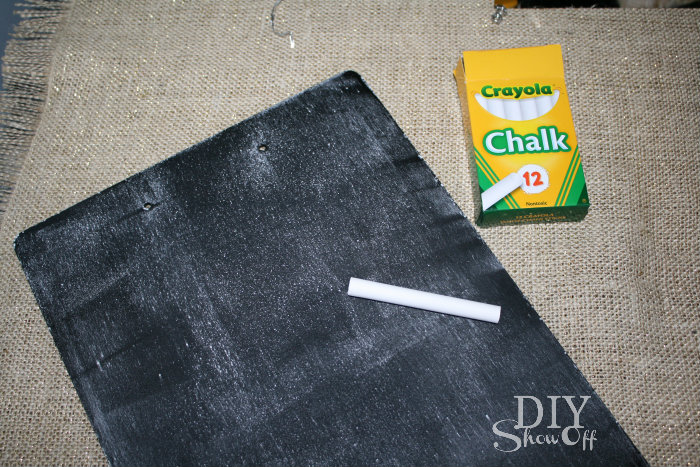
10. Season chalkboard by rubbing the length of a piece of chalk over the complete surface then erasing. 

seasoning chalkboard

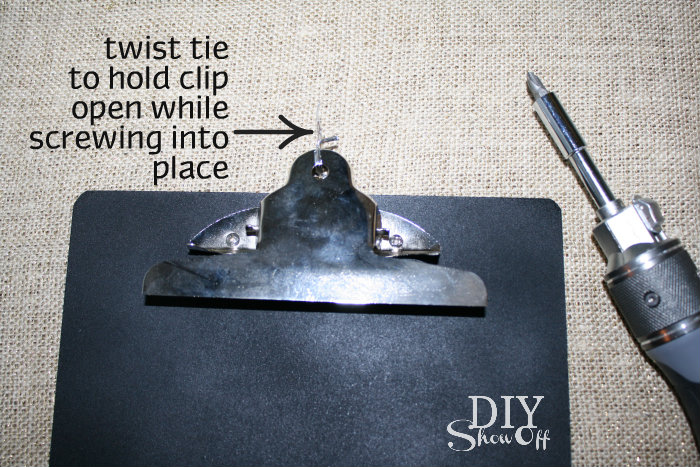
11. Re-attach clips. I found that using a twist tie to hold the clip open then lining up screws made reattaching the clip to the board a lot easier (because of the spring in the clip). Once screws are in place and tightened, remove twist tie. 

reattaching clipboard hardware

12. Embellish chalkboard clipboards if desired. I numbered mine and added some cute stickers. 

decorating chalkboard clipboard

13. Hang! Corkboard should come with hanging hardware but large Command strips will work too. 

alphabet burlap message center

It’s perfect for my black, natural, vintage inspired craft room. Lovin’ it!

craft room

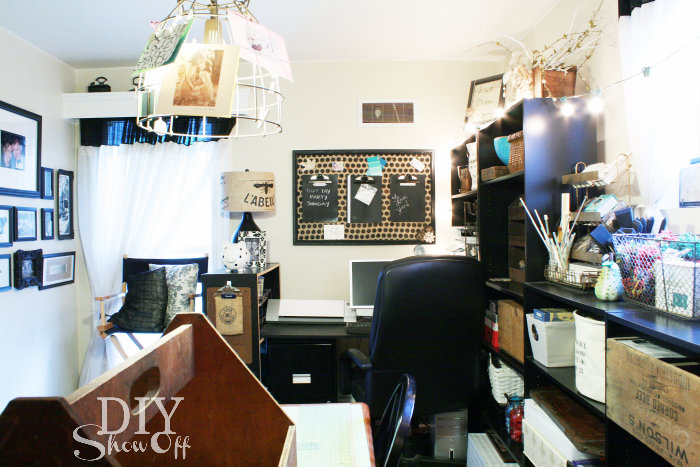
There’s a lot of “stuff” in this room but it is clean and organized!

craft room / home office

I was provided with fabric and a Michaels gift card to complete the challenge. Michaels.com and Michaels Pinterest Boards feature project ideas that use fabric, including throw pillowslamp shadeschair seat covers, and bracelets. Laminated burlap, a Michaels limited exclusive, can be fed through most home printers to add personalized messages and images to fabric projects…I want to try that next!

Earthy Essentials Party – Contest and Highlights

The DIY Club Anniversary Celebration is still going on through Saturday, April 30th.  Have you had a chance to check out the creative links in each party?  Here are some fun and inspiring EARTHY ESSENTIALS projects to get you motivated. You can find all of these projects linked up in the linky below (find the image and visit the link for the original post full of details, tutorial and more pictures).

{ burlap }


{ jute/twine }
    
  
{ drop cloth }
  
{ canvas }
  
{ linen }
   
An Earthy Essentials themed party!  “RUSTIC ELEGANT COUPLE’S SHOWER”
One lucky Earthy Essentials party participant at The DIY Show Off will win a fabulous prize pack from the generous folks at Canvas Corp. – so many fun products to spark creativity and a blog full of TONS of crafty inspiration. 
Psst. Guess what! There’s a Canvas Corp. Burlap Party going on as well!
Here are the items in the Canvas Corp. Earthy Essentials Prize Package valued at $95! Imagine adding this awesome selection to your craft stash:

Stretched Canvas 2″x2″ {2}
Stretched Canvas 4″x4″ {2}
Stretched Canvas 12″x12″ {1}
Stretched Burlap 2″x2″ {2}
Stretched Burlap 6″x6″ {1}
Mini Canvas Triangles {3}
Mini Canvas Tags {3}
Mini Canvas Heart {3}
Mini Canvas Round {3}
Mini Canvas Diamond {3}
Mini Canvas Star {3}
Canvas Round {5}
Canvas Rectangle {3}
Burlap Triangle {3}
Burlap Tag {2}
Mini Burlap Square {3}
Mini Burlap Round {3}
Mini Burlap Heart {3}
Mini Burlap Star {3}
Mini Burlap tag {3}
Mini Burlap Triangle {3}
Mini Clothespins black {1pk}
Mini Clothespins red {1pk}
Clothespins white {1pk}
Jute Rope
Jute Rope Light Natural
The DIY Show Off

Party Details:
DATES: Party is open April 16-30, 2011.

TO ENTER: Link up as many of your own new or old BURLAP, CANVAS, LINEN, JUTE AND TWINE DIY related posts using the linky below.

ELIGIBILITY TO WIN OR BE FEATURED:  Be a follower and include the Earthy Essentials party button in each linked post. 

PRIZE: 1 randomly drawn winner will be selected from the eligible posts to receive the Canvas Corp. prize package (shown above).

***This linky is for projects using ONLY the following materials:  CANVAS, BURLAP, LINEN, TWINE, JUTE.  See you Sunday for the DIY Project Parade – open to all DIY projects. If you notice your link has been deleted – check to be sure you’re linking to the correct party. This linky is for Earthy Essentials ONLY.  🙂 Link DIY projects not related to Earthy Essentials to the DIY Project Parade.  
~*~*~*~
This party is only 1 of 4 celebrating the 1 year anniversary of The DIY Club. Check out the daily giveaways at The DIY Club site and link up to the other 3 parties hosted by my fellow DIY Club friends…

***Psst.  Don’t forget about the WORD WHIPPED GIVEAWAY (enter here)