Looks like a great day to sit near a window and enjoy the warmth of the sun on your face.
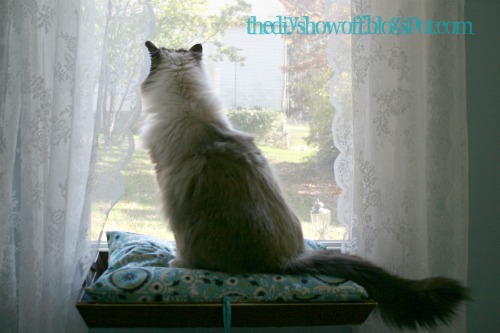
Meet Lalka: Enjoying her new window seat with a view of the barn and her new catnip stuffed dangly toys…
Fun!
A quick trip to the hardware store for brackets and screws and we were able to get started. Lots to choose from. We chose the shortest gray ones for this project. Bri made a window seat too. Hers is from scratch, mine uses an old breakfast tray. Tutorials for both are shown below.
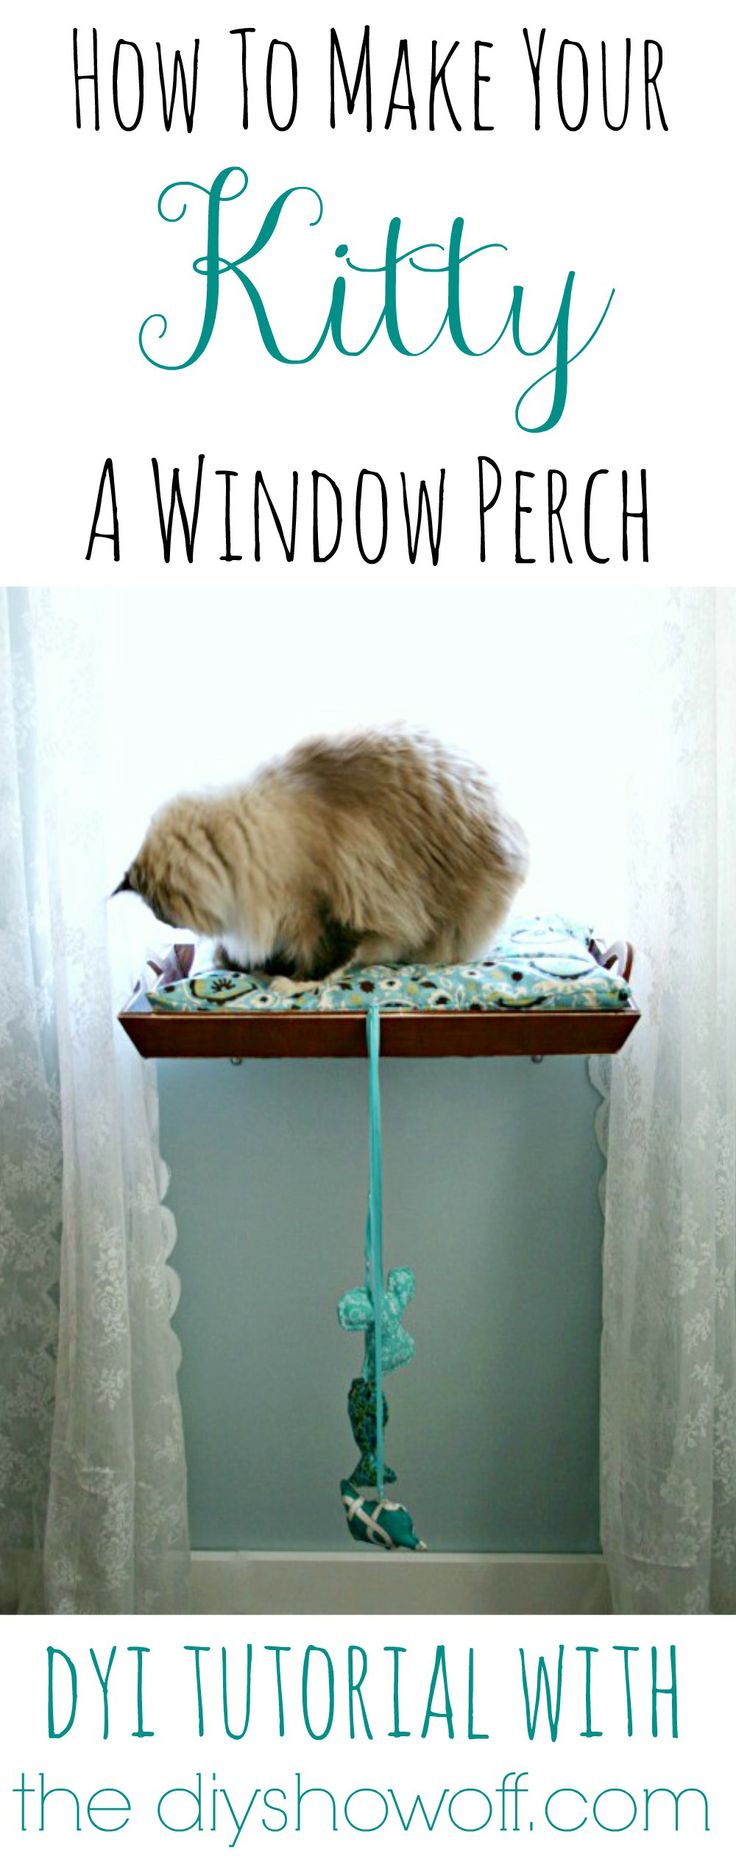
TRAY TURNED CAT WINDOW PERCH
Materials:
Old Tray
Pillow
Shelf Brackets
Screws
Optional: Line tray with scrapbook paper and secure with Decoupage. I used vintage wall paper. New pillow cover. I used an old pillow and leftover fabric scrap. I also used scrap fabric, stuffing, ribbon and cat nip to make some toys attached with an eye screw.
Here’s what I did (using the optional steps mentioned above):
1. I sanded and scuffed up an old tray. I cut wallpaper to fit inside and secured to the bottom using Decoupage. Let dry.
2. Using left over fabric, I sewed an envelope pillow cover for an old pillow to use as a cushion.
Cut fabric. Allow an extra 1/2 inch on the top and bottom. Triple the side of the width of the pillow.
You’ll have a large rectangle. My pillow is approx. 12 x 18 inches. My fabric was cut to an approx. 13 x 54 inches.
The short sides of the fabric: One edge of my fabric is the selvage end. I sewed a hem on the other end.
One end is hemmed. One end is the selvage (or hem both ends if no selvage).
Hem side:
Fold fabric. Edges should be on top (back side up/out) and be near the middle. Anywhere in the middle works.
I want my selvage end to be inside, the hemmed side out. Make sure selvage is the top folded piece.
Pin and sew both long edges. Reinforce over hem/selvage part of seams.
Flip right side out and insert pillow.
3. I drilled a hole and used an eye screw for attaching catnip stuffed toys on ribbon (see toys below).
4. Measure and mark where the brackets will go. Pre-drill holes.
Our windows are not framed in this room and the tray is a perfect fit underneath the sash.
5. Attach bottom screws of shelf brackets.
6. Hold tray in place (my tray fit perfectly under the window) and mark where holes for short screws need to be inserted into the tray. Pre-drill holes.
7. Attach tray to shelf bracket with short screws.
8. Loop ribbon toys through eye screw.
How it looks from underneath…
Lalka loves her new space…
She’s a big girl for 1 year old. Perfect for watching for birds and squirrels or snuggle in a ball in the sun.
Catnip Stuffed Toys
Here’s what we did:
1. Make toy patterns and trace onto scrap fabric. I made a fish, bird and mouse.
2. Double fabric with right sides together and cut out shapes.
3. Cut a piece of ribbon. Mine are between 2-3 ft. Grab ends to find center. Hold center and start rolling ribbon.
4. Pin ribbon roll between two sides (right sides facing each other) of fabric. Ends should be sticking out past fabric.
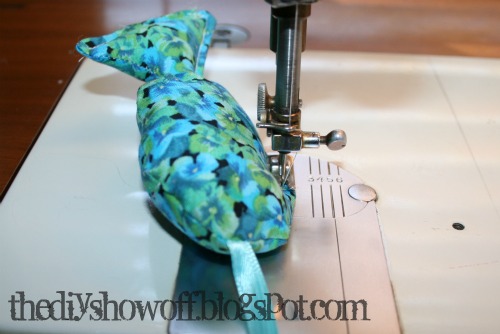
5. Sew around shape, leave an opening for stuffing. I reinforced (back and forth) over the ribbon to make it more durable for pulling/playing. Sew close to the edge but be sure to grab both pieces of fabric. Snip curves.
6. Turn right side out. Alternate stuffing and catnip
7. Hold open edge together, making sure edges are tucked in. Sew closed and continue sewing a border around the entire shape.
8. All done. I fed the top of the ribbon loop through the eye screw and secured animals to hang from cat tray/window seat.
EASY DIY CAT WINDOW PERCH
Bri made one for her cats too, we actually cut a board to fit the window sill…
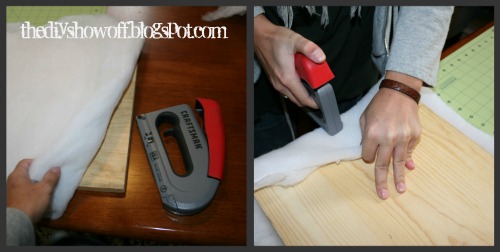
Layout batting and fabric under board and cut to size, allowing fabric and batting to wrap on under side.
Wrap in batting, starting with stapling in the center of each side and working way to corners.
Cut away excess.
Repeat to cover in fabric.
Bri covered a piece of cardboard with wrapping paper and stapled it to cover raw edges.
Follow steps 3-8 above under TRAY to CAT WINDOW PERCH.
Bri’s cats love it!
~*~*~*~
Let’s see what you’ve been up to this past week!
1. You must use the button above (ADD BUTTON HTML CODE FROM SIDE BAR TO YOUR POST) and link to this post to share the linky love.
2.Include your name or blog name and project title. Add your permalink (not your blog url, but your DIY project post url). Feel free to link a Past Post, just invite your readers in a current post with a quick note.
3.Or email your link to thediyshowoff@gmail.com and I will add it for you.
4.If you notice your link has disappeared -please add the link back to The DIY Show Off to your post today, a button or a quick note to your readers about the party and try again! I love when everyone participates and readers check out everyone’s links, but I think the return favor of linking back is the nice thing to do so everyone plays fair and enjoys all of the projects and links. Also – this blog party is for DIY projects only. Links not related to DIY will be deleted.
5. If reading this in an email, pop over to http://thediyshowoff.blogspot.com to see the inspiring DIY projects linked up!
6. NOW you can “like” the links! What a fun idea! Most liked links may be included in a post of DIY Project Parade highlights later in the week
*~*~*~*~*~*~*~*~*~*~*~*~*~*~*~*~*~*~*~









Good Morning, Roeshel! Thanks, again, for the feature yesterday! It was very cool to see MY blog header in my sidebar along with the all the "Blogs I Love".
Ok, that cat perch is too cool. My cat would LOVE it! What a great pet momma you are. =) And you made catnip toys, too sweet.
Thanks soo much for hosting! Have a great week.
~ Catie
My two cats say thank you. They have a couple of window pillows in my craft room since it is a easy hop off the desks in there but I know they would love some perches in other rooms that get more squirrel and bird action outside. Plus it is an extra space the dogs can't get to! Thanks for sharing!
What a cute idea and a great tutorial! This is my first time linking up. Thanks for hosting!
Ohh, how I love that you give your kitty a special place! Cats LOVE to look out windows (as do dogs!) I have a window seat for my kittos, plus they love to use the back of the couch/chair for a different vantage point!
Great tute Roeshel!
gail
You are such a good cat mum! Great idea, especially if it would keep my cat off the furniture.
What a precious bed for Lalka! When I had a cat I wanted to get her one of those window perch things but they were so ugly. This turned out so cute. She is such a pretty kitty. Are ragdolls and great as they say they are?
My cat would love me if I made her a little perch. We ran out of floor space and it got so ratty I got rid of it and now she doesn't have one. This is perfect, because it doesn't take up floor space and it is cute!
It looks great! I made one for my cat when I lived in an apartment years ago. Wish I was blogging then!!
These little perches are adorable Roeshel! Lalka is so pretty! She looks so happy on her new perch! Thanks for hosting!
i was checking out your kitchen! oh my gosh – what a difference the white cabinets make!!!! it's definitely looking like a new kitchen. how inspiring.
questions for you:
did you have a hard time rehanging the cupboards, or was it fairly easy to do?
second question:
would you mind sharing the light blue colour?
ashlee
email haroldandashlee@gmail.com
Thanks, ladies! Now I need a window seat! 🙂
Ashlee, Thanks! It's still a work in progress but almost done!
I only removed the doors, not the actual cabinets so putting the hinges back on in the same holes was as complicated as that got and it wasn't at all.
The wall is painted with True Value Easy Care paint, the color is called "Old Fashioned".
Here is the link to painting them: http://thediyshowoff.blogspot.com/2011/02/painting-kitchen-cabinets.html
Here is the link about the paint color: http://thediyshowoff.blogspot.com/2011/04/kitchen-progress-and-help-me-decorate.html
Hope this helps! 🙂
Lucky Kitties! Thanks for hosting Roeshel!
-caroline @ c.w.frosting
She's so pretty! What a fun cat perch!
Love your cat perch, and that fabric is gorgeous!
Now that is super cute and unique. Great tute too. Thanks for hosting.
My cat would love a perch like that! She loves to sit and watch the squirrels in the yard. Thanks for sharing and for hosting this linkup each week.
So sorry! My wine tikis look like they linked up twice in a row. The web page errored when it was loading so I tried again. My bad!
I love this cat perch! I would love to build one for our Meowzer, but I'll have to find someway to deal with the casing underneath our window.
Thanks for hosting! Have a great week!
My cat would love this! I wonder if this would make her stop wanting to sleep on my pillow…while I am using it!
You and I have the same exact cat! From the back I wouldn't be able to tell a difference! My kitty Ash, has a lighter face and tail but besides that identical! 🙂
Thanks for hosting! What a cute little cat you have! She is pretty lucky too to have such a cute window perch 🙂
I love your site and ideas. I always keep your button on my side bar. Have a great day:)
That is the cutest little kitty perch!! Love the toys hanging, my cats would go crazy love for those. 🙂
xoxo
Thanks for hosting! Happy Monday! HUGS~
Sorry I am getting over late to let you know–You've been featured at http://www.itssoverycheri.com in my Saturday Showcase.
Cheri
Pingback: Happy Birthday, Bri! | DIY Show Off
Pingback: Cama para Gato na Janela | Passo a Passo - Recicla e Decora
Pingback: Tutorial Tuesday – Pet Stuff!!
I just found your window perch on pinterest, so cute and stylish!
If you ever have a minute to spare please check out what I built for my 4 kitties. I just posted it to my new blog:
http://cuckoo4design.blogspot.com/2012/05/cuckoo-for-my-cats.html
Thank you, Julia
aw, what a pretty kitty! And now she has a beautiful perch. Wonder if I can talk my husband into letting me put one up? 🙂
OMG! I got to share this! Too bad I don’t have a cat, if I did, I would be doing this! Great idea!
Our kitty would love this!
What a super lucky kitty you have! Fabulous!
This DIY Cat perch is the MEOW!!! So clever and I love the little catnip toys you added! Great DIY Roeshel!
Thanks for this tutorial and the brilliant idea of using a tray! I’ll have to make one someday when we have our own place. Speaking of which, I read on your bio about how it took your family a year to find “the one” for a home, which is an encouragement to me as my hubby and I have been currently looking for about 3 months now and have yet to find “the one”, so thanks for giving hope that we’ll know when it’s the right place and it can take time. 🙂
p.s. – your Lalka is beautiful! What kind of kitty is she?
Thanks, Draven! Lalka is a ragdoll. I’m so glad you stopped by!
Awesome! Thanks for sharing 🙂 xx
How can u do the same for trailer windows?
Hi Terrie! I apologize for the delay. I’m not sure how to make it work for you other than to recommend sturdy shelf brackets and strong wall anchors. Good luck!