is one talented DIY-er! Take a look at her chair transformations:
Two (technically three) chair revamps in ONE week.

Dang it! Why do I always do this…
I forgot to take a “before” picture.
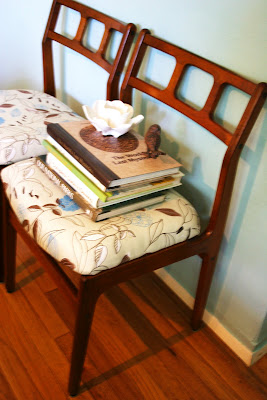
I purchased a set of old chairs from Goodwill for $7.00 total. ($3.50 each). They had an old, textured, cream, super stained, nasty fabric on them. I mean Nasty! Why O’ Why did I forget to take a picture. =(

Anyways… I took the seat off, then reupholstered it with a mod fabric that was new and fresh but still went with the simplicity of the chair design.

I sanded down the chair really good with a fine sandpaper. The wood was a light brown-orange with some surface scratches.
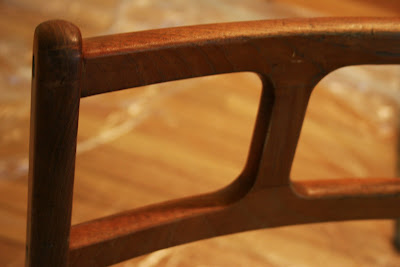 Then I rubbed the stain in and let it sit for about 10 minutes before I rubbed the excess off with a dry, clean rag. The next day once it was dry, I used Minwax wipe-on poly in satin. I love this stuff. You just get a good corner of your rag covered in this stuff and wipe it on. Easy peasy- No brush strokes, and no clean up.

At least I remembered to get a good “Before & After” of the wood. Here it is before I stained and poly’ed and after I was done. Its a bit darker and definitely has a new sheen to it…
 Once that was all dry I screwed the chair cushion back on the body of the chair and took a step back to check it all out. Now I have a new matching set of chairs for under $20!

Since it was over 100 degrees outside, I decided to do this all in my living room. I made sure to turn the ceiling fan on high to help with the ventilation, and used a mask for my mouth and nose. I know your not suppose to do this kind of thing inside, but come on- its too hot out there!
My husband had just finished picking up the living room right before I started this little project. He walked in and saw my giant mess, he just rolled his eyes and took a picture of my messiness.


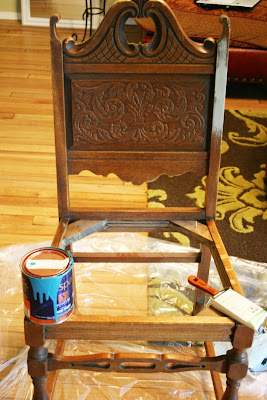
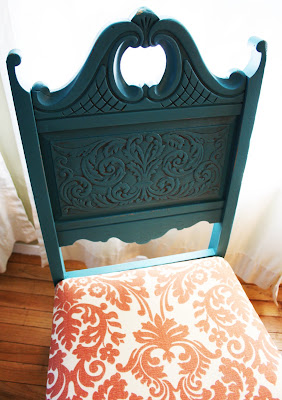
One of my goodwill finds.
 I picked this up for $14. and spend about $6. on fabric (that was 40% off). I got the paint for free from my parents left over from what I used to re-do a built in cabinet for them. I used Deep Turquoise from Laura Ashely.
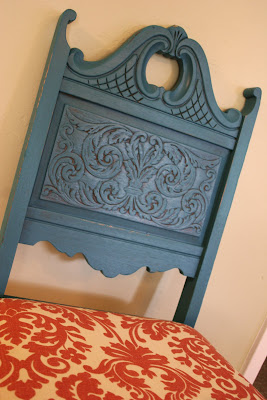
 Once the paint was completely dry, I went over it with light sand paper. I did one more super light coat on some sections. Once that was dry, I distressed the edges and anywhere that normal wear and tear would show. Now that some of the original wood was showing through and everything was dry- I used Minwax wipe on Poly. Let dry, and reattached the newly upholstered seat.
I think I’m gonna sell this one, I have too many chairs.

Thanks for showing off Karli! I love your beautiful “new” chairs! The fabric – the transformation, I’d give you a standing ovation, but I’d rather have a seat! 😉


