


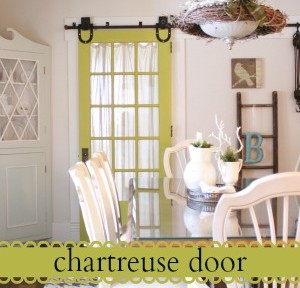
Mini-makeover…
When we first installed the sliding door, I embraced it’s original old paint.
But over the past year, it did feel more “dirty” even after a good scrubbing than “charming”. It just reminded me of the cold weather and dirty snow…blah. You can’t tell from the pictures. But it did have that dirty old worn finish.
Remember how my brain sometimes works with DIY? It’s usually a spur of the moment decision that wasn’t in my plan for the day or ever. That happened with painting the sliding door in our dining room.
And remember when I painted the door in the apartment renovation…
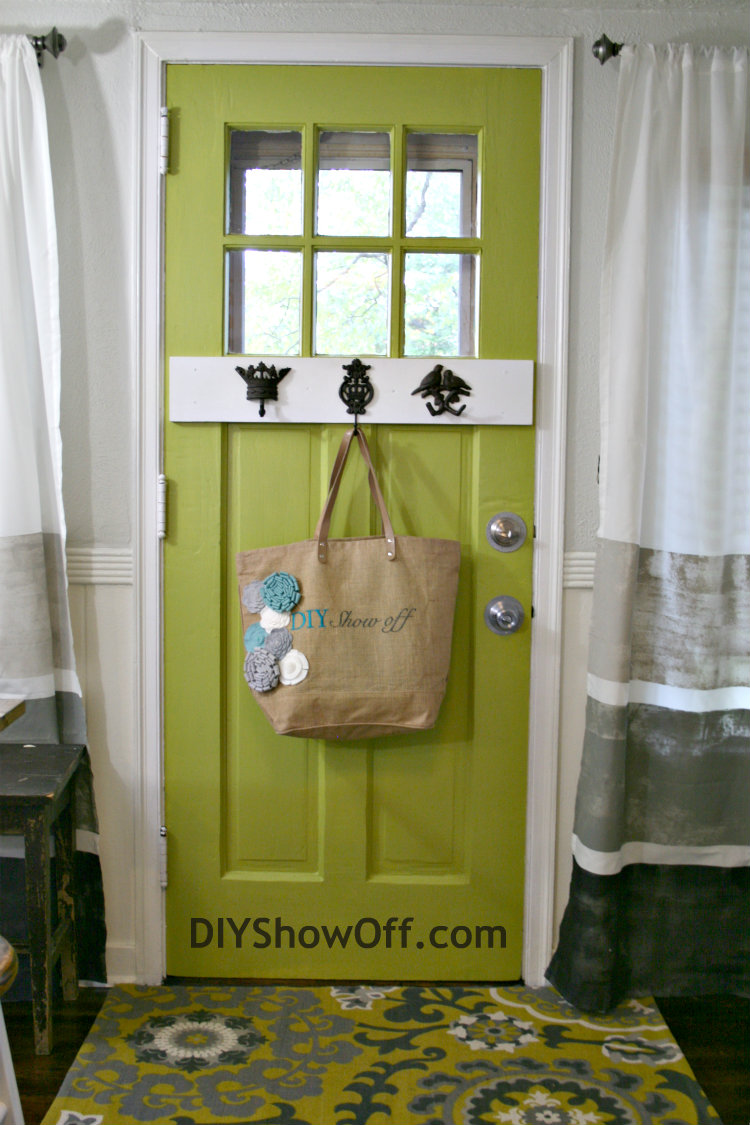
I fell in looooove with that color. A beautiful happy shade of green.
The beginning of the new year consisted of cleaning and organizing the basement somewhat. I stumbled across packed boxes of supplies and tools from the apartment renovation…still not unpacked since November. While putting things away, looky what I found:
Valspar Gilded Pesto
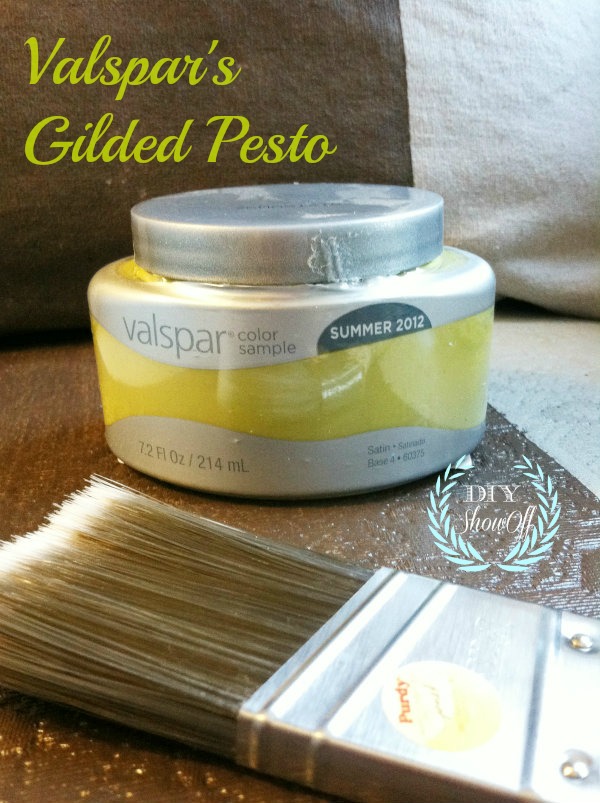
And just like that, in that five minute time span, I decided to paint the sliding door in the dining room, to add some “spring” color to the dingy, dirty, neutral white. No wonder it takes me FOREVER to clean. Distractions get me every time.
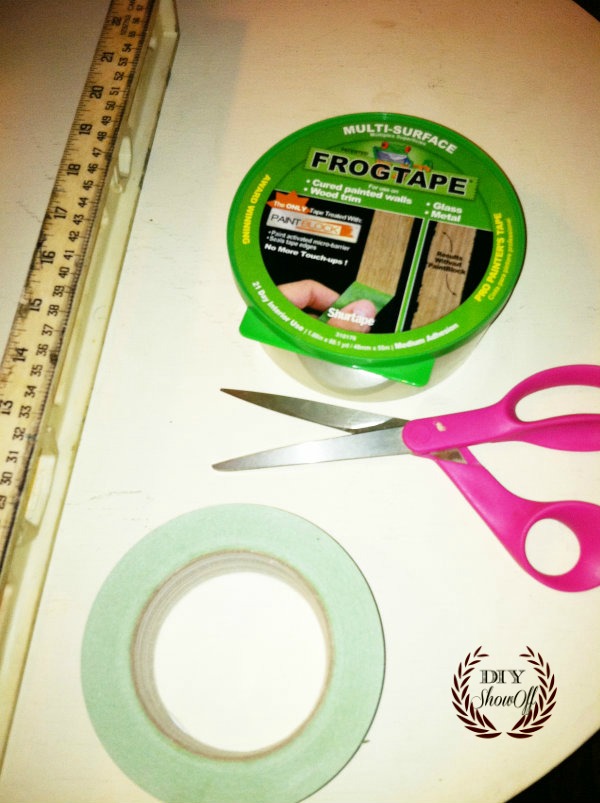
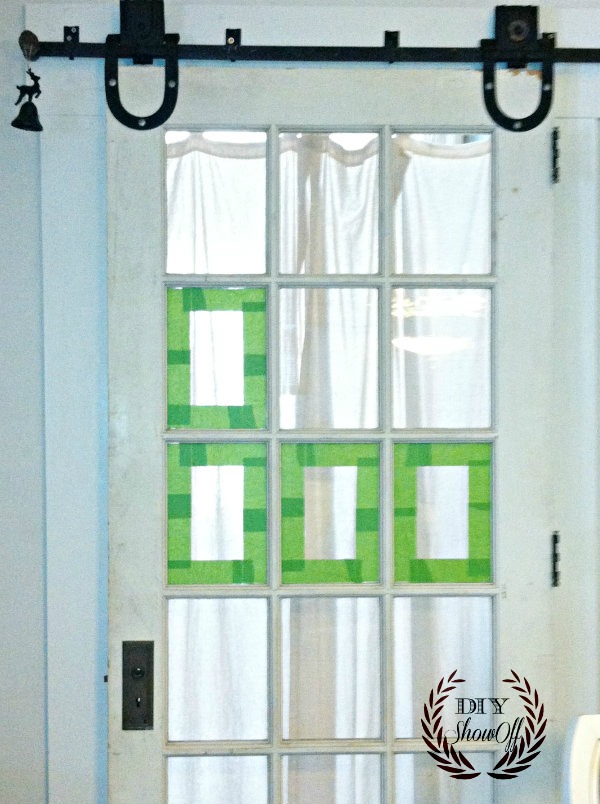
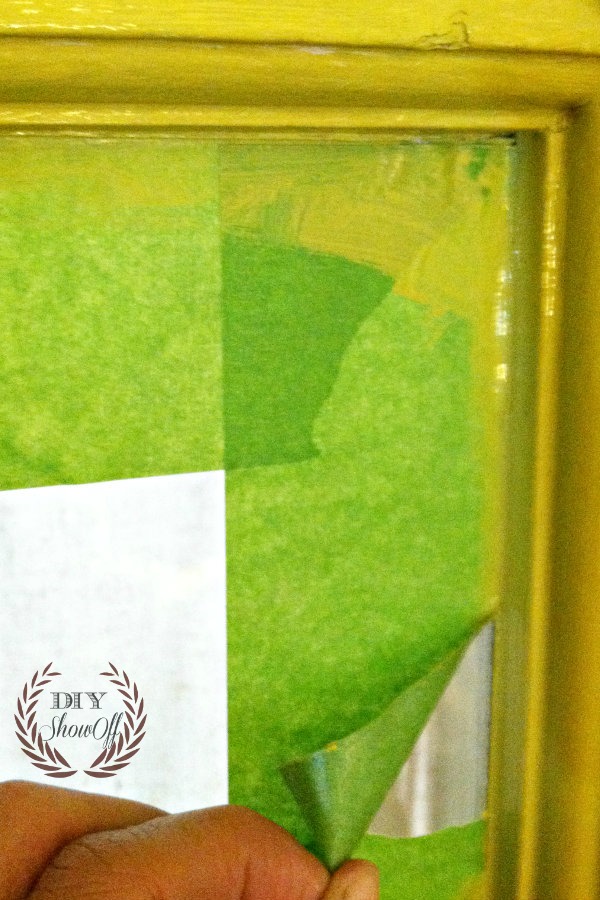
I started by taping off the glass around the mullions with my favorite stash of FrogTape, making sure the edge of the tape was flush against the corner where wood met glass. It doesn’t leave a sticky residue when removed…and I’m all for making a last minute DIY easier.
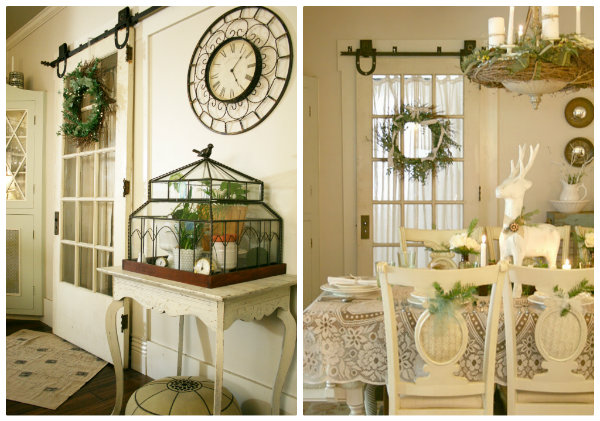
{you can see the dirty original paint job better in this picture}
{curtain is for privacy in the guest room or maybe hiding junk in what’s become a storage room…ummm, I’m not telling}
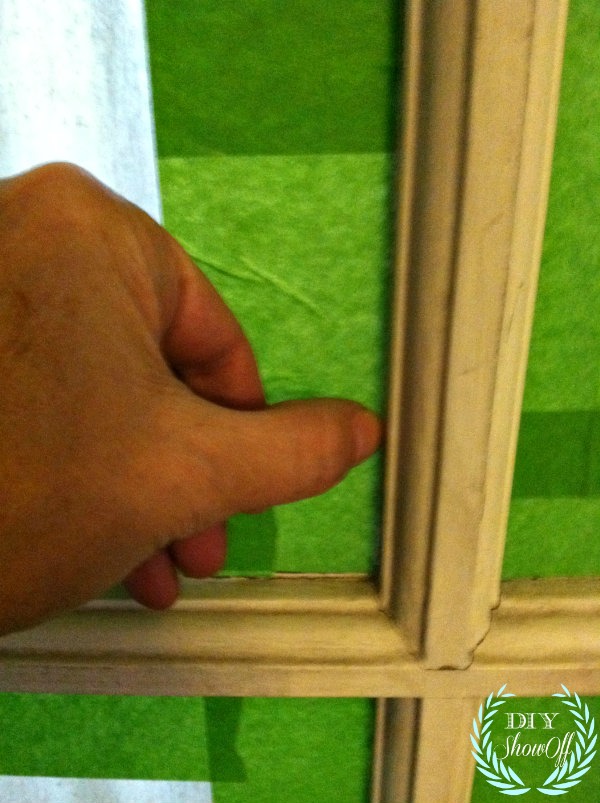
I used my thumb to burnish the edges of the Frogtape to prevent paint from seeping underneath.
Then applied two coats of my sample container of paint.
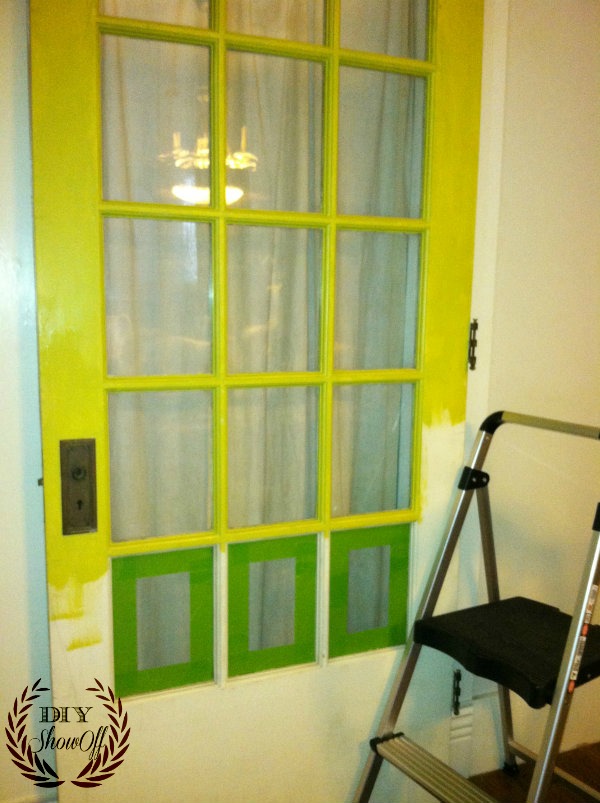
{oops…One coat looked great while wet so I removed tape. I did a second coat on the flat parts after coat 1 was dry}
I removed the tape immediately after the second coat, pulling away from the wood.
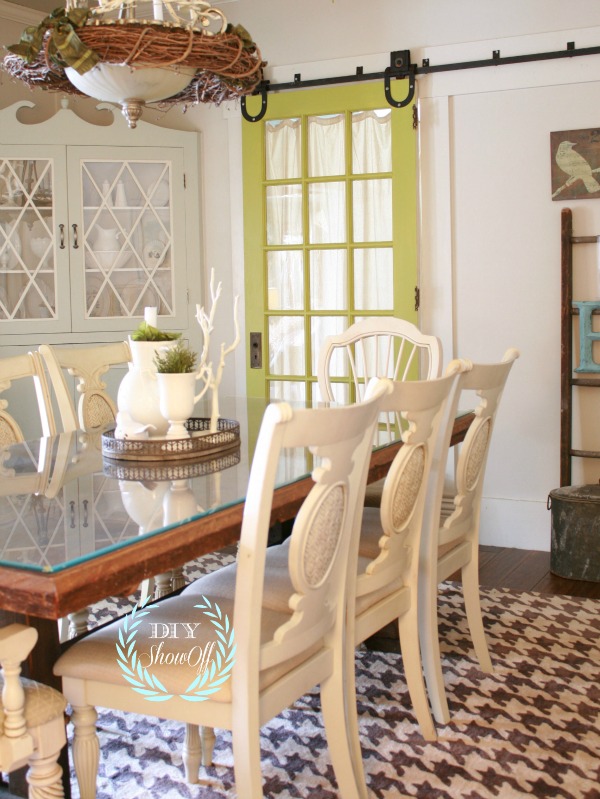
Ta-da…the after:
again…here’s the before:
What do you think? Do the seasons aid in changing your decor? How finding inspiration and materials that you forgot you had when cleaning and organizing? Either way…I’m loving the new pop of color!

- paint the built ins and add hardware to the bottom doors
- swap out the light fixture (wait ’til you see the new one!!!)
*This is a sponsored post brought to you by FrogTape. The opinions are completely my own based on my experience. Results may vary.
Sharing at:
Beneath My Heart’s Best DIY Projects of January
FJI’s Saturday Night Special
Oh..I love the chartreuse door! It’s so fresh and spring time.
Dear Nita! So good to see you! Thank you so much. And yes…I am so over winter and ready for spring. The current temp is 1.
I KNEW that had to be Gilded Pesto when I saw the picture of your door on FB! I painted two chairs with that a few months ago and that is the best color – I love it! You have wonderful taste 🙂 Will you be at Haven again this year? We must bond over the GP. Also, I love your tote – who made that?! 🙂 http://www.rchotx.com/love-that-gilded-pesto/
haha, Heather! Great minds…right? and OHMY! Those chairs! That fabric! GORGEOUS!
Yes! I will be at Haven again this year! Woo hoo! Can’t wait to see you!
The tote is from Nest of Posies…I use it all.the.time. It’s the perfect size for well, ‘toting’. Fits my laptop too.
xo
I saw all of y’all with your bags last year and keep thinking about them 🙂 Thank you for the compliments! I love those stupid chairs!
I love it Roeshel!! I’ve made the decision that I think I want to add more color this year. That door looks so awesome and make such a bold statement!
I do love it…a great choice with all of the rustic wood, chippy paint, warm whites and vintage accents. It still feels neutral in a way too, ya know?
I want one – love the mix of the cool old door with the great mod color!
Kelly
I did think of you when doing this Kelly…it felt “eclectically vintage”. lol 🙂
Helloooooo Beauty! Mmm. Looks gorgeous. So fun, zingy and fresh. Totally makes the whole room shine. I love it!
It’s so lovely, Rochelle! What a BOLD Statement!
I LOVE it Roeshel!!! Such a perfect color!
your door turned out beautiful! A SHOW STOPPER.
LAUREN
I LOVE THE COLOR!
lauren
It’s perfect!
I totally love the pop of color. It looks awesome.
(I have been in the need for color myself. It makes such a difference)
Wow…what a difference! I love the unexpected pop…hmmm…I may just paint my back door! LOVE!
Thanks, Jessica!
Looks absolutely amazing! Totally gives it that POP of color your dining room was craving! If you wouldn’t mind sharing where you got your barndoor hardware, I absolutely love it! I have the same door as you that connects our dining room to a sitting room and the door is always in the way. I’ve contemplated getting rid of it but I love the door too much and using barndoor hardware may be the answer. Thanks again and I love your blog…daily read for sure!
Thanks so much, Erin! 🙂
This isn’t going to be much help though. We got our barndoor hardware from a local Craig’s List ad. $30. I think if you search DIY barn door or something similar on Pinterest, you’ll see a lot of great ideas (and links to hardware).
IN LOVE!!! Gorgeous.
I liked the door before, but that is a beautiful color and makes such a statement in that room. Honestly though, I can’t stop staring at the room itself. It is stunning.
I love the door, Roeshel- the pop of color looks so fresh and fun. And I’m not normally a fan of chartreuse- I swear, I think you could make me love brussels sprouts. Well, maybe not. 😉
lol! You are so funny, Sheila! It’s a great color to pair with purple. 😉
Have a great weekend! TGIF!
I think it looks great! It’s nice to do something different and freshen things up!
LOVE it!
I love the new color! What a difference it makes!
It’s amazing what this color does. The room looked wonderful before but now it has that special “twinkle in it’s eye” so to speak. I love it!
Pop of color is the perfect description. I don’t normally care for chartreuse, but it looks absolutely lovely in your dining room. I’m sure you smile every time you look at that door!
the color of the door is awesome! you did a great job of pulling it all together.
Thanks, Ali! Sometimes you just have to say ‘what the heck’…it’s only paint. 🙂
TGIF!
Wow Roeshel, what a difference. And I love all white…but that looks amazing. I like that you are adventuresome…and
it turns out good for you! hahaha…now if that would have been me…no telling what we would have ended up with! Haha
Love the spring and happy feel it now gives to the room. And you are going to enjoy it every time you go through that door!
It’s great!
Blessings,
Debbie
Awesome! A nice pop of color, so “spring-ish”, I love it!
The door color — very cool. The sky is the limit when you have white trim…ours, unfortunately, is warm oak. Ugh.
But that houndstooth rug! OMG. Love it!
Thanks, T. Warm oak and natural wood tones can be so pretty but it is limiting. I do love that new houndstooth rug too…inspires changes to everything else in the room as well. lol
The new colour is very pretty.
Thanks, Antonella! I do love the color too and if I didn’t…it’s just paint, right? Thanks so much for stopping by! 🙂
Totally LOVE that green! I have that same color in my paint stash! I haven’t used it for anything yet; I just picked it up because I loved the color and it was in that great little sample size! As I long for the fresh colors of spring, I will have to find something to paint with it! Life to the full, Melissa
I love the pop of color that the door gives the room! Love it! I’ve got to figure out a place to put a barn door in my house, that is so cool!
Roeshel! found you through Beneath My Heart’s project party! love the door – wow! that color looks gorgeous with the rest of your kitchen! definitely a great choice to paint!!
I love your change.
I find we have a lot in common I think like you , what I can I find that Ihave to insprie me??? and just go to work and make it happend sometimes things just happend that way and seems to turn out way beter than you everthought of and sometimes gets into your pocketbook deep too.
Absolutely love the door!
I love it! It’s a great way to get a pop of color in the room.
The green shade of the door is indeed lovely and so refreshing! Painting tips offered in the blog are not only useful but quite simple too. I just can’t wait to try out some of these colors on my old furniture.
So cute! I love it. And I totally know what you mean, sometimes I like the chippy worn look but then sometimes it can start to ‘junk’ the place up too much… love the accent color! Little Bit
I love both doors… You are so very talented.
Looks great! Where did you get the sliding door frame?
We were lucky enough to store it from a Craig’s list ad!