DIY 2011 Recap Party

Happy New Year, DIY friends! 
Do you have the habit of looking at all that needs done with little regard to all that has been accomplished? Me too! Always looking ahead to what’s up next on transforming this old house. Who does that?  DIY crazed much? So, this time of year (here’s last year’s post), I love looking back to the year’s DIY and all that we finished up and tackled. Mr. DIY says we get tons done in odd years and that on even years, we’re allowed to sit around and be lazy. Um, he’d be wrong. This DIY girl isn’t going to let that happen! There’s so much to be done, I don’t know where to begin!  Let’s start with reflecting on 2011 for some DIY motivation.
Here is a recap of what went on (DIY and otherwise) at the DIY Show Off home in 2011 according to my picture files:
We adopted Lalka…
Kitchen cabinets were painted, marble backsplash installed, walls painted, new granite countertops and bamboo flooring.

Before/In progress

After:
How to Install a Tile Backsplash
Helloooo beautiful bamboo!
Pantry removed.

Before:

After, the fridge is closer to the work area instead of trying to run out the door…
Love this new-to-me piece of furniture:
Before…
Guest Bedroom Now…
Sitting Room Makeover
Before
After
Before
After
Dining Room Sliding Door 
Before
After…
{opened}
{closed}

Dressing Room Closet Before…

Bi-fold turned French Door tutorial…
 

Craft Room Before

Craft Room After (still tweaking)

Some favorite projects:
Shaw/HGTV Home Design Challenge…How to get this Beach Cottage Look
Whew – what a great year!
Let’s see a recap of your DIY productivity in 2011!  Link up, then visit the links for some motivation to get moving this year!

(Sorry I don’t have the code – the previous didn’t work…making/pasting code into wordpress is a little different so I’m working on it. Please copy/paste picture above and linkt to this post or just link to this post in your 2011 DIY Recap. Thanks!)

  1. Write a post about your top 2011 DIY Projects.
  2. Add the Looking Back button by copying/pasting the code shown above into your blog post.
  3. Leave a comment and visit some of the other links.
  4. If you noticed your link has disappeared, please edit your post to include the link back to this post and try linking again (double checking that you’re linking up a 2011 recap. Here’s the link:  https://diyshowoff.com/2012/01/diy-2011-recap-party.html
  5. Be sure to follow along on G+ or subscribe via email (right side bar) so you catch the latest at the DIY Show Off in 2012.
  6. Thanks so much for sharing your 2011 recap!

If you haven’t already, after linking here, visit and link up at these awesome parties too:  


Special thanks to YOU for making 2011 so much fun! Your support, encouragement and comments mean so much to me…for real. I look forward to us all having a productive 2012 and can’t wait to see what you have planned!  I also want to thank these companies for their support and amazing and super fun opportunities this past year and look forward to an opportunity to work with them again this year…


 Click below to see our participation with...  


Pin It

Brooch Wreath Tutorial/DIY Project Parade

how to make a jewelry wreath
How to make an heirloom jewelry wreath using brooches, charms, broken jewelry, earrings, etc. 
brooch wreath

It’s the time of year forshopping flea markets and estate sales this summer and you’ll likely see lots of costume jewelry, brooches, charms, earrings, etc.  – CHEAP!  Vintage brooches are so pretty but they’re not something I’d wear on a regular basis.  Although if you do this project, you’ll be tempted. and develop a new appreciation for these beautiful pins.  Inspired by the recent trend of brooch bouquets, I loved the look of clustered jewelry.

have no need for a bridal bouquet, but a wreath – now that would add a pretty touch to home decor.  I could see this in my future vintage inspired dressing room:

jewelry wreath

My wreath has a 10″ diameter and took over 100 pieces to get to the point pictured.  Keep your eyes open at your thrift-hunting adventures and start collecting brooches, earrings, charms, costume jewelry, buttons, any small ornament.  You might even have a few pieces lying around that you’d like to include for display rather than hiding away in a jewelry box.  Brooches can get expensive.  We set a limit of $1.  Sometimes we’d go just a bit higher (no more than $3) if there was a pretty one we just had to have but for the most part, yard and estate sales proved to be .25 or 3 for $1. We also scoured the craft section in the thrift stores, scoring large baggies full of jewelry surprises. The local pawn shop/jewelry store gave us a good deal on costume jewelry too.

brooch wreath
My daughter, Bri, and I both made wreaths.  Mine is done in golds, silvers with a touch of white/blue/green. (Note:  Choosing certain colors makes finding pieces a little more difficult.) Bri wanted lots of color and created a beautiful wreath using a variety of pretty mix of costume jewelry baubles.
how to make a jewelry wreath
Materials:
Assortment of brooches, earrings, charms, buttons, decorative pieces, etc.
Straight pins
Hot glue

Styrofoam wreath

Deco Art MagiKote – a mandatory step (see reasons below)
Krylon spray paint or Deco Art craft paints
 
Brooch Wreath Tutorial:
1.

Apply Deco Art MagiKote to the Styrofoam wreath.

MagiKote has the texture of white paint. I love using foam brushes for craft projects.
Have a larger assortment on hand for crafts like the ones sold in bulk by Rockler.
 

MagiKote aids in making Styrofoam a paintable surface by sealing the texture, otherwise paint hits the top edges but not the Styrofoam craters. MagiKote also makes for a better pin-able and glue-able surface.  Brooches etc. get moved around a lot during placement.  If it wasn’t for the MagiKote, there’d be a lot of Styrofoam crumbs and chunks falling out.


Let dry.


2.  Paint the Styrofoam wreath form (a Styrofoam square would be cute too!).  I used Krylon’s Brushed Metallic.  Color:  Champagne Nouveau. The MagiKote also creates a protective barrier so that my spray paint didn’t ‘melt’ the Styrofoam form.

I like that Krylon is quick, easy and fast drying. This sets a background for the pins.  I painted my to blend…


Bri painted hers using Deco Art Gloss Enamels (Citron Green) to pop and coordinate with other colors in her room…
3.  Layout a template to get an idea for placement, favorite pieces front and center. Side pieces can be smaller and aren’t viewed from every angle.
how to make a jewelry wreath
 
4.  Start placement of biggest brooches and pieces including favorites.
 

5.  Once you have the big pieces in place, fill in with smaller pieces.  Open pins stick into the Styrofoam.


Earring posts make placement easy.Clip-ons are just as easy but use wire cutters if necessary to cut backings for easier “pinning”.


Use wire cutters to help when needed.  Barrets, pins, earrings all have backing that can be used to secure to the styrofoam.  Hot glue and straight pins will help too.


My wreath doesn’t use glue but occasionally I used colorful pins, so it can be disassembled if needed…a fun way to display jewelry that is worn or prevent keepsakes from being ruined.

vintage jewelry wreath, crafts
6. Optional:  Use a ribbon for hanging.

Here is my finished (almost – a few more brooches needed for the inside of the wreath)… 

brooch wreath
 
brooch wreath

Bri’s wreath:

jewelry wreath
 

All finished!  Well, almost.  We still have some extra spaces to fill in as summer progresses and I’d like to fill in the inside as well…it’ll take some time. Fun for a game of “I Spy” too! What do you think?

vintage pins
 
brooch wreath
 
guest bedroom makeover
 
What have you been doing this weekend?
 

DIY Burlap & Starfish Wreath

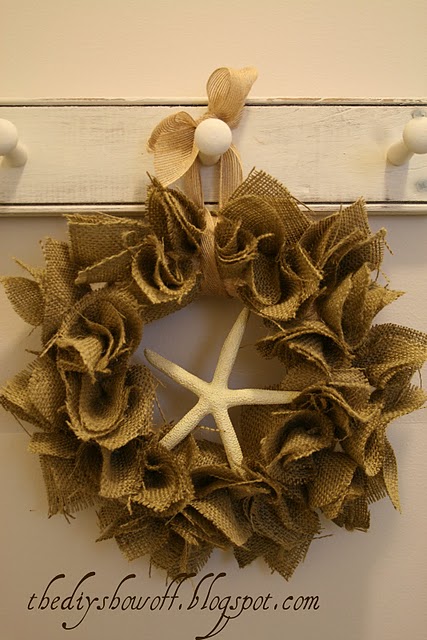
Easy DIY Burlap & Starfish Wreath

Materials:
1 – 8 inch straw wreath (plastic wrap intact)
Approx. 1/2 yard of burlap
1 Starfish
1 Piece of Ribbon (approx. 36″)
Gorilla Glue
Gorilla Super Glue

Tools:
Scissors
Phillips Head Screwdriver

Step 1:  Cut burlap into 4″ squares.  Perfection not required!

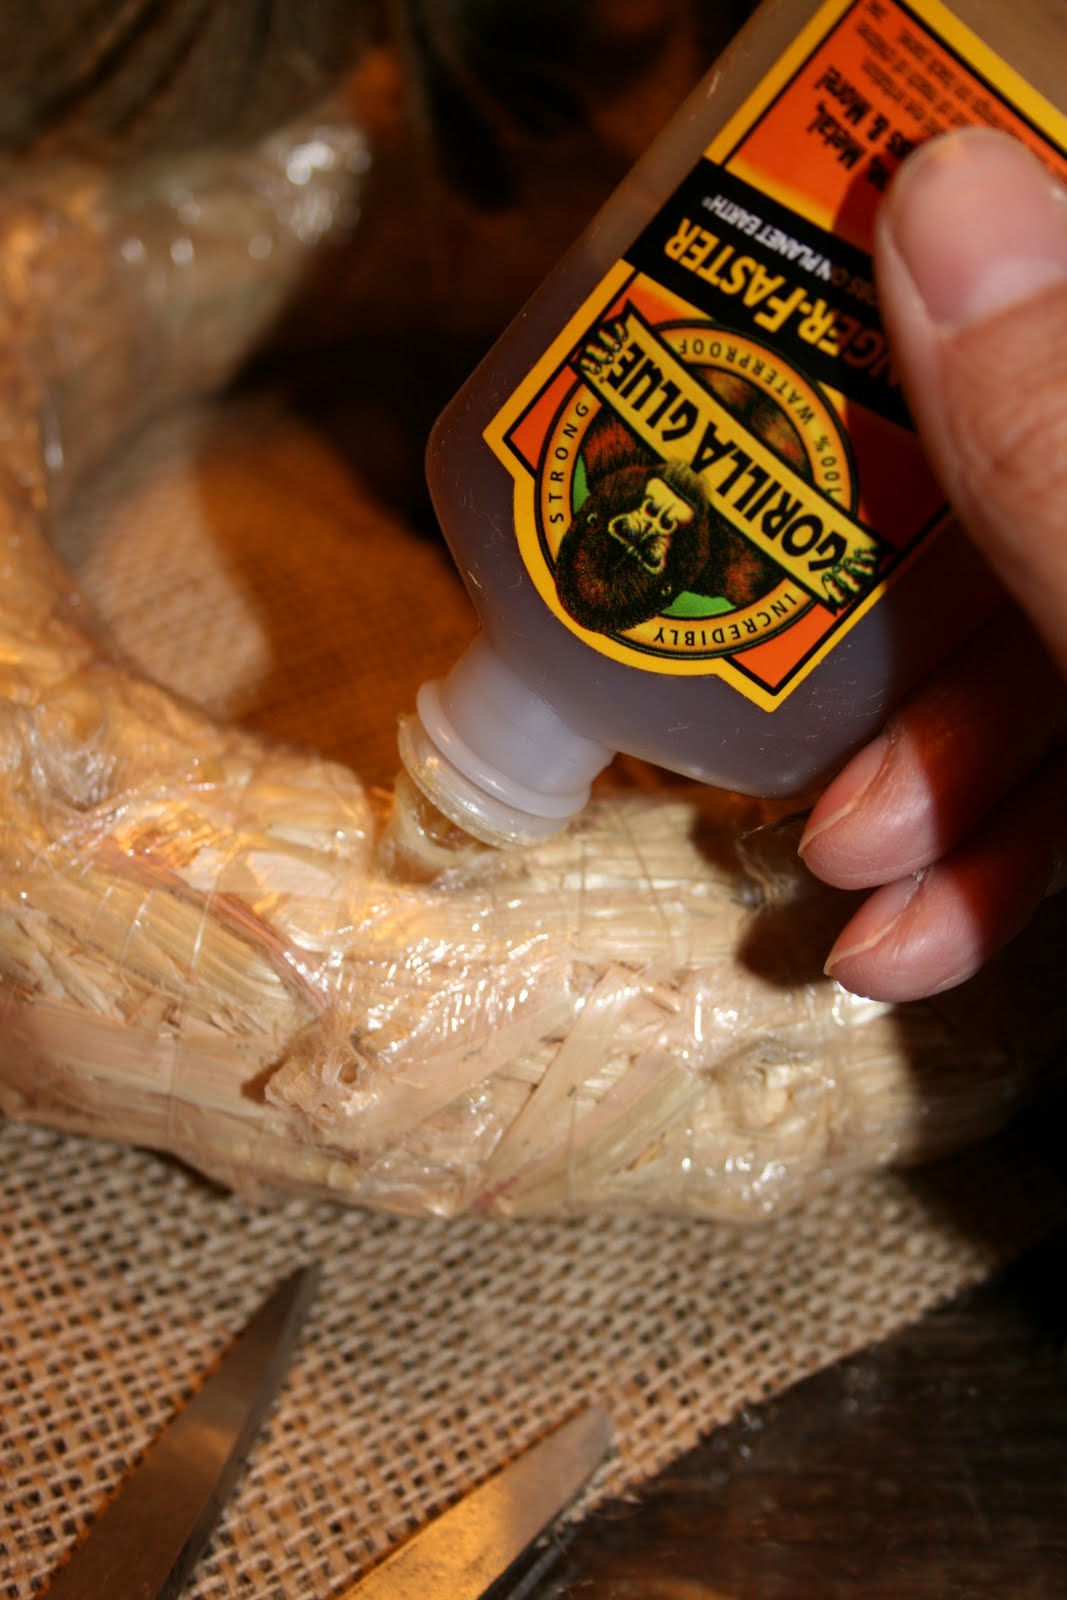
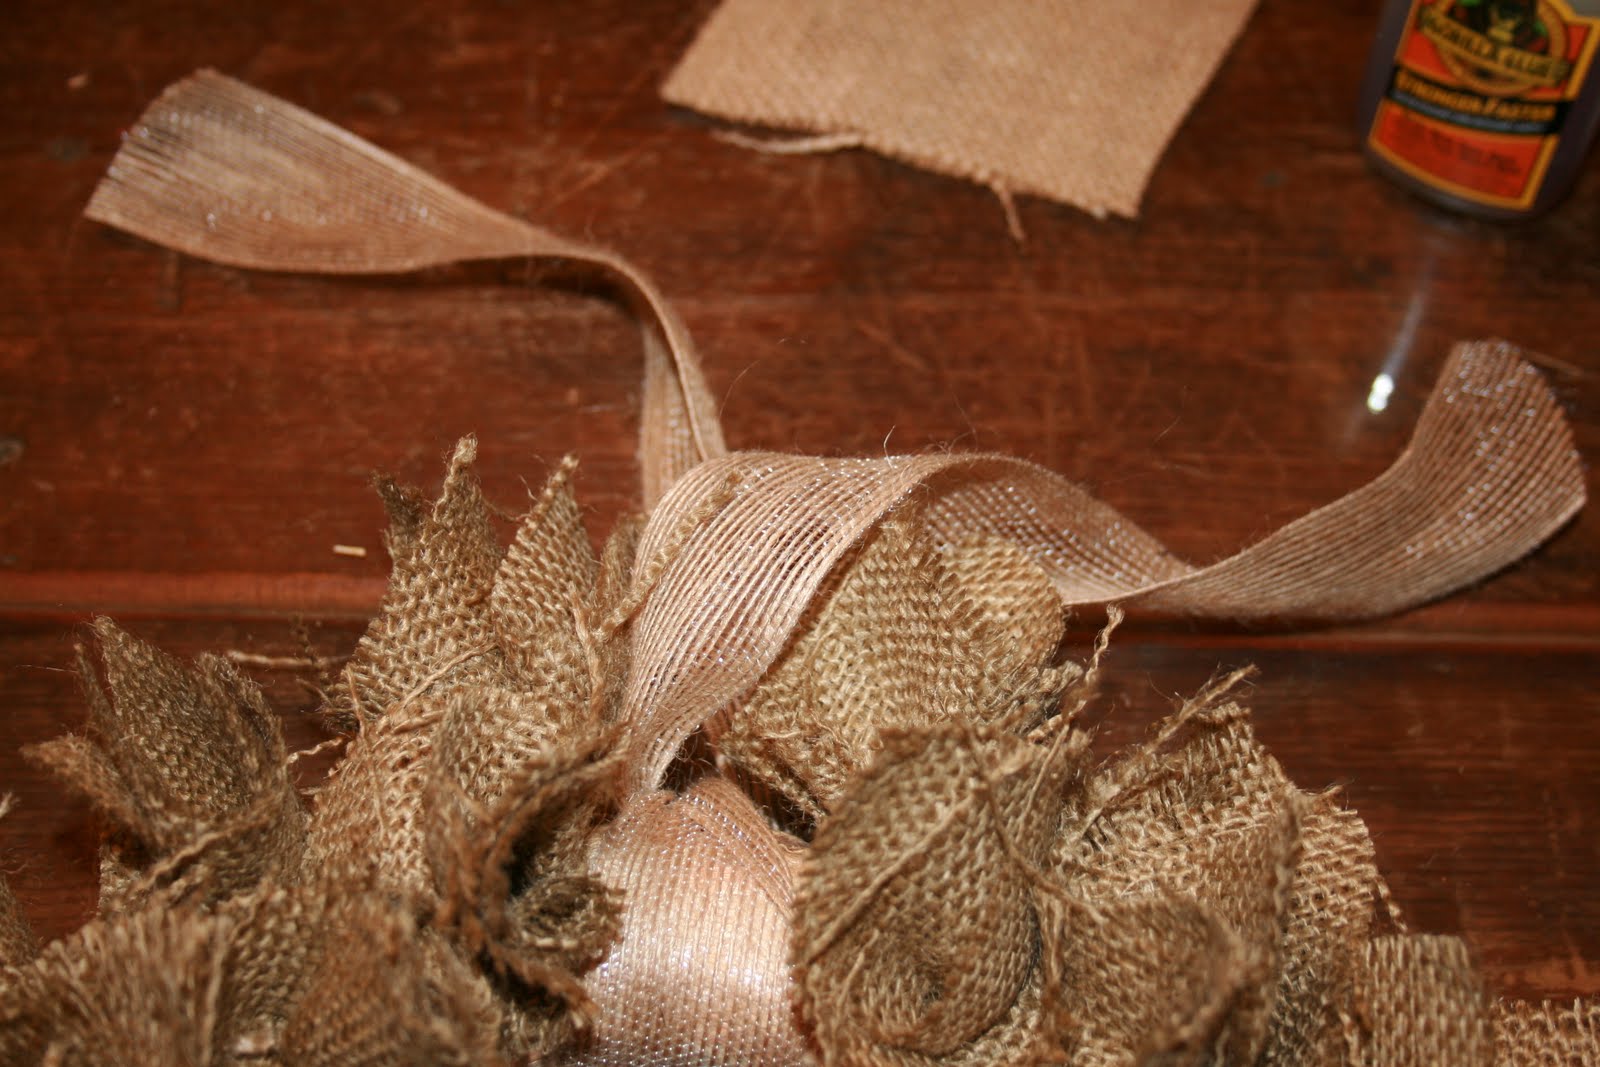
Step 2:  Using the screwdriver, make a pilot hole into the plastic-wrap covered straw wreath.

Step 3:  Add a dab of Gorilla Glue into the hole.  This will expand and keep the burlap in place.

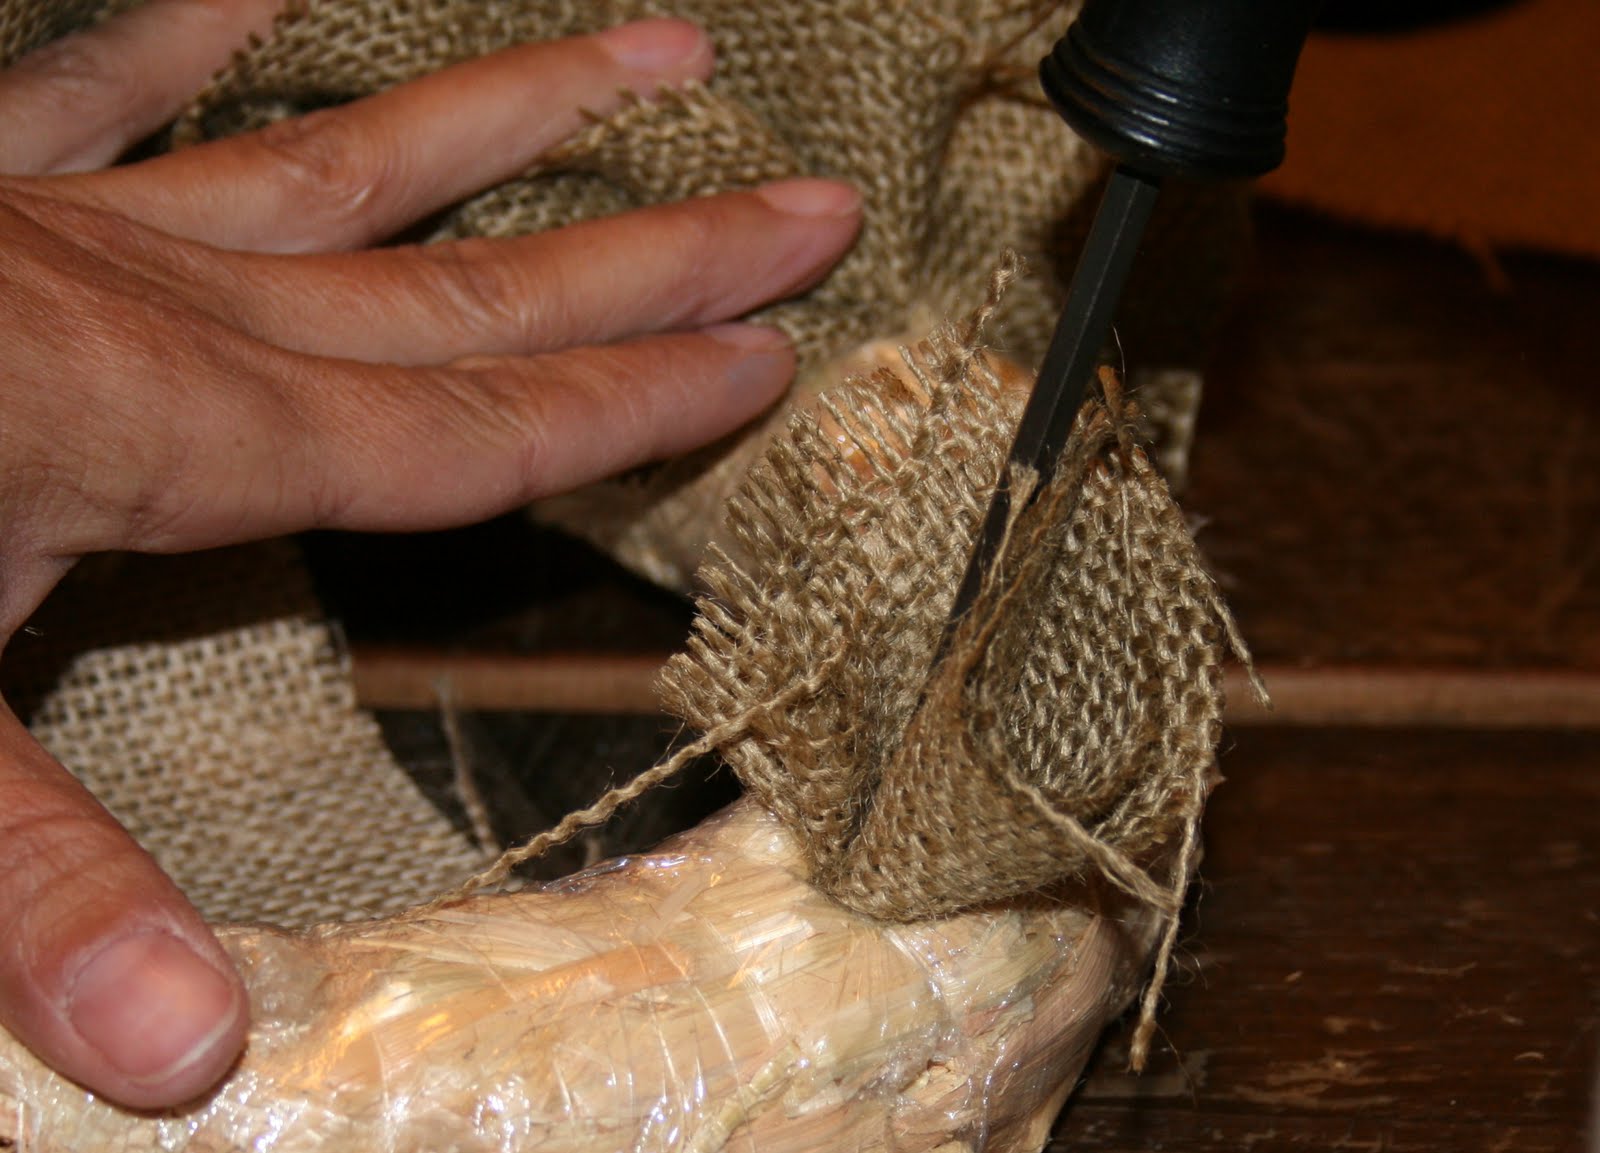
Step 4:  Fold a burlap square into 4s (in half and in half again)

Step 5:  Place burlap corner (without an open end) on top of the pilot hole and using the screwdriver, push into the hole and twist. Repeat until the wreath is covered on the front and outer edge, leaving an open area for ribbon/to hang the wreath.

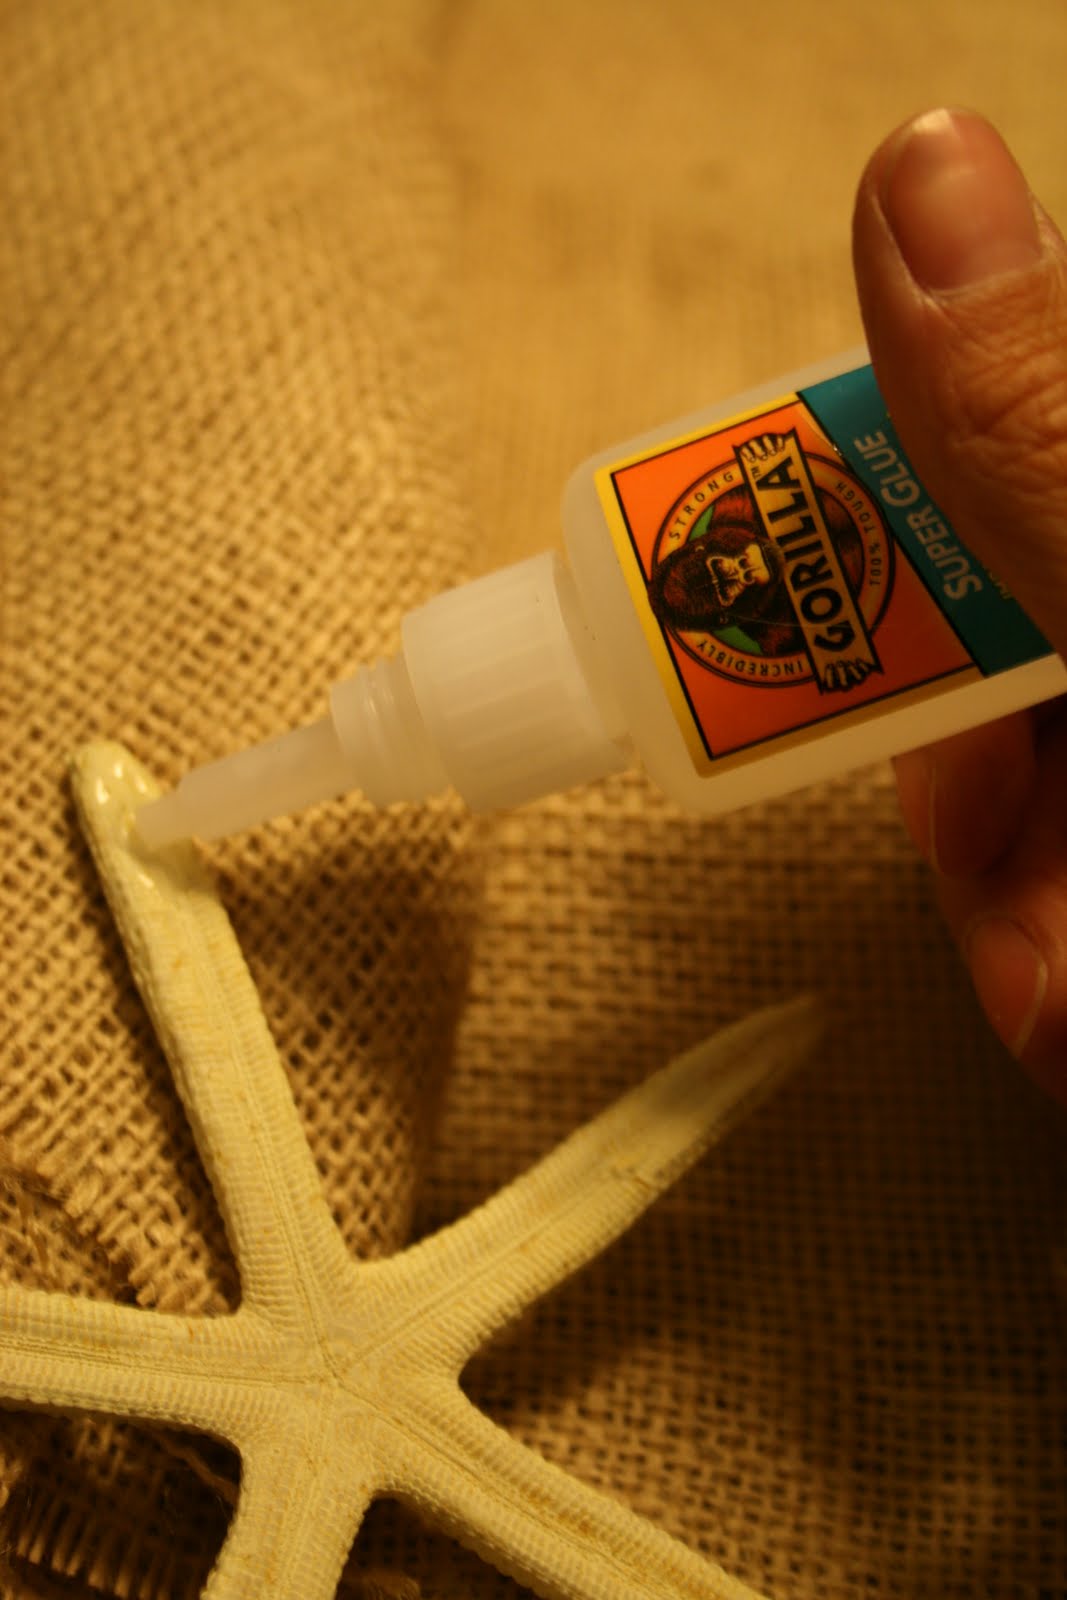
Step 6:  Determine where starfish will go and apply Gorilla Super Glue to the backside of the starfish that will touch the wreath.  Apply pressure and hold for a minute until secure.

Step 7:  Tie the ribbon around the non-burlap part of the wreath.

Step 8:   All done.  Fluff.  Tie into a bow and hang.

Other Options:  Personalize a wreath for any occasion the same technique with different fabrics and embellishments.

See more awesome burlap projects at