DIY Project Parade: Closet Doors – How to Turn BiFold Doors into French Doors

I love this blog day at the DIY Show Off! I finished up the bi-fold doors. Finally!  Only they’re not bi-fold doors anymore!  Woo hoo!
The doors before:

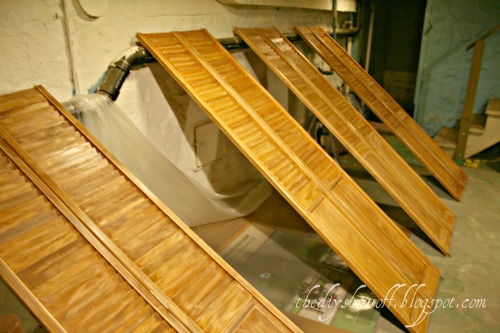
The doors after (see tips on painting shuttered doors here):

But they were still functioning as bi-fold doors. Bi-fold doors are a great space saver in hallways or for laundry rooms, but not necessary in a bedroom. I wanted them to function as French doors.  Super easy to do!

(Dressing Room Sneak Peek!)
Closets Before had curtains for a few years – I hated that wood tone that much!
BIFOLD CLOSET DOORS become FRENCH DOORS…
How to:

The doors were installed as usual in the outer corners. (My doors only have an upper track, the bottom is held in place with a bracket in the corners on the floor – no slider on the floor.)

Remove plastic that keeps the door on track from the upper inner corner. (The upper outer one near the wall will stay in the original track, remove the other top inner plastic.) Mine look like this:

Measure where the door closes and magnetic hardware will need to be place for doors to close and catch.
Start with pilot holes.

Install metal cupboard door hardware (the ‘catch’ piece) onto the track itself, so it hangs down to meet where the magnetic piece is going to be placed on the actual door.

Attach the other piece of the magnetic cupboard door hardware to the door itself, making sure that it lines up with the metal piece on the track so it will catch and stay closed. (Mark and drill pilot holes first.)

These are perfect for keeping the closet doors closed and so easy. Best of all – it doesn’t alter the door itself so if the day comes when you want bi-fold doors again, no problem.  Repeat for all doors (4 in our case).
Stop the folding action by using mending plates:

Three on each door near the top, in the middle and on the bottom.

Mark.

Drill pilot holes.

Attach.

Now the doors don’t fold anymore – but can be easily turned back to bi-fold doors. Permanent for only as long as you want them to be permanent.

Door knobs are from Hobby Lobby (1/2 off of $5.99 each!!!)

Big improvement!
Since this is my dressing room, I liked the freedom to get creative.

“S” hooks make belts/scarves and accessories easy to find. {Don’t you hate forgetting what you actually do own because you can’t see it or find it?}

I love that they open out, instead of fold.  I love the new paint job and pretty knobs. And I love that my cat no longer snoozes on my sweaters, covering them in fur!
What do you think?
Similar ‘S’ hooks:
Dressing Room Reveal coming soon with tons of pictures and a few more details on how my clothing and accessories went from being crammed and sharing space with ‘boy’ clothes to having a room all their own.
Ps. We’re leaving for vacation but I’ve scheduled posts to publish along with some guest posts from some of my creative blog buddies.  Please stop by to give these ladies some DIY Show Off love while I’m away and know that if you comment, ask questions, submit features or email me…I may not get back to you right away but I’d still love to hear from you and we’ll catch up when I return (I’ve been working on another room transformation this past week and can’t wait to share it with you!)


Now – Let’s see your latest DIY project!

The DIY Show Off
1. You must use the button above (ADD BUTTON HTML CODE FROM SIDE BAR TO YOUR POST) and link to this post to share the linky love. You post must be recent, shared at one DIY Project Parade only (not continuously) and be DIY related.
 
2.Include your name or blog name and project title. Add your permalink (not your blog url, but your DIY project post url). Feel free to link a Past Post, just invite your readers in a current post with a quick note.
 
3.Or email your link to thediyshowoff@gmail.com and I will add it for you.
 
4.If you notice your link has disappeared -please add the link back to The DIY Show Off
to your post today, a button or a quick note to your readers about the party and try again! I love when everyone participates and readers check out everyone’s links, but I think the return favor of linking back is the nice thing to do so everyone plays fair and enjoys all of the projects and links. Also – this blog party is for DIY projects only. Links not related to DIY will be deleted. Please share your link one week only. 
5.  If reading this in an email, pop over to http://thediyshowoff.blogspot.com to see the inspiring DIY projects linked up!
6. If you have a Holiday link to share, feel free to link up to here too!
 
7.  NOW you can “like” the links!  What a fun idea!  Most liked links may be included in a post of DIY Project Parade highlights later in the week.
8.  Visit a few other links to make some new friends, get some creative ideas and feel free to leave me a comment. I’m likely sitting here on the computer and could use a happy distraction! 


*~*~*~*~*~*~*~*~*~*~*~*~*~*~*~*~*~*~*~
I was one of the bloggers selected by True Value to work on the DIY Squad. I have been compensated for my time commitment to the program as well as my writing about my experience. I have also been compensated for the materials needed for my DIY project. However, my opinions are entirely my own and I have not been paid to publish positive comments.
~*~*~*~*~
Coming up early January 2012…share your best projects of 2011…
Get Ready
12 Bloggers
12 Colors
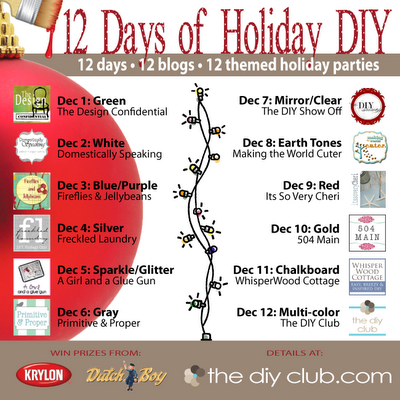
12 Days of Holiday DIY
 
Dec. 1st ~ GREEN ~ The Design Confidential
 
Dec. 2nd ~ WHITE ~ Domestically Speaking
 
Dec. 3rd ~ BLUE/PURPLE ~ Fireflies & JellyBeans
 
Dec. 4th ~ SILVER ~ Freckled Laundry
 
Dec. 5th ~ GRAY ~ Primitive & Proper
 
Dec. 6th ~ SPARKLE/GLITTER ~ A Girl and a Glue Gun
 
Dec. 7th ~ MIRROR/CLEAR ~ The DIY Show Off
 
Dec. 8th ~ EARTH TONES ~ Making the World Cuter
 
Dec. 9th ~ RED ~ It’s So Very Cheri
 
Dec. 10th ~ GOLD ~ 504 Main
 
Dec. 11th ~ CHALKBOARD ~ WhisperWood Cottage
 
Dec. 12th ~ MULTI-COLOR ~ The DIY Club

Pin It

DIY at Stardust – Decor & Style

Hello “The DIY ShowOff” readers!My name is Olga from Stardust – Decor & Style and I am just one of you… a fanatic reader and follower!
I’m a new blogger and I blog about DIY, decoration, makeovers and transformations, house tours and whatever beautiful catches my eye.
S t a r d u s t   -  Decor & Style
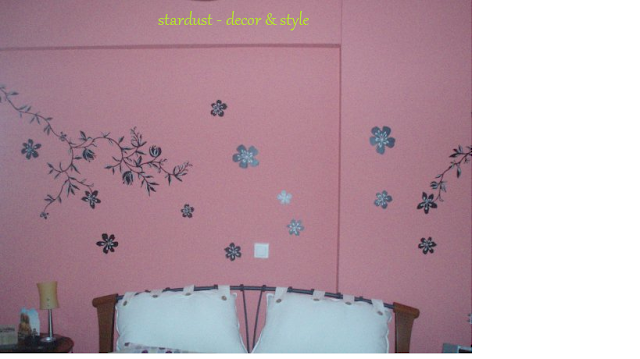
I can’t describe how honored I am to be here today and share some of my recent projects with you!So grab a cup of coffee, make yourself comfortable and here we go…This was my master bedroom a little after we had moved in. At first it was OK, but then I wasn’t satisfied with the colour and even more I hated this awkward wall behind the bed. I was trying to figure out a way on how to cover it and make the room feel more dramatic. The first makeover that I attempted didn’t turn out as I expected.  It kept me thinking. And then it struck me… curtains + paint + a few new accessories… I had it all in my mind. Well check this out for yourselves:
BEFORE
FIRST ATTEMPT OF MAKEOVER
AFTER

What a transformation, right? It seems like a completely different room! And it cost me less than $100.00 (except for the light fixture which was somewhat expensive… but couldn’t resist it…you feel me right?)!For more pictures and details please go here
And then we have the hallway. It was a plain, common, and boring hallway. I’d tried to spice it up with some wallpaper and a mirror from IKEA. Had it like that for about two years. And then one day I decided to do something about it. I ripped off the wallpaper – not an easy job – and painted big horizontal stripes which I lurve! 
Let’s take a look of the Before and After pics:                                                                            
BEFORE

                                                                             AFTER

Well what do you think? And this project didn’t cost anything at all. The paint was leftovers from previous paint jobs which i mixed all together. And there you have it! I loooooove horizontal stripes!  For the full tutorial please go here.That’s all folks for today! If you want some more you’re most welcome to come and visit Stardust – Decor & Style, where you can also see my balcony update. It would mean the world to me to see you over at my place! 
 Hope you all enjoyed the post.A big Thank You to Roeshel for having me here today! Roeshel you are such a sweetie!Merry Christmas everyone!!!                 
xoxo
Photobucket

Pin It
Reminder:

12 Bloggers, 12 Colors, 12 Days
of Holiday DIY

Dec. 1st ~ GREEN ~ The Design Confidential

Dec. 2nd ~ WHITE ~ Domestically Speaking

Dec. 3rd ~ BLUE/PURPLE ~ 
Fireflies & JellyBeans

Dec. 4th ~ SILVER ~ Freckled Laundry

Dec. 5th ~ GRAY ~ Primitive & Proper

Dec. 6th ~ SPARKLE/GLITTER ~ A Girl and a Glue Gun

Dec. 7th ~ MIRROR/CLEAR ~ The DIY Show Off

Dec. 8th ~ EARTH TONES ~ Making the World Cuter

Dec. 9th ~ RED ~ It’s So Very Cheri

Dec. 10th ~ GOLD ~ 504 Main

Dec. 11th ~ CHALKBOARD ~ WhisperWood Cottage

Dec. 12th ~ MULTI-COLOR ~ The DIY Club

The Good Mood {board} – Living Room Edition

Good Mood {board} – Living Room Edition

When I found out that “living rooms” were next up on the Good Mood Board event {blog friends sharing themed mood boards with a mood board linky finale}, I couldn’t wait to get started.  Remember the last time when I put together a mood board for my guest bedroom and shared the reveal about a month later? A mood board is awesome motivation for giving your DIY plan direction.

Well, this time, I’m doing a mood board for our family room. It’s a mess of a room right now with old mismatched furniture (not in a good mismatched way and not in a good “old” way – we’re talking hunter green striped couch with matching hunter green side tables…hellooooo 1990s!), walls in desperate need of paint, another plywood floor, windows with wood blinds but no drapes, huge potted plants and one ugly fish tank with one lonely gold fish that Mr. DIY refuses to part with (in fact he bought a fish tank 3x the size and it’s sitting empty along side the other in the family room at this time).   I’m saving the ‘before’ until I have an actual ‘after’. Hoping that sometime early 2012 demolition and remodeling will take place.

Anyway…Mr. DIY usually doesn’t offer up much in the way of preference when it comes to decorating but I think he’ll like this comfortable design.  If I like it, he likes it. (He’s wonderful that way!)  His only request is a ceiling fan. And of course the fish tank has to stay (gag!) but I’ll disregard that in my design today. It might look like I’m swapping out one mismatched room for another. lol  But this is my starting point in terms of colors and overall style. A mood board for me is a visual starting point – colors/overall feel. It might not be literal in the sense of each piece (definitely not as some of the things are not in my budget) but it gives me an idea of where to start in terms of design. Paint choice, furniture, color, textures…

Neutral, Navy, Texture. I even decorated for Christmas…
It looks a little cluttered but I never ever claim to be a minimalist (unless you count the one time when it comes to fish tanks). It’s so hard to fit all of the details on a little design board…there’s more space in real life. See something you like?  You can see the details of my olioboard here.

Get this look

  • Kids' Wall Paints: Cream Kids Mythic Wall Paint - Bubble Bath
  • West Elm Opaque Linen Grommet Window Panel, 96", Flax - Beige
  • Classic, Hazelnut rustic oak 2-strip planks U1420
  • Killarney Mirror
  • "N.Y. Wall Art 39""H X 39""W Ivory"
  • Brahmi Stripe Dhurrie - Blue/White
  • Low Stowaway Shelves
  • Nantucket Slipcover 2-Cushion Sofa Slipcover Sofa Bskt Weave Tan
  • Samar Ottoman
  • 9' Pre-Lit Frasier Fir 9' Clear
  • Smith Hawken Belvi Woven Side Table
  • "Maldives Trunk 18.5""Hx38""W Brown Wood"
  • Ares Lamp and Shade
  • Home Printed Decorative Pillow - Blue
  • "Succulents In Rectangular Coiled Rope Pot 7.5""Hx5.5""W Green"
  • Bayside Chair
  • Reindeer Lawn Accents Standing Ivory
  • "Mixed Evergreen Puff Pine Wreath 18"" Green"
  • Shangri-La Ceiling Fan by Minka Aire
  • "15""H Finial Ornament 15Hx8.5Wx8.5D Gold"
  • "Glass Star Tree Topper 12"" Gold"
  • Christmas Ball - Mercury - Set of 6
  • Upsala Dresser White
  • "Craftsman 2-Tier Tv Turntable For 36"" Tv Brown Oak"
  • Bronze Terrarium
  • "Trudy Glass Vase 31.5""Hx8.75""D Blue"
  • "Life Is ""Beauty Full"" Wooden Sign 24"" Square Black"
  • "Succulents In Coiled Rope Pot 12""H Green"
  • Herb Pots - Set Of 2 Set Of 2 Sage
  • Reindeer Lawn Accents Sitting Ivory
  • Tall Feedsack On Parchment Burlap
  • Aidan Gray Decor French Industrial Crates Set
  • Mod Pod Single - Navy
What I like is that with this design,  I can add in more color with accessories. 

Pops of red 

or yellow/mustard

or green/chartreuse 

or orange/rust
or even pink/fuchsia if I was so inclined (and only if Mr. DIY became color blind) and it’d still look pretty. 


Very versatile. 

What do you think of my first rough draft?  I love seeing if the real design will be anything like dream version.  

Make sure you pop over to check out the next design in line from
Chris at Just a Girl 

Monday November 28th:
1. Remodelaholic
2. Home Stories A to Z
3. The Handmade Home
Tuesday November 29th:
4. House of Hepworths
5. Simplified Bee
6. Our Humble ABowed
Wednesday November 30th:
7. Design Dump
8. Under the Table and Dreaming
9. DIY Showoff
Thursday December 1:
10. Just A Girl
11. All Things Thrifty
12. Link Party for your boards over at Remodelaholic
Psst…get your holiday/color themed/paint projects ready for:

starts tomorrow 12/1!