DIY Project Parade – Outdoor Decorating

Happy Mother’s Day! 

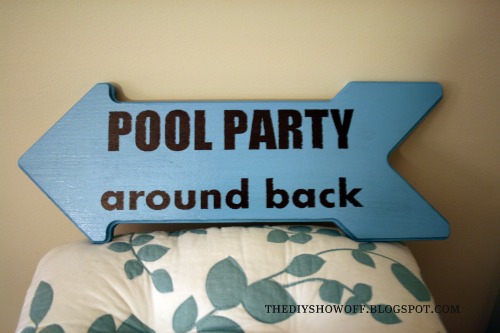
I thought a long time about what to get my mom this year.  I decided to make her two outdoor signs.

My mom’s home is the gathering place for summer parties and family get-togethers.  She has a swimming pool and patio with outdoor chairs, bar and dining area. It’s right off the basement equipped with everything needed for entertaining (a bar, lots of seating, pool table, etc).  To redirect guests to the back yard, she tacks a handwritten note on the front door to “go around back”.  

I made her a sign to lead the way for guests so she doesn’t have a tape a note to the front door anymore.   Materials:  a wooden arrow sign, Deco Art Patio Paint, vinyl as stencil and Polycrilic sealer.  

Turn the sign, and it’s a welcome to the front door when a pool party isn’t going on…

Last year she bought this outdoor fabric:

and over the winter, I sewed new cushion covers for her bar stools and gave her swing a new seat cover, armrests and canopy.  I have no desire to sew again any time soon!  Hardwork!
I used a piece of left over fabric, a wooden plaque, Deco Art Patio Paint and Decoupage to create a fun coordinating sign for her covered patio area. 

See the full tutorial at 
DIY Club

For her birthday…I’m thinking fun outdoor lighting might be in order.  Something like this would be perfect:

Shady Lady Outdoor Atmosphere Pendant

and these outdoor chairs around the fire pit would be perfect too…
Uwharrie Hatteras Chair

~*~*~*~

Do you have a DIY project to show off this week?  I’d LOVE to see it!  Or please visit the links to get inspired!


The DIY Show Off


If you’d like to link YOUR DIY project post to The DIY Show Off Project Parade:


1.You must use the button above and link to this post to share the linky love.


2.Include your name or blog name and project title. Add your permalink (not your blog url, but your DIY project post url). Feel free to link a Past Post, just invite your readers in a current post with a quick note.

3.Or email your link to thediyshowoff@gmail.com and I will add it for you.


4.If you notice your link has disappeared -please add the link back to The DIY Show Off to your post today, a button or a quick note to your readers about the party and try again! I love when everyone participates and readers check out everyone’s links, but I think the return favor of linking back is the nice thing to do so everyone plays fair and enjoys all of the projects and links. Also – this blog party is for DIY projects only. Links not related to DIY will be deleted.

DIY Chalkboard

I’ve been hoarding saving an approx. 3’x3′ smooth chipboard that was packaging/support trash in a furniture box.  I just can’t part with certain ‘trash’, being a DIY-girl, frugal and all. If you’re here browsing DIY ideas…you know what I mean. Don’t deny it. I’m not the only one with a stash of trash for DIY, am I?  I knew that I’d have an idea for it someday.  That day has arrived!  My nephew, Austin, is getting a personalized chalkboard for his birthday.
Materials:

Recycled chipboard (Could also be directly applied to smooth walls with taping off a blackboard shape), Decor Art Americana Chalkboard Paint, Cutting Edge Stencil foam rollerDischangers x 2, Gorilla Glue tape – Handy 1″ Roll, Vinyl decals, Chalk and eraser
Personalized Chalkboard Tutorial:
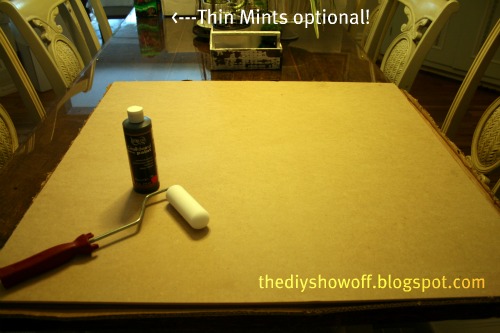
1.  Apply 1 coat of chalkboard paint rolling one direction (vertically) with a foam roller and let dry 1 hour.

2.  Apply 2nd coat of chalkboard paint.  Roll in the opposite direction (horizontally). Let cure for 24 hours.
3.  Flip board and attach Dishangers.  Wet finger and apply water to activate glue.  Dischangers aren’t only for plates – they work with wood too!  I applied a Dischanger to each corner.  

Smooth and let dry 24 hours. 

 4.  Because this chalkboard is for a boy and hanging on a wall, I added STRONG Gorilla Glue tape to help with keeping the Dischangers extra secure (and to keep destructive little fingers from peeling off the Dischangers…just in case – you can never over-do caution.)

5.  Flip the board back over.  Apply vinyl decals.  

6.  Rub the side of a piece of chalk over the entire chalkboard area.

7.  Erase. (Back up eraser on stand by!)
I think my nephew is going to LOVE this!  I’ll add a “Happy Birthday” message and be sporting this gift to Chuck E. Cheese next week!  Those with boys – do you think he’ll love it?  (I’m mother of 2 girls, so sometimes I’m clueless with boys’ gifts!) 
My other DIY chalkboard used the same paint technique but was applied directly to the wall in our kitchen…

Before:
After (except right now the kitchen is undergoing some changes so the ladder and chalkboard wall look the same but the other parts don’t.  Reveal coming…someday! Hopefully soon.):

Join me in linking up your chalkboard project and checking out the great chalkboard ideas at Chalk Talk.

Earthy Essentials Party…twine/decoupaged eggs

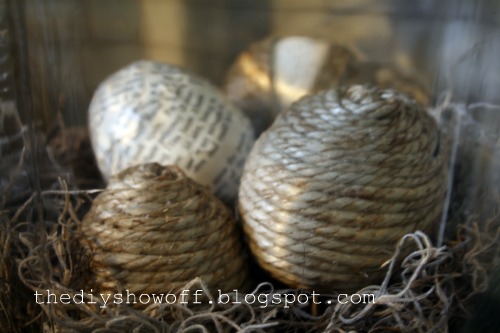
I’m posting a tutorial today at the DIY Club using these materials:

Deco Art Decoupage (comes in gloss or matte)
Twine
Paper (book pages or scrapbook paper)
foam brushes (found at Rockler)
Cute cardboard tag from CanvasCorp.com
Krylon satin white
Gorilla Glue
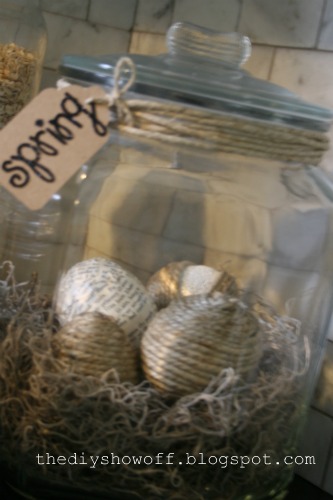
to create these cuties…

 Display in apothecary jars or in nests.

See my full Decoupage Eggs tutorial at 
JOIN THE EARTHY ESSENTIALS PARTY  with your new or old “earthy essentials” project or see the creative links AT