Category Archives: Blog Squad
Painting Kitchen Cabinets
Materials:
Primer
Paint – We used Benjamin Moore Satin Impervo Paint (it’s like an enamel coating – love it).
Paint brush – We use Purdy paintbrushes.
Sand paper – We used our Dremel Mult-Max
These were our cabinets when we moved in…orange-tone red oak with brass handles.
2. Label each door with tape (keep this with the door at all times).
Benjamin Moore’s Satin Impervo is thi
ck. It dries to an enamel-like finish. Spills wipe off with a dry towel easily! It’s also self-leveling and a great choice (worth the extra $) for it’s durability.
Tip: Using a screwdriver and hammer, poke small holes around the lip of the can. It’ll act as a drain for paint that collects there and make life much easier when the lid goes back on easily and isn’t “glued” with paint when it dries.
9. We allowed at least a few days between each coat of paint.
New color is actually not white but gray. It’s Benjamin Moore’s Moonshine. (I’m not sure why that day says is was mixed 9 years ago!) We purchase our paint at our local True Value store.
I’m happy to answer any questions about our experience. Just email me at thediyshowoff@gmail.com
SEE MORE BEFORE/AFTER AND IN PROGRESS PICTURES OF OUR KITCHEN AT
http://thediyshowoff.blogspot.com/p/farmhouse-tour.html.
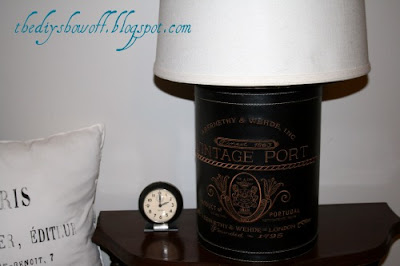
Wastepaper basket to Lamp – Easy DIY
We’ve had this wastepaper basket for a few years. It’s so pretty but no one sees it sitting in a guest bathroom corner plus the bottom had fallen out. Time to replace it with something else and re-purpose the pretty can.

True Value sells lamp kits – this one was around $11. Lamps can be made out of pretty much anything. We used the wastepaper basket and a plastic charger that I already had (Michael’s).
1. Mark the center of the charger and drill a hole big enough for a cord.
2. Drill a hole into the back side of the wastepaper basket big enough for a cord.
3. Following the instructions, we inserted the lamp nipple through the charger and secured with the adapter on the bottom and lock nut on the top.
4. Put the check ring on top of the lock nut.
5. Put the harp on top of the check ring.
6. Unscrew the set screw a bit from the socket cap and screw the socket cap to the lamp nipple.
7. Insert the wire end of the cord through the hole in the wastepaper basket.
8. Pull through the lamp nipple in the charger.
9. Insert wire end of cord through the socket cap and pull through so there’s enough room to work with it.
11. Insert socket shell into socket cap and tighten set screw.
12. Add harp top if you took it off during this process.
13. Glue charger to top of wastepaper basket.
All done! Add a bulb and shade.
What do you think?
Have you attempted to DIY a lamp? A lot easier than it sounds, isn’t it?
. I have also been compensated for the materials needed for my DIY project. However, my opinions are entirely my own and I have not been paid to publish positive comments.


