


Once upon a mid-day dreary, a Halloween “Nevermore” tree served as a lonely focal point in a spooky Victorian vignette but nevermore thanks to the rare and radiant craft maiden, Martha Stewart Crafts!

Now, there’s an eerie glow with the addition of candlelight.

It felt more like Christmas than Halloween when a stash of Martha Stewart Crafts supplies arrived at my door…

This is my kind of trick or treat goodies!
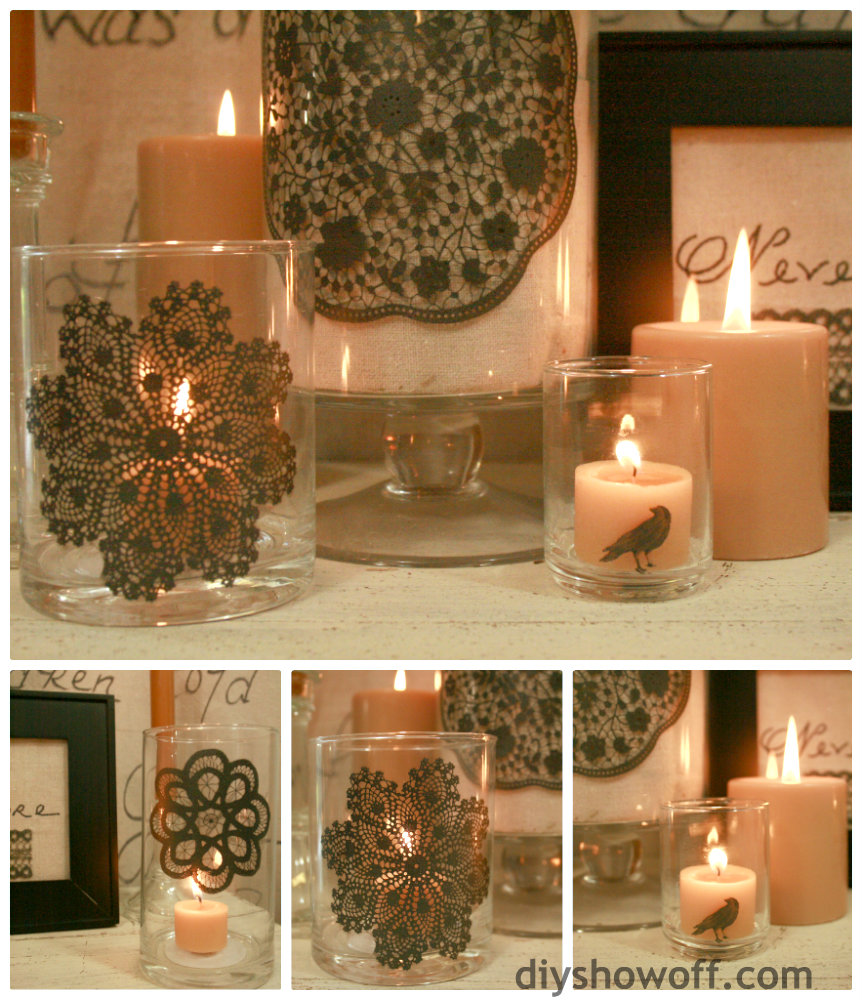
I chose to accessorize glass candle holders with an Edgar Allan Poe/Victorian Halloween vibe with black lace accents {love Halloween that’s not so “Halloween-y” and can be re-used all year round}…

Materials:
- glass candle holders, jars, vases (with a smooth surface)
- squeegee
- Martha Stewart adhesive silkscreens (lace doilies)
- Martha Stewart metallic glass paint (black nickel)
- Martha Stewart adhesive stencils (small holiday collection)
Tutorial:
1. Prep: Cut apart adhesive silkscreens. Peel away the backing of your adhesive silkscreen. Clean glass with rubbing alcohol.2. Place adhesive silkscreen onto glass and smooth into place with a squeegee. They are re-position-able so if it looks crooked, just peel it away and replace. You may also want to tape the side to further secure into place but I didn’t find it necessary until after several washings.
>3. Apply a small amount of glass paint to the outer edge. Using the squeegee, pull the paint vertically, then horizontally, filling in the pattern. Up and down, left to right, down and up and right to left…the silkscreen dance. 
4. Carefully peel away the adhesive silkscreen.
5. Immediately wash the adhesive silkscreen with water (I just ran mine under the faucet and used my fingers to help clean away the wet paint).  Set aside to dry (and replace on original backing to store).< 6. Let glass dry. Glass paint air cures in 21 days or you can speed up the curing process in the oven (follow instructions).
I love the metallic shimmer of the Black Nickel glass paint...
Set aside to dry (and replace on original backing to store).< 6. Let glass dry. Glass paint air cures in 21 days or you can speed up the curing process in the oven (follow instructions).
I love the metallic shimmer of the Black Nickel glass paint...
So pretty and the perfect accent to complete a Victorian Halloween vignette, don’t you think?
style=”text-align: center;”> style=”text-align: center;”>
{DIY Halloween Nevermore Tree tutorial}
style=”text-align: center;”>
I also used the adhesive stencils (the crow) for a smaller glass votive holder…
style=”text-align: center;”>
style=”text-align: center;”>
style=”text-align: center;”>{DIY Halloween Nevermore Tree tutorial}
style=”text-align: center;”>
I also used the adhesive stencils (the crow) for a smaller glass votive holder…
style=”text-align: center;”>
And now the Raven tree is accessorized all the more. The adhesive silkscreens and adhesive stencils are so fun … you’ll want to go crazy with them! I can’t wait to try it on fabric. Bri tested the adhesive stencils on painted/distressed wood scraps. So cute!

See more Martha Stewart Halloween craft ideas…
;
I received product and payment for my participation via The Blueprint Social for this post, however experience and opinions are 100% my own.
Sharing here:

Love this project! Visiting from the Pinterest Party 🙂
Pingback: Fall Home Tour | | DIY Show Off ™ - DIY Decorating and Home Improvement BlogDIY Show Off ™ – DIY Decorating and Home Improvement Blog
Love your use of the screenprints on candle holders! You’re right, these could be used all throughout the year, not just at Halloween. I used the screens for one of my MS projects too – sooooo easy! I want to screenprint every glass surface in my house now!!!
I absolutely love that black lace stencil! Good pick on the color!