My love of DIY is sometimes madness! We have an empty nest this year. We planned a vacation in December because it sounded good at the time to get away while it’s cold and snowy here and escape to somewhere warm and toasty. However, it’s a busy time of year. I’m in a bit of a holiday panic. Since we have so much going on, I thought I’d only put up our smaller pre-lit tree in the living room instead of our monster not pre-lit. I rearranged furniture, vacuumed all over, set up and fluffed the little tree. I didn’t realize it was so little – it looked lost. Sad, really. I don’t think I even needed to rearrange furniture. It just wasn’t going to work. I had to bring up the monster.
So…time to move the little tree to our little sitting room. Only the walls were dingy. A DIY girl cannot decorate and just add Christmas to a blah sitting room! Of course not! So, 4 days before our trip (I hadn’t even packed yet)…I decided to freshen up the walls in our sitting room so that the tree would be happy there.
Sitting room before: I loved the color…it was just scuffed up and scratched and even dirty.
(prepping the room to paint)
Armed with Dutch Boy‘s Refresh paint and my Purdy paintbrush…I had this room repainted in no time flat! One coat. No taping.
You can see the difference here in progress. New wet paint…
Pretty new color is Dutch Boy’s Ypsilanti Skies (yes, I had to go look that up to spell it right only to discover that spell check already knew)….
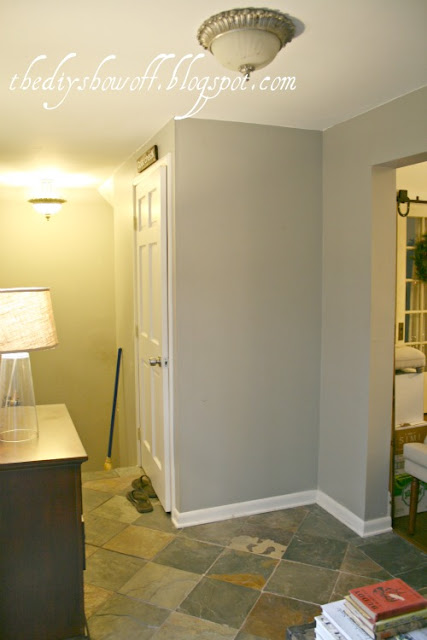
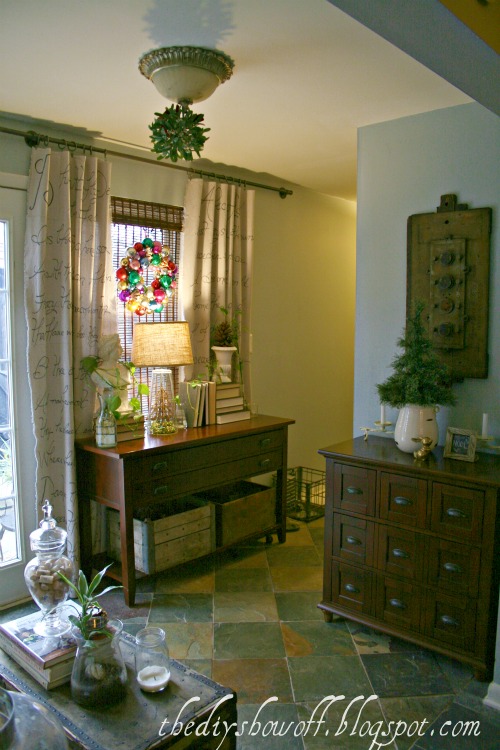
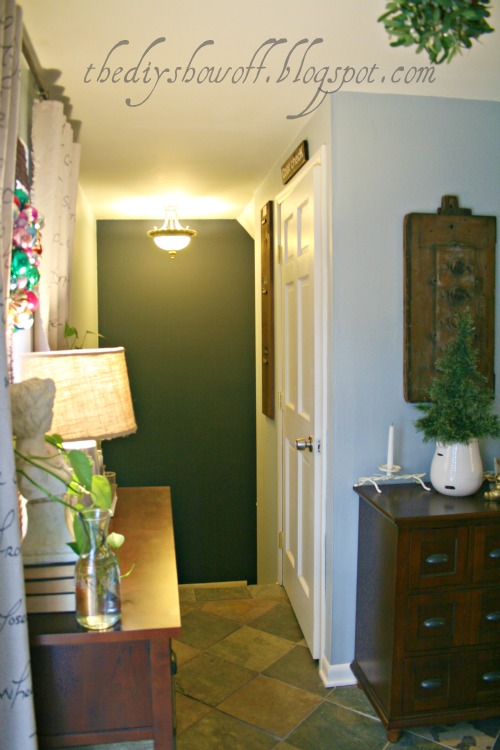
Now it’s a lot fresher and brighter. I love the light blue/gray with the cherry furniture and green from the Christmas tree.
before
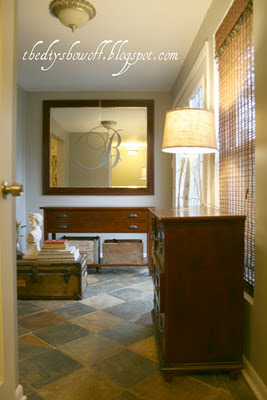 after
after


before
after
before

after
I even made a sign for our coat closet…
More after pictures:
DIY Ornament Wreath tutorial by Mommy is Coo Coo
Mine is a gift. Thanks, Amanda!
I‘ll be sharing a tutorial for the DIY curtain rod and DIY script dropcloth curtains and more coming soon! 🙂
Let’s see what you’ve been up to!
1. You must use the button above (ADD BUTTON HTML CODE FROM SIDE BAR TO YOUR POST) and link to this post to share the linky love. You post must be recent, shared at one DIY Project Parade only (not continuously) and be DIY related.
2.Include your name or blog name and project title. Add your permalink (not your blog url, but your DIY project post url). Feel free to link a Past Post, just invite your readers in a current post with a quick note.
3.Or email your link to thediyshowoff@gmail.com and I will add it for you.
4.If you notice your link has disappeared -please add the link back to The DIY Show Off to your post today, a button or a quick note to your readers about the party and try again! I love when everyone participates and readers check out everyone’s links, but I think the return favor of linking back is the nice thing to do so everyone plays fair and enjoys all of the projects and links. Also – this blog party is for DIY projects only. Links not related to DIY will be deleted. Please share your link one week only.
5. If reading this in an email, pop over to http://thediyshowoff.blogspot.com to see the inspiring DIY projects linked up!
6. If you have a Holiday link to share, feel free to link up to here too!
7. NOW you can “like” the links! What a fun idea! Most liked links may be included in a post of DIY Project Parade highlights later in the week.
8. Visit a few other links to make some new friends, get some creative ideas and feel free to leave me a comment. I’m likely sitting here on the computer and could use a happy distraction!
Sharing here this week:







Thanks for hosting, I love your Christmas decor!
Looks great! I like the rearrangement of the furniture also!
Thanks so much for hosting. Your home looks beautiful! Wishing you and your family a very Merry Christmas!
Jenn 🙂
lovely decor – can you share where you got the love you more pillow?
It looks beautiful in there – I love your tile with the trim and wall color. I also am dying for that ornament wreath!
Your room is so so gorgeous! Thanks for hosting 😉
Looks beautiful. I love the little box that your tree sits in and I always drool over your mirror-so gorgeous.
wow! your tree and room look fabulous! 🙂 So warm and cozy!
I also liked your little tree in it's other spot too.
gail
Your room looks beautiful!!! I love the wall color and the curtains. Merry Christmas!!! Enjoy your holiday in your warm/sunny place.
Thanks, ladies. 🙂
M@Random Musings – It's from WUSLU. but unfortunately the pillow is sold out. Sorry!
Hi Roeshel,
I think your blog post feed is set to Short. In your Dashboard, choose the Settings tab and then the Site Feed menu option. Under the Blog Posts Feed option, make sure Full is selected from the pull down menu. That should fix it.
This is a gorgeous and inviting room!! What a great transformation.
I love everything about this room. I'm mad about the curtains, and the tree. Very cozy vibe. Thanks so much for hosting. Merry Christmas.
Roeshel –
LOVE that pillow!
The season has finally got to me and I entered the same post twice – at 48 and 52 – so go ahead and delete one of them. Sorry about that.
Michael
Funny…I would see putting up the tree as an excuse NOT to paint. You rock and it turned out beautiful. Thanks for hosting!
Your room looks fantastic! Your taste is always impeccable though! Thanks for hosting too!
Hi, Roschel
I love the paint job. Its lovely. Thank you for hosting.
Vanessa
Oh, Roeshel your sitting room looks absolutely incredible! The fresh paint and all of the other lovely details are perfect. Can't believe you got all that done with what you have had going on this month! Thanks so much for hosting us here this week and have a wonderful Christmas! 🙂
Vanessa
Your room looks fabulous! I love the new paint. Such a great place to sit. It looks so lovely!
I don't know what else to say other than love, love, love, love, LOVE it 😀
Your room is stunning. Loving your style. Thanks for hosting (:
You've been one busy girl Roeshel. And yet you still find time to host at this busy time of year. Santa should be very good to you. Your makeover is gorgeous! Thanks for letting me join in.
Merry Christmas…
Tracy @ Cotton Pickin Cute
Absolutely gorgeous Roeshel! So simple – and so elegant. Love it! Love the window panels too! Thanks for hosting and…
Merry Christmas!
xo Lynda
I love it! I think it is so pretty. I especially like the Coat Check sign. Great idea!
That's too funny that your Christmas decorating caused you to "need" to paint a room! I so relate. Looking forward to the curtain rod tute…I need that! Linking up at 144 & 145. Merry Christmas!!!
I love the sitting room and the little Christmas Tree!
Have a fun vacation and Merry Christmas!! Looking forward to more great reading on your blog in 2012!!
Thanks for hosting. Your sitting room looks wonderful. I love the tree in the box! Everything looks so lovely. Great job!
I love the new look! You have some gorgeous accessories in that room…I'm jealous!
I am so glad that I found your blog. Love it and am now following. Please pay me a visit anytime at Hibiscus House, dolly's designs or dolly is cooking. Would be glad to have you Merry Christmas.
I love love love the "Love You More" pillow! It's what Hubs & I always say to each other! Love your decorating style. Thanks for the inspiration!
I really like the arrangement. Your home is always so beautiful and unique. I love those curtains and can't wait for the tutorial. It's amazing what a fresh coat of paint can do. I sure wish i could borrow you for a week, haha. You are so creative. Thanks for sharing at Sunday's Best and wishing you Happy Holiday's.