1. Choose appropriate size Dischanger for plate.
2. Wet finger and rub the back side of the Dischanger to activate glue. Wait a few minutes.
3. Press down on back side of plate (check to make sure design on front and Dischanger on back line up if plate has a design – so it’s not upside down or sideways).
4. Let dry 24 hours. Ready to hang!
5. Using the back of a large piece of wrapping paper cut to the size of the wall space. This makes planning and execution so easy with beautiful results (exactly as planned).
6. Lay out plates in a pattern.
7. Once plates are arranged, trace plates on the wrapping paper. Mark where the nail will need to go. (You may also want to number the plate on the back and match it with the traced circle on the paper so there’s no confusion on placement.)
8. Tape paper onto the wall. Add nails where indicated.
9. Take down paper and hang plates.
What do you think? Do you have a plate wall? Include a link in the comments. Let’s see it!
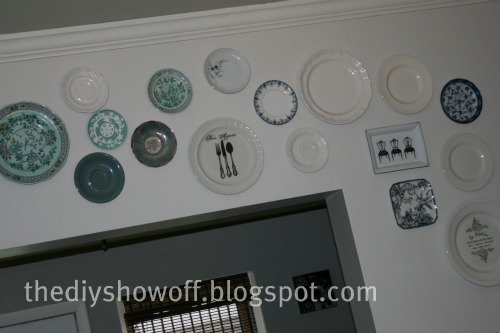
Here’s another look at mine:
all white…
with blue…


I LOVE plate walls..I did one in my second kitchen reno! Yours looks great, and I think we have the same countertops, and very similar kitchen faucets. Great minds..!
Do the hangar things come off easy? Curious if I should apply them to my antique plates or if they would damage them. It would be nice to show them instead of keeping them in a box.
I do not have a plate wall nor really a wall to do one, though I would love to… but why could you not use these Disc Hangers to hang other things? Small farmed things? Anything with a fla-tish back and that is not super heavy?
TG if you look at the website they come off after soaking in warm water, and do not harm the glaze of the plate. Sound like they are a miracle, really!
solongfarn.blogspot.com
Thanks, Late Bloomers for answering TG's question. Yes, they do come off with no damage to plates!
I also use disc hangers for hanging other projects too. They stick to wood as well. The back should be flat and order the appropriate size – makes hanging things super simple.
I love it!! And great tutorial! This makes me want to run out and get some pretty plates, haha! Hope you're having a great weekend!!
Roeshel; I can't wait to buy these plate hangers. Great wall display…Heather
LOVE THIS!!! gorgeous. i want to do a plate wall so badly!
Love it! I have a wall that I want to decorate with all circles. Gonna definitely throw some plates up now. 🙂
Awesome! I would like to know what type of nails did you use! Love it.
Thanks, Janette! I always use brads/furniture tacks since they’re extra sharp and most of my walls are plaster. I also nail into a piece of painter’s tape (Frog tape) first too to help prevent chunks of plaster falling out. https://diyshowoff.com/2012/02/26/diy-project-parade-and-re-arranging-the-living-room/
How have the adhesive discs held up? I can’t decide between the traditional wire hangers and these. I like the clean look of these but have heard horror stories. I am planning to hang it in a high traffic area too.
Vidya, I haven’t had any issues. My plates are still on the wall. Maybe use the dischanger as directed and use an extra secure precaution such as a strip of Gorilla tape as a back up. I really love the dischangers (I’m not a fan of the brassy gold hangers). Good luck!
Do these work with pewter plates as well? Some of my plates are pewter.
Hi Jessica,
The owner of dischangers claims it does work on pewter. Make sure the back is clean and free of any soapy residue or cleaning agents. The glue will react to cleaning agents. I hope this helps!
Pingback: Where I find decorating inspiration. | | DIY Show Off ™ - DIY Decorating and Home Improvement BlogDIY Show Off ™ – DIY Decorating and Home Improvement Blog
Things genius! One tip:after you lay the plates on paper in your final design take a picture with your phone. This way you can refer to it for the final hanging of the plates! I use this trick in many ways-especially when needing to put things back together!! Your wall looks great!