We interrupt this tutorial for the clue
to May’s Project Helper Contest:

back to the regularly scheduled tutorial….
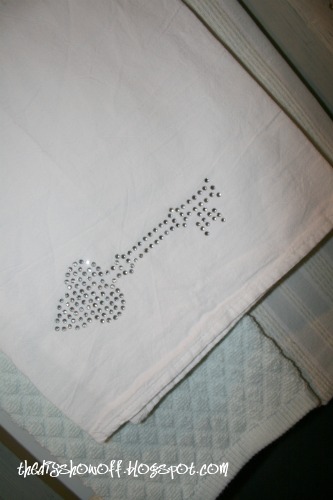
I found plain cotton tea towels at KMart the other day and decided to add a little bling with the Silhouette Rhinestone Kit. If you don’t have a Silhouette, please bear with me. There aren’t too many tutorials out there. By writing up a tutorial, I hope to help someone. Here is how I did it. The Silhouette Rhinestone kit comes with everything you need!

1. I purchased a “key” image from the Silhouette Online Store.

2. It has a warning to NOT RESIZE and to remove the text. I didn’t resize and instead of removing the text, I moved it on the page so it will print near the edge (saves on special paper) and made sure the text was off the page. Hit the ‘send to Silhouette’ button.

3. I used setting 3 for speed and 33 for thickness.

4. Feed a piece of the rhinestone template paper (blue side up) into the Silhouette. Use the pink tip and send to cut.

5. I cut my shape out to a smaller size (aga
in, saving a portion of the paper for another project).
in, saving a portion of the paper for another project).

6. Quickly peel away blue side from the backing.

7. Peel off the circles that didn’t come off.

8. Apply to the backing board.

9. I used the 10ss size (according to the size of holes in my template). Pour onto the backing board.

10. Using the replacement brush, gently move rhinestones over the template, filling as many holes as you can.

11. The Pick-Me-Up tool has two pieces. One that picks up and one to use for pushing rhinestones into place. Using both, fill remaining holes in the template and take away rhinestones not needed.


12. Cut a piece of transfer paper to fit the template.
13. Remove backing and place clear sticky side down over rhinestone design. Smooth over with fingers.


14. Pull back. Rhinestone design pattern will be on sticky side of transfer paper.

15. Place onto fabric. (I was able to remove and re-stick when I made a mistake before ironing.)

16. Put a piece of thin material over the design and iron.

17. Pull away transfer paper (if rhinestones come up, place back down and iron again).

18. Flip. Put material over back side and iron (this helps set the glue).

All done in less than an hour!


Just in time for Mother’s Day!
SPRING SPECIAL!
You can purchase:
A Silhouette SD
The Rhinestone starter kit
3 additional packs of rhinestones
And 1 Pick Me Up tool
ALL FOR $229!
Shop at Silhouette America, click the bundle icon and use discount code “show off”
This Rhinestone Bundle includes:
The Silhouette SD
2 sheets of rhinestone template material
2 sheets of rhinestone transfer tape
2 rhinestone backing boards
1 rhinestone placement brush
1 CD of rhinestone images
1 pack of clear 10ss rhinestones
1 pack of clear 16ss rhinestones
1 pack of clear 20ss rhinestones
1 pack of pink 10ss rhinestones
and
1 Pick-Me-Up tool
This is an incredible deal worth $125 in savings!
Also, if you already have a Silhouette, all rhinestone products will be 30% off.
This promotion will run from April 21st-April 26th. You are eligible for this promotion by using the unique promo code: SHOWOFF.

The giveaway below is closed.
If you’ve read this far, thanks! I have a little surprise for you!
I’m giving away the cotton ‘bling’ tea towel PLUS another little special surprise made by me!
1. Leave a comment about one of your favorite things about spring.
2. Comment that you’ve used the “show off” code for your Silhouette purchase for one more chance.
Comments now through midnight on Friday 4/22 will be entered. Winner announced Sat. US delivery only. 🙂
Good luck!
*** Winners from last month who email me will get a chance to work with me for a “Silhouette-something” using the materials I have in stock for a project for their home.