How was your weekend? Productive? Definitely here…so productive in fact that I’m ready for Monday to be Saturday so I can have a weekend! Anyone reading have magical powers to make that happen? No? Doesn’t hurt to ask or dream. But here is one of the things I checked off my DIY To-Do list this weekend:
My Decorative Plate Wall…
I put up some decorative plates although I’ll be taking them back down to re-paint the dining room walls (dining room makeover in the works!) but sometimes I can’t wait to see how something looks…do you get that way? We’ll call it eager. Not impatient. 🙂
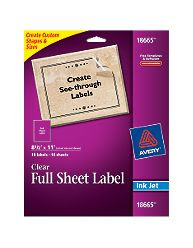
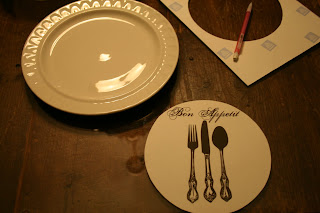
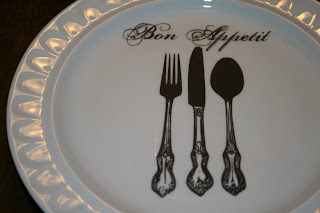
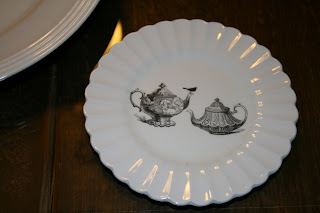
The plates I made are strictly decorative. I printed my images onto Avery 8 1/2 x 11 inch clear mailing labels.
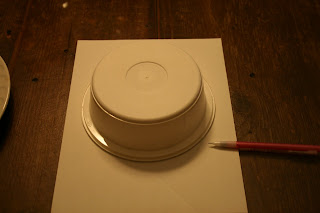
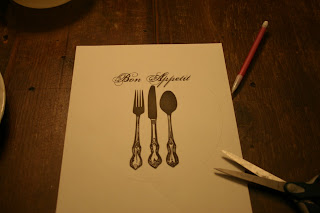
I found a bowl that was the right shape of the flat part of the plate. I traced the image on the clear mailing label (centering around the image) and cut it out.
Easy, right?
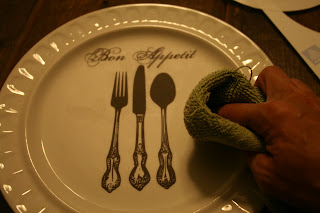
Rub out the bubbles.
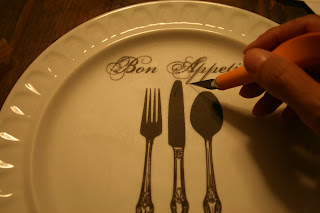
If there is a stubborn bubble, use an xacto knife to make a small slit and rub again…bubble gone!
I‘m sure by now you’ve heard of dischangers to hang plates. They make it so easy. I love that you can’t see a brassy plate hanger. They’re reasonably priced and easy to use too!
Using a finger, wet the back to activate the glue. Place on the back of the plate (if you have a design on the front, make sure that it’s place appropriately). Let dry over night.
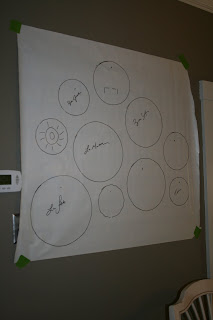
To hang my plates, I laid out a pattern that I liked on the back of a sheet of wrapping paper. I traced them and labeled them so I’d know where each plate goes (to use as a guide after the nails are in the wall).
My wall is plaster. I used a pen to mark onto the wall through the wrapping paper where the nail would go. Then I mark a dot on a piece of tape and line it up with the hole on the wall then hammer into the tape. Using tape with a very sharp tiny black nail (I think it’s actually an upholstery tack), ensures that chunks of my plaster wall don’t crumble. Remove the tape once the nail is in place.
And finally – my wall of plates!
Tip: If you note that your dischanger is crooked with the design on the front of your plate, use a small piece of poster-tacky-stuff on the back to straighten it on the wall. I may be speaking from experience. I’m sure you noted that with my technical term “poster-tacky-stuff”…maybe.
What do you think? I love this look. Is it original? Nope. But it IS original to my friends and family and that’s who sees it. 🙂
As I mentioned, my plates are purely decorative and this would work for plates that can’t be heated and only dusted with a dry cloth but Jenn from Rook No. 17 discovered an amazing product for using transfer images on ceramic dishes. Check out her post here. Speaking of Jenn, random.org chose this as the winner of the Gorilla Glue Giveaway:
- Jenn Erickson, August 18, 2010 12:53 PM 48
- I follow the DIY Club
Congratulations Jenn! It’s your lucky day! 🙂
~*~*~
So…care to share your DIY project? I’d love to see it!
SHOW IT OFF! What did you DIY lately?
If you’d like to link YOUR DIY project post to The DIY Show Off Project Parade:
- You must use the button above and link to this post to share the linky love.
- Include your name or blog name and project title. Add your permalink (not your blog url, but your DIY project post url). Feel free to link a Past Post, just invite your readers in a current post with a quick note.
- Or email your link to thediyshowoff@gmail.com and I will add it for you.
- If you notice your link has disappeared – please add the link back to The DIY Show Off to your post today with a quick note to your readers about the party and try again! I love when everyone participates and readers check out everyone’s links, but I think the return favor of linking back is the nice thing to do so everyone plays fair and enjoys all of the projects and links. Also – this blog party is for DIY projects only. Links not related to DIY will be deleted.










Oh, I love the images you chose to put on your plates! It looks wonderful. Thanks for hosting!
Love the plates! I would never have thought of printing on clear labels… I'm having a duh moment here 🙂
Aw, I love the plates, Roeshel! Great idea to add the graphics/text to them. Wait, you are redoing the dining room? I thought that was one of the rooms you actually had done?! I can't keep up with you, no idea how you accomplish all this:)
Those look so great…I just made a couple plates with vinyl…but clear labels is a perfect idea…can't wait to see the room redone:)
Those turned out so cute. I'm working on a plate wall too, but I need to paint my wall first. You'd think that would motivate me, but I not so much. THanks for hosting again.
Fantastic project!! Looks really, really great!! Thanks for hosting!!
what a great project! I'm definitely going to have to try this one!
LOVING those plates! They turned out awesome! Thanks for hosting another fun party this week! 🙂
The plates look FABULOUS!
Thanks for hosting today! I hope you will come participate in mine! All About The Boy @ The Nifty Nest!
Liz
The plates look so good and what a fantastic idea using clear labels!
What a cool idea! Never saw it before. I have all sorts of plates in my carport above tons of planters…make a bare outdoor wall not so "blah" and I can fill in the holes with your idea! thanks!
xoxo
Nancy
plates are really great!!
A very innovative way of working with plates, turned out very lovely on the walls. Thanks a lot for the wonderful idea.
These look terrific. I saw these disc thingeys on Martha. I wish I had seen them before I put all those holes in my wall 🙂
LOVE your plates! Thanks for hosting weekly!
Love it! I'm a sucker for a great collage of plates on the wall. I love the idea of the wrapping paper too. Thanks for the great advice.
P.S. We're doing a great give away if you're interested.
Those plates look awesome!
Roshell –
What a great project! I love its classic simplicity! And you even have space to add a few over treasures over time! Just might have to be trying this project for upcoming fall-fix-ups!
BTW: So sorry for the double-post. Had a little trouble uploading – Mr. Linky kept telling me to start over – lol
Enjoy your Monday and thanks for hosting. These have been a great way to see new blogs, discover great projects, and meet new people…
😀 Lynda
I love the plates! Wow, I have been searching for years for the perfect "Happy Birthday Plate". I think I'm inspired now to make one myself.
Cheers!
AmericKim
LOVE the plates– never thought of wrapping paper as a guide. Genius! 🙂
Thanks for hosting!!!
I have a plate project in mind too – love how you did that with the labels!
And glad to hear about the plaster wall, we have the same and I always wonder how best to hang stuff.
Thanks for hostessing!
Thank you so much for hosting, Roeshel. I adore your plates (and the arrangement). I can't wait to put my Olive Rue transfers to use (I ordered the Chocolatier one, too)…thank you.
Jami
Hi! Just found you! I added my Medicine Cabinet Makeover! Thanks so much!
Lisa
I copied your label idea in making new fall decoration here: http://mrsmonaghan.blogspot.com/2010/09/makeover-monday.html
Love your stuff!! Ingenious!