


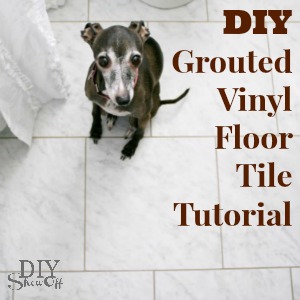
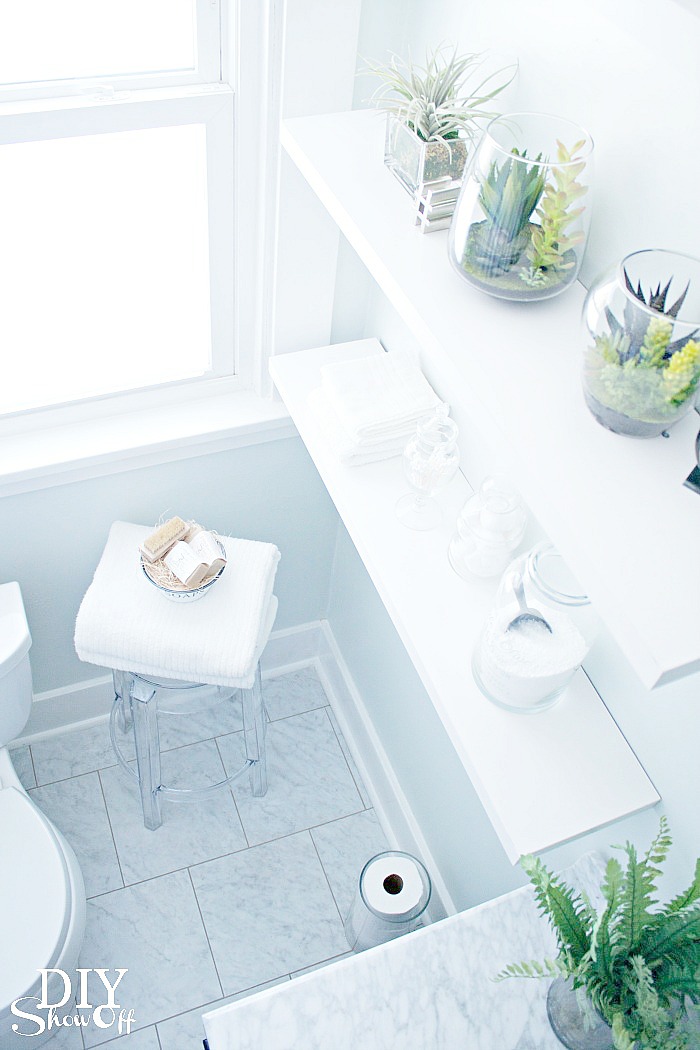
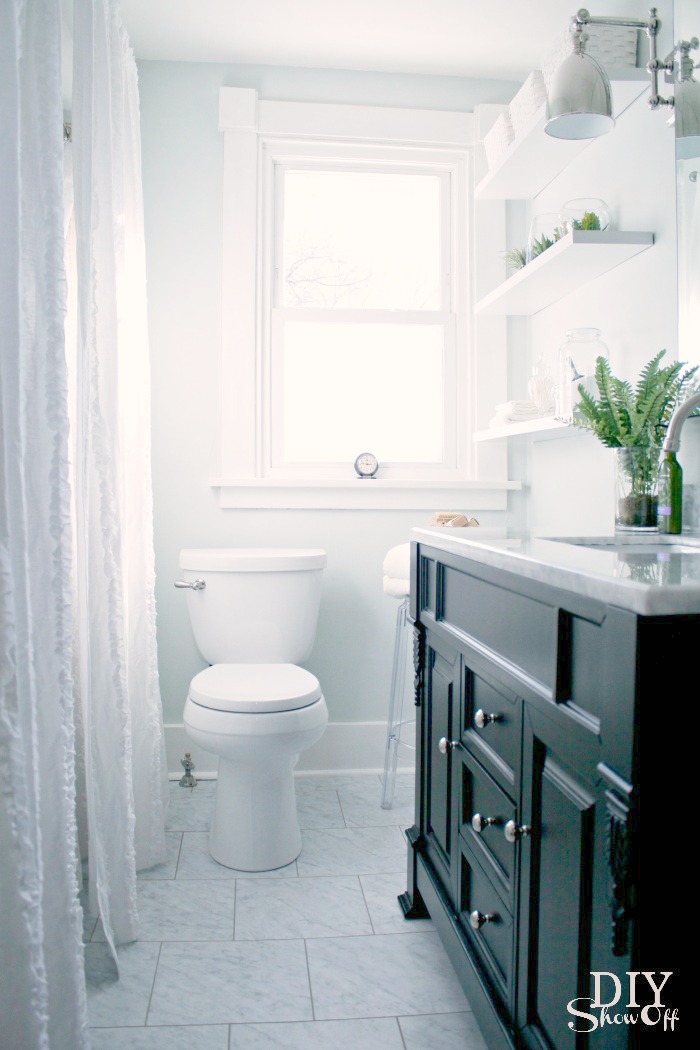
I recently shared the transformation of our upstairs main bathroom. I’m so in love with the complete change, especially the floor.
It looks so much like marble tiles, doesn’t it? But those are vinyl floor tiles with vinyl tile grout. The look without the cost or maintenance and shorter installation time.
Why I chose to go with grouted vinyl floor tiles? Because it’s a temporary solution for us (temporary as in 4-5 years or maybe even a little longer). It’s not for everyone but down the road I have plans on replacing the old tub and shower surround with a slipper tub/shower and at that time, I do plan on using real tile on the floor, under the tub and on the shower walls so in the interim, grouted vinyl tiles were a budget friendly and easy DIY solution that I plan on enjoying every day. The best part? I was able to truly do-it-myself and installation only took one day. It looks professionally done and real! You’ll see mixed reviews and negative comments when researching but I couldn’t be happier and love it!
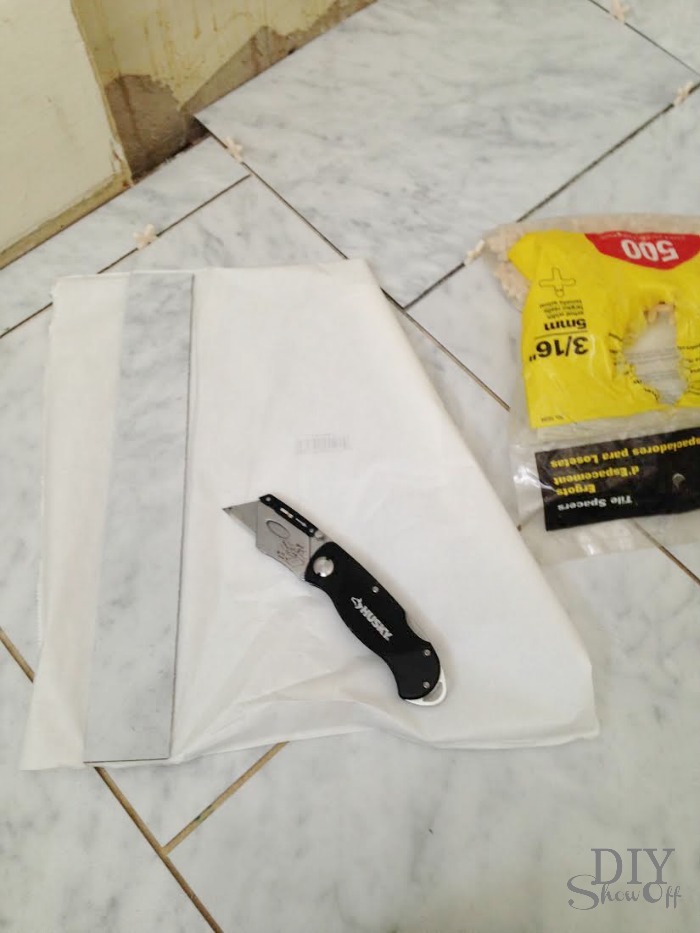
Materials:
- Armstrong 12×12 Crescendo Marble Gray Marble Vinyl Luxury Tiles – measure and determine the square footage you’ll need. Tiles are sold individually. Two boxes was more than enough for my approx. 9 ft. x 5 ft. floor space and gave me a few extra for figuring out tricky cuts and for having an extra piece or two on hand if a replacement is needed down the road.
- Blue Hawk Saddle Gray Vinyl Tile Grout – mildew and mold resistant!
- 3/16 inch spacers
Supplies:
- box cutter/utility knife
- rolling pin
- bucket with water
- sponge
- rag
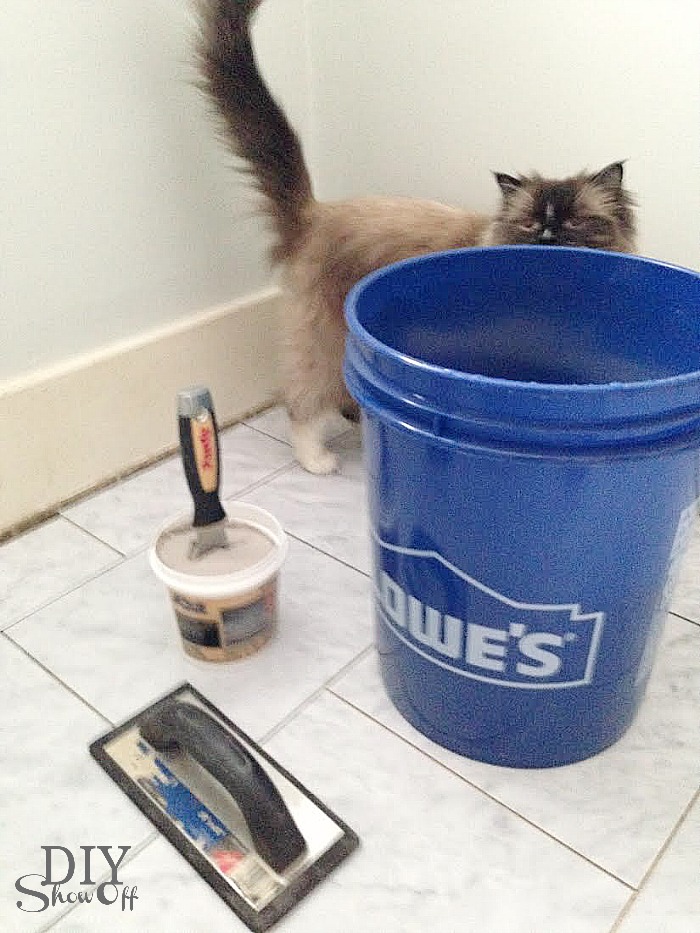
- float
- putty knife
What I did:
The old vanity and toilet were removed. For us it’s because we were replacing those anyway. I recommend at least removing the toilet to get underneath. We also removed the shoe moulding/quarter round trim from around the room. I then removed the old vinyl flooring. I did cheat a little on this part. I hired my nephew to help me scrape off the old vinyl floor paper backing that was glued to the subfloor. That was the most labor intensive part. (Note: I removed the old vinyl flooring because it was peeling up around the perimeter of the room. If it had been secure, level and in good shape, I would have placed my vinyl tiles over it.)
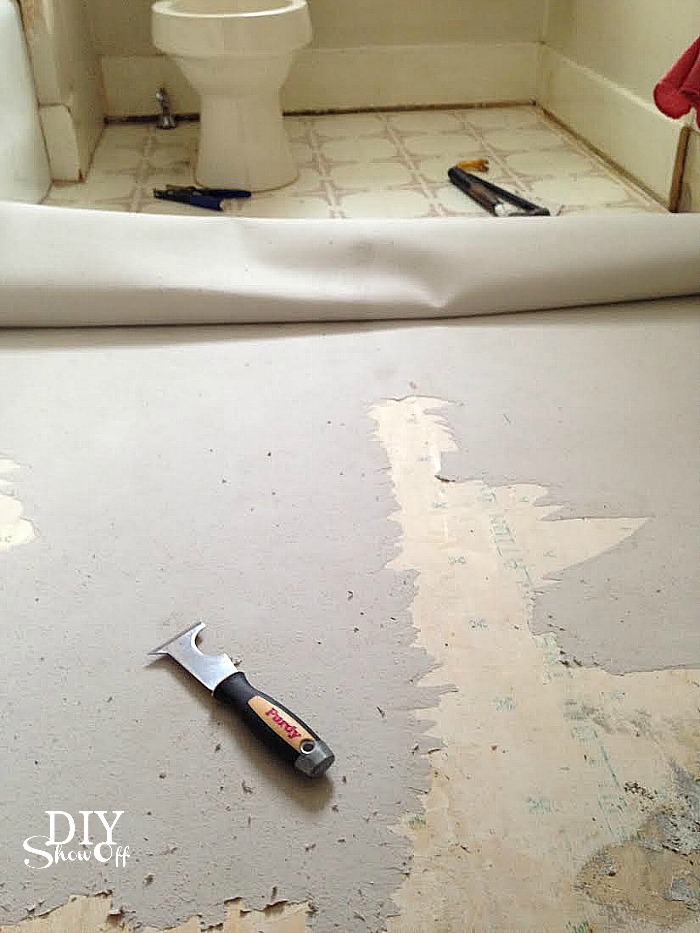
Start with a smooth, clean, level, dry surface. Since this space was prepped for vinyl previously, the subfloor seams were sealed and it was level. Once all of the glued paper was removed and the floor cleaned, I simply started placing my vinyl tiles. I started with laying the full (un-cut tiles), using a staggered pattern. Since such a small amount of the tile is actually visible in this small space after placement of the vanity and toilet, I started with the first full tile placement at the doorway and worked my way back into the room. I made sure to pay attention to “marble veining” so that the pattern all ran the same direction.
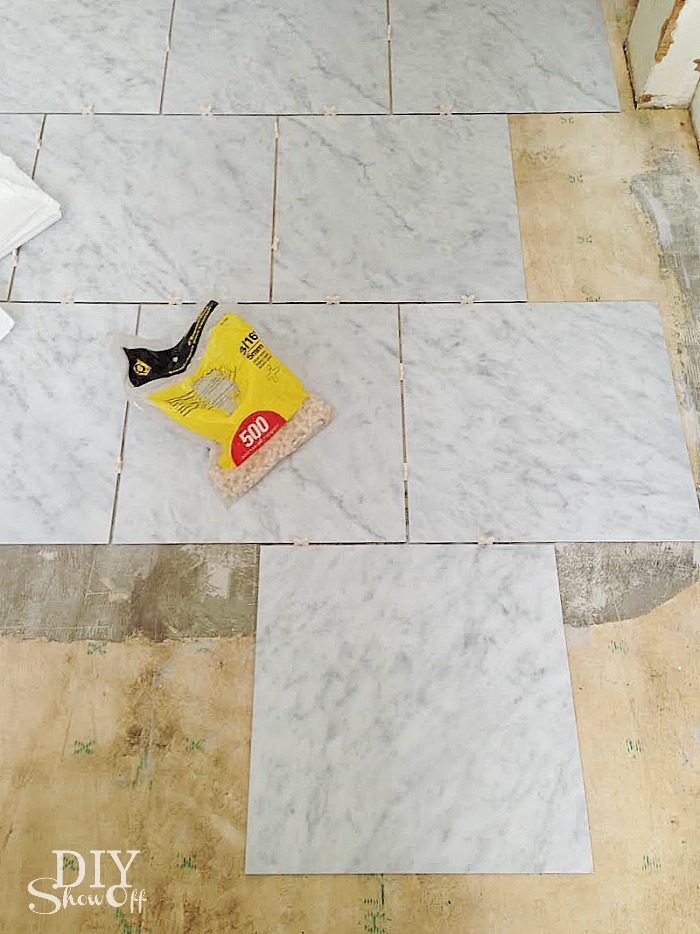
Simply peel away the paper backing (these things were super tacky!) and place the tile onto the subfloor. I used 3/16 inch spacers between the tiles. I marked my tiles 6 inches in on the edge of each tile with a pencil to assist in laying a straight design.
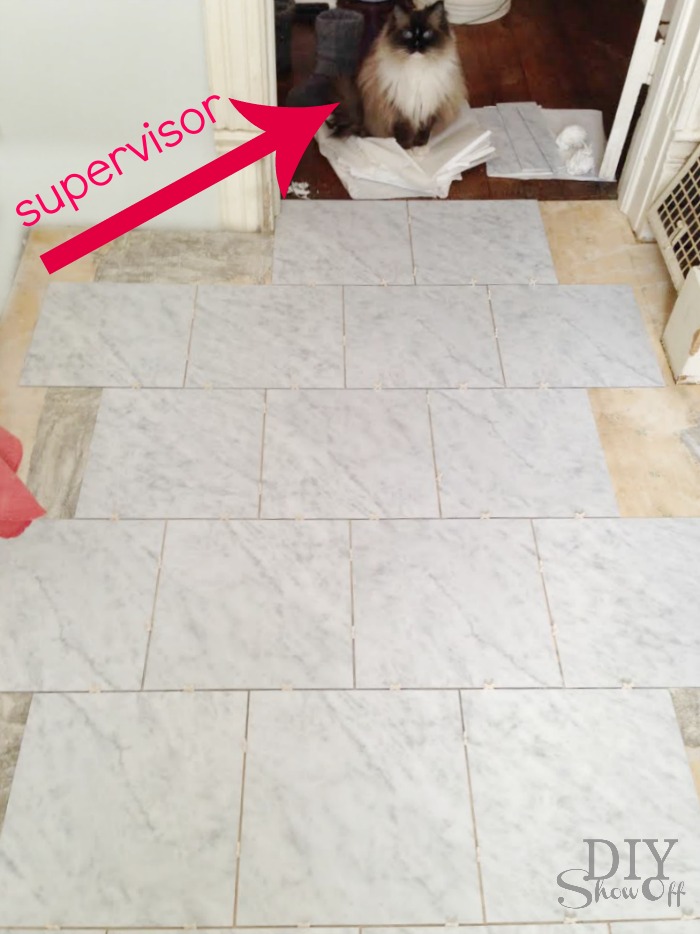
Having a supervisor on hand keeps you focused as well as replacing the spacers repeatedly.
Once all of the full un-cut vinyl tiles were in place, I moved onto what I thought was going to be the difficult part. Cutting the tile was way WAY easier than I anticipated. I simply used a utility knife blade to ‘score’ the cut line then snapped the tile. That simple. I didn’t have to apply a lot of pressure or go over it repeatedly with the utility knife.
There were a couple of tricky cuts around the door frame, heat register and toilet so having a little more tile than needed came in handy.

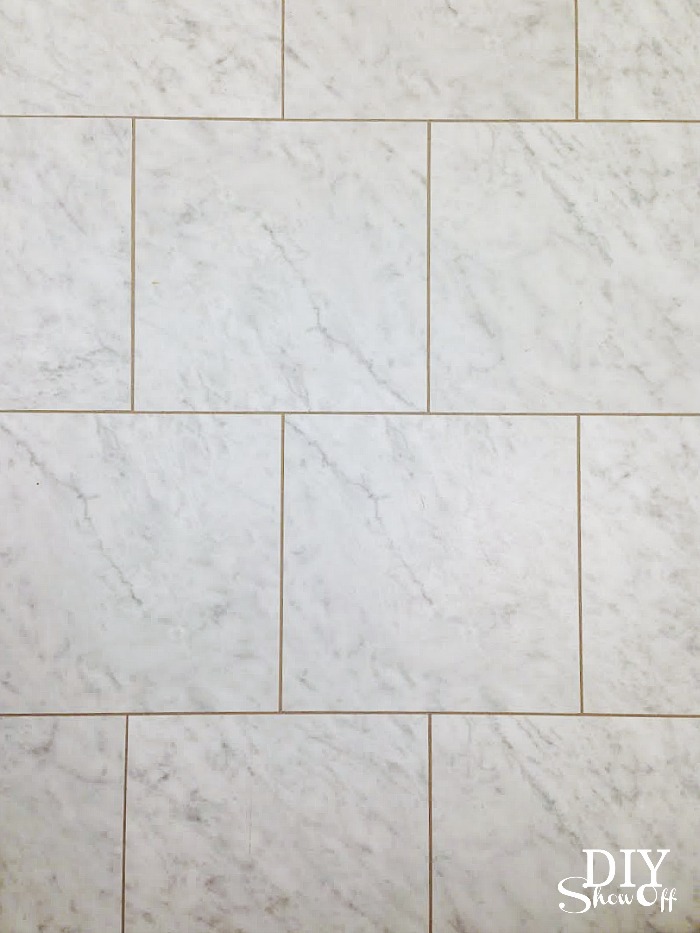
Finish. Stand up and admire your tile. No cuts with a wet saw but you’ll be so proud of how good it’s looking!
Looking good! Ready for vinyl tile grout!
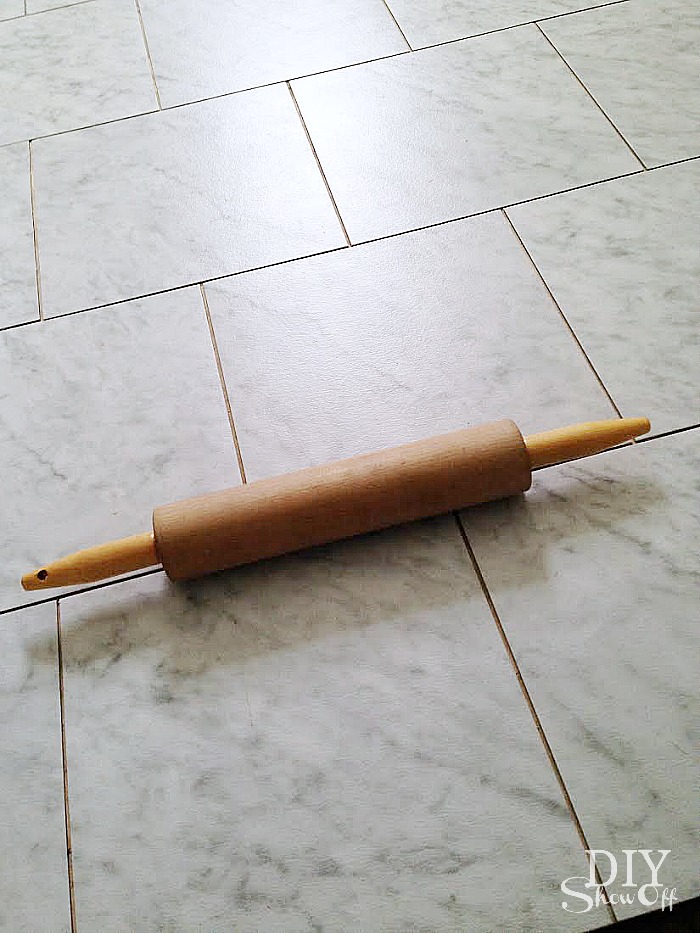
I removed the spacers and rolled over the vinyl tiles with a rolling pin to make sure each tile was secure and in place. Then?! The best part – no waiting for mortar to set…move straight to grouting!
Have a bucket with water on hand (replace dirty water frequently with clean water) and work in small sections from the back wall working backwards towards the door. I worked in 2ft. sections because the grout dried fast. I used a putty knife to apply the grout to the float. Then used the float to “smoosh” the grout into the joints between the tiles. Sometimes I found just using the putty knife or my finger worked in some areas. I wiped away the excess grout with a wet sponge (squeeze out all of the water) then followed cleaning up the water/grout with a wrung-out wet rag where needed before moving onto the next section. I cleaned away all of the extra grout and wiped up water as I went along.
Let dry 24 hours before light use. I also went over the floor with a wet rag after 24 hours. We replaced the toilet and vanity and re-attached the baseboard/trim after about 48 hours.
That’s it! I am thrilled with the result!
I’ve had questions about how this has held up. In the one month that it’s been done, it’s holding up just as well as it looked the first day but I can’t say about long term yet. There is plenty of leftover grout. I made sure my container has a good seal and will keep it on hand just in case repairs are needed. This bathroom is being used daily and so far so good! I’ll check back in with a review in a few months to let you know if anything has changed.
See the complete before and after bathroom makeover here.
Disclaimer: This post describes my first time experience, what I did and what worked for me. Results may vary.
The floor looks fantastic! I never would have guessed it was vinyl. And your supervisor is the best!
Angela @ Number Fifty-Three
I had NO IDEA that such a thing as vinyl grouted tiles exist. They look AMAZING! Thanks so much for the tutorial. These may be a great temporary solution for our girls’ bathroom!
This is genius. I love this idea and the marble style is gorgeous. Hugs, Marty
I was so glad to see this today! I just bought these for my laundry room makeover, but I haven’t installed them yet. I know “the real thing” is the best way to go, but I think this is a great DIY (i.e. quick and easy) alternative for me. Now I’m excited to get it done.
So awesome to see this tut! I’ve only heard once about grouting the vinyl. I’m seriously considering this now! Thanks!
Our daughter did this in two bathrooms in her townhouse she just sold. The floors looked so good, she had to point out to the realtor that they were not ceramic tile. It was an easy process and can be knocked out in a weekend. Thanks for the great tutorial.
Have a great weekend!
Gosh! That floor is fantastic! You did a great job. The supervisor is such a slave driver how could you not. 😉 That kitty has beautiful eyes.
One little tip. Open up your leftover grout and place plastic wrap down on top of the left over grout. I will keep the air between the grout and lid from getting to the grout. Keeps it fresh much longer much like you would do if making pudding or a custard.
Jake’s a Girl
haha! Thank you! Actually – we did place a plastic grocery bag just like you described! 🙂
It looks so good! Our Lowe’s only had the dark tiles on display. I’ve been pondering (for a year) the whole vinyl floor thing in our kitchen too! It would end up being laundry and bathroom also since they’re all connected. Our project would also be temporary. I have since decided I’m going to try paint & stencils with poly-acrylic for a topcoat. Now you have me second guessing! Great job!
Thanks, Erica! I really do love it! I’ve painted floors too in the same way you described (a bathroom and bedroom a few years ago – you can seen them in our home tour) with great results (although more time consuming). Both are great temporary options! 😉 Good luck!
Looks fabulous. I have real marble or marble tiles (100ys old) in almost all my bathrooms and kitchen, and while easy to clean, it’s very COLD and hard underfoot. My one bathroom with pink vinyl over broken tile has not been changed due to this fact, but maybe I’ll go with your solution since it looks so good.
Vinyl tile gets such a bad wrap and I don’t know why? It’s so hardy and it really is diy friendly. Budget friendly as well! This looks so good, and I thought it was real marble tile when I first saw the bathroom reveal! I think it’s a great solution to spending lots and it really could not look better. Great job girl! Good thing you ahd a supervisor on the job site, I’m sure it made all the difference 😉
We did these same tiles a few months ago in our tiny master bath, we LOVE them, from eye level you can hardly tell, love the offset pattern you did!
Love your bathroom, it is just stunning!!!
XO
Looks amazing!
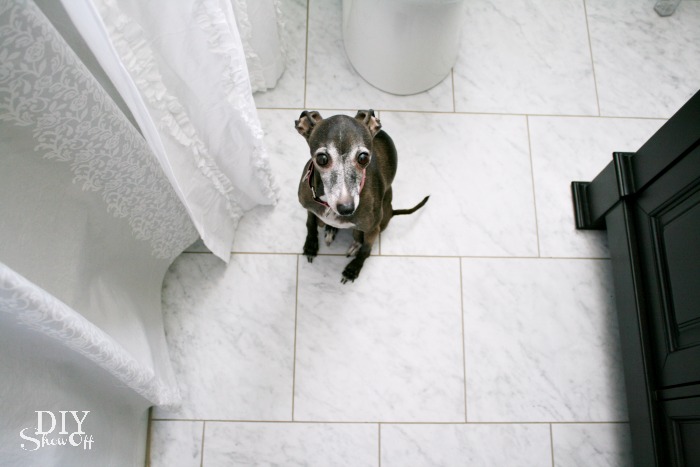
You have an Iggy!!! I have an Italian Greyhound too; they’re such sweet dogs. Thanks for sharing such a great tutorial and including a pic of your Iggy! 🙂
Awe, Jules! I love iggies too! We rescued Rosie about a year ago and have been smitten ever since. 🙂 She often sneaks her way into pictures since she’s always following me around (except when she’s snuggled and napping under her blankets)!
Thank you for your wonderful instructions. Ironically, I just bought the EXACT vinyl tile to do my half bath with, so it was incredibly helpful to see exactly what the finished product will look like. I had never even thought about making sure the marble pattern all ran the same way. We are starting the project tomorrow, Thanks again!!
For future reference for others who want to try this – there is a product called primer for this type of tile. It’s about $12, found on the same isle as tile, and enough to cover 150+ Sq ft. It’s a milky liquid that you roll or paint onto the subfloor (Osb, plywood, concrete, or previous flooring). It goes on clear liquid, then gets white and sticky. Let it dry for 1-3 hours then put your self-adhesive vinyl tile down for a better hold. It was like night and day in the way it stuck. I suggest doing it from the start, as it sucks to do the work and realize it’s needed. It’s worth the small price and short time/ effort, to be sure your money and time isn’t wasted with peeling tile. It’s a great product to make aanother product even better. We went with black/grey wood plank vinyl tile and it looks fantastic.
Do you need to seal the grout?
Hi Donna. I did not but you may want to confirm with the manufacturer. Best of luck!
That is such a pretty bathroom now! You are giving me inspiration to do my own! Thank you for the great tutorial!