


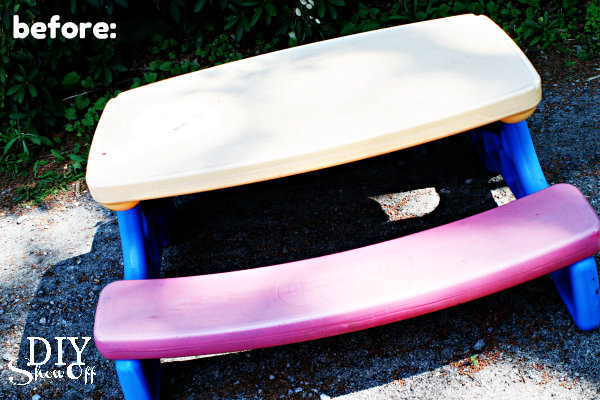
As you know, we entertain a lot in the summer, hosting quite a few family picnics. Guests include my 3-year-old nephew and 2 and 4-year-old nieces. It was decided that I needed a kid’s table and mom scored a Little Tykes picnic table at a yard sale for me for $15. Hurray for yard sale season (and moms)!

But when you don’t have a yard full of fun brightly colored kids’ toys; the red, blue and yellow looks out of place, not to mention it was faded and a little worse-for-wear.
I decided a little makeover was in order.
Materials:
- Spray primer (2 cans)
- Spray paint (2 cans for all over) I used Rustoleum Oil Rubbed Bronze.
- Another can for decorative purposes (optional)
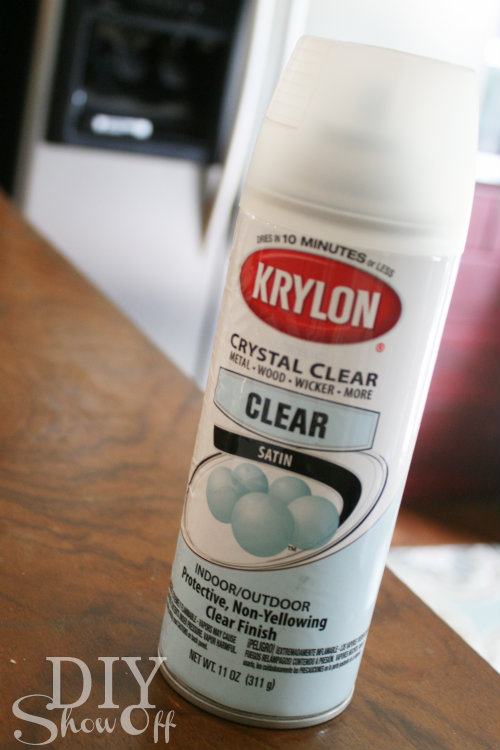
- Spray clear coat
- FrogTape
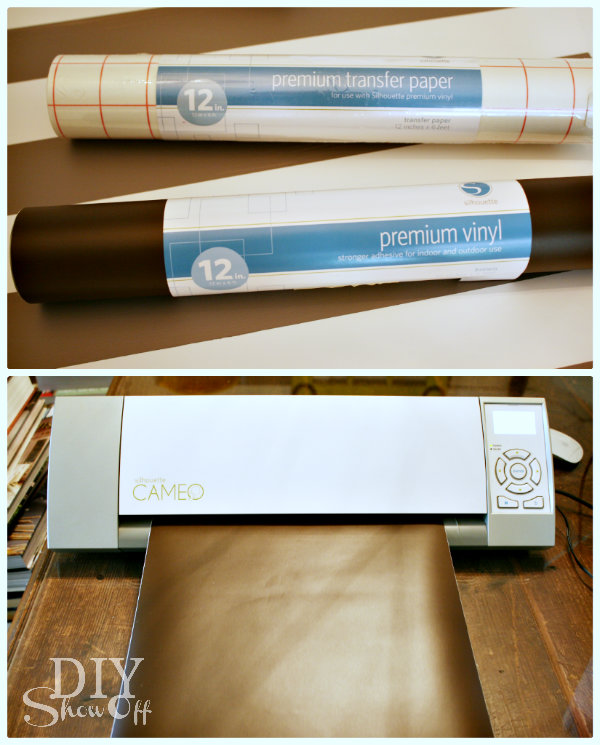
- Vinyl decals (I made my own using supplies from Happy Crafters)
Tutorial:
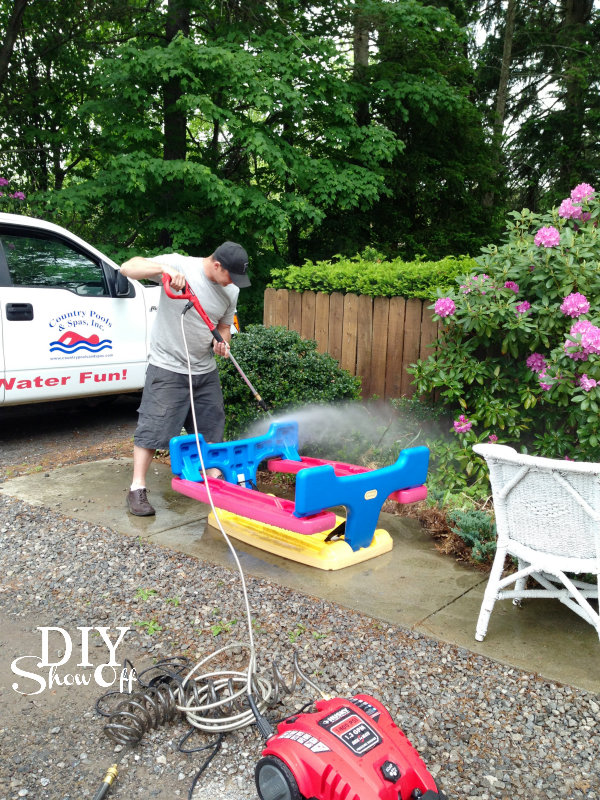
First, I lightly sanded the picnic table with a fine grit sandpaper and gave it a good spraying with the pressure washer. (Thanks, Steve!)
This also comes apart some how, but I couldn’t figure it out so I didn’t bother. Apply a coat of primer:
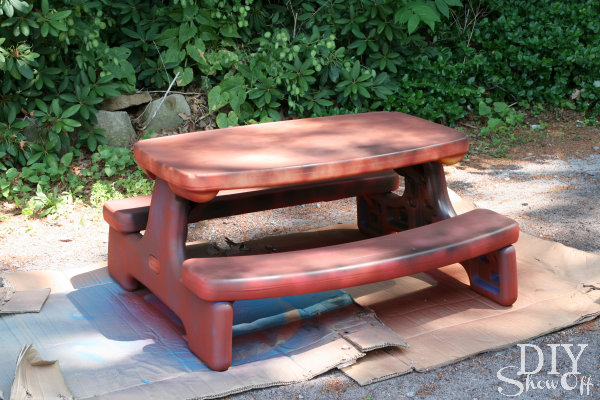
Then spray paint:
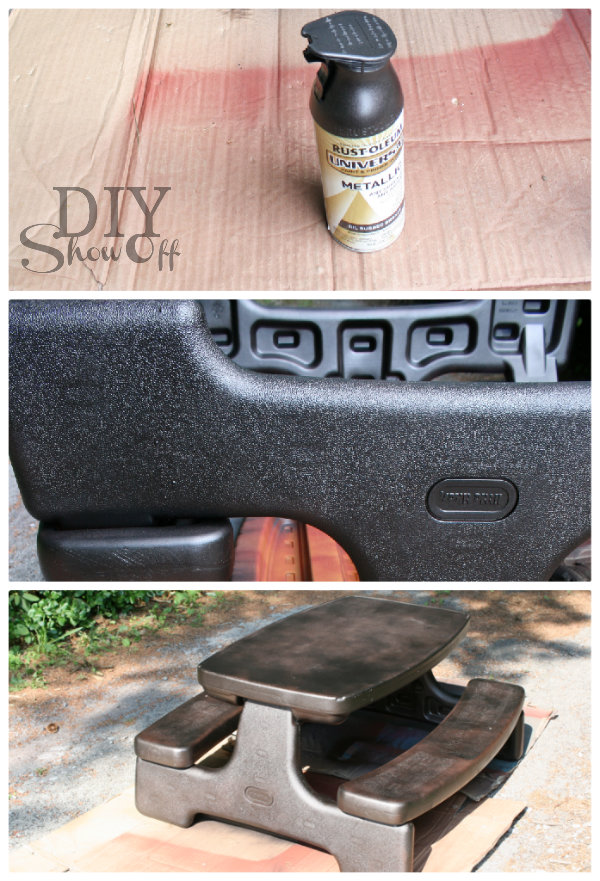
I let it dry and ‘cure’ for a few days.
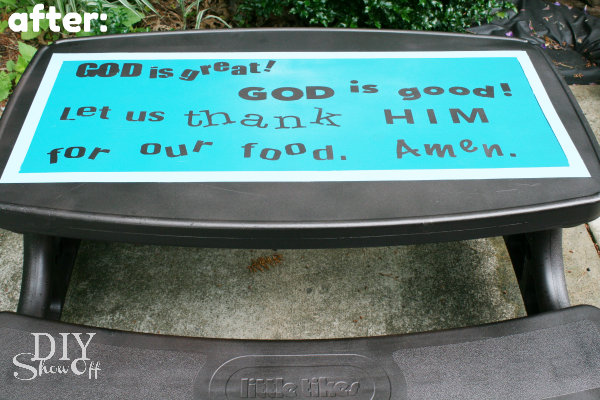
Using my FrogTape, I created a rectangle (table runner) outline on the table part of the picnic table and taped off the rest of the table top.
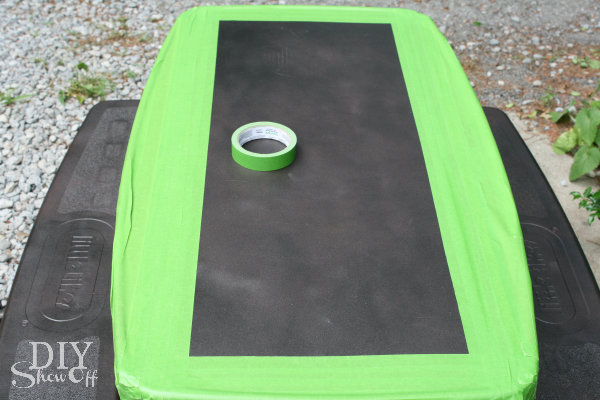
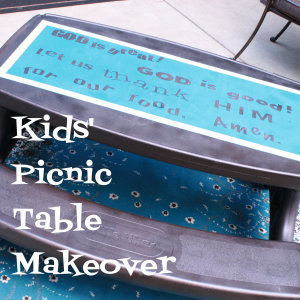
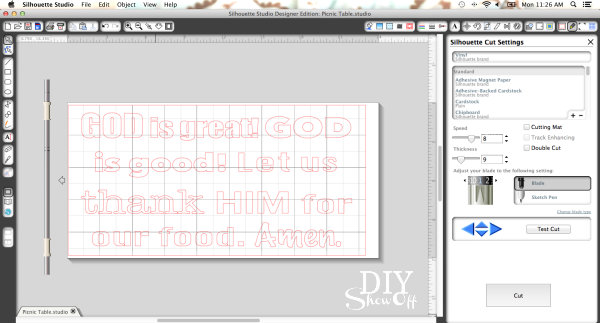
Using my Silhouette Cameo and Silhouette Design Studio software, I created and cut out the letters for a dinner time prayer.
I applied the sticker type vinyl letters to the center of my rectangle and made sure FrogTape and vinyl letters were pressed down securely.
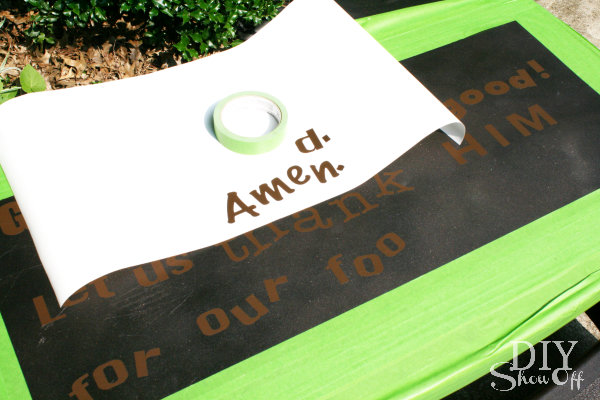
Then gave it a coat of spray paint in Rustoleum’s Lagoon. (I used a large piece of cardboard to shield the benches.)
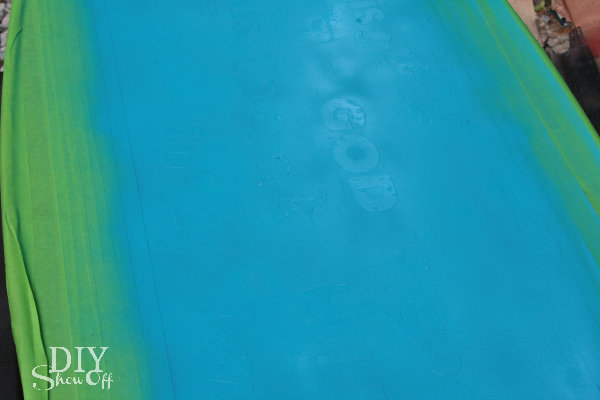
I peeled away the FrogTape and decals while the paint was still wet. I still have blue fingernails to prove it.
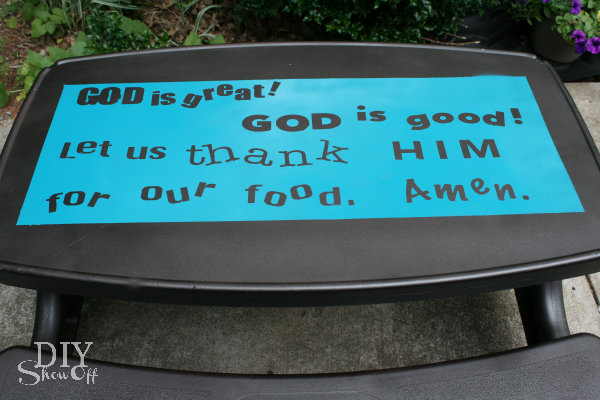
I let that dry for a few days (in my vehicle mostly since it’s been raining off and on so much)…which is why I had no choice but to be patient as well! Then I used my FrogTape again to create a border around my “place mat” and filled it in with DecoArt’s Patio Paint. Then peeled away my FrogTape and again…let it dry for a few days.
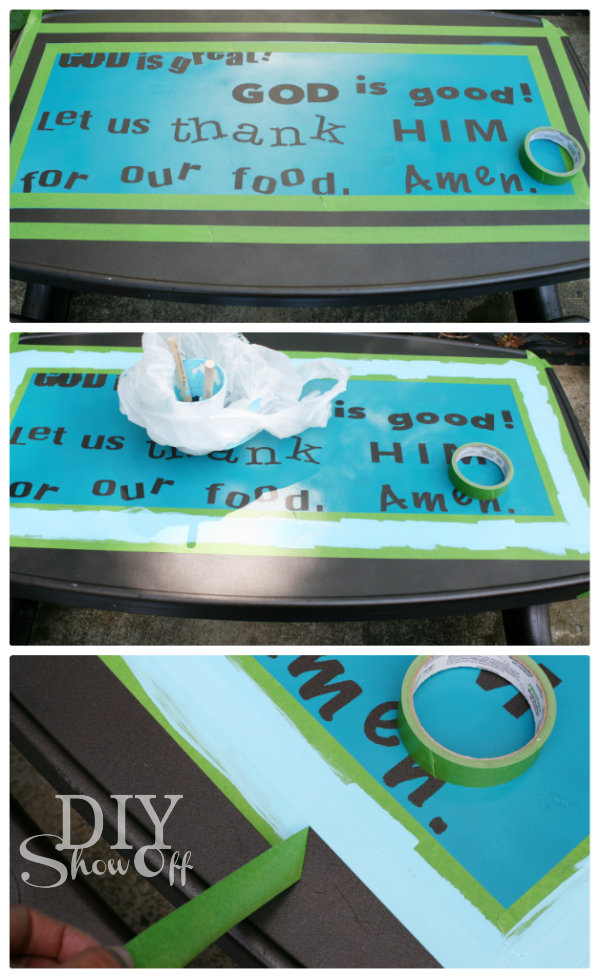
I had to touch up the paint here and there. Then sealed it with a spray clear coat (satin finish) and let that dry.
Much better! And a sweet little reminder for the little ones to pray before digging in.
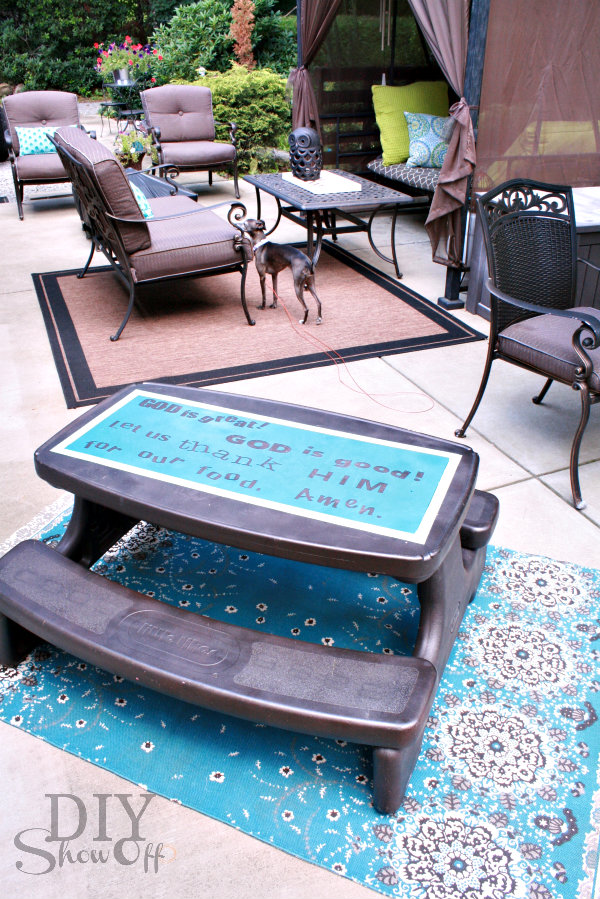
We tested it out over the fourth of July. Now it fits in with our patio…
*This sponsored by FrogTape. FrogTape provided by Shurtech. The opinions are completely my own based on my own experience.
*Vinyl provided by Happy Crafters.

Timing is everything…. I told my husband over the weekend to get our kids picnic table out that I wanted to paint it. He made a face at me! Now I can show him exactly what I was talking about. So tell me…. how many can’s of each shall I pick up?
Bliss
Great, Bliss! I used two cans of primer, two cans of top coat and two cans of clear coat.
Hmmm…. I kid you not that my next door neighbor put one of these tables on the curb about an hour ago. Now the wheels are turning inside my head- not for my own girls bc theyre too big now but for my kindergarten classroom. I never thought about painting it!
So cute Roeshel! I definitely have some plastic kids outdoor stuff that could use a little love like this!! Great job:)
How did this paint hold up to the weather and general use? Did it scratch or peel?
It’s been at least a month and overall, it’s holding up so well! There is a bit on the curved part of the bench where it’s rubbed off a tiny bit. I’m thinking it’s because of the job I did at sanding the curved areas. Make sure to get those curves around the benches and tabletop evenly…if not just a tad bit more than the flat surfaces. Hope that helps!
VERY NICE-VERY CLEVER
How ist this holding up? I did a Little Tikes playhouse a few years back and it did not hold up well? I didn’t use your exact same method though.
Thanks! ?
It’s a few years later now, Sasha, and because I left it sit out (covered patio) all winter, it is starting to flake. :/