


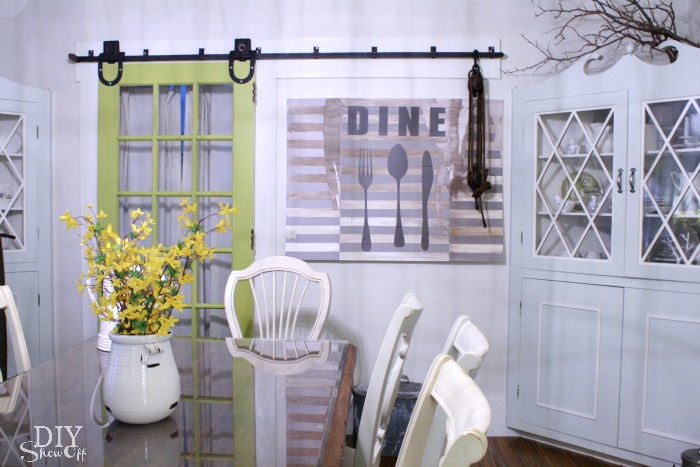
We have a sliding door in our dining room…
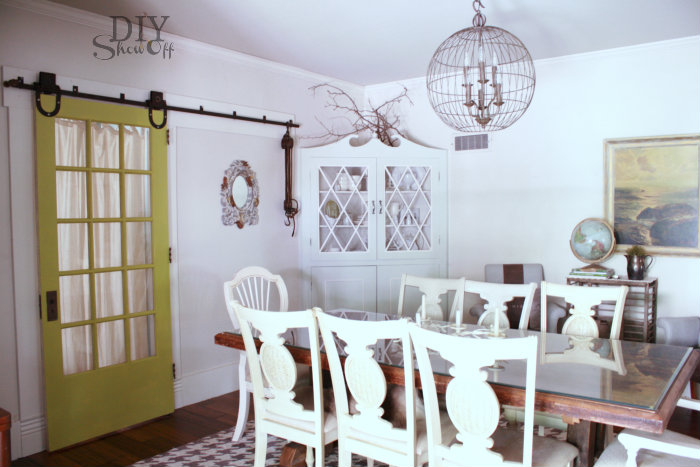
It slides to the right to open. Which means, I can’t hang most things like framed art or a clock or mirror in that space if I want to slide the door open. Shown above…I can’t push that door any further than the mirror, otherwise, the door will knock it right off of the wall.
Earlier this week I shared a DIY foamboard project that I used as a fun gallery wall template/background…
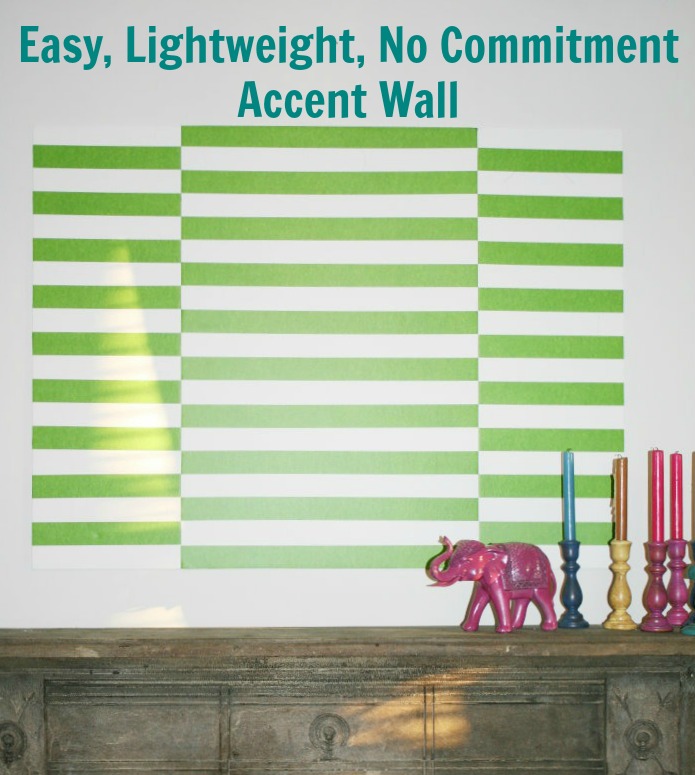
Which made me think…foam board is lightweight AND thin and would work great in our dining room. Perfect wall art material fitting behind a sliding door.
This is how I also know that painting foam board isn’t such a great idea. It warps and bows but I’m still loving my project.
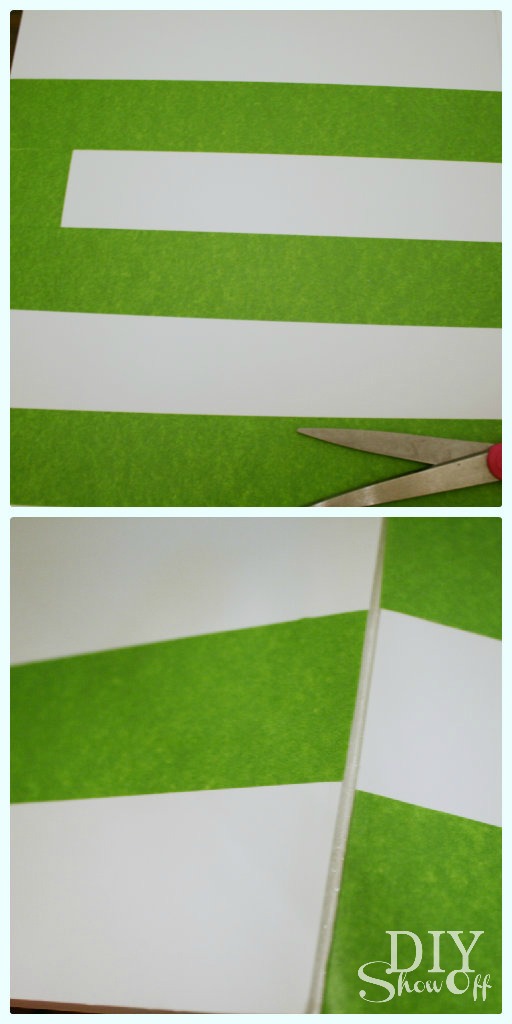
Using FrogTape, I taped off alternating stripes, making sure to press down the edges securely to activate the PaintBlock Technology (to keep the paint from seeping under the tape).
Then painted my stripes. (I think using a Sharpie or decorative tape would be a better option.)
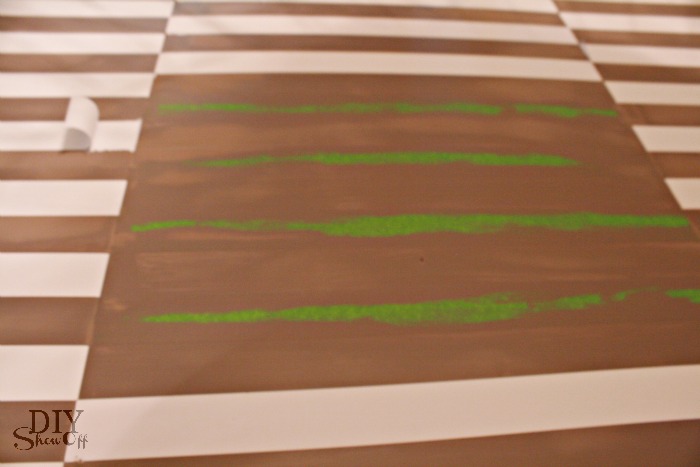
I then removed my FrogTape. It did remove the paper backing in places which is what gives my finished project an aged, distressed look. Even though it didn’t go according to plan, I didn’t give up.
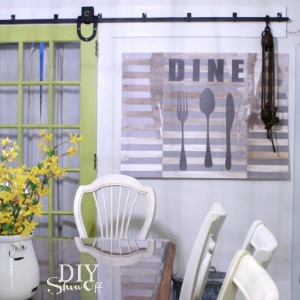
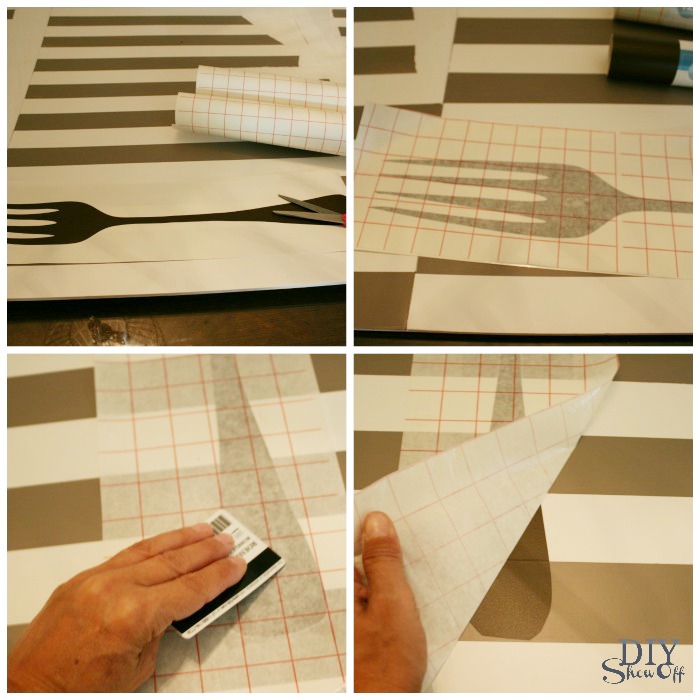
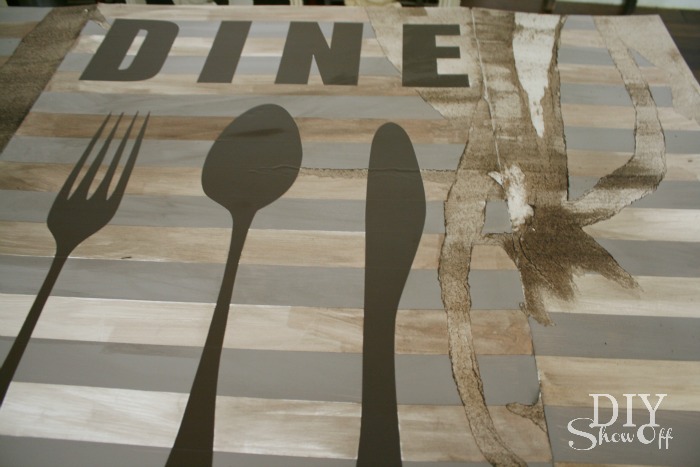
Using my Silhouette Cameo, I created vinyl decals (flatware silhouettes and the letters “D I N E”). Vinyl and transfer paper provided by Happy Crafters.
Then I used a glaze to ‘stain’ the bright white stripes and the areas where the paper pulled off with the FrogTape.
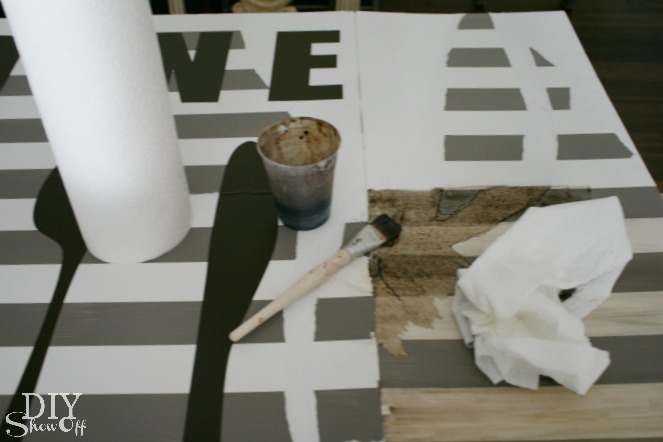
So where the paper pulled away gives it a distressed look:
My foamboard is bowed so I did try adding weight for a while with books. Fail. It didn’t help. But I hung it up anyway using command strips. Even with the warping, it’s still a great fit behind the sliding door…
With the sliding door open…
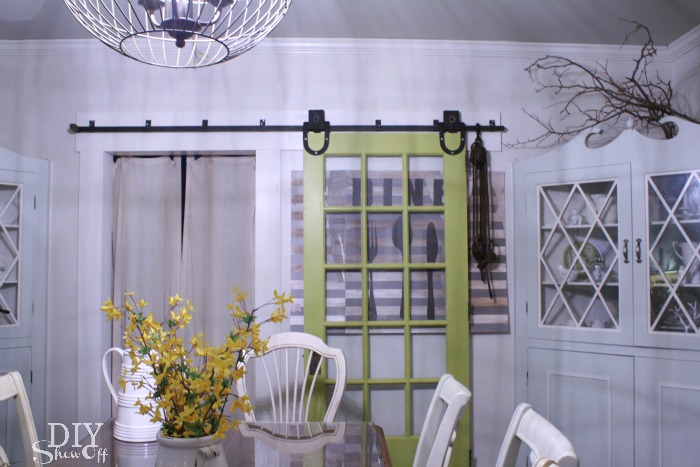
Not bad, right? Lesson learned: don’t paint foam board but I do love that it’s lightweight and thin so I’ll definitely be creating another DIY foam board project for this space. Perfect behind my sliding door.
*This post is brought to you by FrogTape. FrogTape provided by Shurtech. The opinions are completely my own based on my own experience. For more FrogTape projects ideas, check out the FrogTape Blog Squad.
![]()
*This is a sponsored post. Vinyl and transfer paper provided by Happy Crafters.

Love it! That is so creative it’s genius for that space 🙂 Super love the sliding door too!
This is super cute! I like how it turned out, a happy accident?
Loved your project! It’s fun and I like that you can change it out. I don’t do that enough in my house. But your sliding door made me think of something I just did…have you ever heard of removable photo wallpaper? I just had a photo collage made of our beach pictures for our mudroom wall – we come in and out of the pool area there so I thought it would be perfect there and it is! I love that you can reposition it and move it as well. And it lays flat!
I love it! Very cool and it is perfect for the spot!
Love this idea and your sliding door.
I like it the way it is. You know that duct tape comes in all sorts of prints now too….. (sorry Frog Tape). I have Frog Tape right now and will be using it a LOT sometime soon… but hey, competition ya know? Also, instead of painting the bright white, why not a cheap, old fashioned, regular masking tape and NOT remove it?
And finally, I wonder if maybe Frog Tape might come out with more colors like a softer blue than the other brand? I for one would like to craft with a soft blue for still working on bedroom makeover.
I love the way the door window frames the design. I wonder if acoustic ceiling tiles would be too thick? I covered a bunch of the square ones with fabric and hung them (rotated to diamond shape) across our church’s fellowship hall to help with the echo & noise. They looked great, and the kids could use them for pin boards.
I love your “thin” art… I must say I wondered why “thin” when I read the title, but it’s a brilliant idea.
Love the idea of foam board. I made a chevron duct tape canvas art recently. White canvas and black duct tape. The colored tape idea would be great on foam board. I’m also thinking it would work great for a chalkboard print I recently had printed and don’t know how to hang it. I could glue it to the foamboard. Thanks for getting my ideas spinning!
Thanks, Milita! Just be careful – I think the glue may cause the foam board to warp/bow. Just use sparingly! Good luck. I think colored tape is a great idea too. There are so many options!