Bathroom Makeover Before and After (From Dated to Fresh & Inviting)

Featured

There’s nothing “wrong” with a dated bathroom…until you start to notice how much it affects the way a space feels.

Save this for later:

Bathroom makeover before and after showing a dated bathroom transformed into a fresh, inviting space

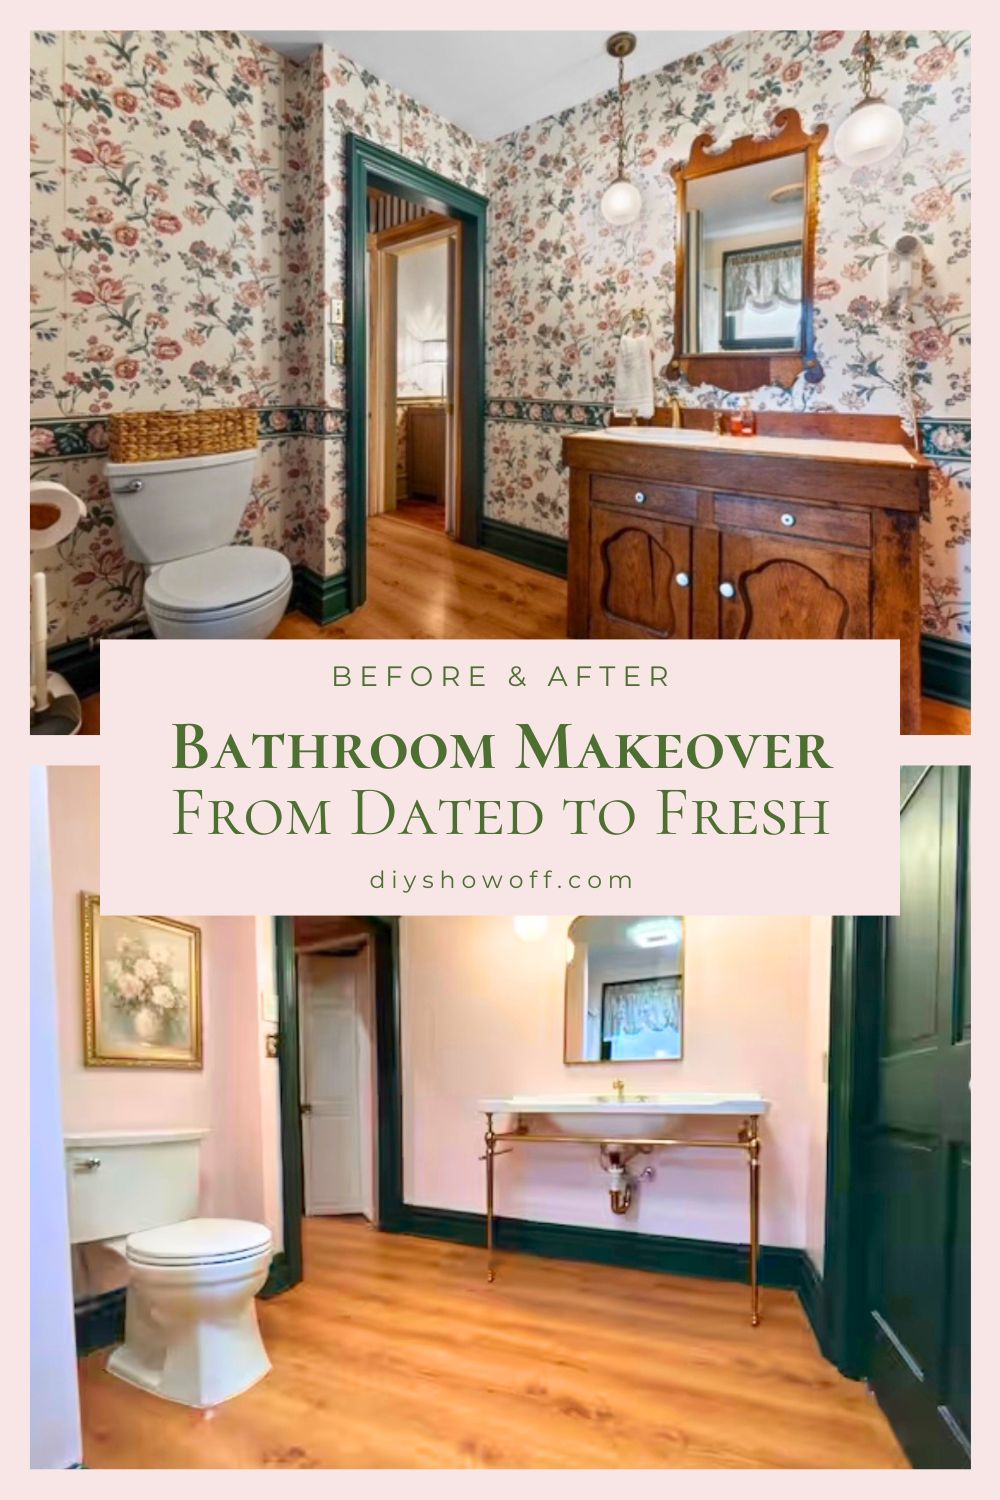
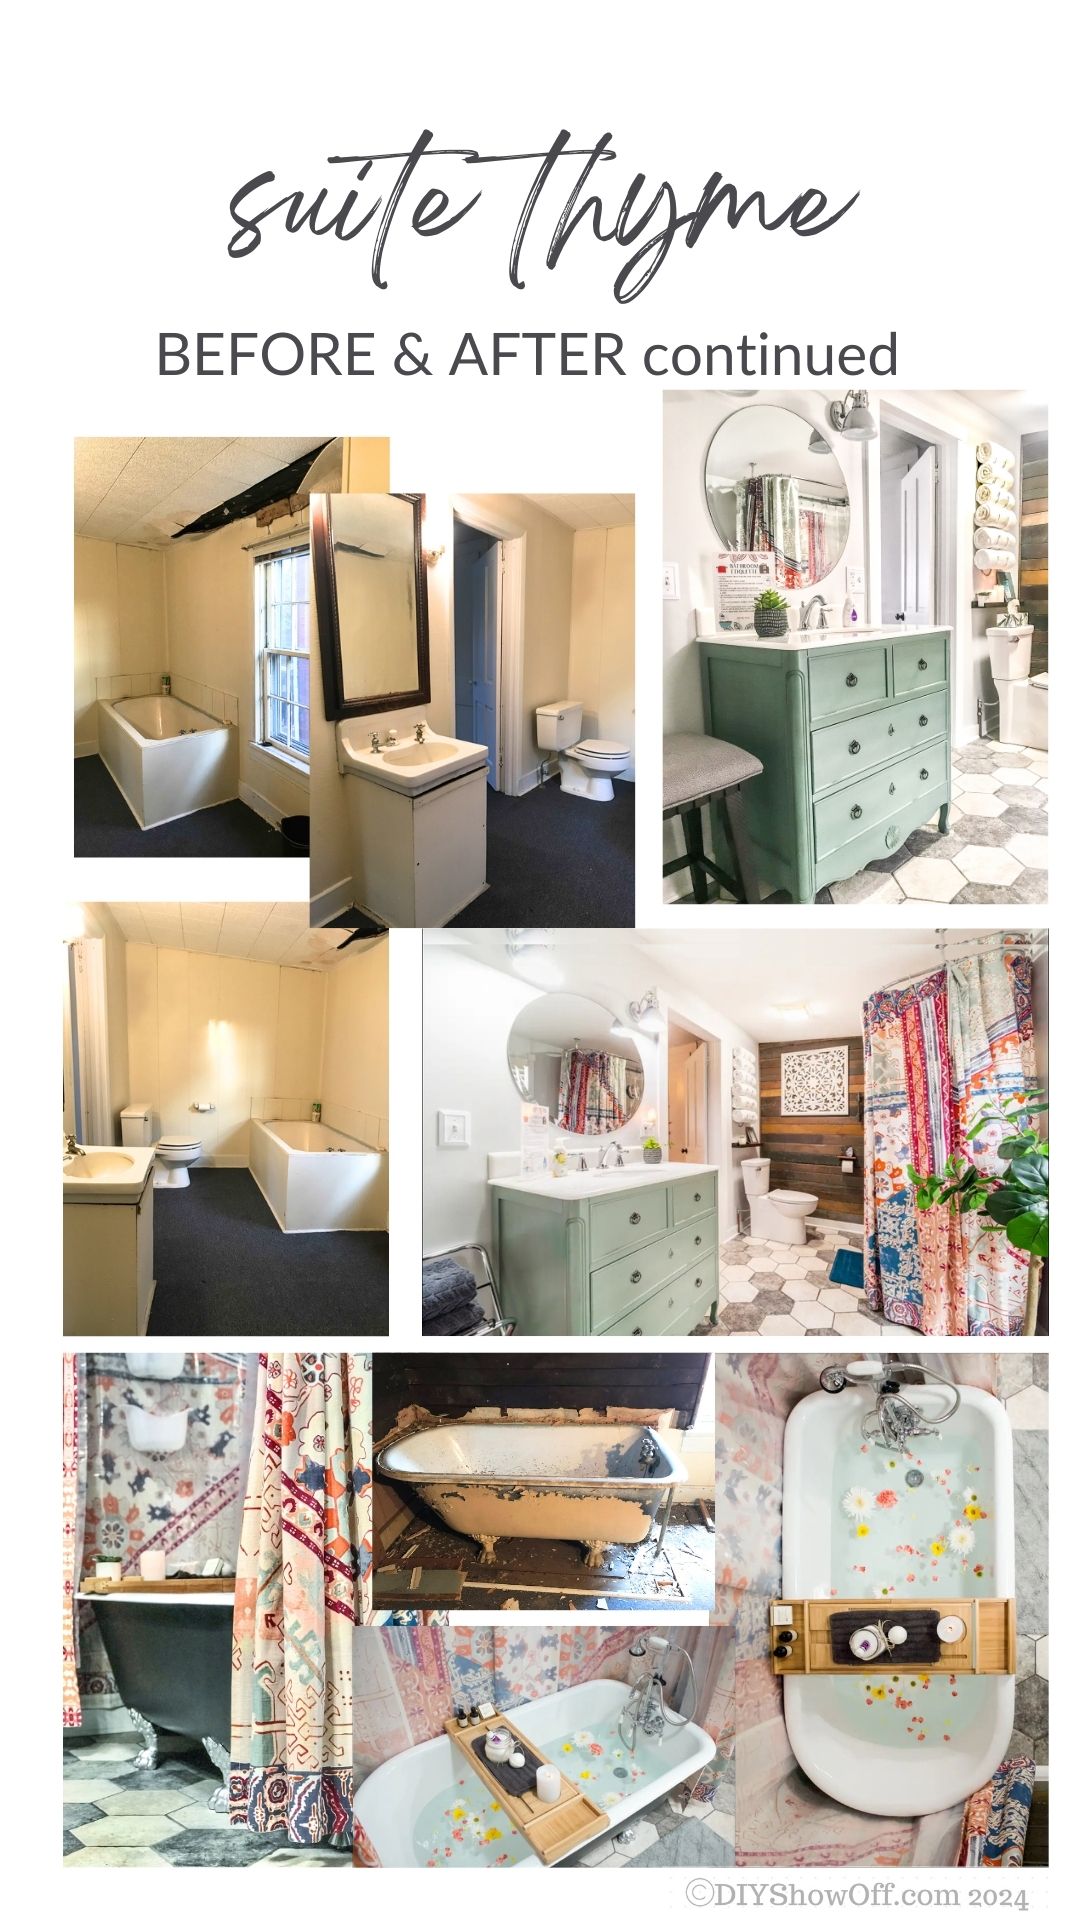
This one had good bones, but it felt tired. The finishes were outdated, the wallpaper peeling, the lighting was flat, and it didn’t reflect the kind of warm, welcoming environment I’m always trying to create, whether for everyday living or for guests.

Instead of a full renovation, we focused on simple, intentional updates that would make the biggest impact.

This bathroom is part of a project I worked on for Suite Retreat BnB & Micro Event Venue, where the goal was to refresh the space while keeping it warm and inviting for guests.
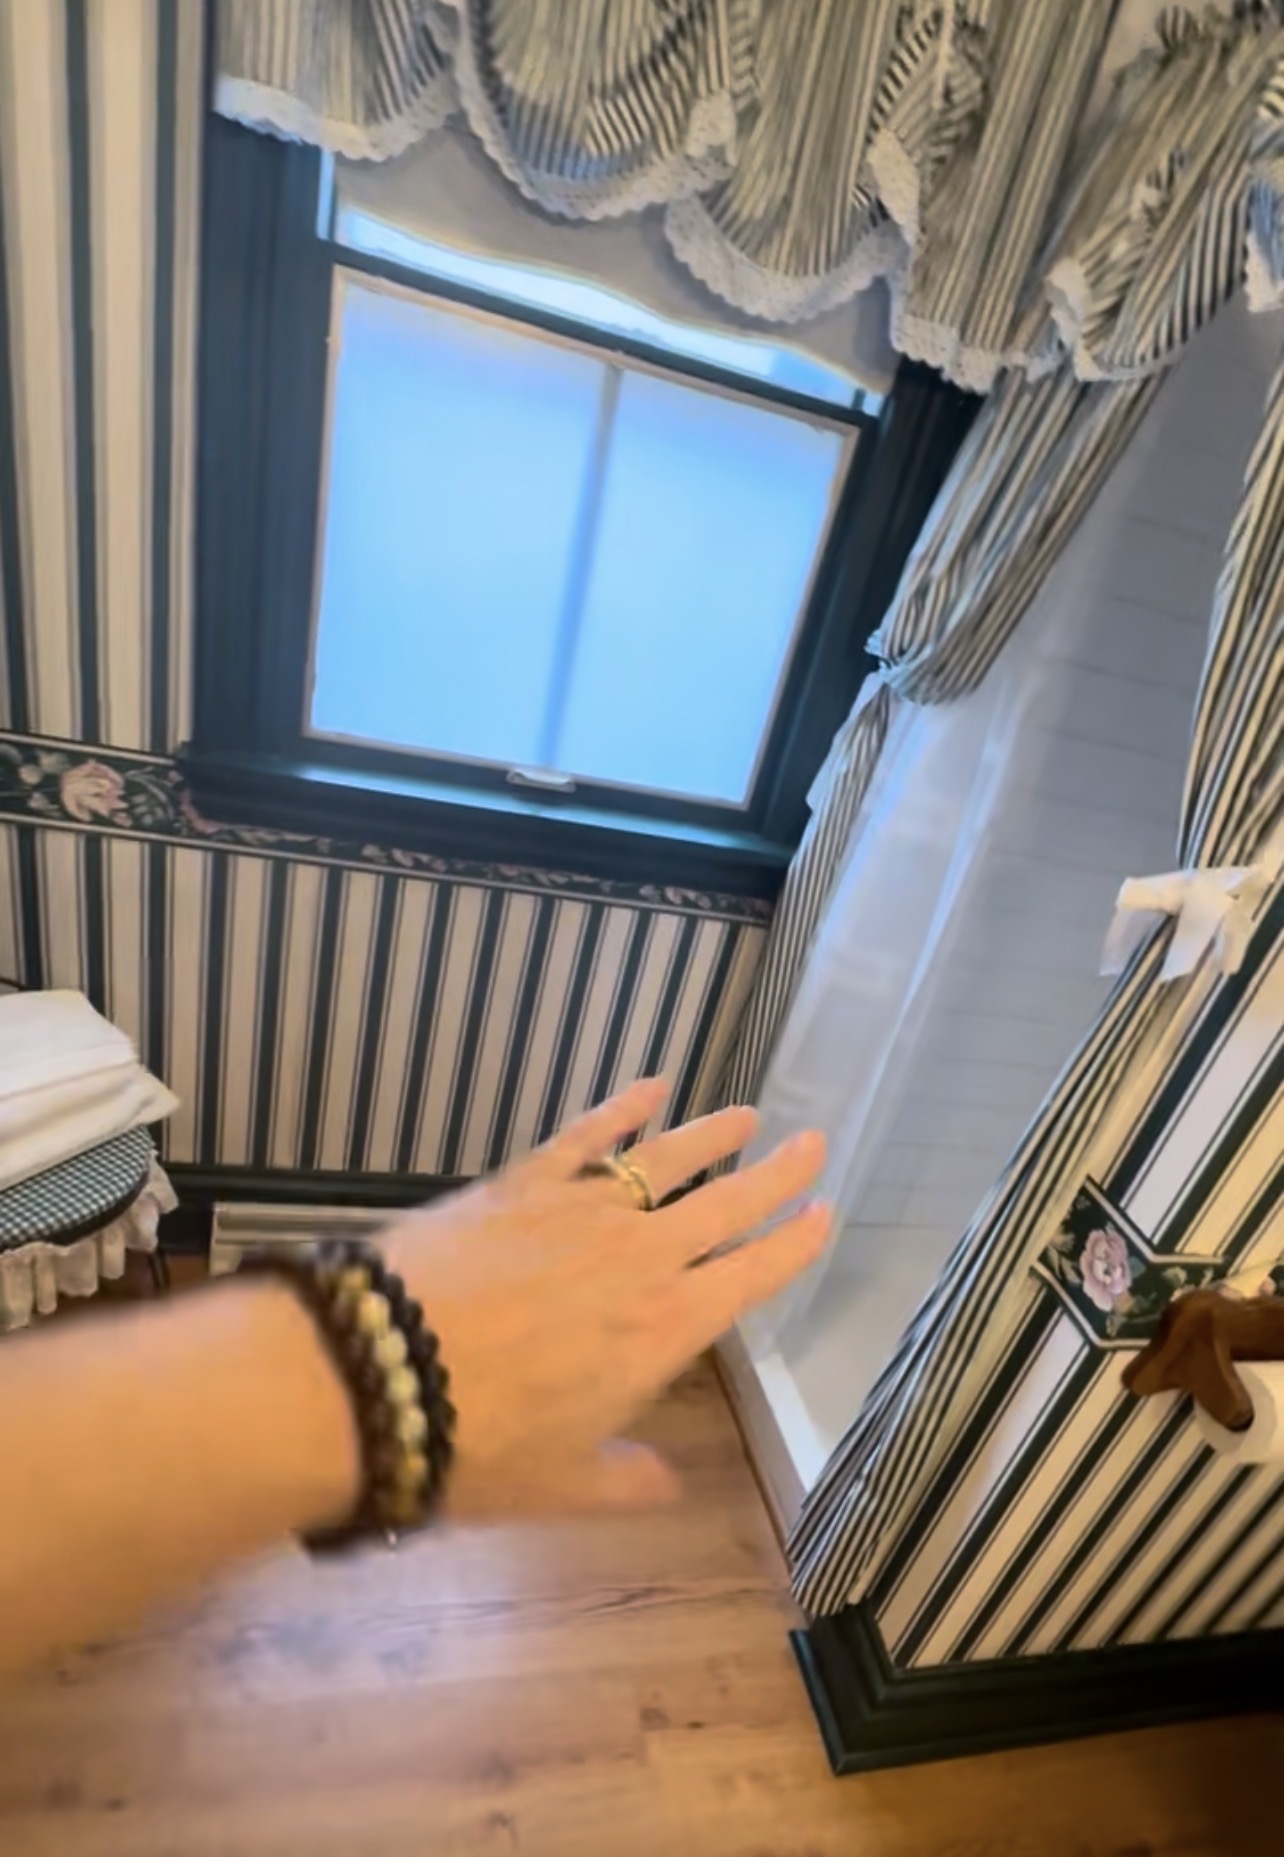
Before

The layout worked. The function was there. But visually, it felt disconnected and a little forgotten.

outdated bathroom with peeling wallpaper and worn fixtures
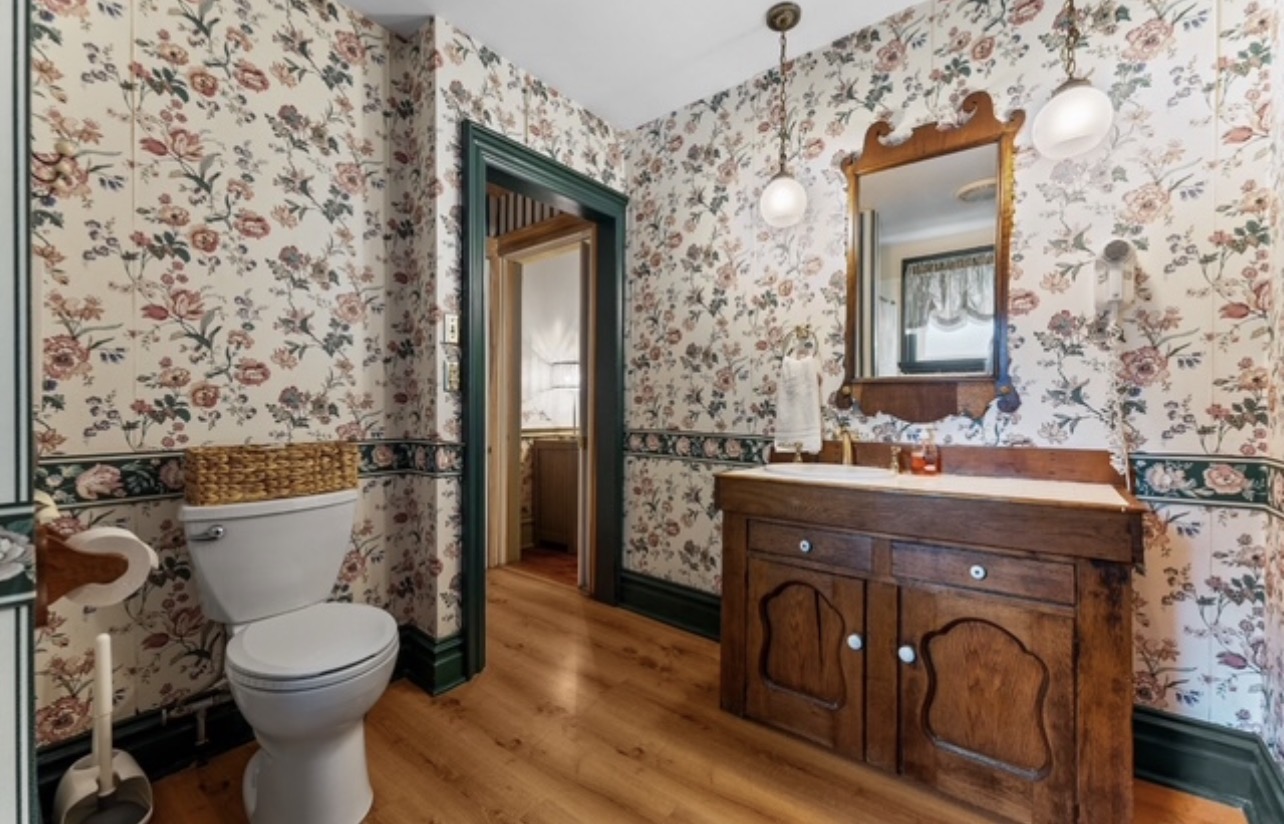
  • older finishes that didn’t feel cohesive
  • lighting that wasn’t being utilized as a complimentary feather
  • no real sense of style or personality

It wasn’t terrible. It just wasn’t inviting.

striped wallpapered bathroom with window

The Plan

The goal wasn’t to over-design the space.

timeless blush bathroom makeover design
Wall paint: Sherwin Williams White Dogwood

It was to:

  • warm it up
  • simplify the look
  • create a clean, cohesive feel
  • add subtle touches that make it feel finished

The kind of space that feels timeless… not overdone.

This post may contain affiliate links. I only share sources for items I’ve used or genuinely love.

What Changed

1. Updated Finishes

Small changes here made a big difference.

Swapping out dated elements for cleaner, more timeless finishes instantly modernized the space without a full overhaul.
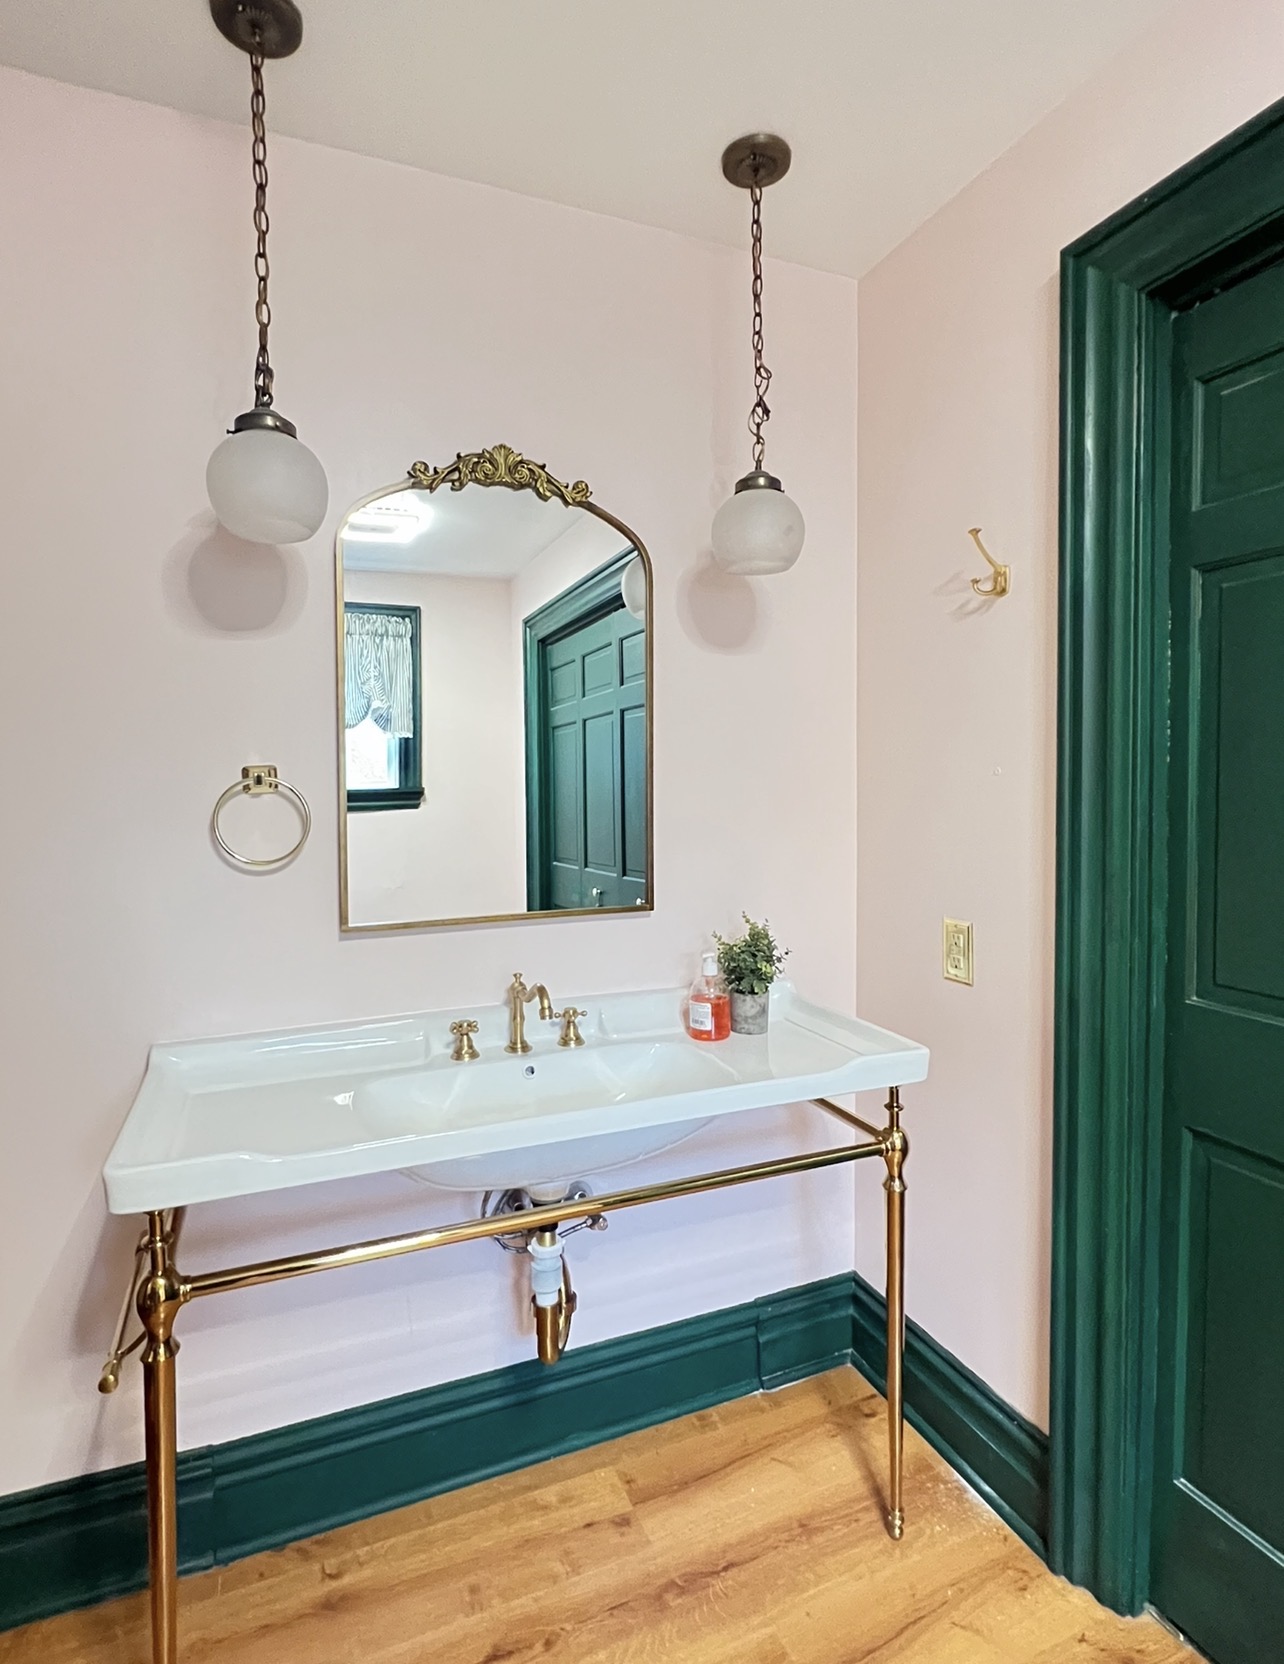
2. Better Lighting

Lighting changed everything. We kept the original pendants but now they’re a lovely feature.

Warmer, softer lighting helped the room feel more relaxed and flattering instead of harsh and flat.
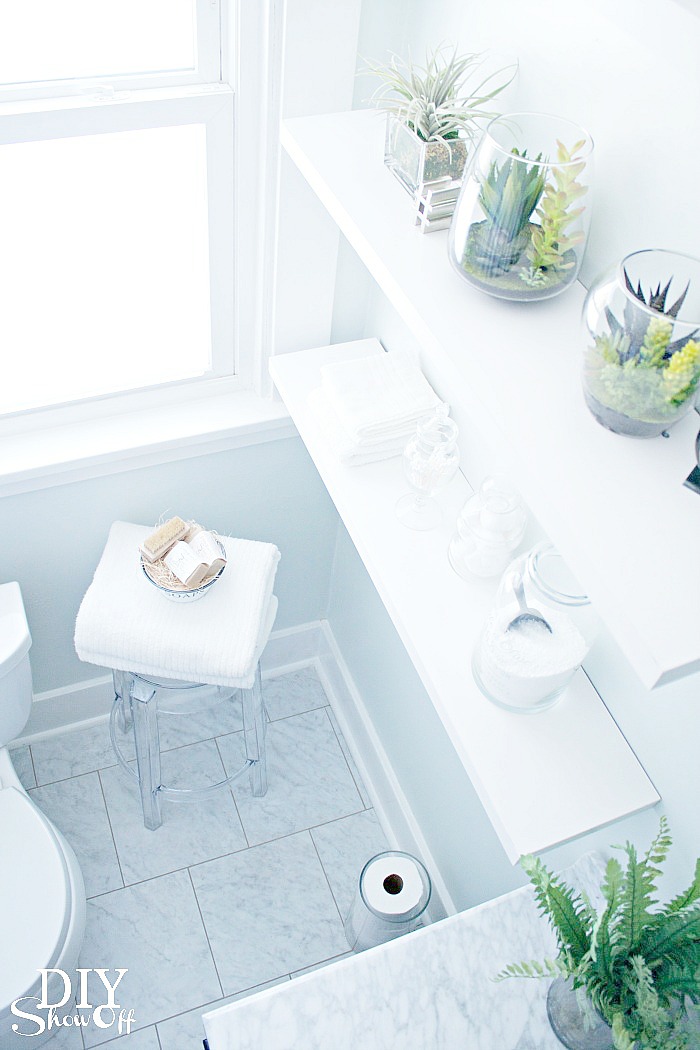
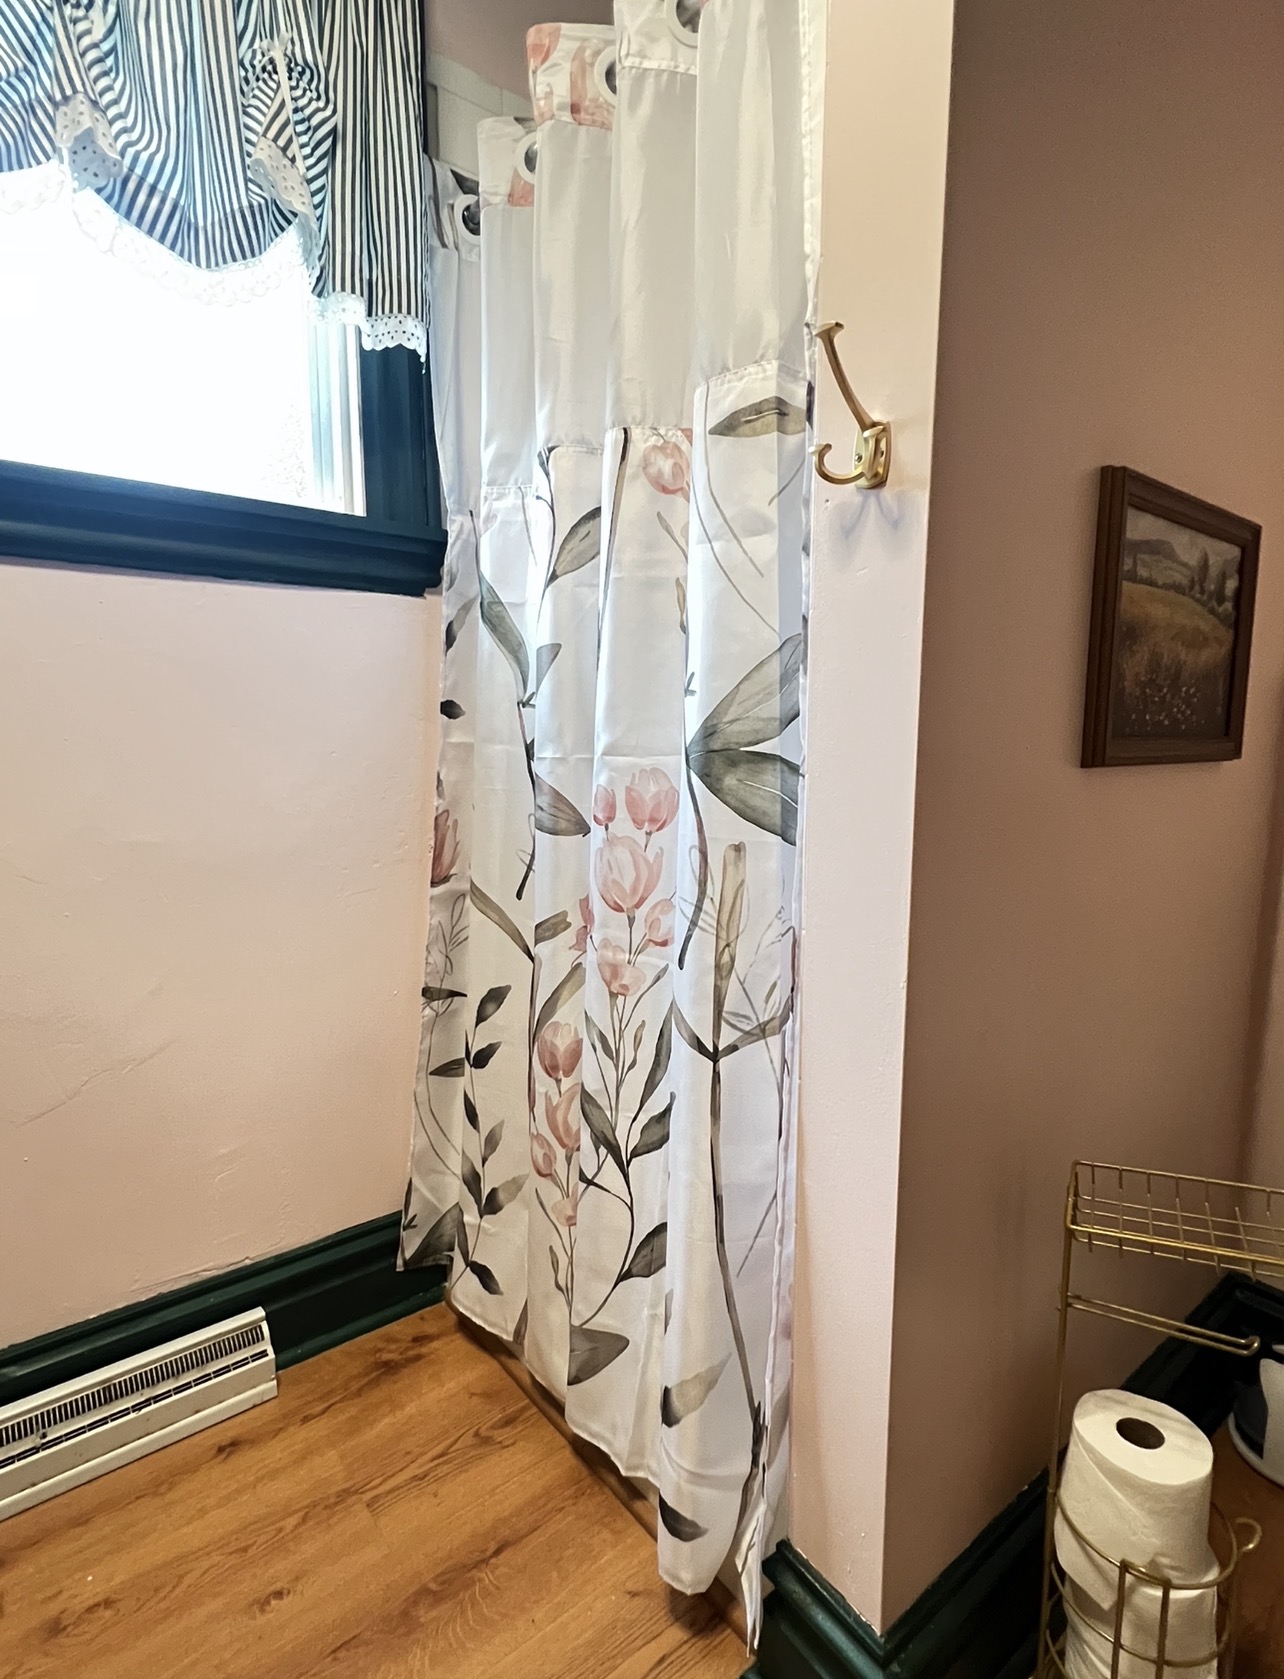
3. Simple Styling

This is where a space really comes to life.

  • fresh towels
  • a small tray for organization
  • a touch of greenery

Nothing complicated but it makes the room feel complete.

4. Intentional Details

Instead of filling the space, I focused on just enough. Every piece has a purpose, whether it’s functional or adding warmth.
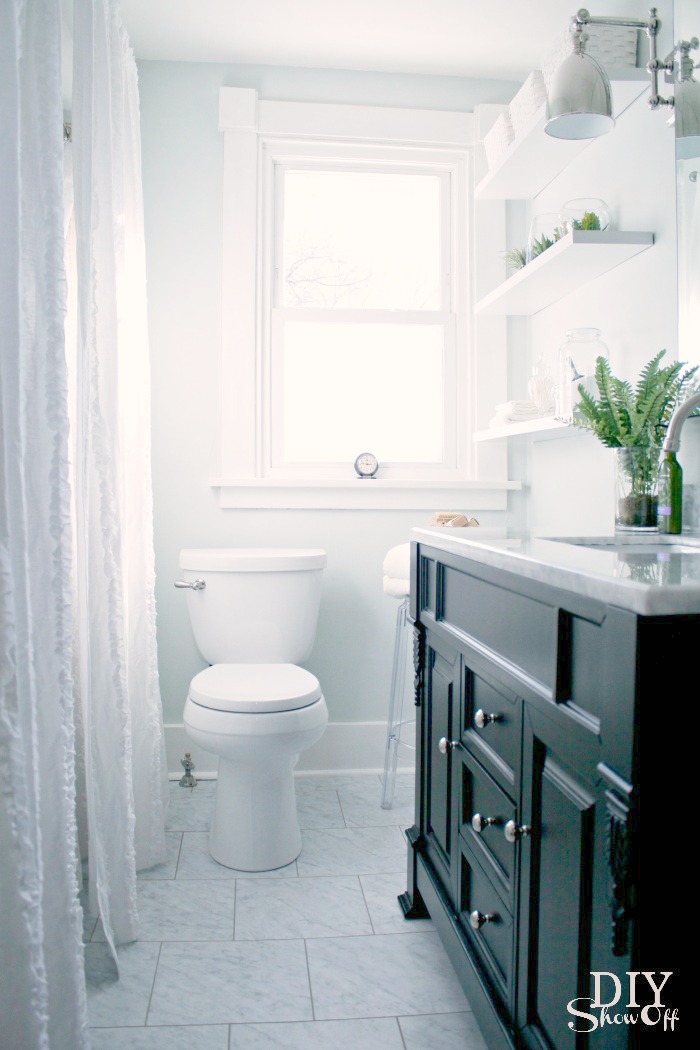
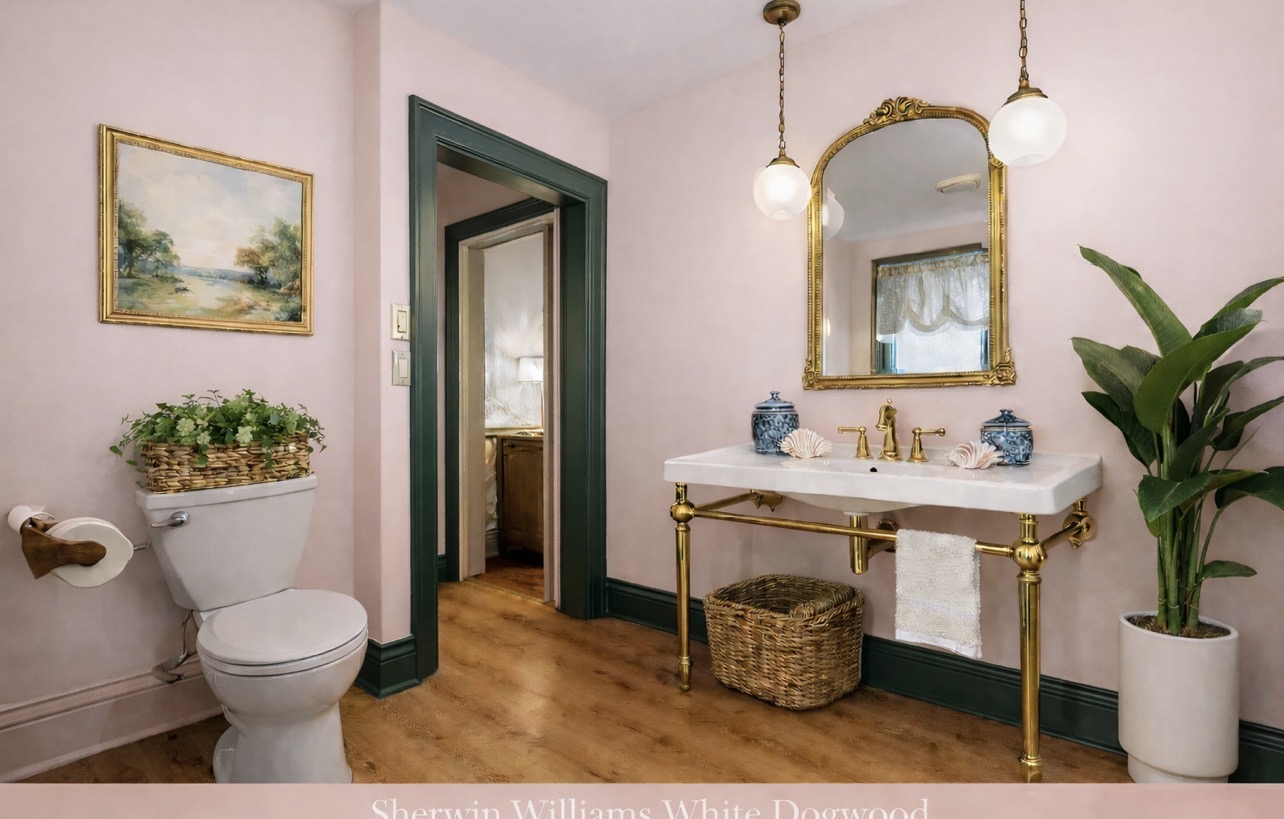
After

The difference isn’t just how it looks, it’s how it feels.

It’s calmer. Warmer. More put together.

blush bathroom with green trim and gold fixtures

And most importantly, it now feels like a space someone actually wants to spend time in…not just pass through. Swapping out the gold pedestal/console sink/vanity and mirror instantly updated the space and gave it a more cohesive, finished look.

white dogwood bathroom makeover

It’s the kind of space that feels calm the moment you walk in, simple, but thoughtfully finished.

Short Takeaways

If you’re updating a bathroom without a full renovation:

  • Focus on lighting first, it changes everything
  • Keep finishes simple and cohesive
  • Add just a few intentional accessories, not clutter
  • Think about how the space feels, not just how it looks

A Note if You’re Refreshing Your Own Space

This is the exact kind of transformation I help with through my Style Thyme refreshes—looking at what you already have and making simple changes that create a big impact.

Sometimes you don’t need a full renovation.
You just need a fresh set of eyes and a clear plan.

What’s Next

Styling! Decorating! I’ll be sharing more details on the finishing touches and styling in an upcoming post!

More Bathroom Makeover Ideas You’ll Love

DIYShowOff Bathroom Makeover

Simple Bathroom Refresh with Big Impact

short term rental design

Check Out a Fully Renovated Bathroom Makeover

woman unsure how to renovated and decorate a room

Feeling stuck with your own space?

If you’ve ever started a room and then… stalled out, second-guessed everything, or didn’t know what to do next —, you’re not alone.

I created something to help with exactly that.

Decorate Without Doubt: Confident Room Method™ is a simple, step-by-step way to move forward when you feel stuck, whether you’re starting fresh or trying to finish what you already started.

It walks you through:

• actually finishing your space

• getting clear on your vision

• narrowing down choices

• making confident decisions

START HERE: CONFIDENT ROOM METHOD

DIY Grouted Vinyl Floor Tiles

I recently shared the transformation of our upstairs main bathroom. I’m so in love with the complete change, especially the floor.

It looks so much like marble tiles, doesn’t it? But those are vinyl floor tiles with vinyl tile grout. The look without the cost or maintenance and shorter installation time. 

grouted vinyl floor tiles - diyshowoff bathroom makeover

Why I chose to go with grouted vinyl floor tiles? Because it’s a temporary solution for us (temporary as in 4-5 years or maybe even a little longer). It’s not for everyone but down the road I have plans on replacing the old tub and shower surround with a slipper tub/shower and at that time, I do plan on using real tile on the floor, under the tub and on the shower walls so in the interim, grouted vinyl tiles were a budget friendly and easy DIY solution that I plan on enjoying every day. The best part? I was able to truly do-it-myself and installation only took one day. It looks professionally done and real! You’ll see mixed reviews and negative comments when researching but I couldn’t be happier and love it!

Materials:

Supplies:

  • box cutter/utility knife
  • rolling pin
  • bucket with water
  • sponge
  • rag
  • float
  • putty knife

What I did:

The old vanity and toilet were removed. For us it’s because we were replacing those anyway. I recommend at least removing the toilet to get underneath. We also removed the shoe moulding/quarter round trim from around the room. I then removed the old vinyl flooring. I did cheat a little on this part. I hired my nephew to help me scrape off the old vinyl floor paper backing that was glued to the subfloor. That was the most labor intensive part. (Note: I removed the old vinyl flooring because it was peeling up around the perimeter of the room. If it had been secure, level and in good shape, I would have placed my vinyl tiles over it.)

removing vinyl flooring

Start with a smooth, clean, level, dry surface. Since this space was prepped for vinyl previously, the subfloor seams were sealed and it was level. Once all of the glued paper was removed and the floor cleaned, I simply started placing my vinyl tiles. I started with laying the full (un-cut tiles), using a staggered pattern. Since such a small amount of the tile is actually visible in this small space after placement of the vanity and toilet, I started with the first full tile placement at the doorway and worked my way back into the room. I made sure to pay attention to “marble veining” so that the pattern all ran the same direction. 

installing a vinyl tile floor tutorial

Simply peel away the paper backing (these things were super tacky!) and place the tile onto the subfloor. I used 3/16 inch spacers between the tiles. I marked my tiles 6 inches in on the edge of each tile with a pencil to assist in laying a straight design.

vinyl floor tiles

Having a supervisor on hand keeps you focused as well as replacing the spacers repeatedly.

Once all of the full un-cut vinyl tiles were in place, I moved onto what I thought was going to be the difficult part. Cutting the tile was way WAY easier than I anticipated. I simply used a utility knife blade to ‘score’ the cut line then snapped the tile. That simple. I didn’t have to apply a lot of pressure or go over it repeatedly with the utility knife.

grouted vinyl floor tile tutorial @diyshowoff

There were a couple of tricky cuts around the door frame, heat register and toilet so having a little more tile than needed came in handy. 

grouted vinyl floor tile tutorial @diyshowoff

Finish. Stand up and admire your tile. No cuts with a wet saw but you’ll be so proud of how good it’s looking! 

Looking good! Ready for vinyl tile grout!

grouted vinyl floor tile tutorial @diyshowoff

I removed the spacers and rolled over the vinyl tiles with a rolling pin to make sure each tile was secure and in place. Then?! The best part – no waiting for mortar to set…move straight to grouting!

grouted vinyl floor tile tutorial @diyshowoff

Have a bucket with water on hand (replace dirty water frequently with clean water) and work in small sections from the back wall working backwards towards the door. I worked in 2ft. sections because the grout dried fast. I used a putty knife to apply the grout to the float. Then used the float to “smoosh” the grout into the joints between the tiles. Sometimes I found just using the putty knife or my finger worked in some areas. I wiped away the excess grout with a wet sponge (squeeze out all of the water) then followed cleaning up the water/grout with a wrung-out wet rag where needed before moving onto the next section. I cleaned away all of the extra grout and wiped up water as I went along. 

grouted vinyl floor tile tutorial @diyshowoff

Let dry 24 hours before light use. I also went over the floor with a wet rag after 24 hours. We replaced the toilet and vanity and re-attached the baseboard/trim after about 48 hours.

grouted vinyl floor tile tutorial @diyshowoff

That’s it! I am thrilled with the result! 

grouted vinyl floor tile tutorial @diyshowoff

I’ve had questions about how this has held up. In the one month that it’s been done, it’s holding up just as well as it looked the first day but I can’t say about long term yet. There is plenty of leftover grout. I made sure my container has a good seal and will keep it on hand just in case repairs are needed. This bathroom is being used daily and so far so good! I’ll check back in with a review in a few months to let you know if anything has changed. 

See the complete before and after bathroom makeover here

Disclaimer: This post describes my first time experience, what I did and what worked for me. Results may vary.