French Cottage Bedroom Makeover

 Lee Caroline Art
Hi, my name is Lee and I’m fromAuckland, New Zealand, the country with 4 million people and 40 million sheep :)…I’m  aprofessional artist and adore interior design, crafts, cooking, fashion and I’m addicted to Houseand Garden magazines so much so that I have copies that go back to early 1970’s. I stumbledupon Roeshel’s gorgeous blog a few weeks ago and I’m so excited and honoured to feature asRoeshel’s guest post today.
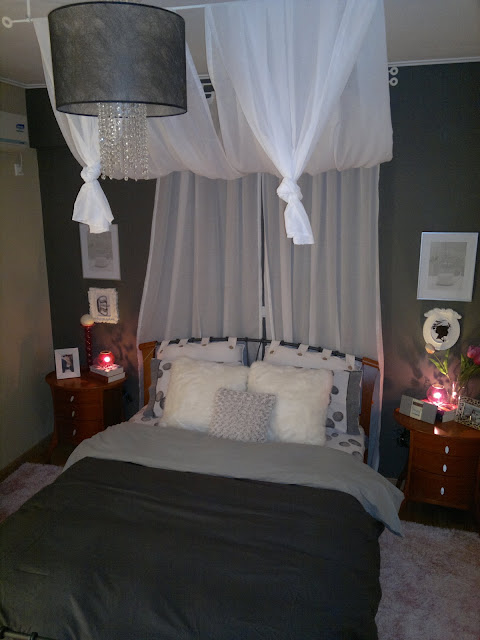
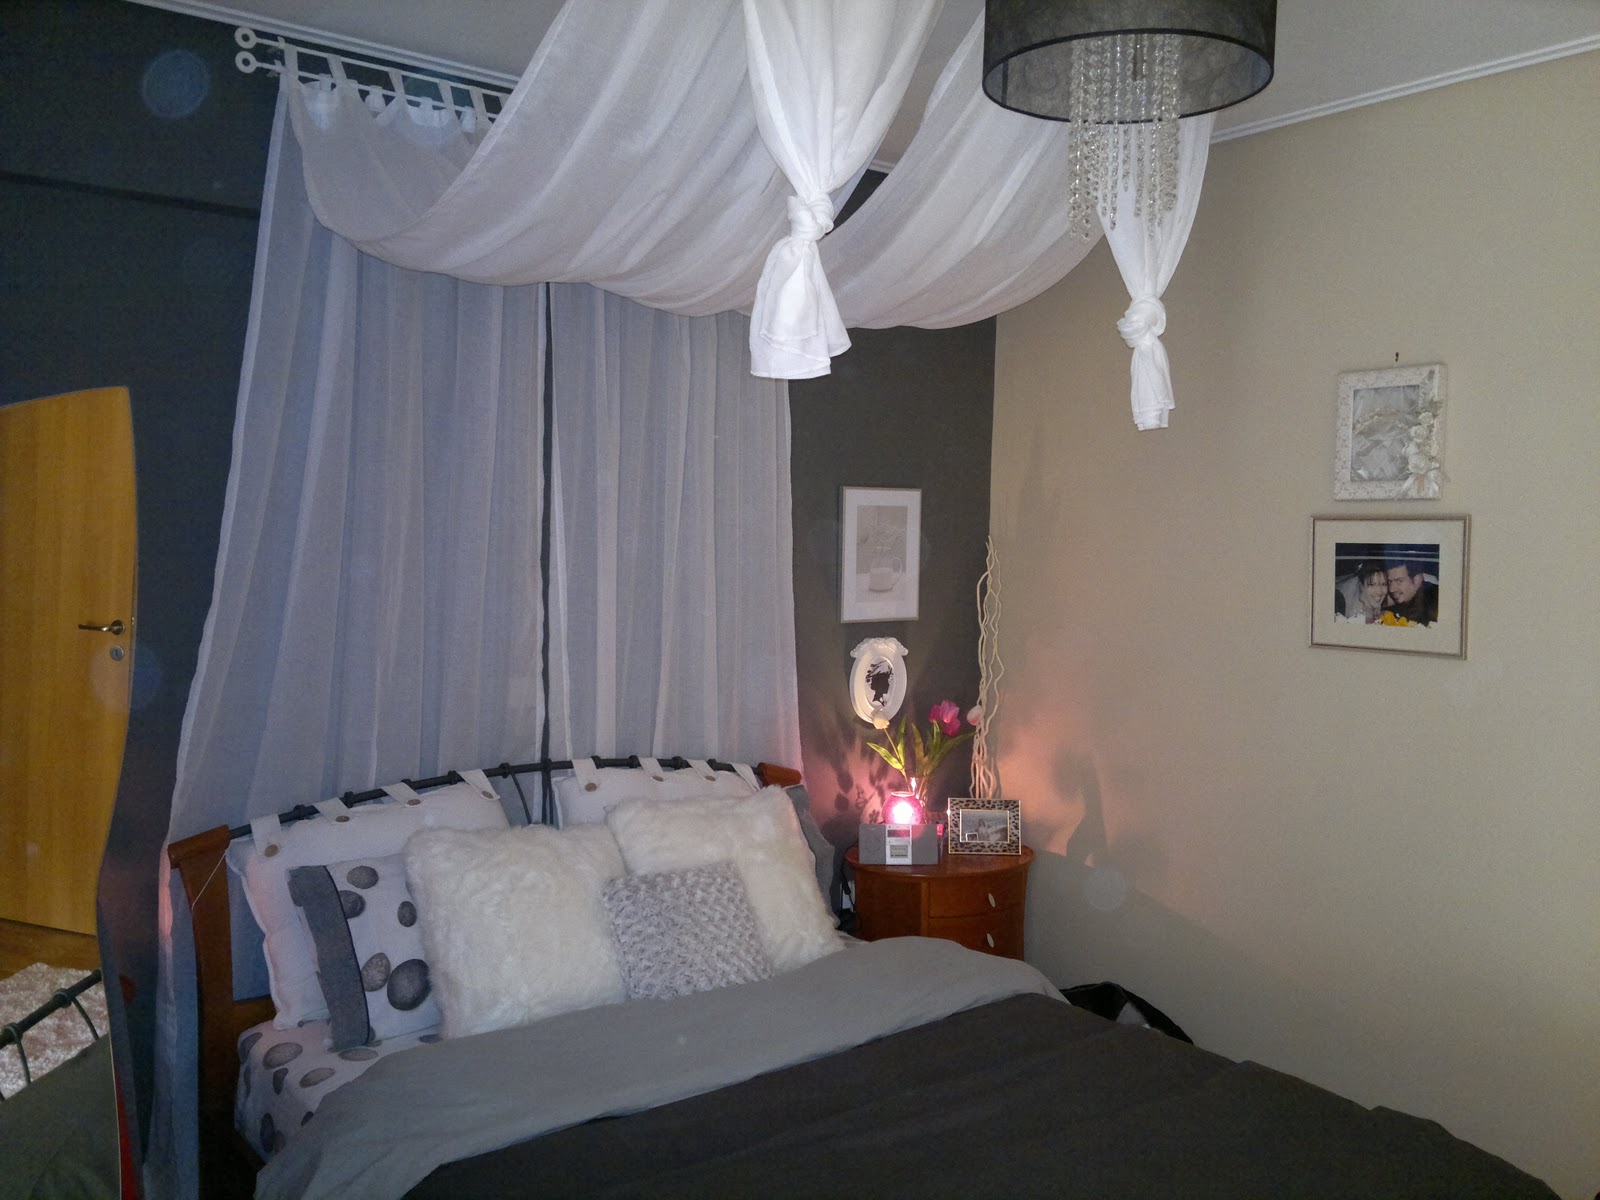
Twenty months ago I returned to NewZealand from 14 years living abroad in Brunei, Qatar and Abu Dhabi. I bought a small littlecottage in a seaside suburb of Auckland called “Mission Bay”.  Its a wonderful location butyou pay a lot of money for property around this location and all I could afford was a boxy littlebrick house on a very tiny section. However, I knew that I could make this house really desirableand I am gradually working through it one room at a time adding character and making it feellike a home. Today I’m sharing the makeover of what was a very boring small master bedroom. My bedroom does have a little en suite and walk in wardrobe which is a great bonus,however I needed to do something to make my bedroom feel special.   
 

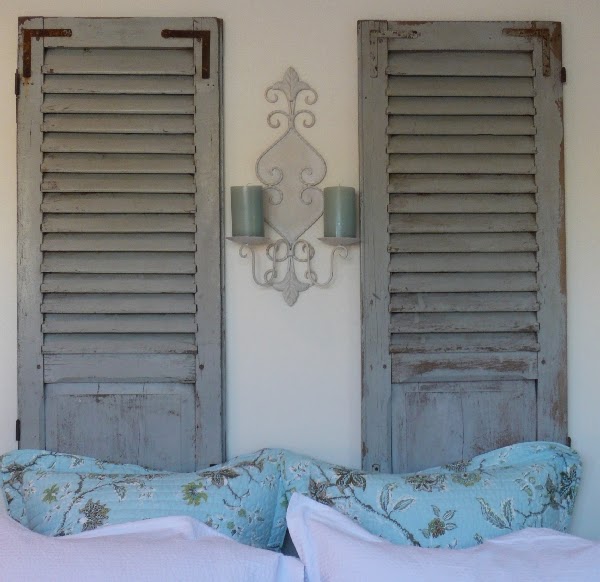
My favourite places on earth are Italyand France, with this in mind and the idea that I love anything French I decided to buy someold French shutters (yes from France!) and use them as a headboard. The shutters are duck eggblue which is my favourite colour for the moment.  Wallace Cotton a lovely homeware shop in Auckland, providedthe bedlinen for me to take some pretty shots of the bedroom once it was completed.  Iam sharing all my photos with you today including a before and after shot of the bedroom.The “before” shot was the previous owners’ look prior to me purchasing the property.

 
My design board
 
 My gorgeous pair of distressed French Shutters.
 
I added a sconce between the shuttersas I felt the gap was a little wide. However, I needed this space to balance the shutters againstthe width of the bed. 
 
 Paradiso quilt from Wallace Cotton
 Simple steel bedside tables that were originally bought for the living areabut didn’t look quite right. I think they are perfect in the bedroom.
 
I love the seersucker pillow for added texture
 My mother gave me this lovely Royal Albert cup and saucer I adore thecolour as I am mad about “duck egg blue”
 
 I used a lovely linen for the Roman blinds in a neutral beige and whitecheck


I hope I have brought some inspirationto you, a simple addition such as the old shutters can make a plain bedroom into a fantasyescape to France!  
 
 
Have a great weekend
Lee oxo
Poppy (my little Schnoodle)
poppy

See more from Lee & Poppy at Lee Caroline Art.
Pin It

DIY at Stardust – Decor & Style

Hello “The DIY ShowOff” readers!My name is Olga from Stardust – Decor & Style and I am just one of you… a fanatic reader and follower!
I’m a new blogger and I blog about DIY, decoration, makeovers and transformations, house tours and whatever beautiful catches my eye.
S t a r d u s t   -  Decor & Style
I can’t describe how honored I am to be here today and share some of my recent projects with you!So grab a cup of coffee, make yourself comfortable and here we go…This was my master bedroom a little after we had moved in. At first it was OK, but then I wasn’t satisfied with the colour and even more I hated this awkward wall behind the bed. I was trying to figure out a way on how to cover it and make the room feel more dramatic. The first makeover that I attempted didn’t turn out as I expected.  It kept me thinking. And then it struck me… curtains + paint + a few new accessories… I had it all in my mind. Well check this out for yourselves:
BEFORE
FIRST ATTEMPT OF MAKEOVER
AFTER

What a transformation, right? It seems like a completely different room! And it cost me less than $100.00 (except for the light fixture which was somewhat expensive… but couldn’t resist it…you feel me right?)!For more pictures and details please go here
And then we have the hallway. It was a plain, common, and boring hallway. I’d tried to spice it up with some wallpaper and a mirror from IKEA. Had it like that for about two years. And then one day I decided to do something about it. I ripped off the wallpaper – not an easy job – and painted big horizontal stripes which I lurve! 
Let’s take a look of the Before and After pics:                                                                            
BEFORE

                                                                             AFTER

Well what do you think? And this project didn’t cost anything at all. The paint was leftovers from previous paint jobs which i mixed all together. And there you have it! I loooooove horizontal stripes!  For the full tutorial please go here.That’s all folks for today! If you want some more you’re most welcome to come and visit Stardust – Decor & Style, where you can also see my balcony update. It would mean the world to me to see you over at my place! 
 Hope you all enjoyed the post.A big Thank You to Roeshel for having me here today! Roeshel you are such a sweetie!Merry Christmas everyone!!!                 
xoxo
Photobucket

Pin It
Reminder:

12 Bloggers, 12 Colors, 12 Days
of Holiday DIY

Dec. 1st ~ GREEN ~ The Design Confidential

Dec. 2nd ~ WHITE ~ Domestically Speaking

Dec. 3rd ~ BLUE/PURPLE ~ 
Fireflies & JellyBeans

Dec. 4th ~ SILVER ~ Freckled Laundry

Dec. 5th ~ GRAY ~ Primitive & Proper

Dec. 6th ~ SPARKLE/GLITTER ~ A Girl and a Glue Gun

Dec. 7th ~ MIRROR/CLEAR ~ The DIY Show Off

Dec. 8th ~ EARTH TONES ~ Making the World Cuter

Dec. 9th ~ RED ~ It’s So Very Cheri

Dec. 10th ~ GOLD ~ 504 Main

Dec. 11th ~ CHALKBOARD ~ WhisperWood Cottage

Dec. 12th ~ MULTI-COLOR ~ The DIY Club

CRAFTY SCRAPPY HAPPY ~ Bedroom Reveal

If you saw my tongue twisting post title before I changed it…I’m sorry!  No excuse except that it’s Monday. I knew I was twisting it around and even proof read the post repeatedly (forgot the title, I guess). I apologize, Jaime! Now –>Meet: Jaime from 
Crafty, Scrappy, Happy
I love her blog – so many beautiful transformations, DIY and repurposing projects to see!  Today, she shares her beautiful bedroom makeover. I love that it’s so personal to her and her style, with pieces that have special meaning.  We have a master bedroom to makeover and I love Jaime’s ideas. 
“I am so excited to show you guys my Bedroom Makeover, it has been something I have been wanting and thinking and putting off doing for a LONG time now…. I just kept pretending that I didn’t mind the look of my room…. Butttt I was finally inspired to make the room HOME—and I am SUPER excited!!”
She refinished all four of the above pieces!
Bed frame:
Old bench/coffee table – upcycled with a new home:
 Dresser:
Not a fan of the curved top.  What’s a DIY girl to do?  Make a new one!
MUCH better, right?!
Night stand:
Sweet and simple, light and airy.
chair:
Pretty!
Total cost for furniture makeovers:  $6!
Accessorizing:
 August 1st has special meaning. 
Beautiful and relaxing…
She’d love to know what you think! Know what I think? I want my room to look this way! Seriously, she’s crafty/DIY ambitious and so successful – she’s even participating in two craft competitions and hosts an awesome linky party. She’s crafty Scrappy Happy – Superwoman!   See more amazing DIY at 
Crafty, Scrappy, Happy