Kitchen Before & After – Tea Party

Ah!  Becky at Tea Party blog has a kitchen before and after that’s a breath of fresh air!  Here is her post:

Kitchen Remodel Reveal


So I’ve promised pictures of our kitchen remodel and was finally able to get some pics…lets look at the before shall we? Don’t be scared…we seen the potential…well, i think 🙂

Remember the marble tile we scored at a garage sale for $250? Thanks to my boss who owned a masonry company, he helped us cut and lay the tile…which I am forever grateful to. This was no small project since the dimensions of the countertop were all differnent and then at the end, leave it to me to decide to cut them all into subway tiles for the backsplash…oh yes, I did…and sometimes I’m still surprised my husband is still married to me after that one. So…a basic breakdown: We took the upper dividing cabinets out and took down the small wall to open up the space. Primed and painted the cabinets a soft white, the tile is an unmilled grey marble so its veining and pattern is all different, I love it, painted the hinges, changed out the hardware, changed out the top molding to a 4″ crown thanks to my dad, Mr. Marvelous for that one, replaced the glass front cabinets above the stove, new faucets and added chandeliers that I’m so excited to tell you about, they were from a restored building out of Idaho Springs from the early 1900’s and they were FREE…yes nada, zip did I pay for them. To sum it up…we did this remodel for about $700…yes you read right…$700… because we did so much sweat work into it and salvaged what we could. We’re not planning on staying in this house for too many years, so this was great for now. I’ll do a more detailed breakdown later on. Hope you like it!


Unbelievable!  $700 for the entire makeover?!  Marble tile at a garage sale?! I’m drooling!  It’s gorgeous!  Beautiful free vintage chandeliers?  Friends and family with DIY skills?  What a lucky girl!  Becky, your kitchen is beautiful.  I love that it’s all DIY but looks designer.  You guys did a fantastic job.  Your kitchen is one of my absolute favorites.  It inspires me and gives me hope.  Thank you for sharing your beautiful kitchen story!
~*~*~
This post is brought to you by

Looking for a uv replacement bulb for your air ionizer or aquarium?  DIY Home Center carries a diverse selection at an inexpensive price. 

Kitchen Makeover at Bambina Babe

Because we don’t all have beautiful kitchens and love to drool over budget friendly makeovers, check out the kitchen makeover at Bambino Babe. Here is Nealy’s post:

As promised, our kitchen re-do. You may remember my recent post about my love for white kitchens {and white trim; in my opinion, the more white, the better}. When we were looking for houses, we found very few {in our price range} with a white kitchen. So my hubby said, “babe, if you want a white kitchen, we’ll get you a white kitchen,” or something like that. How sweet, eh? {He also said I could make a “new house” look as “old as I want,” but that we weren’t going to buy an old home}. 🙂 This redo has been pretty budget-friendly. The biggest project (but worth every drop of sweat) was painting the cabinets white (thank you, thank you, thank you to my parents for the help). It took two weekends. After sanding off the shine, we painted two coats of primer (we used Kilz odorless oil-based primer) and then two coats of paint (Behr semigloss in swan wing). The walls are the same color of white, except in egg-shell finish. We also added some stainless steel hardware (all bought at Home Depot). And the countertops were formica with this oak trim on the sides. We would like to {eventually} replace them, so in the mean time we tried a new countertop glaze, Rustoleum’s Countertop Coating in the color putty. They’ve held up pretty well…they are supposed to be scratch- and chip-resistant; there are a few minor chips but I could probably touch them up with more of the paint. The worst part of the using the countertop coating {besides the smell} was waiting three whole days for it to dry before using the counters. Oh, and how can I forget about the light fixtures? We actually spray painted them in a metallic “brushed nickel” spray paint {they were brown before}. It’s amazing what a few coats of paint can do to transform a room. Here are some pictures. BEFORE:

If I remember right, this picture was taken before we actually owned the house. It’s my hubby (right) and our realtor And AFTER:

One other thing we did was we got the cabinet doors routed out {by a carpenter} and then put glass in them. It cost about $25 for the pair plus the cost of glass. Besides the white paint, this is probably my favorite change to our kitchen – I’m planning on doing another cupboard door or two as well. The bamboo shade was from Target. I might put another one of the patio door (on right) because the morning sun is super bright.

Have you ever considered putting a lamp in your kitchen? I love, love, love lamps on kitchen counters…they give such an unexpected glow in the kitchen (above).

My new basil plant (above) (bowl is from Crate and Barrel a few years ago).

I like to call this Phase One because there are many more things that I would like to do to the kitchen in the future. What are they? Glad you asked. I would REALLY like to get black granite countertops and a white carrara marble island countertop. After that, it would be fun to put in a white subway tile backsplash, a “new,” “old-looking” bridge faucet, some crown
molding on the kitchen cupboards at the top, and of course stainless steel appliances, if they are still in style by the time we get to that! And the lighting could use a litle re-arrangement and a few new fixtures. To be specific, I would like to get some stainless industrial-looking lights above the island.

GORGEOUS! Check out these other amazing DIY Projects too!

DIY Tissue Pom Poms tutorial

IMG_3520

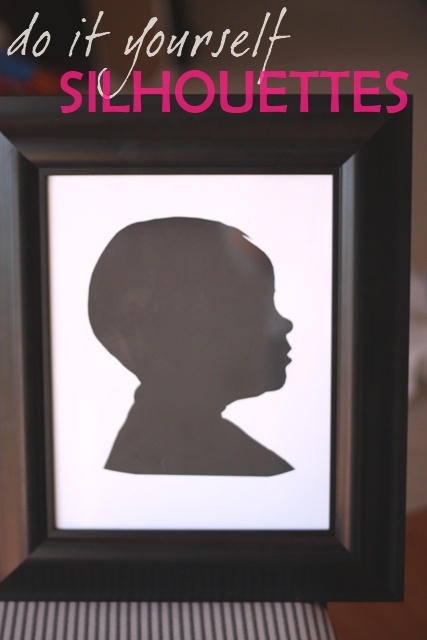
DIY Silhouettes
tutorial

10 Ways to Beautify your Blog

beautify blog

Nealy – thank you so much for sharing all of your amazing DIY creativity! The kitchen is fabulous! So much DIY talent – cabinets, fixtures and countertop! And the tutorials for the pom poms and silhouettes are awesome!

This post is brought to you by

Wanting a dry covered porch, try underdecking for that raised deck and get more room.

DIY Project Parade

I bet you, like me, never ever get tired of before/after room transformations, right? Specifically kitchens since that seems to be hot right now and I’m not complaining! Ours is a hot mess and the more inspiration, the more kitchen makeovers, the more motivated I am to get to mine as soon as I finish up some other little projects. I feel like that’s the one area of my home that would make a HUGE difference. We have so much left to renovate in this farmhouse, but having that done would be a huge chunk of it. It’s the most work and one of the worst looking areas in this old house right now.

So, I wanted to share this kitchen makeover at Starter Home to Dream Home from last week’s DIY Project Parade. Again, it’s GORGEOUS! I’d give anything to have my kitchen look half this nice! Here is her post:

Kitchen Final Reveal!!! Picture Perfect

It has been a hard and long 2 months! Wow, I can’t believe it took us 2 months to get this thing finished. It is FINALLY DONE!!!!!!!!!!! I am so excited to show all of you I had to post this before my big date tonight 🙂

BEFORE

AFTER

I can’t tell you how pleased I am with the final result. Our projects ALWAYS come out BETTER than we had planned.

Remember how I originally had picked, and purchased, Tumbled Travertine as my backsplash? Well, my gut told me it was wrong, so I returned it and traded it for Porcelain, dark and contemporary tiles. LOVE IT!!! That was the best choice I made. And I am SOOOO lucky that Oregon Tile & Marble made the exchange, THANK YOU!

The Granite goes perfectly with our whole contemporary feel. Click HERE for my post on our DIY Granite Mini Slabs

My $10 Valances above my corner sink fit right in.

I am in love with my elegant Faucet that reminds me of Swan Lake. I can’t believe I actually wanted to return it. I have fallen in love with it more everyday. I got it at Lowes for $200!!

I had so much fun Accesorizing my new kitchen:

Got ’em at Target

No, this knife set isn’t new. I just spray painted the wood Oil Rubbed Bronze. A quick fix for it to look sleek and new.

See the “old” knife set to the right?

I wanted to add some accessories on the top of my cabinets. Just because I can’t accesorize within 2 year old reach I had fun with this one! I still feel like I need to tweek it a little bit but I have time for that.

I added this plate for a POP of orange and to add some “Hawaii” to my life
I had to get that green in. Love that green.

I am just loving the look of my Kitchen Island Redo. It makes such a statement! Don’t get distracted my the kids playing on the floor…. hehe

Lets have some fun with before and afters:

BEFORE

AFTER

More:

BEFORE

AFTER

And 1 more:

BEFORE
AFTER
—–

It’s stunning. I love the color. That tile backsplash is my favorite but the pretty white cabinets, that light fixture, the beautiful countertops and gorgeous valances and accents…dreamy!
If you’re not familiar wi
th
Starter Home to Dream Home, you’ll want to check it out. Beautiful home and awesome creative DIY projects!

And if you’re looking for a DIY project to inspire you, click the DIY Project Parade label on the left to see TONS to choose from! I can’t keep up. You guys are amazing! Thanks so much for linking up and sharing your creativity! I’m honored that you share your ideas here! Thank YOU! Now if I can get the weather to cooperate with me, hopefully I’ll have something to share soon!
—-
Now, let’s get inspired!

~*~*~
The DIY Show Off

If you’d like to link YOUR DIY project post to The DIY Show Off Project Parade:
  1. You must use the button above and link to this post to share the linky love.
  2. Include your name or blog name and project title. Add your permalink (not your blog url, but your DIY project post url). Feel free to link a Past Post, just invite your readers in a current post with a quick note.
  3. Or email your link to thediyshowoff@gmail.com and I will add it for you.
  4. If you notice your link has disappeared please add the link back to The DIY Show Off to your post today with a quick note to your readers about the party and try again! I love when everyone participates and readers check out everyone’s links, but I think the return favor of linking back is the nice thing to do so everyone plays fair and enjoys all of the projects and links. Also – this blog party is for DIY projects only. Links not related to DIY will be deleted.

—–
This post is brought to you by:


DIY Home Center carries an extensive selection of recycled outdoor furniture made from Polywood.