DIY Wall Monogram and a Bathroom Update

Kathy from Wheatfield Wonderlings is sharing two DIY projects with us today! A beautiful bathroom update. LOVE the colors, decorating accents and that vessel sink! Here is her post:

Bathroom Update

After living in our home for 3 years, we finally got to updating the bathroom
Here it is before and after

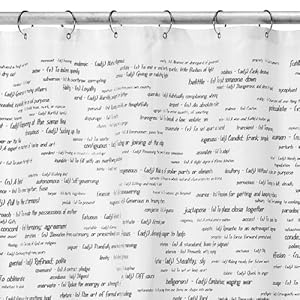
The shower curtain is from here
Top 500 SAT Words Shower Curtain
It makes great educational bathroom reading!

Vanity before we painted it with 3 coats of black paint
Here it is after

We learned how to cut and edge granite!

Ebayed vessel sink and facuet

We still have to replace the light switch cover with a white one, otherwise it is done!
Love it!

And a large “W” for her living room wall. I love personalized wall art and I’m jealous of their awesome jigsaw skills! Here is her post:

I needed something on the wall in the living room.
So I found a font that was swirly enough.
Printed it out on a transparency, put it on the overhead projector
Projected in on a piece on MDF. (My newest favorite medium)
Cut it out with a jigsaw and sanded it.
Painted it with a textured Stone paint
My husband & son nailed it to the wall.
While making it and attaching it to the wall, the big fear was breaking it. Fortunately, that did not happen, thank goodness.
Just what the wall needed!

I love both projects, Kathy! Fantastic job! Thank you for sharing!

~*~*~*~

Have a WONDERFUL holiday weekend! I’ll be back Sun. evening to post the DIY Project Parade. Today is The DIY Show Off‘s 1 year blogiversary! Let’s celebrate next week with coming up on 350 posts and nearly 2000 followers!
You guys ROCK!

—–

This post is brought to you by

Make your deck look better with some polywood outdoor furniture from DIY Home Center.

Make Room in the Bathroom!

Check out what Brittany from Superwoman did to take advantage of unused space in her bathroom. Genius and I’m so impressed! Here is her post:

Bathroom Closet- Demo Project

With all the remodeling projects I have undertaken, I have never done a demo job. Not once.
It was bothering me when I assessed the situation with my bathroom closet.
Remember when I remodeled it? If you weren’t around, check it out here.
Anyways, so this is what my closet looked like:

Oh how I hate this closet!
Senario:
I’m in the bathroom doing my makeup. The bifold door is open because, well, that’s where my makeup is! The hubby decides that he wants to get in the bathroom. See the door behind the bifold? Yeah, it would slam into the bifold.
Stupid….
Let’s look at the storage:
Don’t tell me that you don’t have at least one closet that looks like this. Aweful, just aweful.
More reasons to hate this closet: Wasted space!
Look at all that room!
Such a waste…
Sooo….it had to come down.
I took out all the shelves
Then the strips of wood came out.
I don’t have a picture of the wall being demoed (demo-ed?? demod…nope) but I’ll just tell you that it’s a pain to take down wall studs.
After everything was gutted, I put up the new framework.
Then the new supports were put in.
I decided to go with 1×4 boards instead of a sheet of plywood. One, because I already had quite a few 1×4 boards. Two, because I can’t cut straight on a tablesaw yet. Three, it would be cheaper in the long run.
So I primed and painted every….single….board.
Some boards had to be sent through the table saw to make a notch.
Then I started to assemble everything.
I found this on a trip to Hobby Lobby. I spray painted it, making sure not to do a full coverage coat. I like that look better. You’ll see how that turned out in a second.
I also found some cheap baskets at Walmart. They needed to be spray painted to go with the bathroom, though.
I also added bows.
I put up my metal scroll thing.
Like it? Me, too!
Then on to add the trim.
I already started to add the baskets to get a feel for what it was going to look like.
After repairing the walls, I was done!
There you can see the new tiling on the floor of the closet.
I hope everyone likes it!

Great job as usual Brittany! So functional, organized and it looks great too!
Photobucket

Beautiful Bathroom Makeover and More – Casa Brasi

I‘d like to introduce you to another amazing DIY’er! I love this bathroom makeover from Amanda at Casa Brasi. The color with the black accents is stunning. Here is her post:
 

We closed on our house in August 2007. Since then, the room in the house that has seen the least decorating action is our half-bath. It’s a real shame too because it’s one of the rooms that gets used the most. For starters it’s the only bathroom on the first floor, so we use it all the time, but more importantly our guests use it when they come to visit!
When it came to decorating this bathroom, I was stumped. We painted the walls. Fine. No sparks. I painted the cabinet black last year. It then matched the mirror, but other than that…still no sparks, no vision, no nothing.
It wasn’t until we had the old countertop replaced with granite that it hit me. I knew exactly what to do.
Half Bath Before:

 
Inspirational Granite:
 

This granite is not the same as the granite in the kitchen. It’s more striped and has a lot more brown/gray in it. As soon as the granite was installed, I could tell right away that the walls had to go. They looked entirely too gold against it. The question then became: what color should I paint the walls? I mean I knew it should be gray of some sort, but there are a million grays out there. Then I remembered that I had ordered a sample pot of Mouse’s Back by Pratt & Lambert. I tested it out on the walls. In one word: perfection.

On Saturday I went to Lowe’s to have P&L’s Mouse’s Back color matched into a Valspar paint. I did this because (1) Lowe’s is closer than the guy who sells Pratt & Lambert paint and (2) Pratt & Lambert paint is more expensive than Valspar paint. While I was at Lowe’s, I also picked up a new light fixture (way overdue although not as bad as my master bathroom lights. Just wait till you see those.)
Sunday, I painted the bathroom. Oh, and I wired the light fixture. All by myself! House is still standing. Painter, electrician. Whatev.

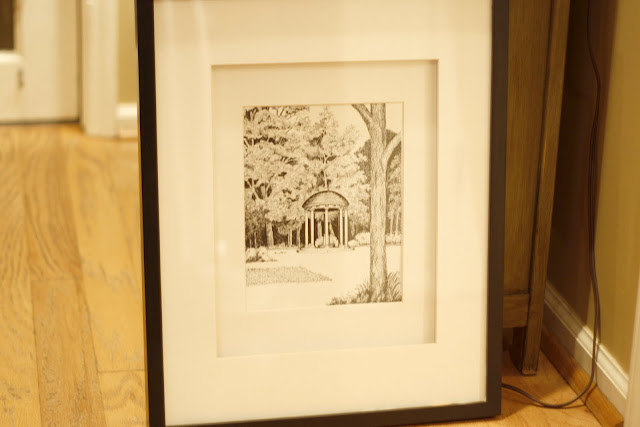
Then I got to work on the art. A few weeks ago I went to my local Old Time Pottery and found two 16×20 frames (double mat). $10.00 each. Awesome price. Not awesome color. So I painted them.
They started out this color:

And ended up this color:

This sketch is of a local landmark. I got two different ones at a local antique store for $3.00 each.
Last night I put it all back together.
Half Bath After:

My apologies for the toilet seat being up! It was the best picture so I had to post it.

 
Better, huh? Not finished though. Working on a little DIY I plan to share with you shortly.


Gorgeous photography and more creativity and inspiration. If you get a chance, pop over and check things out. Don’t you love making new friends?

Thanks for sharing Amanda! 😉