DIY Project Parade & Playing Sublimely

I‘m honored to show off this beautiful chandelier for Amy at

Here is her tutorial/before and after photos.  It’s stunning!  Note the finish she did!

How to make your own Niermann Weeks: kinda

Oh how I love the look of a Niermann Weeks chandelier, and oh how I hate the price of them. My friend Karen who is one of the most fashionable ladies walking the planet, got me thinking about how to create the look of a Niermann Weeks chandelier. She is a girl after my own heart and loves to decorate fabulous for less. I have told you before that I am a “faux, faux finisher”. I pretend a little with decorative finishes, but I had never experimented with applying any products to a fixture before. So I gave it a shot.

Here are a few finishes I liked from the Niermann Weeks collection, all priced over $5,500:


Here are a few of Brooke’s table lamps from her Giannetti lighting collection, love the finish of these as well:


And this is what I wanted to transform into something lovely: a $25 brass consignment store find. I liked the lines of it, and it was large enough to go in my foyer.

Everything I used was products that I had around my house (Faux Effects plaster), but you could use regular plaster and tint it any color you wanted. I scooped the product up in my hands and smeared it all over the chandelier. My first plaster color was a bronze shade. I let that dry and then I repeated the exact same “technique” with a neutral color plaster (I am using that term loosely as my five year old helped me cover the chandelier in plaster with her hands). Once both layers had dried I sanded it a little by hand to let the darker shade underneath show through.
We did change out the glass because I wanted an “old look”. We replaced the plain glass with “seeded glass” for a vintage feel. I considered not putting any glass in it at all. I think that would have been a nice look also, but ultimately the “seeded glass look” won me over.
Then my cute carpenter risked his own life to hang my creation. He is a good man.Isn’t she lovely.

Can you see the finish and texture?

The seeded glass reflects specks on our walls at night…it’s dreamy.

I love not having to spend $5,500 to get the look I want, and I love Karen for convincing me to try this.

Thanks for sharing your Gorgeous transformed chandelier, Amy!&n
bsp; I love the beautiful finish you did – and now I’m on board.  I want one too!  You’re the most fantastic talented faux, faux finisher!  🙂  
And to the rest of you:  Pop over to

and see more DIY inspiration!

~*~**~*~

Show off your DIY projects too!

The DIY Show Off

If you’d like to link YOUR DIY project post to The DIY Show Off Project Parade:
  1. You must use the button above and link to this post to share the linky love.
  2. Include your name or blog name and project title. Add your permalink (not your blog url, but your DIY project post url). Feel free to link a Past Post, just invite your readers in a current post with a quick note.
  3. Or email your link to thediyshowoff@gmail.com and I will add it for you.
  4. If you notice your link has disappeared pleaseadd the link back to The DIY Show Off to your post today with a quick note to your readers about the party and try again! I love when everyone participates and readers check out everyone’s links, but I think the return favor of linking back is the nice thing to do so everyone plays fair and enjoys all of the projects and links. Also – this blog party is for DIY projects only. Links not related to DIY will be deleted.

    DIY Project Parade

    I have so many DIY projects planned and can’t wait to actually get busy and share.  For this week, I have a little one. My daughter, Bri, and I gave some old lamp shades a new look. I loved the burlap texture before  (and seriously considered buying her new ones so I could snag these but I didn’t get around to it in time. Darn!) Her style is different so here is what we did.

    $1 yard sale lamp shades before:

    We ripped off the old trim and laid it out on the new fabric.  Using a light marker, we rolled the lamp shade on the fabric, tracing the bottom then top shape.  These lamp shades had a slight taper, so this is the best way to ensure the new fabric covering is the right shape/size.
    Niski was partricularly interested in this step.  “Are you making me a dress?”
    She says she’s a DIY doxie and should be included in this post because the D in DIY is for distraction according to doxies.
    Back to the lamps (sorry Niski)…
    Cut out the shape BUT cut about 2 inches from the line drawn to create the fabric so that you have an allowance to fold over the top and bottom of the lamp shade. Our fabric was folded so 1 pattern = 2 new fabric cutouts for the 2 lamp shades.

    This is how it looks (pardon the chandelier checking her reflection in the glass top table).

    Iron a hem on one of the side seams.

    Sew the hem.

    Next, we used spray adhesive to attach the fabric to the lamp shade.

    Now, we do not recommend that you get distracted by the ‘fun’ part of making the lamp shade pretty and by one of these (pictured below) and abandon the camera.

    But here are the next steps:

    Wrap the lampshade in the new fabric, using the hemmed side to cover the unhemmed side.
    Clip the overhang on the tops and bottoms so that they can be folded on the inside and lie flat. Use hot glue to secure.
    Using hot glue, decorate with ribbon and/or fringe.

    Lamps were $5/pair at used furniture store!  Great thrifty find!

    All done:

    (More to come soon on where these are going!)

    ~*~*~*~
    And some amazing highlights from last week’s DIY Project Parade!  Click the links for more details.
    So pretty –
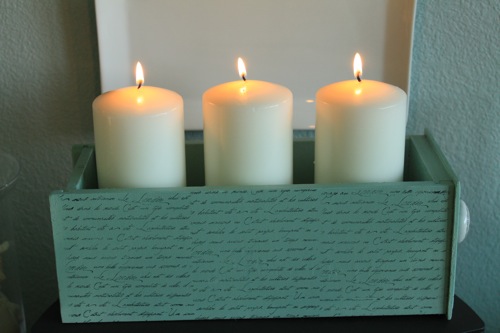
    a drawer turned candle holder at Decor Chick

    Pretty monogrammed nesting tables at The White City Project

    More pretty nesting tables – numbered! at Posh Pieces

    Beautiful chandelier makeover at Thrifty Miss Priss
    DSC_2287
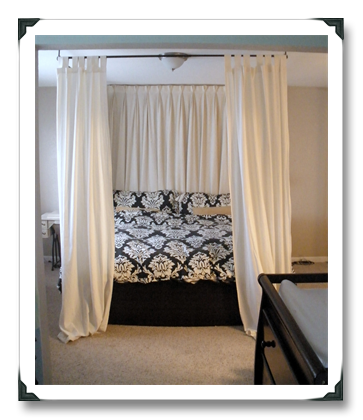
    Creative curtain headboard at Pregnant with Power Tools
    There are more highlights I want to share with you – I’ll do it sometime this week!
    ~*~*~*~
    So...What have you been up to?  Feel free to link up!

    The DIY Show Off

    If you’d like to link YOUR DIY project post to The DIY Show Off Project Parade:
    1. You must use the button above and link to this post to share the linky love.
    2. Include your name or blog name and project title. Add your permalink (not your blog url, but your DIY project post url). Feel free to link a Past Post, just invite your readers in a current post with a quick note.
    3. Or email your link to thediyshowoff@gmail.com and I will add it for you.
    4. If you notice your link has disappeared pleaseadd the link back to The DIY Show Off to your post today with a quick note to your readers about the party and try again! I love when everyone participates and readers check out everyone’s links, but I think the return favor of linking back is the nice thing to do so everyone plays fair and enjoys all of the projects and links. Also – this blog party is for DIY projects only. Links not related to DIY will be deleted.
    ~*~*~*~
    ~*~*~*~
    Brought to you by
    UK Bathrooms supply high quality bathroom accessories

    DIY Project Parade

    I‘m working on a DIY project that involves a LOT of sewing and if you’re interested, I’m completely recovering an A-frame swing (canopy, arm rests, seat cushion) for my mom. 
    So here are some highlights from last week’s DIY Project Parade.  Thanks for sharing your amazing DIY skills – everyone!  I am so inspired by each project and even if I haven’t had time to comment (sorry – I wish I did!), I love seeing all of your creativity!  Click the links to be redirected to the original post!
    Check out this GORGEOUS day bed Shauna created at Perfectly Imperfect.  DROOL!  I want to curl up there with a novel and never leave. Isn’t it relaxing?  I’d love an all white space to call home.

    You have to see this awesome peg board book at Pregnant with Power Tools! Genius space-saving idea!
    This before and after hutch from Melanie at The Frosted Gardner is SO pretty!  Definitely an inspiration.  I have 3 built-ins in my dining room, but I’d still love 1 more and to redo a free-standing one!

    BeforeAfter

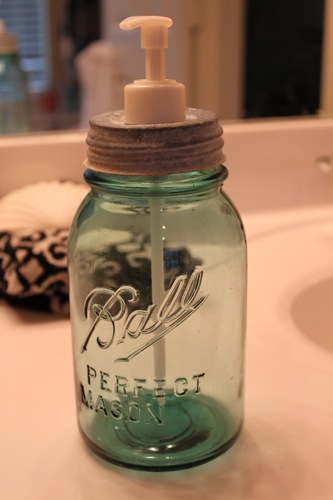
    I love this soap dispenser at Decor Chick…too cute and something I’m going to try. (Even if it wasn’t original, Emily, YOU inspire me – I haven’t seen it before and I love it!)

     
    This one is amazing!  Utility sink turned into cart!  Check out the before and after at Yes! Big Deal!  Don’t you love it?  Who doesn’t love more storage options?  How creative!
    In my house, I’m looking at a screen covering a big sooty black hole, how about you?  Original idea & pretty! – fireplace art at Messie Confessions!

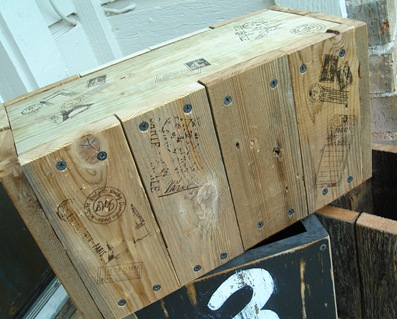
    Cute shipping crate step stool at All Thingz Relatedlove the stamps!  Perfect touch!

    106

    A Grillicious Menu Board and Tool Holder  tutorial at 504 Main!
    I see a birthday gift idea for Mr. DIY!
    Look at this pretty DIY headboard at House of Huddleston – Love the fabric pattern and soothing colors.
    Another item to add to my DIY “I want that” list.  I’ve never used a drying rack, I hang things around the house.  How much more functional is this awesome Ballard-inspired drying wrack at Attempting Creative.
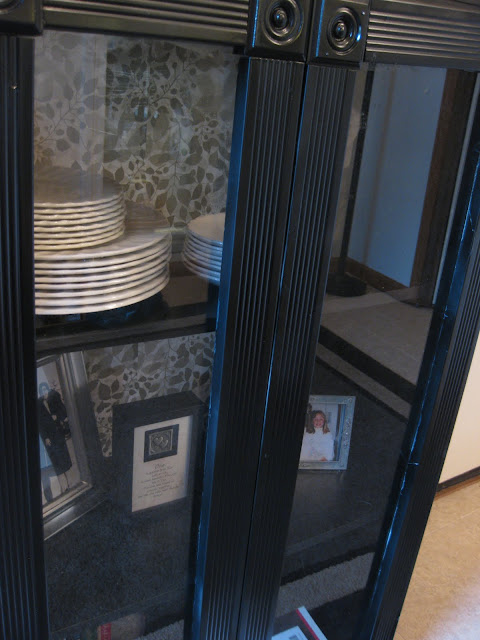
    LOVE this tutorial for making your own glass doors for your book shelves!  
    Thanks for the tips,
    Amanda!

    I mentioned Friday that I’d have another closet makeover to share and I will do that soon!
    ~*~*~*~
    So...What have you been up to?  Feel free to link up!

    The DIY Show Off

    If you’d like to link YOUR DIY project post to The DIY Show Off Project Parade:
    1. You must use the button above and link to this post to share the linky love.
    2. Include your name or blog name and project title. Add your permalink (not your blog url, but your DIY project post url). Feel free to link a Past Post, just invite your readers in a current post with a quick note.
    3. Or email your link to thediyshowoff@gmail.com and I will add it for you.
    4. If you notice your link has disappeared pleaseadd the link back to The DIY Show Off to your post today with a quick note to your readers about the party and try again! I love when everyone participates and readers check out everyone’s links, but I think the return favor of linking back is the nice thing to do so everyone plays fair and enjoys all of the projects and links. Also – this blog party is for DIY projects only. Links not related to DIY will be deleted.
    ~*~*~*~