DIY Project Parade and a GIVEAWAY!

Thanks for all of your sweet comments on our exciting news!  We can’t wait to share MORE DIY projects involving this old house and fixing it up with you!
~*~*~*~
This giveaway is now closed.  
$25 PHOTO JEWELRY MAKING GIVEAWAY!

Have you noticed this sponsor on my side bar? 

 
PHOTO MAKING JEWELRY is giving YOU a chance to win a $25 gift certificate! Awesome! How?  

  1. 1 Entry = Visit http://www.photojewelrymaking.com/.  Come back and comment what you love!  (Leave your email address if you can’t be reached via your blog.)
  2. 1 Additional Entry = Blog, tweet or gossip about this giveaway on Facebook.  Come back and share the link.

Giveaway starts NOW and ends Wed. at midnight EST.  Winner will be chosen by random.org (only comments following giveaway rules will qualify) and announced Thursday, 8/12.

~*~*~*~

MOM – if you’re reading, stop right here and come back after Thursday!

Photo jewelry is a great gift idea – if you can part with it! Very affordable, DIY, easy and personalized.  I love personal gifts and my mom’s birthday is this week so I made her a photo bracelet with pictures of her favorite things – her beautiful grandchildren. 

The kit arrived with everything needed including a CD with a program to help resize the photos. I chose the Mother’s Day Scrapbook Bracelet (here).
Once the software is installed, I followed the directions to resize my photos.  It was super easy!

  1. Once the PDF is open, click “file” then “print” then “properties” .
  2. Set paper to “glossy”/”photo”.
  3. Change paper size to 4×6.
  4. Load 4×6 paper into printer making sure the glossy side will be the printed side.
  5. Click print!

Let the printed photos dry for a few minutes.

Cut out your photos.

Using a fingernail, peel the adhesive backing off and place the photo in one of the photo holders on the bracelet.  Repeat until you have all of the “sticker photos” placed.

Now, peel off the Krystal Clear Itz covers and place over each picture (they’re adhesive also).

I love how the pictures look under the “bubble” cover.

Now it’s time to hook the bracelet together.  One end has “claws”.  Push open with your thumb and hook to the other end.  Be careful!  It’ll pinch you!
 1
 2
All done!  Isn’t this pretty?  My mom is going to love it!
I also made this pretty necklace (here).  I love it!  
I used one of my favorite images from 
 *Olive Rue has a “try before you buy” HERE
*Buy one image from Olive Rue and mention this blog – get another image free!

*Order 5 items and mention you’re are ordering for a DIY project to participate in the DIY Club Inc. monthly contest and get a free image!


(Have YOU entered the contest?)
My project qualifies because I used one of the sponsors listed at
the DIY Club Inc.  How about yours?  Check it out!
Awesome prize package!
What do you think?
It’s so simple.

~*~**~*~

Show off your DIY projects too!

The DIY Show Off

If you’d like to link YOUR DIY project post to The DIY Show Off Project Parade:
  1. You must use the button above and link to this post to share the linky love.
  2. Include your name or blog name and project title. Add your permalink (not your blog url, but your DIY project post url). Feel free to link a Past Post, just invite your readers in a current post with a quick note.
  3. Or email your link to thediyshowoff@gmail.com and I will add it for you.
  4. If you notice your link has disappeared pleaseadd the link back to The DIY Show Off to your post today with a quick note to your readers about the party and try again! I love when everyone participates and readers check out everyone’s links, but I think the return favor of linking back is the nice thing to do so everyone plays fair and enjoys all of the projects and links. Also – this blog party is for DIY projects only. Links not related to DIY will be deleted.

DON’T FORGET TO ENTER THE GIVEAWAY!

Exciting Announcement!

If you’re a DIY Show Off regular reader, you might be a tad aware that Mr. DIY and I are serial DIY’ers so I am so excited to officially announce ((insert drum roll))….see that last name on the list?


If you’re not familiar with the DIY Club Inc., it’s a group of 6 bloggers who get DIY crazy to create some really fun DIY projects.  I am excited to be working beside these talented ladies: 

                                                                    
CHERI
ROESHEL
The DIY Show Off
I am so excited to be a part of this creative team!   Lots of inspiration, good times, helpful tutorials AND the best partYou’ll want to get the details on the awesome monthly contest – going on now!  The prizes are so amazing and so big that you definitely want to pop over and check it out!  I hope you’ll join the party! I can’t wait to share my  projects with you…coming soon!  If you have any questions…let me know!  🙂 

—–

YOU’RE INVITED!
The DIY Club August Contest

1. Use ONE of our sponsor items (not one from each — just one item)
2. Take a picture of the sponsor product and show it in your post
3. Grab our button and you can put it in the post or on your side bar

You can enter a project, using ANY PRODUCT, from any of our Awesome  SPONSORS:

1- ROCKLER
2- Gorilla Glue
3- Orchid Ceramics
4- Mythic Paint
5-  DREMEL Tools
6- Cutting Edge Stencils
7- DISChangers
8- DecoArt
9- Design Divas Wall Vinyls and Lettering
10- Olive Rue (mention DIY Club Inc. or The DIY Show off in the note section when ordering and receive a free image AND get the “try before you buy” at www.oliverue.blogspot.com)
11- PK Glitz

    Click the button below to grab the button code and link up!  I hope to see you there!
    Good luck!


    CLICK HERE!

    We’re so blessed with lots of excitement going on around here and we’re so thankful to be surrounded by so many creative geniuses – you included!


    DIY Project Parade


    Question.  Have you ever nearly finished a DIY project only to realize at the last minute that you did something wrong in the process?  Do you start completely over or just live with it? 
    On occasion, despite my prep and research and the ‘vision’ in my head, this happens to me.  And it just happened.  I’ll tell you about it but first, I finally finished painting my daughter’s room.  
    Not a mistake:  We’re Benjamin Moore fans, but for her room I used Mythic paint .  I was so impressed and not disappointed!  The quality was just as awesome!  The consistency was just the way I like it and I do a lot of painting!
    Here is her room before.  When we bought our house, I gave the girls permission to pick out their own paint color (after all – it’s only paint) and they painted the rooms themselves (mistake!  What a messy job!).  She chose a pretty bold turquoise color and we paired it with hot pink and black accessories.  It didn’t take long for her to outgrow it and my eye would twitch (DIY OCD) when I went in there because of the teen-paint-job which you can’t see in pictures…but there are accidental turquoise brush strokes on the white trim and door and drips on the floor and…you get the idea. I managed to snap a quick picture before painting.
    She has pretty French Provincial furniture.

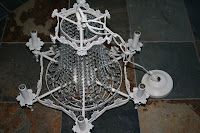
    This chandelier (free):

    got a makeover:
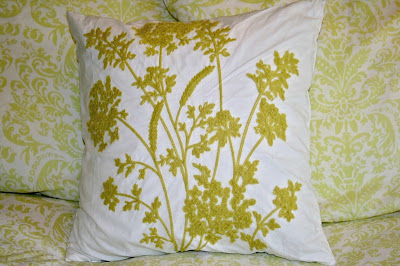
    In the guest room, we have this Pinecone Hill Genevieve bedding (celery):

    I want to give the guest bedroom more of a farmhouse look or maybe even move it downstairs and use the existing guest room as a dressing room (future DIY!), anyway – this pretty bedding goes to her.
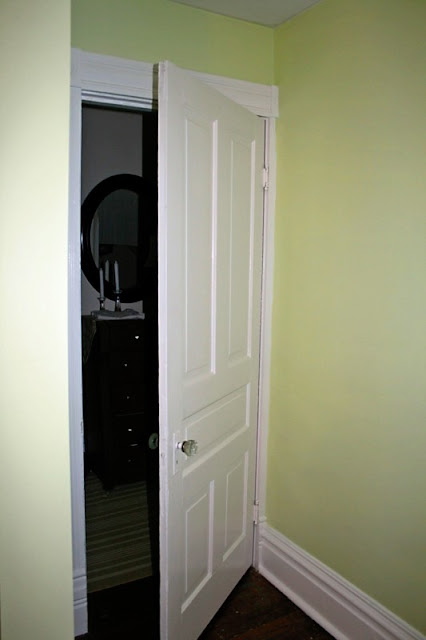
    I chose wall color to match the bedding. It’s called ‘Lamorna’. The Mythic paint covered the turquoise in two coats! It was pretty bright and when painting over the turquoise, I kept thinking it was the same color as that “glow in the dark” color.  I was scared! After all of the walls were painted, it still seemed a little bold, but with drying and the bedding and creamy white accessories, she loves it.  Feminine but still a little crazy for her teenage taste.  (Seriously – if you saw the picture I took with my cell phone – the name of the color would be ghost/plasma!) I used the color ‘Sweet Silence’ to freshen up the trim. It’s a nice creamy white. I’m considering painting her furniture with it too…but we’ll see if that works out.  So many projects, so little time!
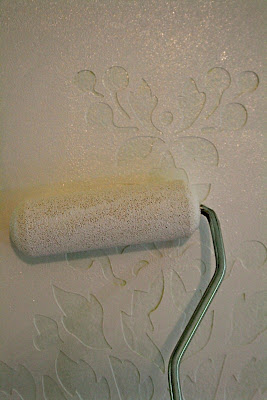
    So, now my error.  I have a damask stencil from Cutting Edge Stencils.  It is amazing!  It was so easy to use and my plan was to give the wall with the two windows a damask wallpaper-look.  I used the same ‘Sweet Silence’ colored Mythic paint that I used on the trim.The damask stencil is almost identical to the damask pattern in the bedding and curtains. Here is a close up of the bedding:

    Frog tape kept the stencil in place.  
    I just dipped my foam roller into the paint then used an empty paint tray lined with foil to get the paint on the roller evenly and applied it to the stencil.  Easy!

    A lot of measuring/centering and leveling and I got the base of 3 vertical lines on the wall. THEN I discovered that the stencil has a “built in” guide for overlapping a finished stenciled area in order to create a wallpaper-look easily.  Oops! WHY didn’t it click before I was to this point?! I swear I read the tutorial!  Perhaps just too much on my mind. So, I painted over and started again for the center part of the wall and did it properly.  I painted the ‘guides’ on the stencil for the vertical lines towards the corners of the wall to give it more detail.

    See here how the top of the stencil overlaps a finished stencil area?  It keeps things lined up!  How cool!

    If you’re looking for a stencil – I highly recommend Cutting Edge Stencils.  It’s a really nice size and so easy to use (learn from my mistake!).  I will be using it again. I love it and it made the entire project less overwhelming. I’m going to use it in another upcoming project too!

    So here is the back wall of her room.  My little DIY helper is going to Germany for a few weeks (foreign exchange program) and I’ll be working to get the rest of the room done before her return so more to come!

    Love the free chandelier in here…

    Pillow on clearance at TJMaxx..

    Frame from estate sale – future project.  🙂


    What do you think?  We still have to get lamps, wall art, frame a mirror, pick up a thrift store chair she likes, work on the estate sale frame project and turn the bifold closet doors  into French doors for the side of the room you don’t see in pictures. 


    ~*~*~

    ~*~*~*~
    So...that’s what I’ve been up to.  What about you?  Feel free to link up!

    The DIY Show Off

    If you’d like to link YOUR DIY project post to The DIY Show Off Project Parade:
    1. You must use the button above and link to this post to share the linky love.
    2. Include your name or blog name and project title. Add your permalink (not your blog url, but your DIY project post url). Feel free to link a Past Post, just invite your readers in a current post with a quick note.
    3. Or email your link to thediyshowoff@gmail.com and I will add it for you.
    4. If you notice your link has disappeared please add the link back to The DIY Show Off to your post today with a quick note to your readers about the party and try again! I love when everyone participates and readers check out everyone’s links, but I think the return favor of linking back is the nice thing to do so everyone plays fair and enjoys all of the projects and links. Also – this blog party is for DIY projects only. Links not related to DIY will be deleted.

    — 
    This post is brought to you by… 
     

    Looking for that nail free premium deck finich, hidden deck fasteners by Tiger Claw are your solution.