Holiday Highlights #4


I
don’t have a lot to share this week. My decorations are still sitting half in/half out of containers around the house! Hopefully by next week, I’ll have some pretty holiday DIY projects completed, another tree up and decorated and our entire home will be all set for Christmas.

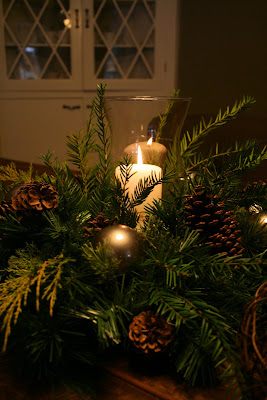
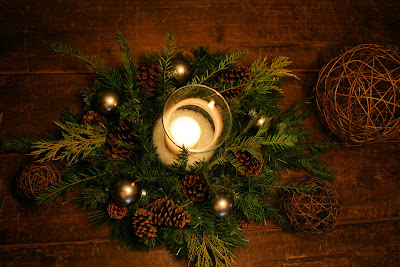
I wanted a rustic/natural looking winter centerpiece for my new barn wood trestle table (new table = another minor DIY project/reno in the works).

Materials
are mostly things I already had:
Wreath
Candle
Glass vase
Faux snow (the only thing I purchased)

I put together a centerpiece that turned out to be exactly what I was looking for.


I plan on adding some DIY mercury glass bulbs to give it a Christmas touch but this is what I’ll use through the winter, even after Christmas is over.

Edit! I gave my centerpiece a little more Christmas spirit. I added some ornaments and different pine tree clippings to fill the room with a Christmas-pine scent. 🙂 Lots of pictures. I just love it.



(This is Not holiday related, except that it feels like a gift when I get time to work on something “fun” and DIY-related! If you haven’t seen them, I have sneak peeks of the progress of my painted bathroom floor! HERE!)

~*~*~*~*~*~


My Happy House is having a Holiday Challenge. Check it out! She also shared a tutorial (here) for making real pine wreaths! Beautiful and now I’m thinking of redoing my centerpiece. Or at least throwing in some real pine clippings for the scent. (DONE!) Isn’t it pretty? And I bet it smells just like Christmas too! ::insert scratch screen and sniff widget::

~*~*~***~*~*~

Now…link up your inspiration. I love seeing your ideas and DIY holiday projects.

If you’d like to link YOUR DIY holiday project or even holiday decor for inspiration post to the party:
  1. You must use the button above (or html code on left side bar) and link to this post to share the linky love.
  2. Add your permalink (not your blog url, but your holiday project post url which is the web address that goes directly to your holiday project blog post, not your blog address). Feel free to link a Past Post, just invite your readers in a current post with a quick note.
  3. Or email your link to thediyshowoff@gmail.com and I will add it for you.
  4. If you notice your link has disappeared please check the content of your post. Is it holiday related? Add the link back to The DIY Show Off to your post today with a quick note to your readers about the party and try again! I love when everyone participates and readers check out everyone’s links, but I think the return favor of linking back is the nice thing to do so everyone plays fair and enjoys all of the projects and links. Links not related to DIY holiday projects or holiday decor for inspiration will be deleted.

I’m joining

Head over and check out all of the links for great transformations and inspiration!

Holiday Highlights #3

 
Welcome to the 3rd DIY Show Off Holiday Highlights party!

Link up your holiday projects, decor or check out the links for great ideas & inspiration!

I decorated my Christmas tree tonight! In yesterday’s post (here), I shared how I gave my tree some height and covered the ugly tree stand. Today, I swapped out the tablecloth for a burlap cover (using the round tablecloth as a pattern and sewing 2 half circles together). I love it! Here it is with the burlap “root ball” look that I was going for.

This is our main Christmas tree in the livingroom which is a little more formal at the moment. I love the glow and could sit and enjoy a Christmas tree for hours, listening to Christmas music. (Pictures make the ornaments and decorations look pink, but they’re actually pretty shades of gold.)


More Pretty Projects

~*~*~*~*~*~
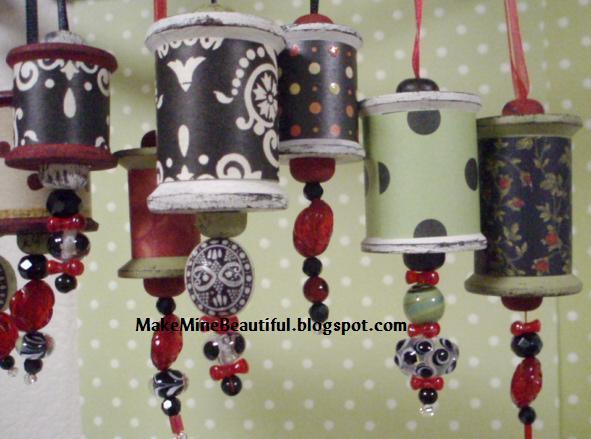
Look at these spool ornaments! I love them – so unique and so pretty!


DIY instructions at Make Mine Beautiful!
Thanks for sharing your creativity, Polly!

~*~*~*~*~*~*~
I love this ornament tree that Courtney made!
More details at her blog, RedHeads Craft More Fun.


Isn’t it pretty? I love the different sizes and pretty blues.
Beautiful job, Courtney!

~*~*~*~*~*~*~*~

You know how much I love mercury glass. Using the technique I shared on my pumpkins, Jodi made these pretty vases and ornaments. Great job, Jodi! I’m definitely going to do some too!


HERE are the painting instructions. But, for the ornaments, Jodi put on a rubber glove, removed the hanging neck piece, held it by the neck and sprayed. Then she put a screwdriver in the hole used clamps to hold the screwdriver.


~*~*~*~*~*~*~*~*~
D
aily reminder. Shop the vendor links for awesome gift ideas and


The DIY Show Off

Now…link up your inspiration. I love seeing your ideas and DIY holiday projects!

I’m also linking up to

If you’d like to link YOUR DIY holiday project or even holiday decor for inspiration post to the party:
  1. You must use the button above (or html code on left side bar) and link to this post to share the linky love.
  2. Add your permalink (not your blog url, but your holiday project post url which is the web address that goes directly to your holiday project blog post, not your blog address). Feel free to link a Past Post, just invite your readers in a current post with a quick note.
  3. Or email your link to thediyshowoff@gmail.com and I will add it for you.
  4. If you notice your link has disappeared please add the link back to The DIY Show Off to your post today with a quick note to your readers about the party and try again! I love when everyone participates and readers check out everyone’s links, but I think the return favor of linking back is the nice thing to do so everyone plays fair and enjoys all of the projects and links. Links not related to DIY holiday projects or holiday decor for inspiration will be deleted.

Christmas Tree Stand Cover


I
managed to put up the tree today. It’s not decorated yet. I do prefer a real tree (love the smell) but with the hardwood floors and potential water damage and the fact that Mr. DIY prefers not to search for and transport a real one, we have a really nice artificial tree. It’s older, before the time of pre-lit but we do have another pre-lit one for the family room. Anyway…back to why I’m writing. I wanted to share this incase you’re putting your artificial tree up this weekend and like this look. Oh – and if you ever need to know where your artificial tree needs ‘fluffed’…take some pictures. All of the “holes” between branches really shows up!

This may not work for everyone’s taste and style, but I don’t like the look of the artificial tree stand and don’t want to argue with the dog over the tree skirt. So this year, I decided to attempt something different. A ‘faux root-ball look’. Mr. DIY thinks I’ve created more of a ‘cupcake look’ but I really love how it turned out. It also gives the tree more height. Luckily we have 9′ ceilings.


This is all from things I had around the house. I love when a new look is free!

Edit: I swapped out the table cloth for a burlap cover by using sewing 2 half circles together (using the table cloth as a pattern). Now it looks less like a cupcake.

Materials: Round table cloth, 2 pieces of twine, beverage tub and a few twist ties.

First I laid out the table cloth. I may pick up some burlap this week and sew a big enough circle to swap out for the table cloth.
Then I set the beverage tub in the middle and put the tree stand on top.
I secured two of the tree stand “legs” to the beverage tub handles with twist ties (I twisted around the handle first, then up through the hole on the “leg”).
Next, I gathered the table cloth up and Mr. DIY held it while I tied a piece of twine around it, just below the “eye screws” for tightening/straightening the tree ‘trunk’.


Then I put in the bottom of the tree and the other pieces and straightened out the branches. Once I could tell that the tree was straight (after some adjusting of the ‘eye screws’ in the bottom), I used another piece of string to tie above the ‘eye screws’. Fluff the excess table cloth around.< img alt="" border="0" id="BLOGGER_PHOTO_ID_5409312549635374434" src="https://2.bp.blogspot.com/_Ydn4kd0aaEY/SxG9GqgUPWI/AAAAAAAAB7o/bBILpAHJGTg/s400/treecupcake1.jpg" style="cursor: pointer; display: block; height: 267px; margin: 0px auto 10px; text-align: center; width: 400px;" />I added some burlap ribbon to finish it off.

You could also use any fabric or decorative round table cloth. I really love the burlap:

What do you think? Here is my tree decorated: