DIY Show Off Fall Festival

Great links of autumn inspiration last week!  Thanks for linking up and sharing your DIY fall projects.  I could just feel the warmth, smell the mulled cider and taste the fall treats!  DIY wreaths seems like a favorite fall project, so I went through the parties and grabbed the photos and links.

Raggedy Wreath shown left is by Thrifty, Nifty & Wise.

Here’s my DIY fabric wreath tutorial from last week if you missed it:

This week…using “S” hooks, I added a grapevine wreath and some leaves to the pendant light in the dining room:

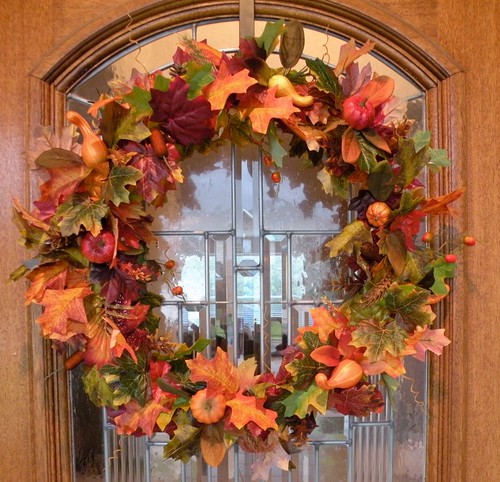
Dollar Store Fall Wreath at House of Hepworths:

DSCN5281

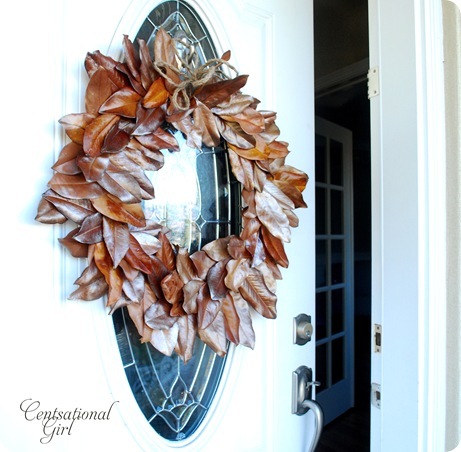
Magnolia Wreath at Centsational Girl:

cg front door magnolia wreath
 $5 Wreath in 5 Minutes at The Penny Parlor:

Pretty Yarn Wreath at Ready.Set.Plan:

Monogram Wreath at Petit Design Co. blog:

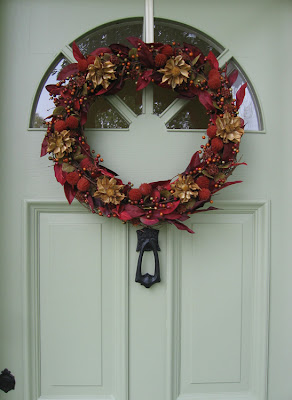
Champagne & Chocolate Wreath at The Answer is Chocolate:

Another Monogram Wreath at Pinkapotamus:

$5 DIY Wreath at Decor Roomies:

Twine Wreath at Beauty4Ashes:


Book Page Leaf Wreath at Mad in Crafts:

Fall Wreath DIY
tutorial
at Cozy.Cottage.Cute.:


Frugal Fall Wreath at Frugal Mom x 3:

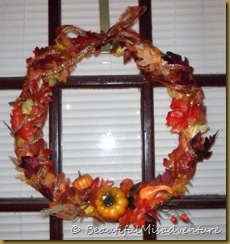
It’s Fall Ya’ll at Beautiful Misadventures:

SAM_0306

DIY Grapevine wreath at A Glimpse Inside:

DIY Fall Wreath at Fishin With the Trouts:

Do you have a DIY Fall Project to share?  
Show it off!
Rules:
  • Create a blog post about an Autumn/Fall project that you’ve done
  • Add your project title to Mcklinky (example: House # Pumpkins)
  • Type in the permalink address, not your basic blog address. A permalink is the address that links directly to your specific post. (example: http://thediyshowoff.blogspot.com/2009/08/house-number-pumpkins)
  • Please use the DIY button or link to this post to share the party with your readers.
  • Although a tutorial is helpful, it’s not required. Anything DIY – autumn related is permitted.
  • Please follow all steps above or your link will be deleted.  If you notice that you’re link disappeared, please make the correction according to the rules above and re-link!
  • Enjoy and be inspired!
~*~
There’s still time! 
Enter to win your $200-$300 choice of faucet from Delta!
Enter to win $100 True Value gift card or mystery prize (mystery prize purchased by me)!

DIY Fall Festival and Easy DIY Fabric Wreath

Do you make your own wreath?  Looking for an easy tutorial?  This one is perfect.  Inexpensive, easy and DIY.  Easily customize it for any occasion but by using fall colors…I’m reminded of a pile of raked leaves.  Perfect for fall!

I made this from a straw wreath and fabric.

It’s a wreath…

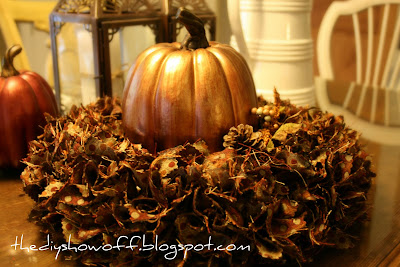
or a centerpiece…

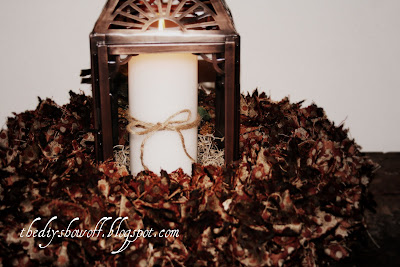
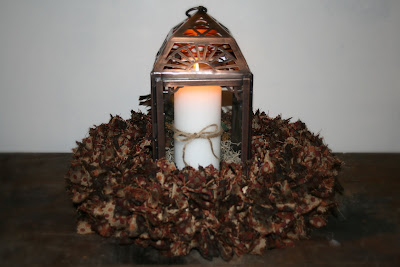
or a candle/lantern ring…

I love how it turned out.  It reminds me of a pile of raked leaves!  I love that there are so many different options.  This one is perfect for Fall but use different fabric to make one for Halloween or holiday fabric for winter or Christmas or Spring or to match decor. You could even match your clothes if you were so inclined.  I can’t wait to make another one! In fact, I’m working on another with different fabric and I’ll post pictures when it’s done (using my rotary cutter so it’ll be quicker and even easier).
Here are the instructions for making a larger wreath.  You choose the theme or design!
Materials:  1 yard of fabric, one 14 inch straw wreath (leave the plastic wrapper on)
Tools:  Scissors (or pinking shears), screwdriver

Optional:  Embellishments, hot glue, wire cutter, Gorilla Glue

Instructions:
1. Fold fabric and cut into squares.  Mine are 3×3 inch but you can go bigger and they don’t have to be perfect.  No one will know! (I chose a fabric looked pretty on the back too but it’s not necessary.)  This is the hardest part because cutting up a yard of folded fabric hurts!  But a rotary cutter would make it a lot easier.

2.  Holding a fabric square in one hand and a screw driver in the other, place the screw driver into the center of the fabric square. (It’s hard to get a picture because it takes both hands but hopefully this helps.)  ***Note:  Burlap is a little trickier. It helps to use the screwdriver to make a pilot hole, then fold the burlap into a square.  Dab Gorilla Glue into the hole and then using the screwdriver, push the end of the square that is all fabric (hold the fabric like a diamond, it’s the bottom part that is all fold) into the hole and twist.
3.  Poke into the straw wreath (with plastic wrap still on) and give it a little twist.  That’s it!
To keep things very secure, you can use a dab of Gorilla Glue before pushing fabric into place. It will expand inside the hole and adhere to the fabric and straw. This will keep the fabric from falling out, especially if the wreath hangs in a high traffic area such as a door.

4.  Repeat until the wreath is covered.  Place about an inch apart, filling in randomly or from outside in, whatever works best for you.  When done, go back over and fill in any ‘holes’.
5. Embellish with leaves, pinecones, a bird, etc. (or other decorative items depending on the season/holiday or look you’re going for).  I use wire cutters to cut the wire stems shorter or to cut off smaller silk flowers/etc. to embellish.  Creating a pilot hole using the screwdriver helps or attach using hot glue.  I also slid a twist-tie in the back/top underneath the fishing line looking string that keeps the straw wreath its shape to hang it. 

That’s it! Super easy.  Inexpensive.

So easy, I made a second decorative one from burlap and a smaller straw wreath.  Tutorial using burlap here.
—–
The DIY Show Off

thediyshowoff.blogspot.com

~*~
 http://diyclubinc.com/

***Sharing my fall wreath tutorial at Centsational Girl.  🙂

Do you have a DIY Fall Project to share?  
Show it off!
Rules:
  • Create a blog post about an Autumn/Fall project that you’ve done
  • Add your project title to Mcklinky (example: House # Pumpkins)
  • Type in the permalink address, not your basic blog address. A permalink is the address that links directly to your specific post. (example: http://thediyshowoff.blogspot.com/2009/08/house-number-pumpkins)
  • Please use the DIY button or link to this post to share the party with your readers.
  • Although a tutorial is helpful, it’s not required. Anything DIY – autumn related is permitted.
  • Please follow all steps above or your link will be deleted.  If you notice that you’re link disappeared, please make the correction according to the rules above and re-link!
  • Enjoy and be inspired!


Linking to:

Just a Girl – Show & Share

Burlap leaf garland and easy faux pumpkins

Inspired by the cooler temps, I got the itch decorate a little fall vignette.  I’m not ready for summer to end, but I’m hoping that by seeing this…I’ll accept it.  🙂

Here is how I made the garland:

Materials: 

Burlap scraps
Jute twine
Gorilla Glue
Deco Art Dazzling Metallics

Cut a desired garland length from the twine, allowing for some scrolling and circles.

Trace a few leaves gathered from the yard onto some burlap scraps.

Cut out. Laying everything out on a piece of cardboard works best for when gluing.  It’s the same color as the burlap, so pulling it up after drying doesn’t affect the look on the back. 
Using a small dab of Gorilla Glue (it doesn’t take much), glue the burlap leaves to the twine and the circles to hold their shape.

Add weight to the glued areas.  I use glass.  It didn’t seem to glue to the project.

While it’s drying, I began the next step by painting a border on the leaves around the weights and then touching up the other areas after the glue was dry.   I used Decor Art Dazzling Metallics that I had left over from last year.  Pretty handy to use the leaf as a palette.  🙂
Note:  If the glue expands, it’s okay.  Just paint over it, it adds color and interest! 🙂
I love how it turned out.  Getting me in the autumn spirit!
For the pumpkins, I spray painted my faux pumpkins white and let dry.
Then, I used the paint from the leaf borders to “paint” my pins.  Just dip and swirl.  Let dry.
Next, cut a piece of twine and swirl and curl it, pinning along the way. Or create a monogram or other design.
I pulled off the stem and gave my pumpkin a “mop top”.  I could get pictures because it involves both hands but here is what I did.  Wrap twine around one hand 10-12 times (keeping ends at left or right edge of hand).  Pull off, keeping a thick twine circle intact.  Pinch in the middle and tie with another piece of twine, knotting in the center.  Fluff.  It’s a pom pom! 
Apply Gorilla Glue (I used the white here in case I used too much).
Find the middle of an end of the twine pom pom, not the middle where the knot is but the underside of that and push down onto the glue.  Add weight and let dry.
What do you think?
 —–
The DIY Show Off

thediyshowoff.blogspot.com

~*~
 http://diyclubinc.com/
 
—–
It’s that time of year again!  I loved all of the Fall related DIY projects last year.  If you’re looking for inspiration, click HERE to get some ideas and more HERE from last year.
And if you’re an early bird and have a Fall DIY project already done, feel free to link up!  I know it’s early.  Still August!  But I need a little fall cheer to help me welcome the cooler temps.  I love fall. It’s the season after that – don’t say it!  I’ll stress, start biting my nails and go into hibernation. 
The DIY Show Off Fall Festival will start today and run every Friday until the snow flies or it’s time to think about something else.  We’ll play it by ear and see how it goes.
Rules:
  • Create a blog post about an Autumn/Fall project that you’ve done
  • Add your blog name and project to Mcklinky (example: The DIY Show off – House # Pumpkins)
  • Type in the permalink address, not your basic blog address. A permalink is the address that links directly to your specific post. (example: http://thediyshowoff.blogspot.com/2009/08/house-number-pumpkins)
  • You must use The DIY Show Off Fall Festival button and link back to The DIY Show Off Fall Festival post so that everyone gets to join in the fun. Here is the button:
  • Although a tutorial is helpful, it’s not required. Anything DIY – autumn related is permitted.
  • Please follow all steps above or your link will be deleted.  If you notice that you’re link disappeared, please make the correction according to the rules above and re-link!
  • Enjoy and be inspired!