Dining Room Furniture Makeovers

There is a lot of painting furniture makeovers out there (love them!) but staining furniture is another beautiful option. I have two before/after projects to show off! Lauren (nestie artsywife07) submitted her china cabinet. Here is her note:
“This cabinet was given to us for free by my mom’s friend and I decided to stain it to match our new table and chairs. I gave it a light sanding by hand and then wiped it down with a tack cloth. I mixed two different finishes of stain together (a latex with poly built in and a gel stain). I’m sure you’re totally not supposed to do that, but it was the only way to get the finish and color I wanted. I applied the stain with a sponge brush (pay the few dollars extra for high quality ones from Lowe’s or Home Depot, I tried cheaper and the finish wasn’t as nice). I did one coat and then a lot of touch ups. I also decided to get rid of the window pane pieces to give it a more streamlined look.”
Before:
After:


(New light fixture too!)

I love the rich dark color! Staining is so much more work than painting in my experience (I loathe the sticky/oily feel when working with it) but your project shows it’s so rewarding. It’s gorgeous! Great transformation and lucky you, Lauren to score a beautiful piece of furniture for free! You did a beautiful job with it!

~*~*~*~*~*~*~
I’m also showing off for Marlen from Northern Living in the South. Her dining room table transformation is unbelievable. I never would have believed the before and after pictures were the same set! Here is her post:

THE DINING ROOM TABLE IS FINISHED AND READY TO BE EATEN ON, FOR PUZZLES TO BE ASSEMBLED ON AND TO BE DANCED ON. don’t act like you don’t dance on your table when no one is looking. oh? me neither.

quick history- the table was given to us by my grandparents who moved down to fl and no longer wanted it. it was a pine 8-top piece of craftmanship with two removable leaves. here is a before photo without either of the leaves in.

after sanding the entire table at the wood shop on base, we were ready to start staining. we went with a black stain even though some recommended using black paint. here i am, staining the second coat with the leaves in. i told you it was big!

it ended up with 3 coats of stain and 3 coats of polyurethane finish.

the table was a piece of cake compared to the chairs. luckily, josh did most of the sanding, but i was still left with the majority of painting and covering the seats. check out the old twill seat covering!


josh removed the seats with his handy dandy drill and i covered each of them with a staple gun. the hardest part was getting the corners nice and tight without any fold in it. i actually hated this procedure but someone had to do it and it was not about to be josh. he just pointed and laughed at my frustration. and then took a picture.

we were told we didn’t have to sand the chairs all the way down to the bare wood if we used spray paint instead of stain. and that is exactly what we did. sanding anything previously stained down to the bare wood is a pain in the you know what. if there is a short cut, i will take it. and i did. how many cans would you say it takes to cover six chairs? you are wrong, it took 19. NINETEEN! you may be wondering what happened to the other 2 chairs? well, lets just say they are getting a pretty little slipcover for now. the base actually ran out of the spray paint we were using and we didn’t want to risk having two ugly ducklings by using a different brand. if we ever need all 8 chairs, the slip-covered chairs will be placed on the ends of the table. maybe someday when i get the crazy idea to refinish a dining room set again, i will tear off the slipcovers and spray away, once again. here they are, all lined up, drying in the sunshine. ta da!

the chairs took three cans each to cover completely. i then covered them with a thin coat of polyurethane so it had the same sheen (low luster) as the table itself, and to protect them from getting scratched up. below, is a finished chair. i am happy.

and for the grand finale!


it is finished and i am very pleased that it is. you will not see me jumping on any more refinishing tasks.. for now. hey, you wanna discuss those candlesticks? because i do. they are steal with tons of bead work. originally, they $50.00 for the tall ones and $40.00 for the shorter one. you wont believe what i paid for them… $28.00 total. let’s just say it together- “what a deal!” now let me fill you in on yet another secret- they are actually taper candlesticks! however, with the help of the hub, i removed the taper holder and voila! i bought these springy tri colored pillar candles separately to liven up the dark colors. enjoy!


It’s awesome Marlen! Thanks for showing it off!


All Ready for Partying – A Party Patio (barn) Makeover!

I love participating in parties and I love Jen so even though this is an older post, I thought I’d dig it out, brush it off and “wear” it to the party!
I’m so excited to share my barn before/after pictures. This space was completely un-usable, except to store/throw junk. Now it’s a functional clean party space hidden from the rest of the house and road. I’m still working on some additional DIY touches, but in the meantime, I think you’ll agree that the transformation is a HUGE improvement.

To keep costs low since this area is only used for occasional entertaining, we re-used a lot of the things we discovered in the barn already (and more DIY coming). We also obtained a few things from estate sales.

Before (left side):
The “barn red” paint was faded to a really ugly pink. The ‘floor’ was dirt with broken bricks/pavers. There were LOTS of spiders.
We took out the crumbling brick and concrete pavers that formed a broken floor on top of dirt, some broken glass and weeds. We added paneled siding to the back wall and painted. We poured a concrete patio (professionals did that part since it was a large area).
My husband framed the door and the wreath was on clearance at Joann Fabrics for $8.
I’ve had these old looking milk bottles for years … in the basement/storage.I also have special plans for the short table (hope to finish it this week).
The left side is still a work in progress…so updates coming in the future.

Before (right side):
Scary, huh?
Ready for the after of this side?

I love it. I changed my mind – it’s not all about entertaining. This is a great spot to relax! The wicker furniture was picked up at an estate sale. Isn’t the footstool the cutest? I didn’t even bother with repainting it. I loved it the light faded blue that it is. I did give the wicker chairs a coat of white spray paint to freshen them up.
I sewed cushion covers with fabric I bought at Goodwill. (I’ll spare you the nasty before picture.)
We found the old Coca Cola sign in the barn.
I made a table from a crate and old window we also found in the barn.


The other accents we got at estate sales (the book and gauge). The blue canning jar I confiscated from my brother. The bird house was hanging on the old grape arbor.
The only thing new is the birdie cloche I got at TJ Maxx a few months ago (how perfect for a barn!) and the white lantern (above).
I also ran out of time for replacing the hanging light bulb fixtures since I’m so indecisive. Since we have a BBQ coming up, my quick temporary solution was the paper lanterns (less than $2 on sale at Michaels). I already had the area rug too.
I did make a chalkboard from one of the old windows. It’s not hung up yet, but here it is:
The tables looked liked this before. The first one was actually nailed to the back wall.

Tables/etc. now:
Now, with new legs and paint and a “found” bench…they’re perfect for picnics, cookouts and to use as a buffet table.

Here is the transformation one more time:

Before

New Back Wall


New Concrete Patio

Russ tries out the paint sprayer

And now….


I do have a huge wall to decorate yet too and I’ll share details as they happen.

Edited to add:
Remember this?
It’s the mantel I found in the loft of the barn. I’m pretty sure it’s original to the house.

It was filthy-dusty. The paint job also looks like it’s 80-years-old. For now it just got a major scrubbing and I think I like the finish. Very rough old paint. I think it’ll go here. What do you think?

This post is brought to you by Tunstall Garden Buildings, manufacturers of timber garages and other quality garden buildings.


Consider a fire pit to enjoy your outside space.

Julia's DIY Upholstered Headboard & Guest Bedroom Makeover

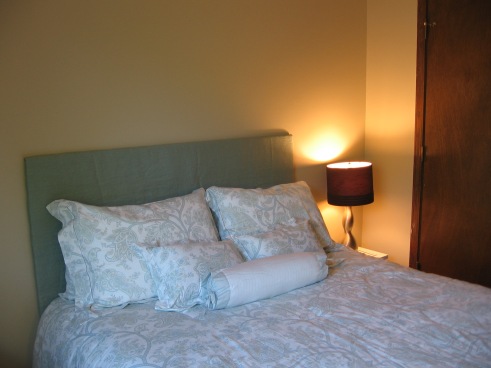
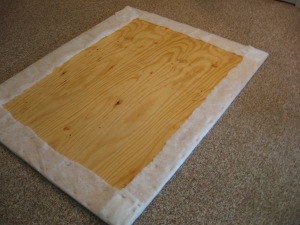
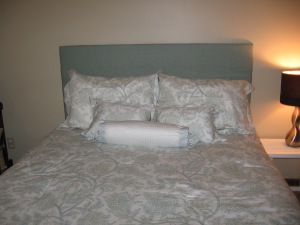
Julia from Pugs Not Drugs submitted her beautiful DIY upholstered headboard. She did a great job and all her hard work deserves a “show off”! Here it is:

009

“So last night we upholstered a headboard for our guest room! Took less than 30 minutes! The most intensive part was shopping for the materials, finding the right fabric and the right size batting and plywood. We were fortunate that my father in law had a piece of plywood in the exact dimensions we wanted! We do not have a vehicle big enough for bringing a 60” wide piece of wood home so we were grateful for his help! There are many ways to do this project, some use foam to make a thicker headboard, I couldn’t find foam in the right size so I settled for one layer of batting only. You can use plywood, mdf, or just a square frame if you want it to be more lightweight. You can put legs on it, attach it to your bed, or hang it on the wall. Ours was the right height so that we could just set it behind the bed and push the frame up against it to hold it in place. As long as nobody gets jiggy on our guest bed I think it will be fine ;)

Project materials & budget breakdown:

60” x 48” plywood: free
2 yards of upholstery fabric: $35 (I splurged a bit, although it was on sale at Hobby Lobby)
queen size quilt batting, extra thick: $15
staple gun & staples: $20

TOTAL COST: $70

and I will use that staple gun again and again, love it!!

Directions:

1. Assemble your materials, cut plywood or mdf to the desired size.

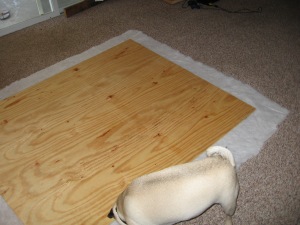
2. Lay batting on the floor, set wood on top (warning, pugs find quilt batting QUITE delicious)

015

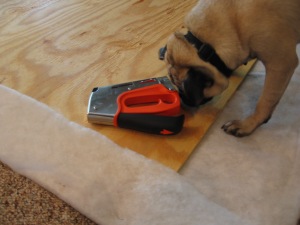
3. Fold batting over and staple into place. (at this point you should probably put your pug outside)

017

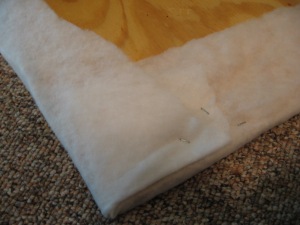
4. Take extra care at the corners to fold everything over so you get squared edges

020

5. Take a break and admire your handiwork thus far

022

6. (no pics of this step, sorry). Iron your fabric, don’t be lazy like me and just throw it in the dryer to release the wrinkles, that doesn’t really work.

7. (again no pictures, Tyler and I were both busy during this step). Lay the fabric on the floor, set plywood on top, and staple the fabric just like you did the batting

8. Install headboard via your chosen method (hanging on wall, setting on legs, attaching to bed, wedging between wall and bed, etc). Then step back and admire your handiwork. Congrats, you just DIY’d a headboard!”

035

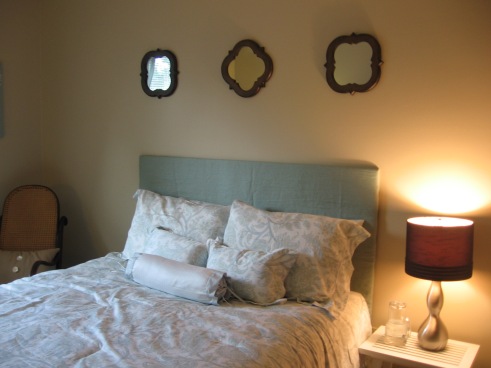
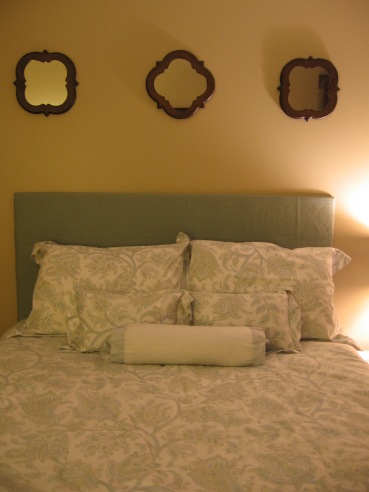
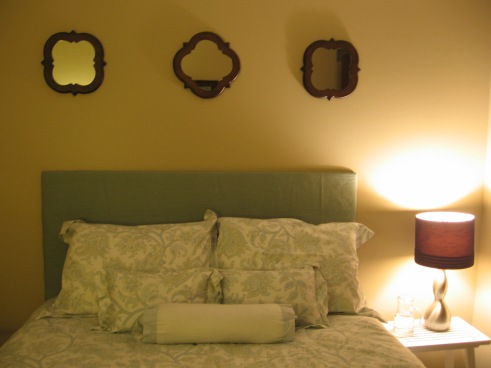
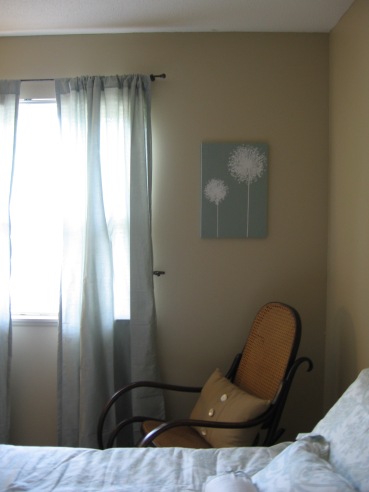
And here is her guest room. I love the soothing light colors and every detail.

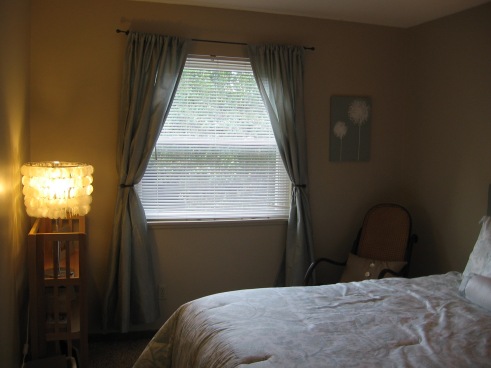
“We love having visitors, so one of the rooms I was most excited about decorating in our house is the guest room. We had a guest room/office in our old apartment but it was pretty much just a mish-mash of (way too much) furniture. In this room we went with a neutral wall color and have filled the room with blue, white, cream, and brown accents. We wanted to keep the room light since there is no overhead light fixture. The window and lamps are the only source of light! So far we’ve had good feedback from our guests, I’m sure we will keep tweaking the room over time to make it more cozy and comfortable for our visitors!

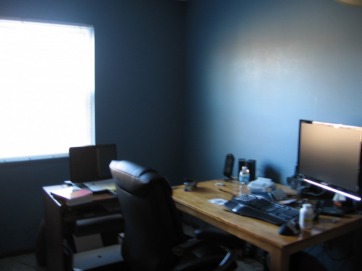
Here’s a reminder of the BEFORE:

previous owner apparantly liked his office to be very VERY dark. There were no lights in this room people! And the walls were dark blue!

And our AFTER:

010

056

053

111

044

051

011

paint color: Sherwin Williams nantucket dune
bedding set from TJMaxx, came with skirt, sheets, pillow & sham cases, comforter, and decorative pillows, a great value!
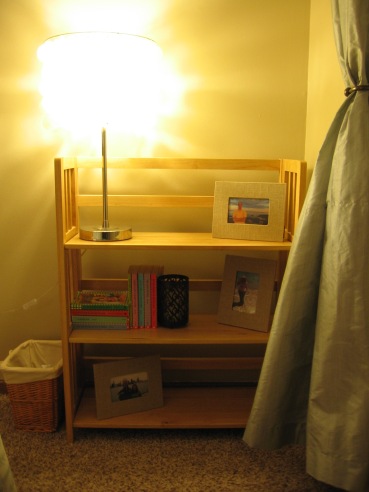
curtains, decorative pillow, wall art, and picture frames from Target
bedside lamp from Pier One, capiz lamp from craigslist
upholstered headboard:
DIY!
mirrors from Hobby Lobby
glass pitcher from Homegoods

Budget breakdown:

paint/primer/supplies: $50
upholstered headboard: $50 (not including the staple gun)
bedding set: $120
mirrors: $36
curtains, wall art, frames, pillow from Target: $75
lamps: $60
bentwood rocking chair: hand me down from the in laws!
pottery barn bedside table (not pictured): $5!
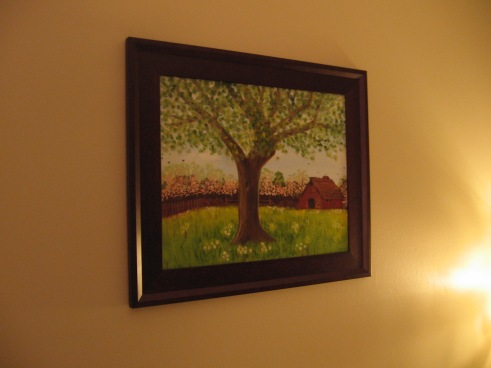
new frame for the painting given to us by Tyler’s grandma: $15

TOTAL: $378!

This room is essentially finished, all I have left to do is put a new coat of paint on the bedside table and put it in the room! We’ve had two guests try out the room already, who wants to be next??”

Waving my hands over here! Julia – I’m next! With so much going on here…I’m looking for a retreat and your guest bedroom looks so peaceful. Great job! Thank you so much for sharing!