DIY Project Parade – Frosted Vinyl Windows

It’s that time of the week. Time to recap and show off your DIY projects! I love seeing your DIY talent!  
 The DIY Show Off
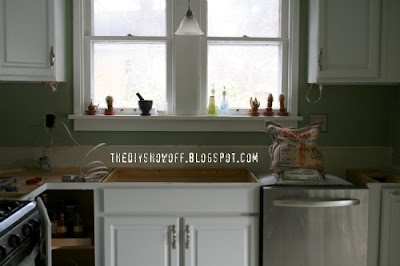
We’ve been working in the kitchen – getting an electrical outlet underneath the sink for a new instant hot water tank and the old blue laminate countertops are GONE!  
Before: Good bye blue laminate!

Looking better already.  In Progress:  Old counter, sink and faucets gone!  Running electric to install an outlet under the sink for instant hot water tank.

In the meantime, I started “frosting” the glass panels on the French doors between our living room and family room.  The family room is on our DIY to-do list and isn’t finished.  It’s where teenagers hang out and a ‘catch all’ for just about everything so being able to see in there isn’t ideal.  

And since the family room isn’t completed, the family room side of the French door still has plastic on the window panels – until I either stain or paint the door (rather than taping when the time comes).  That’s why the windows look foggy.  Until the family room is done – it also helps to disguise the plastic on the window panels!  Love this! That foggy/dirty look always bothers me!

Before
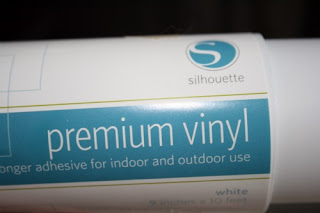
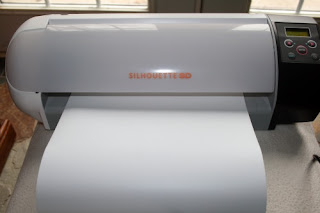
Using my Silhouette, I cut vinyl panels.
  • First I measured the glass panels in our French doors.
  • Next, I enlarged my paper from 8.5 x 11 to 8.5 x 14.
  • Draw a “rectangle” and size it to the glass door panel (subtract just a tad so it fits on the glass panel). My rectangle was 6 x 12.
  • Insert the image.  I used “mesh flower lace” from the Silhouette Online Store.
  • Drag and re-size the image to fit within the rectangle. The rectangle gives a border so that the actual mesh flower lace design is what is removed/negative. 
Remove the vinyl that won’t be applied.

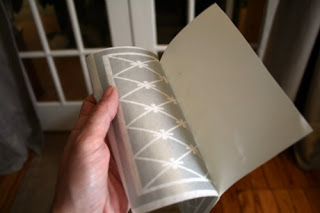
Use the transfer paper so that the frosted vinyl can be applied to the glass panel. 

Pull apart (vinyl should be on sticky side of transfer paper and waxy grid side is garbage).

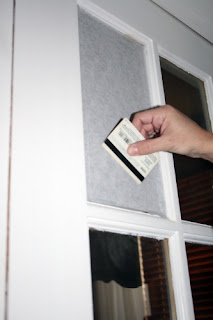
Place to glass panel and rub with a credit card.

Peel away the transfer paper.

I’ve been using my frosted vinyl for a number of projects lately so I was only able to finish three panels before running out and I’m waiting on my frosted vinyl order.

I love the way it lets the light into our living room but adds a little privacy between the living room and family room.

Here is the way it looks from the other side (the unfinished family room side).

This week I discovered that Jen at Tatertots and Jello had the same idea.  Pop over to check out her cute design. 
I’ve been having fun with the Silhouette but granite countertops come Tues. – so I’m hoping to have some more kitchen progress to share including more information on the awesome faucets and pretty back splash!
~*~*~*~


Do you have a DIY project to show off this week?  I’d LOVE to see it!  Or please visit the links to get inspired!


The DIY Show Off


If you’d like to link YOUR DIY project post to The DIY Show Off Project Parade:

1.You must use the button above and link to this post to share the linky love.


2.Include your name or blog name and project title. Add your permalink (not your blog url, but your DIY project post url). Feel free to link a Past Post, just invite your readers in a current post with a quick note.

3.Or email your link to thediyshowoff@gmail.com and I will add it for you.


4.If you notice your link has disappeared -please add the link back to The DIY Show Off to your post today, a button or a quick note to your readers about the party and try again! I love when everyone participates and readers check out everyone’s links, but I think the return favor of linking back is the nice thing to do so everyone plays fair and enjoys all of the projects and links. Also – this blog party is for DIY projects only. Links not related to DIY will be deleted.


Silhouette is offering DIY Show Off readers a special discount on that same Silhouette and premium vinyl bundle with a unique code SHOWOFF usable at silhouetteamerica.com.  That promo code will get you the Silhouette bundle for $225 ($375+ retail) and/or 25% off premium vinyl if you’re looking to show off.  SHOWOFF code is active from the 23rd through March 1st (if you don’t win – you still get a great deal!).

Personalized DIY Chalkboard

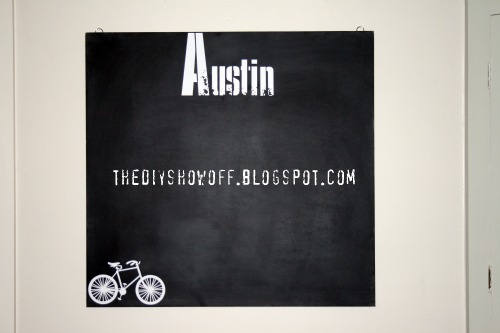
My nephew’s birthday is coming up soon.  Being a mom to two girls, I’m a little clueless when it comes to boys.  However, we’ve had a piece of chipboard from furniture packaging just sitting around waiting for a DIY idea.  I decided to make my nephew a personalized chalkboard for his birthday.
Materials:
Recycled chipboard (Could also be directly applied to smooth walls with taping off a blackboard shape.)
Decor Art Americana Chalkboard Paint
Gorilla Glue tape – Handy 1″ Roll
Vinyl decals
Chalk and eraser
I found that using an Xacto knife to remove intricate parts of the vinyl design is more helpful than using a fingernail. 
I purchased the bike and LD Survivor font from the Silhouette online store.

See the full tutorial at the DIY Club!


~*~*~*~

THIS JUST IN – Miranda from Just Drink Coke is hosting a new linky party called 
“The Reality Collection”!  With the popularity of reality tv, she is hosting a party about real life – your beautiful mess.  Like she says, it happens to the best of us. It happens to all of us.  So share your beautiful mess – you don’t have to spend a lot of time making it like you do with DIY, it’s probably already made.  She’s right. 

My pictures above are close ups but below is me zooming out. I displayed the chalkboard on the dining room wall for photo purposes. I am more of an “organized messer”. This my beautiful mess. The others are ugly messes not meant for blog friends’ eyes! Trust me. You’d be scared.  

Do you do this too – zoom the unwanted things out of your ‘after’ shots? 


Share your reality at 

Just Drink a Coke.


~*~*~*~

Dresser Labeling

In honor of the Silhouette Giveaway, I’ve been using my Silhouette machine like crazy. You’d do the same!  I know it!  I’d say one of the best things about cutting vinyl is the ability to label things.  I imagine my entire house will be organized and labeled before the end of the week. 
Please bear with me as I post a few Silhouette tutorials for those looking for tips.
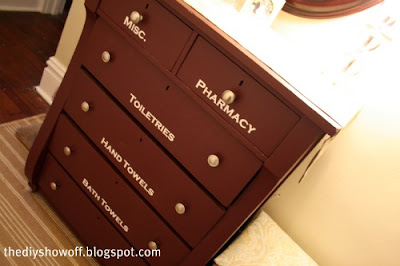
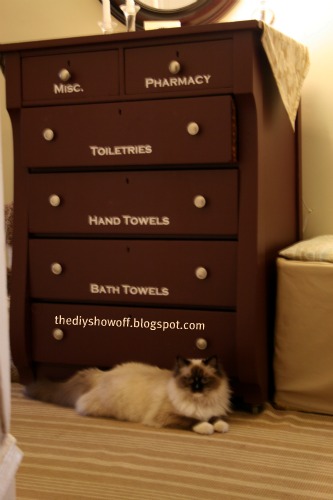
We have a dresser in our upstairs hall that holds an extra supply of toiletries and towels.  I gave the dresser a makeover a little over a year ago (dresser/stairway/hall makeover).  But being upstairs in the hallway, I love that I can get a little whimsical with it so I decided to label the drawers.  Makes it a lot easier for our family to know exactly which drawer to open and serves as a reminder to where extra supplies are (no more yelling where the toilet paper, soap or clean towels are). 
Here is how creating vinyl labels works for me:
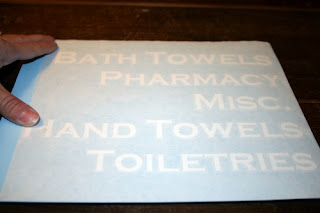
Open the Silhouette software.  On the left is a ‘text button’ (the letter “A” in a box).  Click that and type out the labels.  To the right are the font and size options. (Click pictures to enlarge.)
Make sure everything fits within the red cutting area.  Click the “send to Silhouette” button on the upper left task bar.  On this page, I change settings according to the vinyl packaging (speed and thickness).  
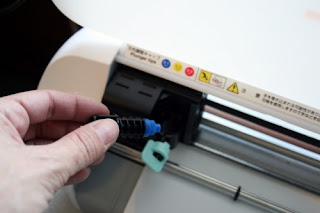
Insert vinyl shiny side up and press “enter” to feed.  I find that trying to flatten the “rolled” vinyl works best in helping to keep the machine from peeling up vinyl as it cuts.  Use the blue cutting tip. 
Click “Cut Page” – let the Silhouette work it’s magic!
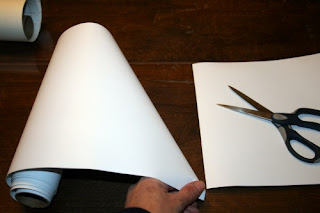
Press “enter” on the Silhouette machine to unload vinyl.  Cut the project off of the roll of vinyl. 

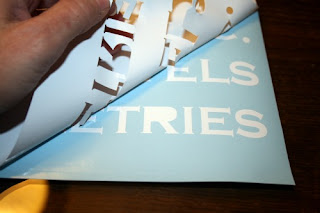
Peel away the unused part of the vinyl.
I use my fingernail to peel away the extra vinyl inside of the letters where needed. 
You could finish here and peel the vinyl like you would stickers, but the next steps help to keep everything aligned and evenly spaced when applying.
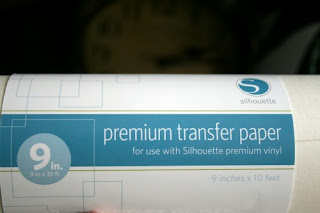
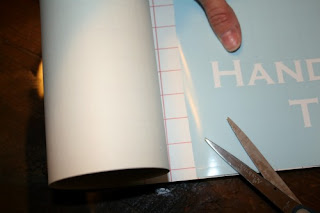
Cut transfer paper the same size as the page of vinyl.
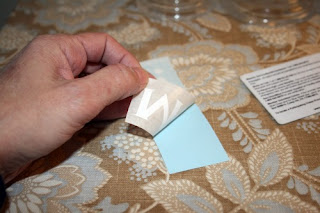
Peel away the grid backing…
Place transfer paper over vinyl lettering.  Smooth and rub.
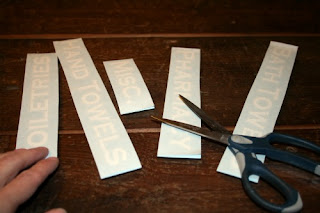
Cut apart words if needed and trim a little. 
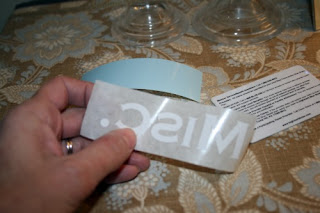
Rub the transfer paper side with a credit card to transfer the vinyl from the blue wax paper side to the thin transfer paper. 
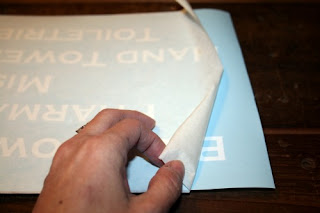
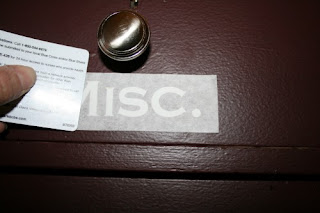
Peel off the transfer paper.  If the vinyl isn’t sticking to the thin transfer paper, put it back together and rub then try again. 
I placed the transfer sticky side down where I wanted the label.
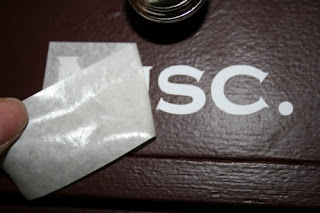
Using the credit card, rub the transfer paper in place. 
Peel away the transfer paper. 
That’s it. The more you do it, the better and quicker it goes!  Hope this helps.  If you don’t have a Silhouette, ordering from custom vinyl cutters these places will achieve the same results!
Design Divasten 23 designsSay it on the WallSingle Stone Blog Button
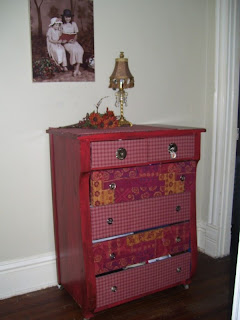
Here is the dresser way before:
before:
NOW:
(Please pardon the blurriness. Multi-tasking going on during project and photography.)
Looks like I have a diva on my hands too!