Silhouette Heat Transfer Sewable Fabric Interfacing Tutorial and a Little Giveaway

I knew once I had a Silhouette machine, there would be endless creative possibilities.   Now the Silhouette machine cuts fabric!  Using scrap material, I made my daughter a doxie (Niski!) pillow.  
Here’s how I did it. 
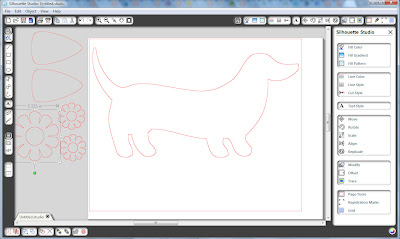
I hope to make my own pattern but until I figure out how to do that, I purchased a doxie shape from the Silhouette online store and sized it.  I did cut out some other shapes including an ear and some flowers for appliques as well. 
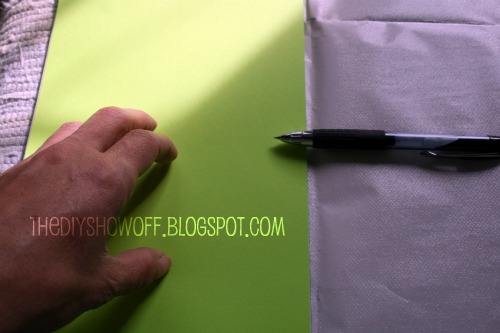
My doxie was approx. 6 x 9 inches long so using a piece of cardstock as a pattern, I cut a 6×9 piece of the heat transfer fabric interfacing.
Iron on to fabric (rough side of heat transfer interfacing paper to back side of fabric).
Cut out the 6×9 heat transfer paper fabric interfacing once it’s ironed (cooled) to the fabric.
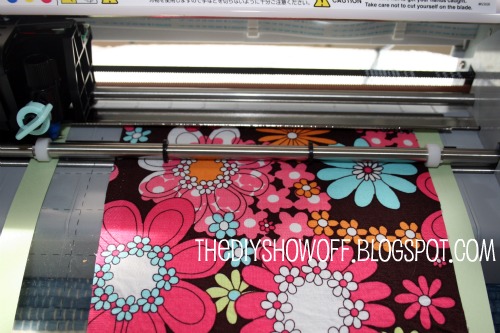
I used my Silhouette cutting mat.  This will work best if your cutting mat isn’t very sticky (not new).  The heat transfer fabric interfacing paper backing sticks to the mat so I had to clean that off/peeling bits and pieces.  The other option would be to make sure your fabric is at least 8 inches wide going through the feed (so it doesn’t move around).  Stick the paper side to the mat, fabric side up.  I always stick to the right side.
Feed mat into the machine. (I always insert mat and vinyl on the third line from the left as the machine cuts closest to the right margin on projects shorter than 12″ unless you make adjustments in the software).
Change to the pink cutting tip. 
Send the image to the Silhouette for cutting.  My settings were 3 for speed and 33 (the highest) for thickness.
Cut image.
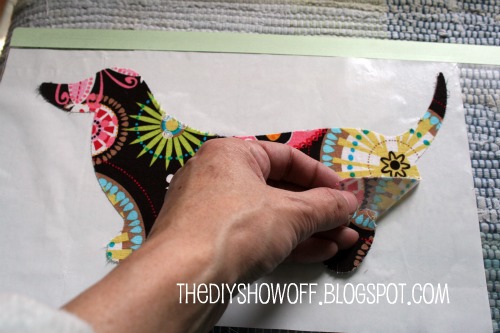
Unload and remove ‘negative’ fabric.
Lift up fabric doxie – instant iron on applique! How cool!
Iron fabric into place on 1 side of the right side of pillow to be sewn (or whatever you’re creating). 
Once it’s ironed on, it’s temporarily in place and ready to sew.  Sew close to the edge of the fabric applique. For rounding corners, make sure needle is down through fabric, lift foot and turn as needed. Lower foot and resume sewing. 

The back side will look like this:
Add extra iron ons for texture and depth, a button for an eye.
I got caught up in my project and didn’t photograph the remaining steps but I made a pillow cover.  Pin right sides together and sew three sides of the pillow cover.  Snip corners of fabric up to the seam. Turn right-side-out. Insert pillow and hand or machine sew the opening shut. 
Front Side:
Back Side:
So cute!  I’m not crazy about the shape of the dog (it seems a little distorted to me), but for first time test…it’s cute and my daughter loves it.
~*~*~*~
Now onto my Silhouette giveaway!  (This was so much fun last time I did it and I hope to share a picture of the previous winners’ projects soon…if they’re willing to ‘show off’.)  No machine giveaway this time…sorry! But I love sharing my Silhouette with you by helping you with your DIY project in the meantime!

Comment below what you’d want to make with a Silhouette machine.
Vinyl Art?
Labels?
Vinyl Lettering for a DIY sign?
Iron On?
Fabric Applique?
Scrapbook supplies?
A special card?

Here are the projects I’ve made using my Silhouette if you need some ideas:

1 comment/entry per person.
I will choose a handful of readers, based on my materials and ease of your project. 
I will be purchasing some more vinyl and images for the purpose of this giveaway.
Giveaway is open to US DIY Show Off readers/subscribers only. 
Comment now through Wed. 3/23 at midnight EST.
Winners must respond to winner announcement at the end of the week.

Good luck!

~*~*~*~
March Promotion for DIY Show Off readers:  Purchase a Silhouette SD, one of each fabric interfacing (clean cut & sewable) and a roll of white flocked heat transfer material for $229.  Also, readers that already have a Silhouette can get 25% off fabric interfacing. The March promotion will run from the 21st through the 27th.  
Use promo code “SHOWOFF” 


Reader Love

When I announced the Silhouette winner last month, I offered to choose a few ideas that I could manage with my existing supplies and beginner skills.  I think I mentioned I’d only choose 3 but I love you guys and couldn’t decide so I chose 11.  Here are the projects I chose (first come first serve but a ‘runner up’ prize if you’re late):
Janae said…
My Bathroom!!! I have 3 glass jars and 4 small frames in my bathroom that need vinyl (“1” “2” “3” for the jars & “B” “A” “T” “H” for the Frames). I hope I win!!!! :


Angie K. said…I LOVE your blog! What a sweet offer! If you pick me…I’m getting ready to paint my kitchen canister set. I would love a set of labels for them: Sugar, Flour, Tea and just a cute little bird for the 4th cannister since I stuff random things in it. CLAIMED!


Lauren F. said…So jealous of the winner! I would love vinyl cut out labels for the three canisters in my pantry– Flour, Sugar and Baking Mix. Pick me, Pick me!!! (pretty please with a cherry on top!) CLAIMED!


 Katie Bell said…Remember that one time you and I were painting our kitchens a similar color green…we’re like kindred spirits, except I won’t be having granite counter tops in the near future. BOO. Anyway, I have this little dormer window and I’m going to turn it into a reading nook, so I thought it would be oh.so.fun. to put the commanding words READ on the window….totally do-able, right? CLAIMED!

ashley said…Congrats to the winner! Thanks for doing the vinyl giveaway! 🙂 My dream project would be for my breakfast area… The word “EAT” spelled out in frames, so I would need individual letters of E, A, and T for the little frames. 🙂 Thanks again. 🙂

Christina said…oh man I wanted to win that so bad!!Oh well 🙂I would love simple “Welcome” vinyl for a project I’m planning 🙂Thank you…you’re so sweet to offer this chance!! 🙂 CLAIMED!

ro-grammie said…I want to label some water bottles for the table so

water

aqua

l’eau

vaduh

second choice would be a stencil of a squirrel to put on my grandbaby’s jammies!
heather

Holly Austin said…
When I saw that “Holly” had won, I had to do some serious squinting to make sure it wasn’t me. LOL!! I would love to have a “Welcome” vinyl for my back door 🙂

Michell@Girl in Air said…
I want to number my stairs…my son (18 months) and I count them as we walk up…the hubby would NOT be happy if I painted them since we just had our house built and paid extra for nice hardwood:-) CLAIMED!
Heidi V said…I would love to have our address for our main door. We live on a corner lot and our address is on our official front door but that is not the door we use which ends up being very confusing for everyone!
Angel said…What a nice offer! My dream small project would be iron-on cut out of “middle sister” for my middle daughter. Lots of big sister and little sister shirts out there. Middle sisters….not so much. Thanks! I wish I had the money to splurge on the deal but I’ll have to hold off. Thanks for hosting the giveaway!Angel

Congratulations, ladies! Please email me at thediyshowoff@gmail.com (first come/first serve).  We’ll discuss your project and see if it’s something I can accommodate!  First responses have a better chance that I haven’t run out of vinyl/heat transfer/etc. IF THAT IS THE CASE (I run out), I’LL HAVE TO OFFER YOU A CARDSTOCK CUT OUT (available shape or monogram) as a “runner up” prize – something you can frame instead.  
Pssst.  Guess what?!  Silhouette has generously offered another Silhouette SD giveaway at the DIY Show Off – starting March 21st!!!  Also – using the code diyshowoff you can get a Silhouette SD, one of each fabric interfacing (clean cut & sewable) and a roll of white flocked heat transfer material for $229.  Readers already owning a Silhouette can get 25% off fabric inter
facing. Check back March 21st!
**There’s another kind of giveaway coming up this week too.  Unscramble the letters (2 words) for a hint:  H A P P Y B L E A B S (you’ve probably seen this giveaway being hosted by a lot of blog friends).
ENJOY THE WEEKEND!

Silhouette SD Winner & a surprise!

Wow!  Thank you all so much for entering and a special thanks to those of you who shared the giveaway on your blog, Facebook or Twitter.  I know how it feels to want this machine so badly you can taste it, so badly you enter every single giveaway following all of the rules, to dream about the projects you’d be able to do every day.  I want each of you to have one but Silhouette said “one”.   🙁

And so…

The winner of the Silhouette Giveaway is…#422

Sweeter Hours said… 422

Wow. This is very exciting! Thank you for offering such a great give away!
Well, I have been wanting make a growth chart for a while, also I have been wanting to make a pantry with labels. I make a lot of teeshirts by hand painting with freezer paper and this would make my life easier!


CONGRATULATIONS!  Hurray to Holly!  Hugs for everyone else!

Holly wins: A Silhouette SD, 1 roll of black vinyl, 1 roll of frosted vinyl, 1 roll of transfer paper, and a Home Décor CD of images (retail $375+).


If you haven’t won with all of the giveaways going on or if you’re looking for a deal and ready to buy one – Silhouette is offering DIY Show Off readers a special discount on that same Silhouette and premium vinyl bundle with a unique code “SHOWOFF” usable at silhouetteamerica.com.  That promo code will get you the Silhouette bundle for $225 ($375+ retail) and/or 25% off premium vinyl if you’re looking to show off.  SHOWOFF code is active through March 1st.  $150 OFF!
~*~*~*~
Thank you!


A little surprise…
I can only give one Silhouette away but I appreciate ALL of the entries, my friends and readers.  I can certainly make a few vinyl cut-outs to giveaway to a few of my friends! It’s not a Silhouette but it’s the best I can do.  🙂 Comment on this post what your Silhouette dream project is. I’ll choose 3 of the comments (projects I know I can handle using my limited supply).  Comments from today only (2/28 until midnight EST and US residents only).  I’ll choose the lucky 3 tomorrow. Thank you so much for your support!  
I’ll choose a few winners as soon as I get a chance this week (keep commenting until Friday 3/4).