


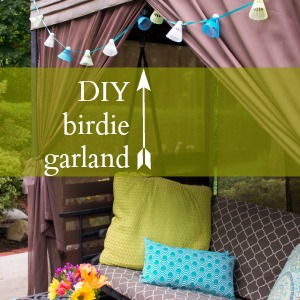
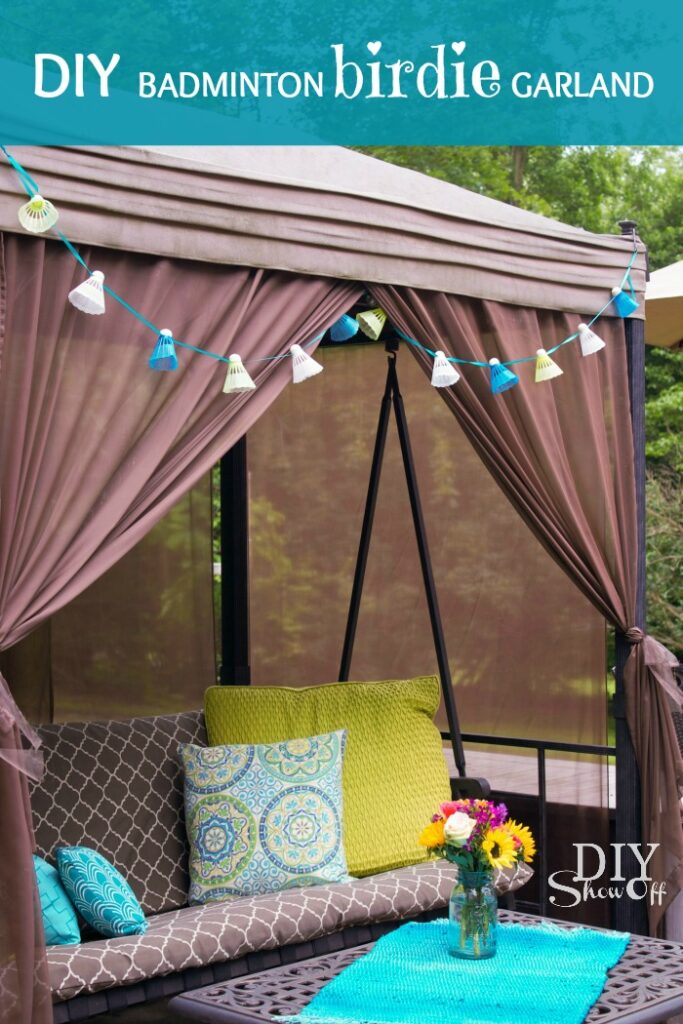
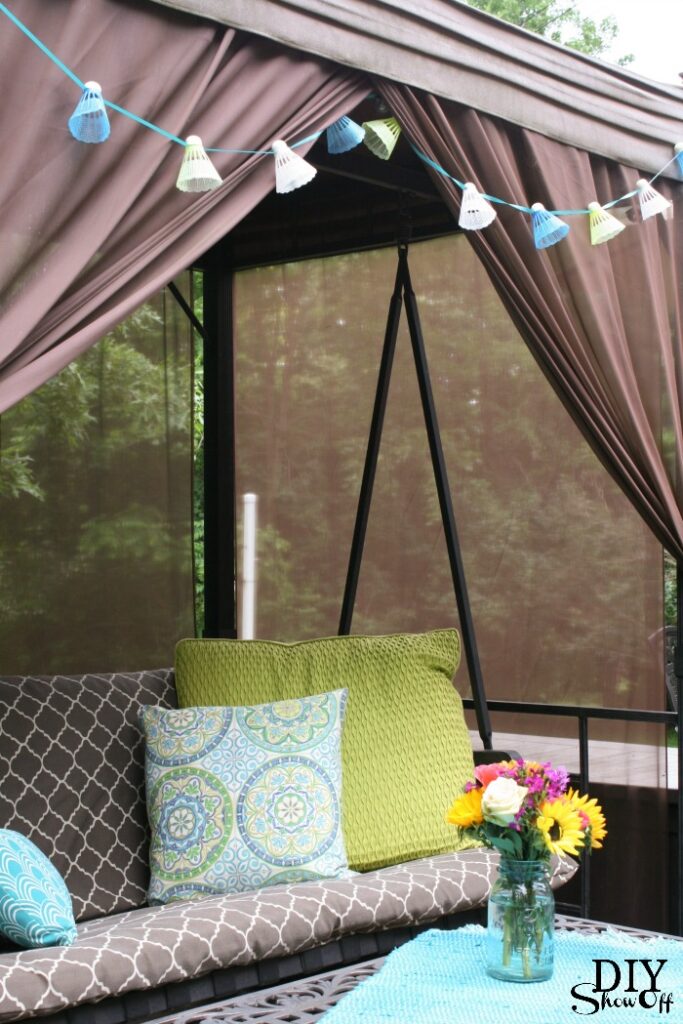
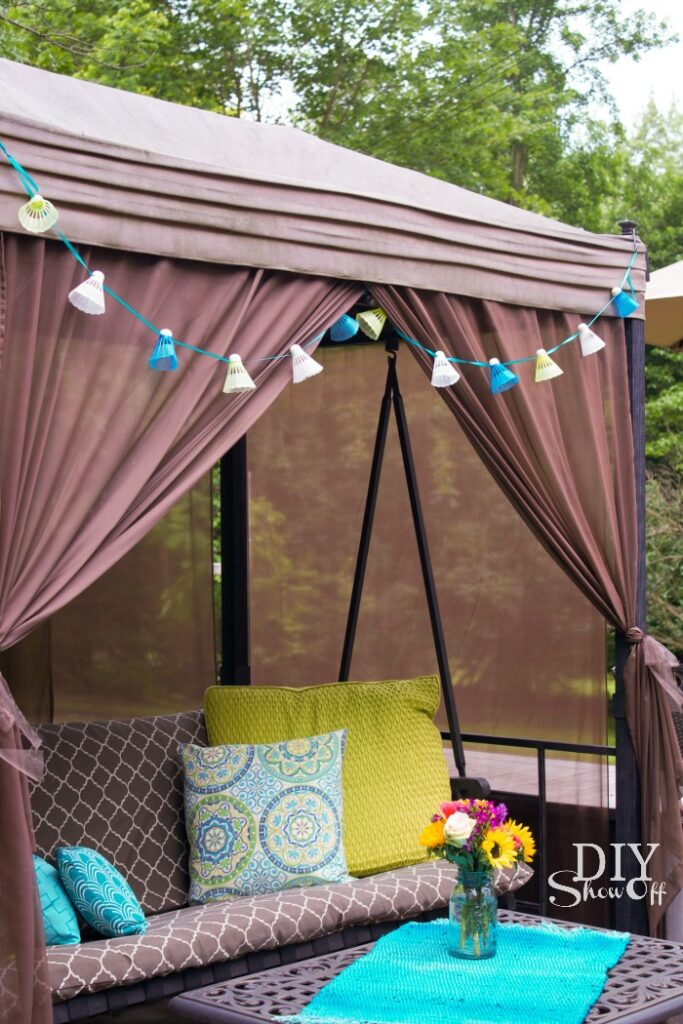
Looking for a budget-friendly way to add a little whimsy to your outdoor space this summer? This DIY Badminton Birdie Garland is a simple, playful project that brings a fun pop of color to patios, porches, garden parties, and backyard gatherings. It’s an easy way to dress up your space with a lighthearted vibe and you can make it in under and hour using inexpensive supplies!
Keep scrolling for the quick tutorial, creative summer styling ideas, and even more “fun in the sun” inspiration! Visiting from the beautiful summer bedroom at Town and Country Living? Welcome, friends! I’m so happy your here!
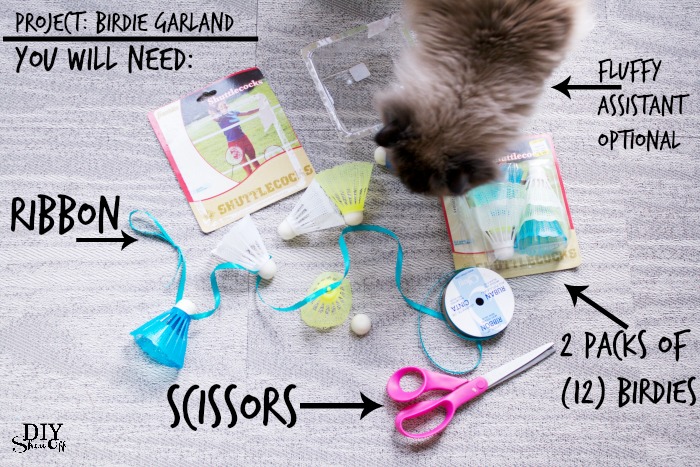
Materials:
- ribbon
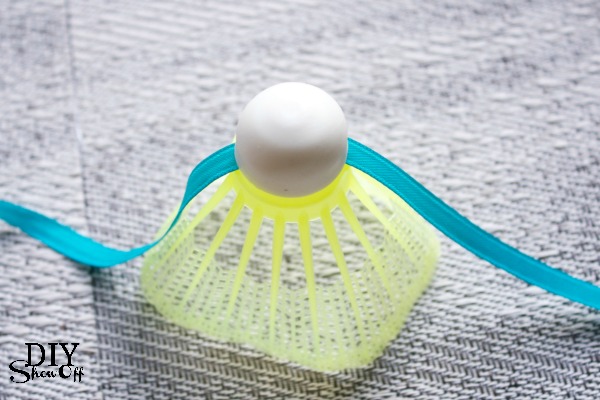
- colorful plastic badminton birdies (they even have glow in the dark!)
*DIYShowOff is a participant in the Amazon Associates program designed for provide a means for sites to earn by linking products we use. I earn a small percentage from qualifying purchases. Thank you for your support! xo
Tutorial:
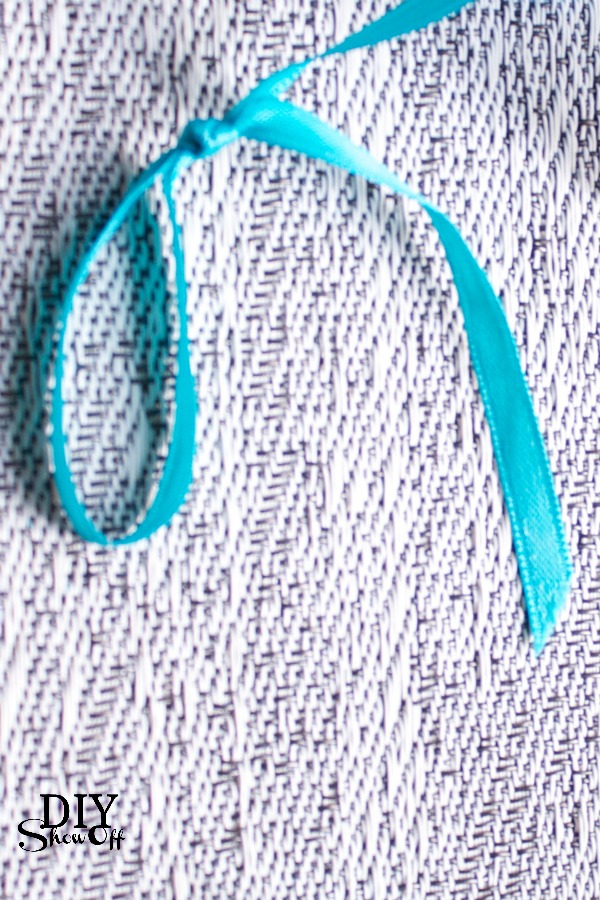
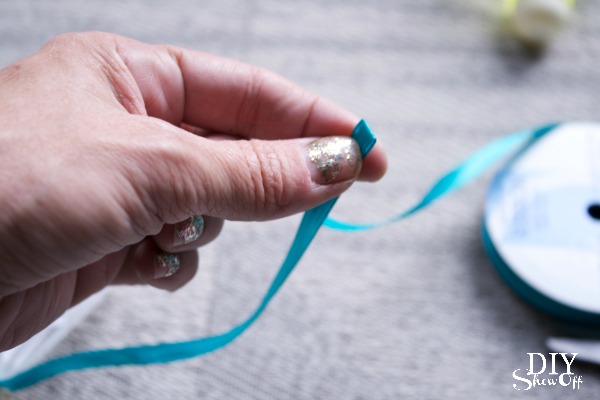
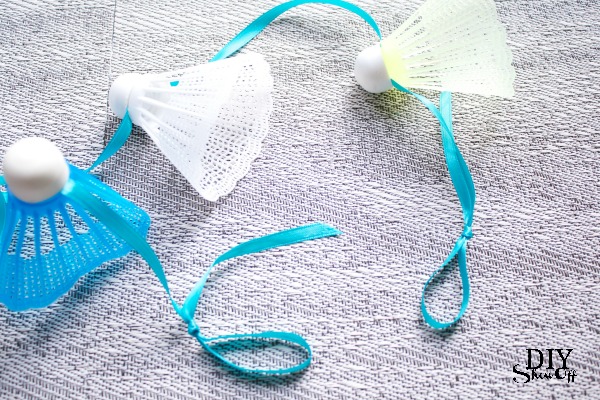
1. While length of ribbon is still attached to spool, create a loop (for hanging) and knot.
2. Remove caps off of all birdies (mine simply popped off).
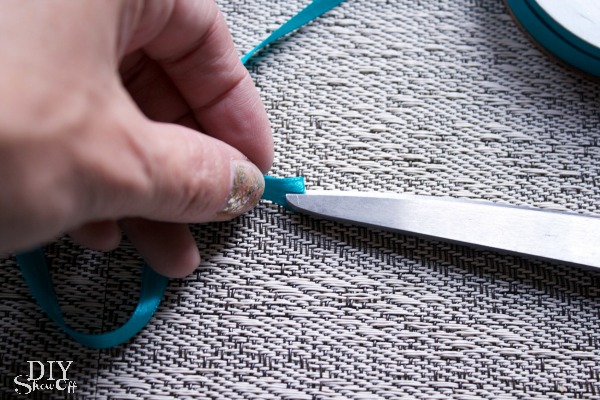
3. Using the package (or ruler) determine distance between each birdie (starting from the knotted loop).
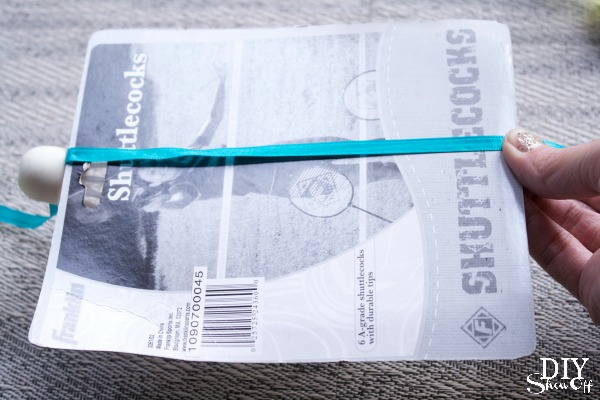
4. Fold ribbon and ‘snip’ with scissors your measured mark. Just a small snip will do.
5. Place snipped area of ribbon over ‘peg’ on birdie top.
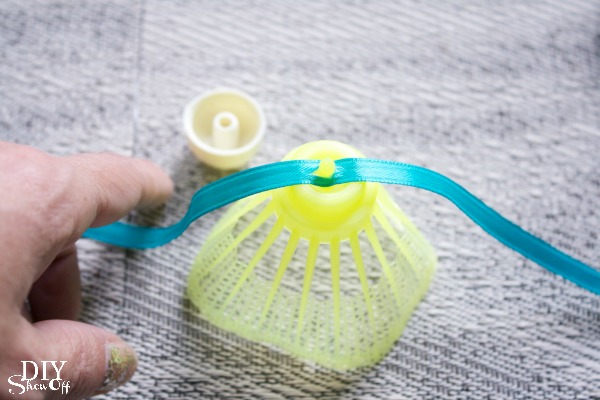
6. Replace birdie cap.
7. Repeat steps 3-6 using all of your birdies.
8. Then simply measure same short ribbon distance one last time, add a few more inches. Cut ribbon, create a loop and knot for the end.
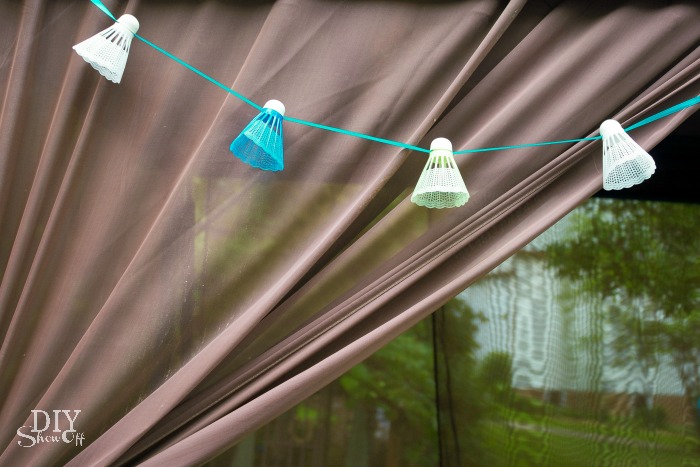
9. Hang! Summer outdoor family game themed. Super cute (easy and cheap too)!
Fun Fact:
Did you know the official name for a badminton birdie is actually a “shuttlecock”? It gets it’s name from the way it “shuttles” back and forth across the net and it’s resemblance to a traditional featured “cock” (rooster) used in old fashioned games. But let’s be honest… “birdie” is a way cuter name for decor!

Follow along the entire Fun in the Sun series by heading over to At the Picket Fence for some outdoor inspiration and by visiting the links below for summer recipes, crafts, projects, decor and more!
More Summer Fun from DIYShowOff:

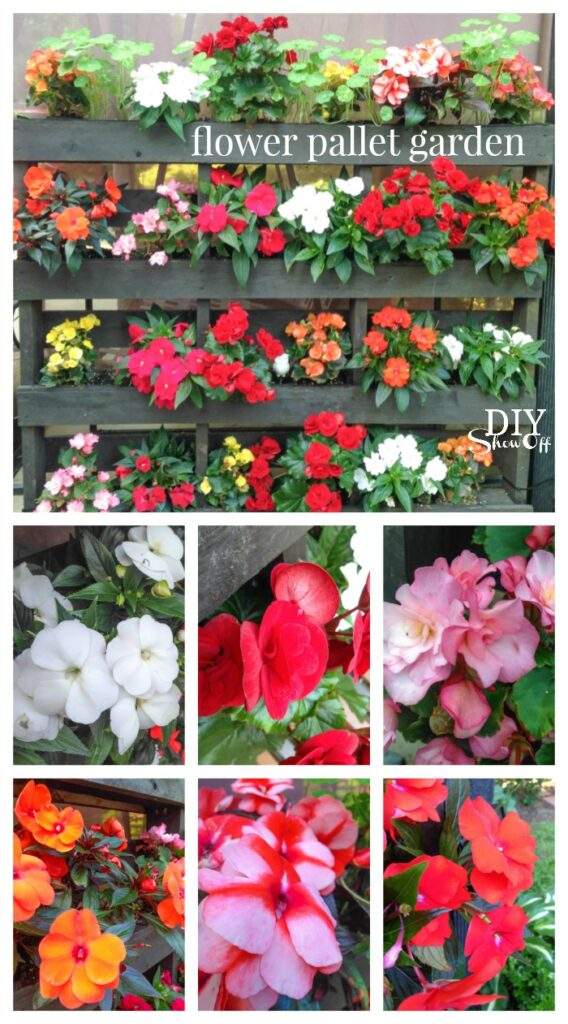
Build a Beautiful Flower Pallet Garden
I see that cat is bird hunting 😉 Mine are out stalking a hummingbird as I type. As if. hehe.
This is such a cute Summer project. I love the creative twist!!
This is super cute and creative!! Pinned 🙂
XO
Kristin
So cute and clever. Thank you for sharing.
Those are really cute. Would be adorable strung along a strand of christmas lights if you wanted to also use them at night!
You are so clever Roshel! I love this! It will make anyone smile who sees it!
Pingback: Easy DIY Beverage Tags - Domestically Speaking
Roeshel that garland is SO cute! What a clever decor idea for a summer party!
Pingback: Mantel Decor Ideas : Blue, Taupe and White Palette - Setting for Four
OK that is sooooo stinkin’ cute!! What a clever idea Roeshel!
I don’t know which is cuter … your birdie garland or your fluffy assistant! What a cute idea. LOVE your cabana!!
Pingback: Fun in the Sun Linky Party and $250 Giveaway - Domestically Speaking
Pingback: Summer Link Party and $250 Cash Giveaway - Clean and Scentsible
Pingback: Fun In The Sun Link Party and Giveaway! - At The Picket Fence
Pingback: Fun in the Sun $250.00 CASH Giveaway and Linky Party | Cupcakes and Crinoline
Pingback: Cucumber Melon Gin Spritzer - Sand and Sisal
What a clever idea! We love to play badminton and usually have our net set up in the summer to play! Your outdoor swing looks all ready for some summer relaxation! It was so much fun to party with you again Roeshel! xo Heather
Pingback: Gilded Mason Jar Vase ~ Fun in the Sun Blog Hop and Giveaway | Cupcakes and Crinoline
Oh, this is such a brilliant idea. It is pretty, cute, motley, easy and quick to be made. Thanks for the tutorial. I consider to realize the project this weekend but will replace the fluffy assistant with my little daughter 🙂
This is such a cute and clever idea, Roeshel, and I love your fluffy assistant!
Just wanted to know if the swing pictured above came with that covering. It looks just like mine and the original topper became too old to keep and I love what you have done with that one!
Hi Tina! No, it’s a DIY project but fairly easy (and inexpensive too). Here’s the link: https://diyshowoff.com/2013/05/06/easy-diy-patio-swing-drapes/ Hope that helps!
Oh – mine does still have the original topper though. Sorry, I was thinking about the drapes that I added and the slipcover. It did get a makeover but the very top canvas is still the original.