The Creative Process by Amy from The Salvage Collection

Meet:  Amy from 
The Salvage Collection
greetings, DIY showoff readers!  i’m so excited to be here since i’ve been an oogler of roeshel’s blog for quite a while now.  i love the way, along with her own DIY journey, she promotes so many creative bloggers through her hugely popular site.
anywhoopla, i’m here today to toss out some ideas about the creative process.  you know, the thingy you do in your head between having an idea and finishing a project.
via
oh, you don’t think you follow a process?  hmmm.  let’s talk about that a bit.
i have an interior design degree and, though i loved my major, i never was exposed to the creative process as i know it today.  perhaps it was because i did not attend a “design school” and my major was housed with the other “girly” majors (i can say this b/c i’ve held two of those girly professions so zip it.).  regardless, i recall being assigned a project and…uh…going to quarter beers on thursday night, watching jack and jennifer get back together on “days of our lives” and then pulling an all-nighter hanging in the studio with my design buddies, working to meet the deadline.  i went straight at it with nary a crumpled paper on the floor to prove my planning.  and, yes, i graduated.
via
in fact, i’m not sure i ever heard the word “brainstorm” until i returned to graduate school–after a few “eh” years in corporate interior design–to become a teacher .  
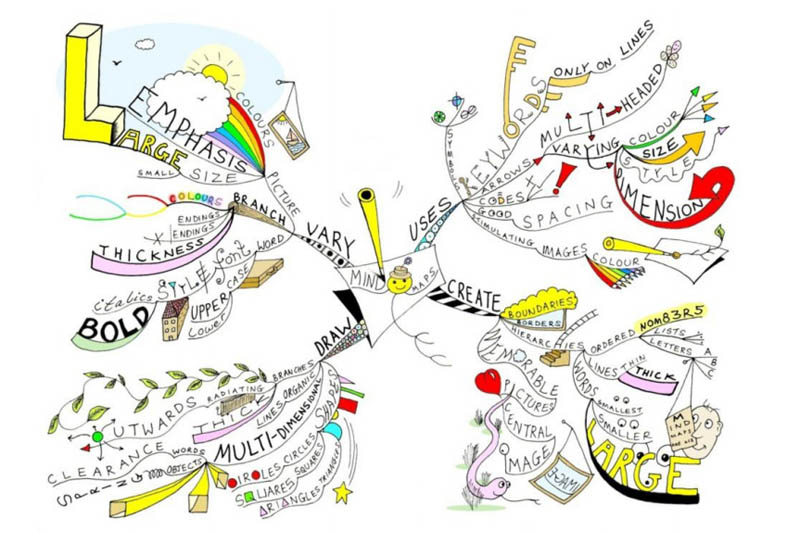
brainstorm

in recent years, much of my training and research about teaching was based on processes to help each student tap into her creative side when approaching an assignment.
“just toss out a bunch of ideas even if they’re crazy or strange or silly or ridiculous.  there is no such thing as a bad idea.”
“close your journal and walk away from the first draft.  put some space and time between you and the words, then go back and reread it when you are fresh.”  

“you can and should always edit, always make changes because nothing is perfect the first time.”
that’s a bit of what i’d say to my sixth grade students as i walked them through the writing process, hoping they’d understand that it’s messy yet malleable, flexible yet under their control.
sounding familiar to you?  uh-huh.  i sniff me a diy-er who dippin’ some toes in the creative process river.
am i wrong or is this process—the process of creating—not overtly exposed in this blogiverse of  delectable “before and after” shots?  of course, we love to hear the origin of the idea but, dude….really?  c’mon.  how’d miss diy design diva get there with THAT from waaaay the $#@! over there?  …and why won’t she toss me a rope so i can climb to the creative summit on which she rests and hang with the cool diy cats?
oh?  wait a sec, she’s going to share it?  alrighty, then.  get to it.  i’m all ears.
(but is it a cat or a dog… or something else?)
miss diy design diva:
“well, let me see if i remember this correctly.  i believe i was sitting in my eclectic vintage ’60’s kitchen on my original eames chair–found on a brooklyn curb–eating my organic avocado/free-range turkey sandwich on gluten-free low-carb fat free bread with my husband, the head designer–and self-taught professional photographer–at schnockeral and sven.  our cats, ernie and bert, were playfully tossing around one of the 128 catnip-stuffed felt mouse toys that i had crafted earlier that morning.  suddenly, our yellow lab, scout, darted into the room and clamped down on bert’s neck like a shark scoring the leg of a surfer.  ernie went limp, bert sprouted wings, flying to safety atop the fridge and i…. i…. i saw scout’s soft yellow fur gently intermingled with ernie’s calico patches… BAM!

yes.  oh, yes.  that’s when my new 12 pattern hand-printed silk-screened 100% organic cotton fabric line flashed before my very eyes.”
  

(i made that up.  really, i swear. i’m weird creative that way. nooooo, it’s not from my interview with a famed diy blog queen.)
moving on.
does a design plan usually come to one in a “flash”of genius like the diva’s or is it more of a gathering little twigs in an effort to build a fire of an idea?  it could be a bit of both but the consensus of the people who study this stuff agree that it’s more like the fire analogy.  “they” have organized the creative process into the following steps:
1. PREPARATION
2. INCUBATION
3. ILLUMINATION
4. IMPLEMENTATION
simply stated, it’s not much different than the process i taught to 6th graders in expanding their writing. now that i’m painting furniture full-time, i also realized that i’m NOT using this process fully when i dive into each piece as is evident in my recent flubs.  let’s face it, when juggling 4+ projects that need to be squeezed into an hour here and twenty minutes there, the “process” can become lost in the… uh… process.
my recent process-less process….
STEP 1 “preparation”:  choose a project and start the basic repairs to prep for the finish while you explore the details of the piece.
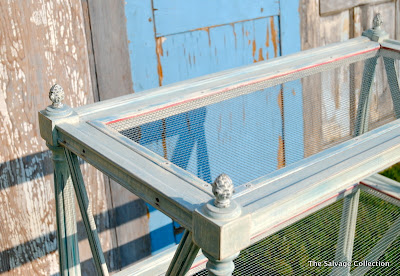
for me, STEP 1 was selecting and repairing this formerly-caned shelving train-wreck-of-a-piece to tackle:
scary, right?
STEP 2 “incubation”:  this is where we are supposed to be open-minded, explore the crazy ideas (hello, donna at funky junk), ask the opinions of others, visualize the end result, ponder, poke, prod, peek around (hello, pinterest!), pour over colors….and document all of it so we see the ideas, make connections and don’t forget any of it along the way.
STEP 2 for me with the scary shelves was…. a whole lotta phooey.  yep, this is where i swerved to the left in the process due to my lack of patience.  i was like violet, the greedy blueberry girl in willy wonka’s chocolate factory…
“DADDY! i want to use my new annie sloan chalk paint in provence and old white.  I WANT TO USE MY NEW PAINT!”  
i barely tasted the chocolate bar of “step 2: incubation” as i shoved it down my throat and popped open the paint cans.  i didn’t explore and i didn’t document; i just raced to the finish with my golden ticket… paint cans and turned into a plump blueberry along the way.
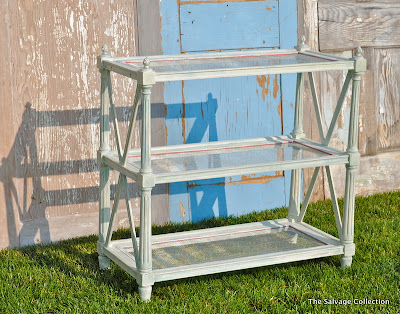
so, here is the result of speeding through the design process…
yes, it’s nice but… just eh.  whatev.  after 263 hours, it’s not the “wow” that i wanted it to be because i went all “violet” and didn’t pause to explore ideas.  currently,  i’m using it as a punishing daily reminder of PATIENCE and PROCESS.
and what will i do in the future?  in typical teacher fashion, i’ll be using one of my black and white composition books to write and sketch my ideas for each of the 4+ painting projects i am currently steering…
starting with two traditional school chairs that i plucked up for $10 each.  yippeedoo!
care to join me as i document my way through the rest of the creative process to wow up these drib-drab chairs?  i promise it won’t be boring…and the posts won’t be this long, either.  hopefully…for your sake.
in the meantime, if you want to see more about the way successful people work together in the creative process, then check out this 2+ minute video of creative wizards at anthropologie staging window displays for earth day.  note the sketchbook, peeps–part of THE PROCESS!
thanks, roeshel!  hope i haven’t sent too many of your readers running for the hills….

Jingle Bell Door Accent ~ Tutorial by Hilani

Handmade by Hilani

DIY…I mean, it doesn’t get any better then starting a “Do-It-Yourself” project and feeling accomplished when you’ve completed the task, no matter how long it took.  

When I stumbled upon theDIYshowoff blog I can estimation over an hour was spent browsing and admiring all of Roeshel’s and her husband’s work, plus those of her fellow DIY lovers.  Having almost a year under my belt with a website, 18+ months on Facebook , I’m kind of new to the world of blogging.  But I’ll tell you, this Mom of two boys, and an owner of a Small Business is having so much fun meeting new people, and being inspired.

I’m honored to be here, and share with the theDIYshowoff lovers a tutorial I created for {Jingle Bell} Door Accent.

It’s an under $5.00 craft:
I just love the sound of Bells during Christmas.  I have them on frequently used doors throughout our home.  

I’ve been holding onto a great find from the $1 ribbon bin at Michael’s, until I have just the right project for it.  This “Merry Christmas” ribbon, which was right up my alley due to it’s price and vintage appearance was a great find.  

I was browsing the isles, at our local Hobby Lobby, when an idea called out at me.  A canister of vintage/rustic bells called my name from a 50% off shelf.    I decided, that moment, I was going to create a Door Bell accent with them and the ribbon.  I excitedly dropped them into my cart, and while hearing their distinct Christmas jingle, my creative wheels started spinning…”What exactly should this craft look like when I’m done?”

I remembered, while driving home, that a week prior I threw in my cart a bag of wooden Stars from the clearance section at Michael’s.  That too was a great find because the set of 4 stars were only $0.47.  Below is a tutorial on making this Jingle Bell Door Accent.  
 
Project Time:45 minutes – 1 hour (Ideal for naptime)

Supplies Needed
Purchased Items:
Ribbon $1.00
Bells $4.99 (mine were 50% off)
Wooden Star ($0.47 clearance)
Scrap Fabric – Two contrasting colors or One (FREE)

On Hand Supplies:
Craft Glue
Close Pin
Pencil
Rag (for sticky fingers)
Damp Paper towel

Step 1:
Trace on wrong side of fabric for Front fabric choice, if using two different prints.
Step 2:
Free Hand an additional trace line about 1/2 an inch larger, for cutting, around the actual star size.
Step 3:
If using a second fabric, trace on right side of fabric the star. Otherwise, trace a second star on your first fabric making two star cut-outs. One larger and one exact.
Step 4:
Get Glue and Star ready for gluing. Place wooden star on wrong side of Fabric and cut slits into into corners of fabric for easy folding over.
  

Step 5:
Apply Glue to wood and begin folding over fabric.
Step 6:
When corners fold over, cut off excess fabric.  To adhere the corners from lifting, smooth over extra glue with  your finger.
Step 7:
When finished this is how the right side should look.  Turn over with wooden Star exposed upwards, and apply your second fabric star on top.
Step 8:
Grab your bells and ribbon. Cut Ribbon 30″ long, or more, you can always shorten your tails. Be safe, cut longer. :0)
Step 9:
Find the middle point of your ribbon. Apply glue to the center of the star on the fabric. Wrap your ribbon around the star. Place glue at the top of the star, between the two ribbons, to merry them.  Hold them together with a cloths pin. 
Step 10:
Count out 11 – 12 bells and begin to thread them on the ribbon. Thread 1 bell on each strand and the third bell onto both strands.  Continue to thread until you’ve used all bells.
Step 11:
Find a door to hang them from for ultimate drying of glue (while cloths pin still attached).

I hope you enjoyed this tutorial and it inspires you to make one to fill your home with sounds of Christmas!

If this inspired you, I’d love to know. Be sure to visit me at my Blog and join in on my many creative outbursts!

DIY Holiday Highlights and Ballard Knock Off Christmas Trees by Attempting Aloha

Aloha DIY Showoff readers!
I‘m Charlie (pink, not blue), and I blog over at Attempting Aloha. :)Today’s going to be an easy tutorial on how to gussy up your plain-Jane small Christmas trees. And it may involve kitty litter…
 
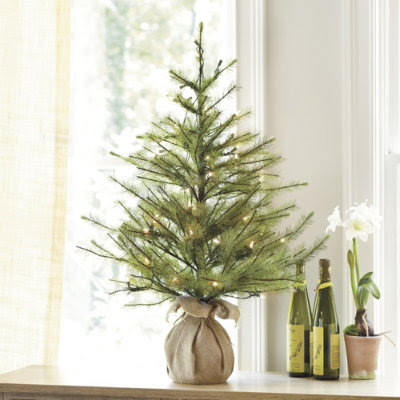
Like most crafters with a love of home decor, I’m a faithful subscriber to Ballard Designs. And I LOVE their Christmas stuff. Their prices make me roll my eyes, though.Exhibit A:
Ballard Designs
Cute little 3′ tree in a nursery sack with some twinkle lights. I’m thinking, “It’s Ballard, so this is probably like $45.”  WRONG. Try more like $99. Seriously?  Who buys this stuff???!!!  And will they adopt me?? Just kidding.Kind of.Someone who actually purchases from Ballard would probably scoff at all my attempts to knock them off. lolBut it’s not going to stop me from trying!  So here’s what I came up with.First, I found this awesome store here called Christmas Tree Shops. When I first saw it in July, I thought, “Strange that people would buy Christmas trees in July and even stranger that that store is ginormous.”  But then I got one of their mailers, and their store has EVERYTHING. It’s like a Dollar Tree but with more home decor and only slightly more expensive. It’s awesome!Anyway, when November rolled around, their mailers included…wait for it… CHRISTMAS TREES! Go figure, right?They had a 20% off entire purchase coupon, and these 4′ flocked trees were marked $10 each. I snagged the last two (on November 2) and brought them home (along with my pre-lit 6.5′ tree for $39). Total cost for two small trees and the pre-lit tree = $48. Awesome!I originally intended for these little guys to go on my front porch and was going to just leave them as is (cuz sometimes I get the lazy bug). But when I put the poor things out there, they toppled right over with the tiniest of breezes. Lame.WARNING:  I craft at night while my three kids are sleeping. Most of my “how to” pics are dark and may or may not have been taken with my iPhone… 😉
So I knew I needed to beef up their bases, and I knew the Ballard way had to be hacked.I had some burlap that I had purchased from Hobby Lobby. I believe it was $4.99/yard. Someone correct me if I’m wrong. And don’t forget to print your 40% off coupon. You can always find them on their website. 🙂 I knew I needed something heavy in mine to weight it down. We have some rocks in the yard, but it was cold, and I wasn’t in the mood to play scavenger hunt. So I searched our garage. WOW!  There’s a whole stash of failed bunny supplies in here!! Sweet! We have a rabbit, and our girls want to keep his cage in their bedroom, but he really stinks. So my husband keeps purchasing all this stuff to try to see if it will help the cage smell better. None has yet satisfied him. So I was VERY happy to find some scented kitty litter AND a ginormous bag of cedar chips. Awe. Some. The cedar chips alone would work if you’re not trying to weight down your trees (ie, if you’re keeping them indoors), and that HUGE bag cost $7 at Walmart in the pet section.
If you cross your eyes at this pic, it looks less blurry. ((cough cough))
I knew the kitty litter would go right through the burlap holes, so I first took two plastic grocery bags and layered one inside the other and then place the tree stand inside the two like this:
STEP 2:  Pour in some kitty litter (or whatever other thing you’ve chosen to weight down your tree if you’re using them outdoors). You can skip this step if you’re keeping them indoors.
STEP 3:  Add cedar chips to bulk it up sufficiently.
STEP 4: Take the two sides of the bag handles, and tie them in a knot as tight around the base as you can.
STEP 5:  Pick up the tree (holding on to the bag also, so the tree doesn’t come out of its stand) and place it in the middle of a piece of burlap. I didn’t cut my piece until after I had it wrapped up, so I don’t know how large they were, but I would guess 1/2 yard to 3/4 yard. It will depend on how bulky you make your base and how much excess you want sticking out around the top.STEP 6: Take a piece of jute and wrap it around a bunch of times (real tight). Be sure to keep your first end a little longer, so when you’re done wrapping, you have something to tie the two sides together with. I left mine in a simple bow. You could, of course, embellish with a flower or something.STEP 7: Cut the excess burlap down until it looks even and just how you want it. 🙂
I liked their twinkle lights, but I decided to keep them off and added these pinecones that I scored for $1 also at Christmas Tree Shops.
I simply hot glued them on. All 85 of those bad boys.
Once I had mine indoors, I decided I really liked them by the fireplace, so they’re staying there this year!
Who knew kitty litter would come in so handy in home decor, right?Ballard definitely has one on me as far as staging and photography goes, but at a savings of $170+ ($85 PER TREE)?? I’m pretty proud of mine. 
 
Feel free to stop by and visit anytime. We love tourists!! 
 
Aloha and Mele Kalikimaka,Charlie 
Attempting Aloha
 
Let’s see what you’ve been up to! Or browse the links below to visit some amazing blog friends and their DIY holiday projects!
 
 
  • You must use the button above in your blog post or side bar to share the linky love.
  • Add your permalink (not your blog url, but your holiday project post url which is the web address that goes directly to your holiday project blog post, not your blog address). Feel free to link a Past Post, just be sure add the DIY Holiday Highlights button to your side bar.
  • Or email your link to thediyshowoff@gmail.com and I will add it for you.
  • If you notice your link has disappeared please check the content of your post. Is it holiday related? Add the link back to The DIY Show Off to your post today with a quick note to your readers about the party and try again!