Guest Post…Custom Crock & DIY Project Parade

I‘m so honored to have Holly from 504 Main guest blogging today.  She is awesome! If you’re not a follower at 504 Main, please stop over and say hi!   Here she is…

Hey there!

I am so very tickled to be here at The DIY Show Off. Can I have a little “I’m in awe” moment, please…when I began blogging a year ago, Roeshel’s blog was one of the first DIY blogs I followed and linked up to for her Fall Festival {I was scared}, and she was do darn nice. So maybe my hubby has to blame Roeshel for my DIY craziness! Anyway, while Roeshel is off Country Living it up, I am here to blog it up!

Now, on with the show…I am Holly, and 504 Main is my place where I entertain, cook, create. I have a vintagey, beat up, discarded, slightly French, yet totally American aesthetic {confused? Me too sometimes!}. I like what I like! I LOVE repurposed crafting, creating and DIYing. I prefer to use unusual materials to create beautiful projects, like my screen wreath or my biscuit table.


Today, I am going to share a tutorial I did over at my place awhile back for The DIY Club. I am always looking for fun, new DIY projects. I have tackled my kitchen recently {that was part DIY and part hire someone to DIY}, and am working hard to accessorize it like it deserves…like I deserve..I have waited a long time!

My “old” kitchen had a not-so-cheap-stainless steel utensil holder that turned out to be a dud – too small and it cracked – perhaps it was not really stainless steel! I was on the hunt for a nice big crock to put those utensils in, but couldn’t find one that was not $50.00 or with some design on it that did not suit me…then it hit me…duh! Make my own!…Or at least buy a plain one and make it better!

Seriously, it seems like a lot of steps, but don’t let it scare you…it is not that bad! After you do it once, you’ll see and be hooked on this process like I am! You get a professional looking finish – it is awesome!
***********
Bon Appetit Crock
Click HERE for printable pdf crock tutorial

 Supplies

-Image {from Olive Rue}
-Waterslide decal paper {available online or in some art stores…email me for info} – there are a few brands. I am trying out a new one soon.
-Crock, white {purchased at a kitchen store}
-Bowl with lukewarm water
-Oven
-Decal squeegee and/or paper towel
DIY It! Bon Appetit Crock
1 – Print image onto waterslide decal paper – if your image has words, you will want to print a mirror image of the design.
NOTE: For the process and paper I used, the background turns a vintagey tea stained color in the curing/baking process, so I added an oval border {super simple to do in almost any program}. There is another method to using waterslide decals to avoid this, but I like this look. Again, I just purchased a new brand of paper and will report back!
2 – Let image dry for at least 15 minutes {this drying time varies based on the paper and method used, consult paper directions}, so that the ink does not run. I let mine dry for a few hours.

3 – Cut image out – either closely around border or closely around the image itself. 

4 – Determine placement or image and prepare crock {or whatever you are transferring the image to}.
5 – Add lukewarm water to a bowl, large enough for the cut image to be submerged.

 6 – Place image in water for approximately 1 minute. The image will immediately curl…gently uncurl.

7 – After removing paper, position the decal in the correct place on the crock {with the words reading correctly}.
8 – Blot the image with a soft towel and smooth out {or if you have the proper squeegee, use that} to
remove air bubbles {This step is important…my first go around I thought I had it and…nope – lots of air bubbles!}
9 – You may want to use a hair dryer to assist in adhering the decal to the piece and removing those remaining air bubbles too.
10 – Let piece air dry for 1 hour*
11 – Set oven to 200 F and bake piece for 1 hour.
12 – Set oven to 300 F and bake piece for 1 more hour.
13 – Set oven to 350 F and bake piece for 1 more hour.
14 – Set oven to 400 F and bake piece for 15 minutes.
15 – Remove from oven and let cool  – the image will be shiny and the background will have the light patina coloration.
16 – wipe piece {being careful of the image} with a damp sponge to remove excessive adhesive {it is brown – you will see it.}

*The new paper I have purchased, it supposed to be clear and does not require baking process. YOU MUST READ ALL DIRECTIONS FOR THE BRAND OF WATERSLIDE DECALS YOU PURCHASE.

If you start playing with waterslide decals, you will be hooked. I recently added one to an old window and, man oh man do I have a list of projects for this craft!

Thanks for listening! I for one, cannot wait to hear about Roeshel’s adventures!
Come on by and say “Hi” at 504 Main.

~*~*~

SHOW IT OFF!  What did you DIY lately?
The DIY Show Off

If you’d like to link YOUR DIY project post to The DIY Show Off Project Parade:
  1. You must use the button above and link to this post to share the linky love.
  2. Include your name or blog name and project title. Add your permalink (not your blog url, but your DIY project post url). Feel free to link a Past Post, just invite your readers in a current post with a quick note.
  3. Or email your link to thediyshowoff@gmail.com and I will add it for you.
  4. If you notice your link has disappeared please add the link back to The DIY Show Off to your post today with a quick note to your readers about the party and try again! I love when everyone participates and readers check out everyone’s links, but I think the return favor of linking back is the nice thing to do so everyone plays fair and enjoys all of the projects and links. Also – this blog party is for DIY projects only. Links not related to DIY will be deleted.

*A special thanks to Holly at 504 Main and Jennifer at tatertots & jello for their help this weekend.  I’m back from the Country Living Fair. What a fun time – loved meeting some blog friends, seeing so much creativity , making new friends and can’t wait to tell you all about it.  
Now I’ve received heart breaking news about my dad.  Please keep my dad and family in your thoughts and prayers and thank you to the girls at the DIY Club from the bottom of my heart for being so patient and understanding and helpful during this time.  ~Roeshel

Guest Blogger: Tatertots & Jello

I’m having a blast at the Country Living Magazine Fair!  What a hot & windy day but so much fun!  If you’re in Columbus – stop by the Gorilla Glue booth to meet Nadine and Holly from Gorilla Glue and me too! There are so many antiques and crafts that you’ll need a wagon.  And good walking shoes.  And I haven’t checked the weather yet for tomorrow but hopefully not an umbrella or raincoat.  

I’m sure you know her, but just in case…DIY Show Off reader, meet Jen from tatertots & jello. Not only is her blog full of DIY creativity, beautiful inspiration and great projects but she’s a sweetheart too.  Happy Birthday Jennifer!  Thank you so much for guest blogging while I’m out of town and sharing your favorite projects!  I am in love with a laundry room!And the beachy bathroom is gorgeous too! 

 Hi — I’m Jen from tatertots & jello and I’m so excited to be here at Roeshel’s wonderful blog! I am a HUGE fan!!

I thought maybe I could share a few of my favorite DIY Projects with you today…

This summer I transformed my bathroom from kind of Tuscan:


to “Beachy” with Board & Batten: 

 It’s amazing how much brighter and larger the room looks with the wall treatment and lighter color!

Another Project I just finished this week is my Laundryroom Redo! 
Yikes – it started off like this {very messy picture}

And I installed the same type of Board & Batten treatment as I did in the Bathroom redo. I used a wonderful stencil from Cutting Edge Stencils {a DIY Club sponsor} to stencil between the panels. 
 
I really like the way the two elements came together in the room.

Another DIY element in the room were shelves that we made under the counter. I wanted a place to put laundry baskets for my four kids. Then when they have clean clothes I have a place to put their clothes. And they are able to check the baskets each day to see if there is anything they need to put away.

We also took out a closet and made that space into a nook for lockers.

 
Those are a couple of my most recent DIY projects! Thanks for letting me come over and say hi! I just love Roeshel and I think she is wonderful!!

DIY Show Off Fall Festival #5 (Fall Mantel Inspiration)

HAPPY FALL! It’s official!  I’m celebrating by heading to the Country Living Magazine Fair in Columbus tomorrow morning!  If you’re going, be sure to check out the DIY Club at the Gorilla Glue booth!  Woohoo!  I’d love to meet you and you’ll see our projects featured there!  So exciting!
I HOPE TO SEE YOU THERE!
I went through the previous Fall Festivals to feature Fall Mantels this week.  Our tv is over the mantel in our living room so decorating is tough but here is what I did last year (remember when my walls were red?!).  Maybe next week I’ll decorate with the new wall color – can’t wait!  Last year:


Mantel shelves last year:

Looking for fall mantel inspiration? Check out these ideas.  Please click the link to be directed to the original post.

This is great inspiration for when your tv takes up most of the mantel space. Simple. Beautiful.
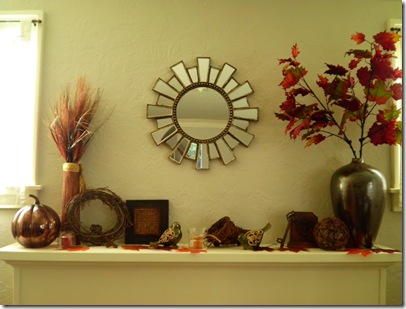
If you don’t have a mantel – create a similar look with a decorative shelf or existing nook/niche/ledge.

IMG_20100910_215916

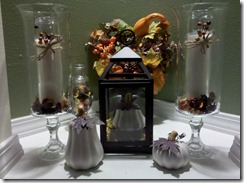
Use a mix of existing fall decor to create a beautiful display.
SANY0271
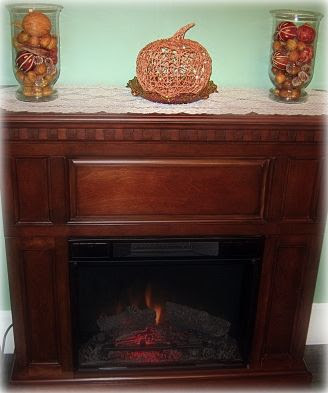
Who’s says you need a fireplace? Love this!
Now this is my kinda mantel! I could look at this for hours.  She did a beautiful job!
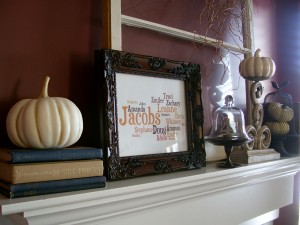
I love her word art!

So warm and inviting!

My favorite mantel maestro has always been Sarah from Pewter & Sage.
Beautiful!

More fall mantels linked in the party below!


Show off your Fall projects!

Rules:
  • Create a blog post about an Autumn/Fall project that you’ve done
  • Add your project title to Mcklinky (example: House # Pumpkins)
  • Type in the permalink address, not your basic blog address. A permalink is the address that links directly to your specific post. (example: http://thediyshowoff.blogspot.com/2009/08/house-number-pumpkins)
  • Please use the DIY button or link to this post to share the party with your readers.
  • Although a tutorial is helpful, it’s not required. Anything DIY – autumn related is permitted.
  • Please follow all steps above or your link will be deleted.  If you notice that you’re link disappeared, please make the correction according to the rules above and re-link!
  • Enjoy and be inspired!