liked my monogrammed mirror
and it inspired to ‘save’ one she had given to her. She inspired me right back. Here are some of her DIY projects:
Then, just when I had given up, my dad offered me a rather, uhm, interesting bronze-y, gothic-y, filigree-y mirror my parents received as a wedding gift 35 YEARS AGO! It’s been collecting dust in their basement for years. My response to him was a very enthousiastic, “Yeh, I’d love to take it off your hands!”. Followed by a hesitant, “…that is, if you don’t mind me going at it with a can of spray paint”. Thankfully, my dad has always been a fan of my rather *creative* decorating solutions and didn’t have a problem with the mirror getting a facelift.
Here’s the mirror before (a tad too Liberace for my taste):
I used Rust-Oleum Paint for Plastics in Shell White for this project. Because it’s meant for outdoor patio furniture, I got to skip the primer step…it’s an all-in-one product that has great coverage. I also did some glazing on it to bring out some of the details.
Next I made myself a monogram (inspired by this post at The DIY Showoff). To create a stencil, I printed off the letters I wanted on plain paper, traced it onto sheets of window cling I had hanging around, and cut the letters out with an exacto knife. I placed the stencil on the mirror and sprayed them with Krylon Frosted Glass Finish. My first attempt = epic fail. The window cling shrunk when the frosting touched it, smearing the frosting spray across the surface. Not. Good. The second time around I made a stencil from cardstock, sprayed it with readjustable stencil spray and placed it on the mirror. This, too, was a miserable failure, the frosting seemed to pool around the edges and formed this yucky crust and the adhesive spray left a sticky mess all over the mirror which I had to attempt to remove using nail polish remover and a q-tip…not fun. Finally, I made a stencil from, of all things, shelf contact paper and it worked like a charm! SUCCESS!
I am so happy to be able to use this mirror in my foyer. It’s a great connection to my parents and I can’t wait for them to see it.
Here is the breakdown of costs for this project:
$ 0 for the mirror
$ 7 for spray paint
$ 0 for frosting (leftovers I found in my craft cart – go figure)
$ 11 for stencil adhesive
$ 0 for glaze
$ 1 for contact paper (gotta love the dollar store!)
Total Cost = $19
Thanks for sharing Melodie! I think it’s GORGEOUS! Great job! So, while I was checking out her mirror, I snooped around on her blog and came up with MORE of Melodie’s awesomeness. A DIY label gets me every time. Click the links for more details including cost breakdown and tutorials:
A sterile cold bathroom warms up:
Side note: Scotch brand painter’s tape is possibly the *worst* painter’s tape I have ever used. Bleh, garbage!
Before:
WOW! So much creativity all in one blog! LOVE it! Thanks Mel!


Hi Roeshel, I wanted to let you know that your pics are not showing up on your most recent post!
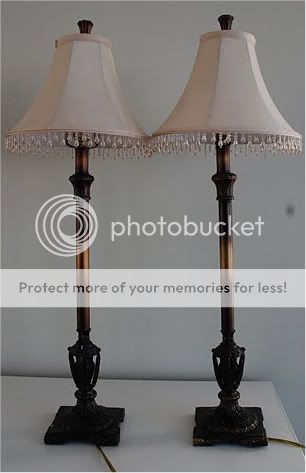
Thank you for sharing this. I love the lamp makeovers – and that Mel shared her failures with the mirror.
Geez! These all turned out great! She is so stinking creative!!
~Morgan
http://meetvirginiaandroo.blogspot.com/
http://www.etsy.com/shop/MeetVirginiaShop