Junk to Just-so-sweet!

When I saw this before picture, I know I would have passed this dresser right by and one word would have crossed my mind, “ew!” (and I had a door in my home covered in stickers from previous owners – so time consuming to get those buggers off. What every happened to sticker books?). Anyway…

saw the potential. The makeover is gorgeous! Way to rescue a sad piece of furniture, Kari! Here is her letter:

Hi there!

I just discovered your blog last week, and read every entry in an afternoon. I loved looking at all the transformations and DIY projects. I thought I’d send you photos of the project that got me hooked on DIY.

Here is the before of my daughter’s dresser:

When we found out we were having a second baby, we realized we’d need more clothing storage space. Our grandparents dropped off this $5 dresser they had found at the thrift store. I nearly fainted when I first saw it. It was hideous! They assured us that it was real wood and could be fixed up nicely with a bit of hard work. We sanded, painted and added some beautiful new glass hardware and it was still a fraction of the cost of a new dresser.
After:
Once it was complete, I was hooked! Now one of my favorite things to do is to go to garage sales and thrift stores to find old tired furniture that I can turn into beautiful pieces for our home.

Thanks!

Kari

Don’t you just love beautiful furniture makeovers?

Pssttt…My Own Little Show & Tell!

You guys! Can I just show-off for a moment? Of course, right? That’s what we’re all about over here. (Believe it or not…being the center of attention scares me!) Let me start by saying, I know how you feel when your project is featured and you have a few minutes of blog-fame and you get super sweet comments from people thoughtful enough to take the time to type a flattering compliment. It’s such a rush! It makes you smile. It makes your day, perhaps even your entire week! Am I right? Take a peek at my feature at one of my favorite blogs (probably one of yours too). If you’re not already a YHL fan, John & Sherry have an amazing blog full of gorgeous DIY inspiration, the coolest design boards and a beautiful home which they have been renovating themselves (and Burger!). It’s one of my daily reads (when I have the time to read daily). Head over and take a look!

Thanks for letting me brag. 🙂

John & Sherry – if you’ve found your way to this post – THANK YOU so much for making my day by featuring my easy-little tray project and for sharing all of your inspiration & creativity in your fun blog! You guys are DIY super-heros!

Oh! Just got a note that it’s also featured on

Apartment Therapy

with a different use in mind (landing strip for kids’ treasures). So cool, huh?

Now back to the regularly scheduled The DIY Show Off. 🙂

Green Project: Wood Art Collage

Hi DIY-ers! Look at this beautiful piece of art made from scraps by Lynn at Nonflammable! Her blog is FULL of creative, unique and beautiful DIY projects with tutorials! I couldn’t help but go through her entire blog … enjoying each one! (Thanks Donna!)

Here is Lynn’s tutorial:

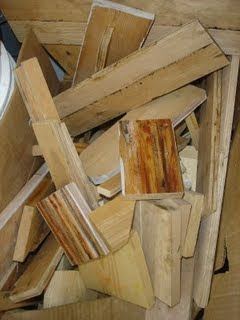
I have an accumulation of wood scraps from various home remodel projects.

Recently, my dad gave me a box of some interesting looking scraps.
Of course i couldn’t say no.
I decided to make a wood collage with them
for a unique art piece to hang near our outdoor dining area.

What you will need for this diy: ½ thick plywood cut to size. assortment of wood scraps/trim pieces paints and stain, optional wood sander miter saw wood glue findings; hardware, kitchen utensils, nails…I left off the fish. Square nails from the 1800’s It comes together better if the sizes and shapes are similar. Working from the outer edges of your plywood to the center allows for a clean finish whether you intend to frame it or not. You may have to layer up as you work towards the middle; the depth adds interest. Make sure you have a general layout before gluing. Use a wood saw towards the end to fill gaps, or layer up. I found it easier to paint after all pieces were in place, and made a frame with cedar left over from our deck remodel. If it hangs outdoors, apply a protective sealant. Embellish your collage with your findings.

WOW! Lynn – it’s beautiful and perfect art work for an outdoor dining area! Awesome job! Thanks for sharing!