I don’t know about you, but I love a good room makeover post. Rachel from Home Sweet Home submitted her beautiful kitchen transformation just in time. 🙂 Here is her letter and post:
Hello!!! We have finished our kitchen and I thought I might just show it off!!! We (okay, mostly my extremely talented father) did all of the work. Tile, flooring, electrical, everything!!! So the only expense was the cost of materials, and we got a great deal on those too!
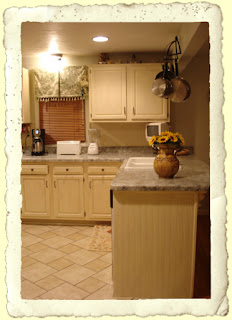
We went with stock cabinets from Lowe’s, and with our military discount, only spent about $2000 on those. The granite tile, we found at an estate sale for (get this!) only $1/sq ft! The flooring, which we put throughout our entire house except the bedrooms, was only $2500. It’s bamboo from Lumber Liquidators. We reused most of our old appliances- just got a new microwave. We had purchased a new dishwasher a couple of months before beginning the project. We spent a total of about $200 on the back splash tile. A bit of a splurge, but most of that is for the beautiful glass tile, and since the counter top was such a deal, we decided to go for it! The faucet was a great deal too…on sale for $100, marked down from $500!
We still have to put in our custom built wine rack (you can see the hole) and put in the hardware, but it is so great to finally have a kitchen back! And it was totally worth the wait!!! How blessed we are to have such a talented family member!!!
I give you…OUR NEW KITCHEN!!!!
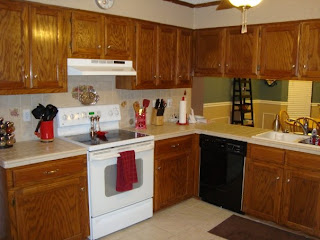
Okay, first, I thought I would remind everyone of what our kitchen looked like before our big project…
This is looking into the kitchen from the dining room.

Here is the view coming in from the living room.

And here is the view coming in from the garage.

This is the hole where our new built in wine rack (that is still being built) will go into:

This was my gift to my husband for being so patient and letting me do pretty much whatever I wanted to our house. 🙂 It is a flip down flat screen TV that is also a Radio, CD player, and DVD player.

Here is the view looking into the kitchen from the dining room.

Here is the new sink area. I love my faucet!!!

Our pullouts in the new pantry cabinets…speaking of…

Here are the new pantry cabinets on either side of the refrigerator. They are great!!!
 Here is the kitchen as you walk into the room from the garage. It hardly looks like the same house!!! It is just lovely now! I am so happy! It’s been a long road, but I am glad we did it!!! We still have to put in the hardware, but other than that, and some more flooring in the bathrooms, we are done!!! Yea!!!!
Rachel – thanks so much for showing it off – lucky you to have a skilled family member. Can I borrow him? I really love the tile (and the deal!) and the beautiful dark cabinets! Awesome job!

 We also painted the walls a very light, sage green. The color is subtle and has a very relaxed feel. We carried the light sage green into the adjoining breakfast nook, after removing the old wallpaper border. I have decided I’m going to install the beadboard wallpaper in the breakfast nook in the near future. I will also add chair rail moulding above it.


