Awesome DIY Kitchen Makeover

I received this note from Kinga and Joseph from BlueLoom about their awesome DIY kitchen makeover.  Sometimes budgets are small but results are HUGE!  Take a look!

When we bought our house, we knew we had to do something about the ugly kitchen from the 70s.

We didn’t want to spend thousands of dollars on a complete renovation, so we decided to do it ourselves.

Total kitchen reno took us more than 2 years but we saved a lot of money. The biggest project was to restore the existing kitchen cabinets which were solid maple, so we were able to send them and apply white paint. See our original blog post here:

http://blueloom.com/index.php?p=93&more=1&c=1&tb=1&pb=1

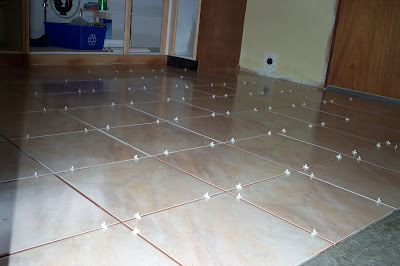
Money saved on cabinets allowed us to hire contractors to install spanish tile floor and new windows.

We did the rest:

  • restored kitchen cabinets and replaced hardware
  • installed the backsplash
  • installed new counter top
  • replaced all light fixtures and added two new ones above the sink
  • removed one kitchen cabinet and installed a dishwasher (originally there was no dishwasher in our kitchen). We also built the new cabinet for the dishwasher.
  • replaced the old trim
  • replaced electrical switches
  • removed wallpaper and painted the kitchen

The sink and faucet were pretty much the only things we kept. 

Here is the kitchen before:

First, we removed all cupboards and hardware.  We used electric sender to send cabinets to bare wood. It was a very time consuming process but eventually saved us a lot of money, and we were pleased with the result.

This is how the cabinets look like after sending. They were ready to be painted.

We applied one coat of primer and two coats of paint and installed new hardware. We also installed backsplash a replaced countertop ourselves (more on that in the near future).
 New tile

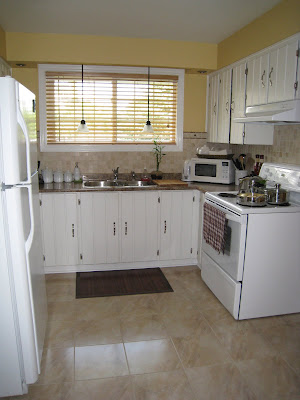
Here is our new kitchen:
Once our window was replaces, we installed two identical light fixtures above the sink. We paid lesss than $100 for both lamps at Home Depot.
New light fixtures
Old cabinets, new look
New table


If you purchased your first home and like us inherited an old kitchen, you don’t need to spend thousands of dollars by putting a brand you kitchen in. We saved a lot of money by painting old cabinets. The only expenses were primer, paint and new hardware.
WOW!  All of their hard work paid off because it’s a beautiful transformation, isn’t it?  Gives me hope for my own old kitchen.  Thanks for sharing Kinga & Joseph!  You guys rock!

——————

This post is brought to you by
 

Feeling a bit cold coming out of the shower? Get a new bathroom radiator from UK Bathrooms

Guest Blogger – Ashli from Maillardville Manor (Kitchen Organization)

Thank you so much to Roeshel for allowing me to guest blog here at the DIY showoff. I have never guest blogged before but jumped at the chance when Roeshel put the call out. Hopefully Niski gets better really soon, I am amazed at Roeshel’s ingenuity, the little Show Off undies and grocery cart, talk about making the best of a bad situation.
For anyone wondering who the heck I am. I’m the author of Maillardville Manor, you may have seen my computer/craft room submission here at the DIY Showoff a couple of weeks ago. I live in British Columbia Canada with my husband (who does all the heavy lifting here at the Manor and painting for that matter), and our dog Max (a 4 1/2 pound yorkshire terrier with an attitude). Maillardville Manor is about decorating, budgeting, pets, and eco friendly living, with a strong undertone of organization, and no where in our house needed more organizing then our small kitchen.
We have a good amount of cupboard space for a small kitchen, but we also cook a lot and those cupboards filled up fast.
We received a beautiful set of pots and pans as a wedding gift and we wanted to make sure they stayed beautiful. We didn’t want them clanging around in a drawer or cupboard getting scratched and dented along the way. Our little kitchen had no room for a traditional pot rack so we improvised using an Ikea hat rack and some S hooks. The result was a very functional statement in our kitchen.
The next item on our to tackle list was our pantry or lack there of one. We bought a plain jane cabinet from Ikea and purchased two Akuram glass paneled doors, voila we had a pantry. We lined each shelf with pretty green shelf liner and then neatly stacked our food inside (I say neatly because with glass front doors I’ve pretty much dug my own grave).
With our leftover shelf liner I thought it wise to line under the sink, we keep our garbage under our sink and enough said. Our garbage cans are from Ikea’s Rationell Series, as is the pullout shelf. We keep all of our cleaning products on that little pull out shelf (a.k.a. the best $20 I ever spent). The garbage and recycling bins fit nicely and leave just enough room for a few bottles of dishwasher liquid.
Our dining room barely fits a table and 4 chairs so the idea of a sideboard or hutch is a pipe dream to us. So we pared down and organized the rest, determined to make all of our dinnerware fit into one cabinet. We invested in like items, meaning all of our dinner plates are the same, so they would stack together neatly. Likewise for our side plates, and drinking cups, they all fit perfectly aligned, side by side. We consigned all of our mismatched wine glasses and invested in a set of crystal goblets and flutes. We chose white ceramic for everything because then matching wouldn’t be an issue, we could buy the pieces that fit our cupboard and not be stuck with a set containing matching platters or bowls that don’t fit anywhere.
To round out the kitchen I have two favorite products I love to use and display. The first is a drop in dish rack. We hand wash our knives and larger items and having the dishes drip dry into the sink and not on the counter was a $2.48 luxury I wasn’t going to pass up.
And second would be my two ceramic bowls with little ceramic lids, perfect for serving and storing. Both were from Target recently, however both were on clearance so I have no idea what their availability is like.
There’s our kitchen, what’s the saying “an apple a day keeps the doctor away” well in our case a little organization keeps the metal health professional away. Anything to make the morning run smoother is worth my time and energy.
Thanks again Roeshel for having me here on the DIY Sho
woff, I hope you’ll come visit me over at The Manor and  as always well keep Niski in our thoughts and prayers for a speedy recovery.
 —
Isn’t that refreshing?
Have you stopped by to see Ashli’s Home Tour?
Get inspired!
Thanks Ashli, for sharing your beautiful kitchen and organization tips with us!
I was inspired the minute I read it.  Mr. DIY was so thrilled (he does the cooking) because I went straight to the pantry and re-organized it all.  Once we get busy with the kitchen remodel, I’ll be using your post as reference!  🙂  Thanks for the motivation!
~*~*~
This post is brought to you by
How much more usable living/storage space could you have with an under deck drainage system?

71 Toes ~ Home Tour

I recently was introduced to a new blog (thanks Kristy!) and not only am I excited to feature her beautiful home with gorgeous pictures, I admire her faith and strength.  Meet Shawni from 71 Toes.  You’ll want to take the time to browse her blog full of beautiful photography and great stories and to learn more about her and her amazing family but in the meantime, I’d love to show off her home and before and after projects.  Prepare to fall in love (of course with her home, but with her family as well!)  Here goes!


Family Room/Kitchen

Our family room/kitchen went from this:
to this:

…and the view coming from the other direction went from this:to this:
The dining nook went from this:
to this:(For more about that map, click here.)

And the family room took a lot of different looks before we really decided what we wanted. It went from this:

to this:
to this:
and finally to this:
I had some of my favorite places printed up on canvases to add some color:
(The top one is Wellesley College, middle is Bear Lake, and the last one is Utah.)

And you can read about the saga of making our family motto here.
Anyway, it’s finally done, and we love how bright and light it feels.

Kitchen

So, here’s the kitchen for now:Oh my word I love white cabinets.

Especially when they used to look like this: Room Change
(More to come but here’s a sneak peek):

It’s taken us a while to transform this:…into this:
 
Entryway
So, our entry way started like this:

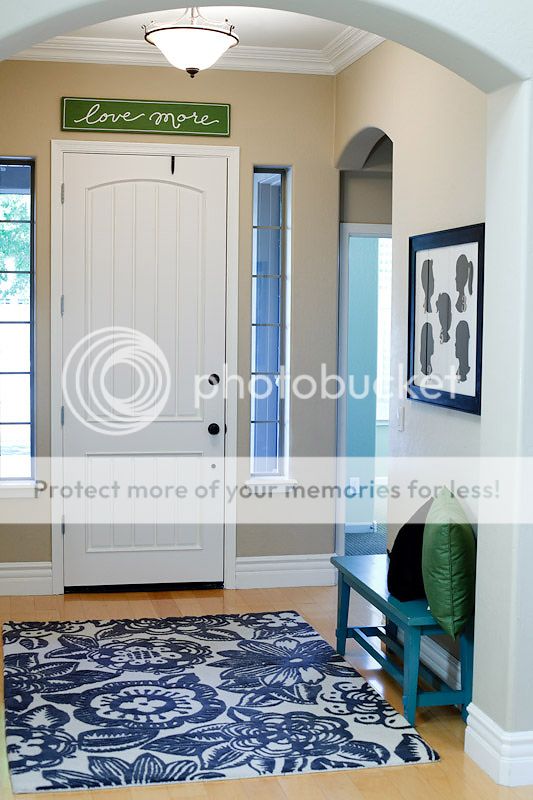
Then we painted the door almost black way back when (this is the only picture I have for some reason):The “Love More” is just something I put up there because it has some special meaning in our family…and who doesn’t need a little reminder to “love more” once in a while?

After our “spruce-up” we ended up with this (although that archway is NOT blue…not sure why it looks like that):

And here it is with a little of the dining room in there too…before I finished those window pane thingys:
My favorite part? (Aside from the fact that it’s bright and light and has that rug that I love sitting there for me to walk by all day long):

This thing:
More details on the DIY art here!

Dining Room
This was our dining room a long time ago:
It held no furniture for YEARS (but it was a great dance/gymnastics room).

Then we finally filled it up:
And spruced it up a little bit with this molding:
Here is the finished product from one angle:

And here it is from the other direction:
(This is where we have Sunday dinner.)

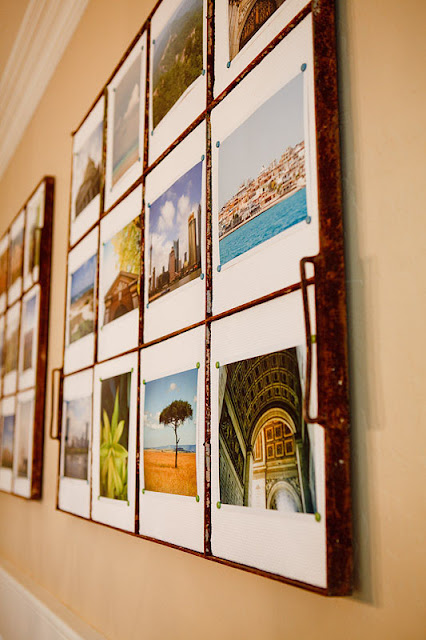
That wall over yonder is my favorite part. Denise saw these old, rusty window panes at this antique shop and told me I needed them. She has vision. I do not. (I love her.)

Dave’s comment when he saw those heavy metal things was that we needed to make sure we were all caught up with our tetanus shots.

But I LOVE how they turned out.

Denise had the idea to put a bunch of dining stuff in each frame, but I could never find enough stuff, so I got foam core board cut to fit in each frame, covered each one with white coarse linen, and stuck in pictures of places we’ve been (you know how I salivate over traveling the world). We like to talk about those places over Sunday dinner. And it means something to all of us.

Her “sprucing up” journey began HERE.

Before

After

Shawni – thank you!  You and your family are such an inspiration.  I don’t know where you find the time to fit in DIY or “sprucing up”! Thank you for showing off your gorgeous home and style and sharing your beautiful spirit through your inspiring blog and story.  
More awesome posts by 71 Toes that you should check out:
Walls 

The Inspiration behind 71 Toes ~ here.

 theilovelucyproject