This way! Check out these sweet little girls’ rooms! I love all things pink and feminine. These are both too cute!
First, I love the details (look at her cool headboards!) in this pretty shared girls’ room from Pam at Bibbidi Bobbidy Beautiful! Her story about her husband’s painting cracked me up too! Here is her post:
Here’s the before:

And the after!
It’s finished! Well, sorta finished. Almost finished. Just a few little… Aw, who am I kidding- you know I’m gonna tweak this one till they’re in college! Like that little space between the top of the window frame and curtain rod- don’t you think vinyl lettering that says “SISTERS make the best friends” would be sooo cute?! The bedding is called “Spring Tulip”. My dear friend, Becky helped me pick it up while it was on uber sale at the pottery barn outlet near her house last year. I lucked out and found the drapes on eBay a few months ago. I got the vanity for free on freecycle and I picked up the chair at our neighborhood yard sale and refinished it in this post. I made the roman shades with instructions from my girl, Jenny at Little Green Notebook (by the way, she just finished her little girls’ room too and it is sooooooo fabulous!)
At the foot of each bed is a little modular shelf thingie from Ikea (from a zillion years ago- used to belong to a friend in college) that I’m using as a little storage bench for books. I topped each with a little cushion I made by slipcovering a 1″ piece of foam. I kinda cheaped out on the foam, but I guess they get the job done. I’ll beef them up when I can get a better deal on the foam. Oh, and the rug was $40 (I think?) at Sam’s club. 
I was hoping to find some Jenny Lind style headboards on CL, but so far I haven’t had any luck. I found these white ledge shelves at goodwill for $3 each and figured that could take the place of a headboard until I found some that I liked. Once they were in place I remembered this photo (I think it’s from BHG?)
And got excited because I had similar looking cushions that I thought would fit the bill sitting in the top of the closet. They were the first incarnation of the bench cushions, but I forgot that they would pull in when they were stuffed and they came out too small for the benches. They happen to be the perfect size to hang under the ledges. Hooray for happy accidents!
I blogged about the artwork here and I just added the little potted tulips and framed initials. The “pots” for the tulips are little buckets I found at the dollar spot in Target. I found wooden tulip cut-outs at the craft store and covered the stems in ribbon and the flower part in scrapbook paper. I stuck them into a piece of styrofoam in the pot and covered the top with moss. Easy, peasy. To make the framed initials, I used my embroidery machine to embroider the initials onto scrapbook paper (yes, it can embroider paper!) but could have just as easily cut the letters out of scrapbook paper and layered over another sheet. I painted the green part of the walls and my hubby, the fine artist, humbled himself to paint the ribbon effect border. He really does not enjoy any kind of painting that is merely decorative. 
Wanna know something really funny?! I originally suggested to my hubby that perhaps as a substitute for headboards, he could paint a trompe l’oeil mural of a headboard onto the wall behind each bed. It took some nudging, but he eventually agreed. He went off with his sketchpad to figure out what he wanted to do. He emerged a while later, excited to show me his ideas. I took one look and started laughing. I was sure it was a joke. You see, he had sketched out this crazy scary gothic bed with hypogryphs, dragons and griffins perched on the bed posts. It was terrifying. I’m not exaggerating, there really were dragons… and griffins! AND hypogryphs!! Oh, MY!! In true artiste style he said something to the effect of, “If you don’t like
it, that’s just fine!” and stormed out of the room. I tried not to, but that made me laugh even harder. Oh, dear god. He actually thought we would paint dragons and griffins on the wall of our three-year-old daughters bedroom!! Um, hello? Nightmares?! Ever wonder what in the world is going through your man’s head?! After he calmed down he explained that the gargoyles and griffins would protect her while she slept. Okay, that’s pretty sweet, but what’s the matter with guardian angels?! Apparently, I haven’t read enough fantasy novels. I told him if he wanted to paint medieval/mythical creatures in our home he’d have to wait until we have a boy. Anyway, back to the room at hand… Here’s the opposite wall. I’m not in love with this arrangement on the wall, but it took some doing to get that shelf hung, so it’s staying, at least for a little while. 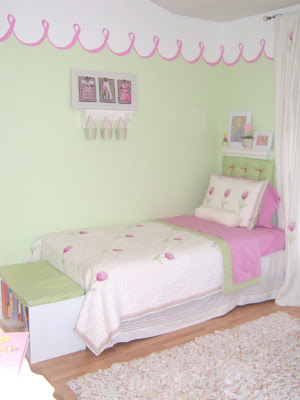
I found the shelf on a recent goodwill run, and the little painting of the dresses was a Homegoods find. There are a few more of the Target pails on the pegs for hair do-dads and such.

The dresser was my husbands in his single days. It used to be brown but I spraypainted it white. I really wanted to change out the hardware, but between the serpentine shape of the drawer fronts and the non-standard widths of the existing drilled holes, I gave up the search and decided instead to use this ribbon that I already had in my stash. The mirror was another Homegoods find (I just added more ribbon) and the crosses and knick-knacks were all gifts. I know the yellow ducky lamp doesn’t quite fit the color scheme in here, but my aunt made him for me in her ceramics class when I was a baby, so I’m not painting him. He did get a new shade.

By the way, in case you were wondering who was peeking down from that ledge up there, here’s a better look…
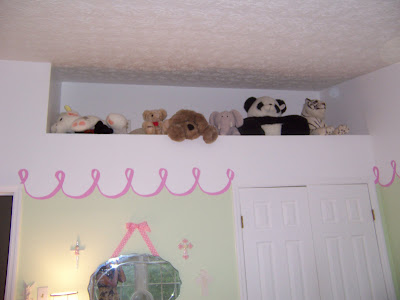
What in the world is the point of this weird little space? You can’t really tell in the photo, but it’s really high. I risked life and limb standing up on the dresser on my tippy toes to get those guys up there. And there’s an electrical outlet up there! What in the world might someone possibly plug in up there?!
ACK! No sooner did I finish that sentence than I realized I could plug in a cute chandelier up there and swag it over towards the center of the room, right?! Hmm….
Or if we ever have a Duggar sized family (breathe Boogie, I’m only kidding!) we can put a mattress up there!
I’ll leave you with one more little Homegoods find…

Then – there’s this cute little girl’s room. Check it out at 3 Bundles for Me. I love the wall words, pretty shade and the bedding. It’s so pretty! Here is her post:
Poor G, she has been in her room for 2.5 years and we had yet to do ANYTHING with it. No paint, nothing. This is the before:
It was a baby room. With rocker, random flower decals that made sense when it was E’s room and a changing table.
Also, if you look closely, you’ll see in the two corners where the pink paint looks two colors. This is where the previous owner tried to touch up cracks with the wrong color pink.
Here is the after:
The view into the room from the hall
I love that I can see this decal from the hall. G’s story makes this the perfect quote.

We chose Pink Persuasion from Lowe’s Valspar Low VOC line. It is bright, but beautiful.


The polka dot decals are also from Etsy.
This wall is still a mystery. I think I am going to do a large Monogram of G’s name or a quote. (I welcome any suggestions!)
Some of my thoughts are:


I don’t really LOVE either of these. But they are both cute and would look nice.

This is a Pottery Barn changing table that I got as a great deal. I love it, but need to figure out how to get convert it to a regular dresser. I bought it because it was convertible but now I can’t figure it out! The buckle is hiding under the picture. 🙂

 Pottery Barn Bedding & G’s little corner to play with her house. The budget was slim, and I spent a total of about $60 on the polka dot decals and the quote. Everything else was something I had laying around. The paint (and supplies) came from Lowe’s with a gift certificate from credit card rewards.
GREAT JOB LADIES! THANK YOU SO MUCH FOR SHARING!
Do you have a makeover to show off?
Email me at thediyshowoff.blogspot.com


 Jewelry Organizer from The Crafty Clique

 And so does my guest room.


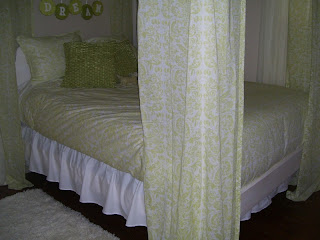


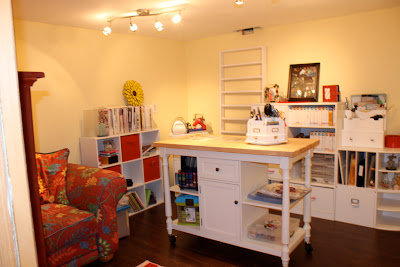


 After
After


