Staying in the Closet – It's Reading Nook!

I‘m currently organizing a closet but when I saw this one, my jaw dropped.  I want a reading nook in my closet!  lol  Check out the gorgeous makeover from Brittany at Pretty Handy Girl.  Here is her post:


This past weekend my husband took the boys camping. A free weekend – by myself – peace and quiet!
(insert sound of hammers, jigsaw, table saw, and more hammering)

Well, forget the quiet part, I decided to tackle another DIY project I had been thinking about for almost two years. I first got the idea after seeing this photo in Creative Home Magazine:


Kym, the homeowner, had turned her son’s closet into a private nook. I thought, no problem, I’d complete this project in an easy 2 days. Afterall, how long can renovating one 6′ x 2′ closet take? During stopping points I could squeeze in a pedicure, swim some laps and possibly have a friend over for wine and some chat one evening.  Truth be told, it ended up taking a full 3 days (and nights)!

So, here is the abbreviated (press fast forward on the remote) version:

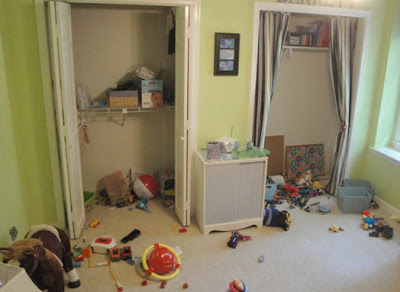
My three year old has two full size closets in his room. And, yet, his toys were always strewn around the room. Here is my “keeping it real” BEFORE picture:


Last year I took the doors off one of the closets and put up some curtains so he could have a little hideaway.

First task (after cleaning up all those toys, of course!) was removing hardware, demolition and patching holes (where I found I didn’t know my own strength.)


Phew, glad that is done. Now comes the fun part, time to build!

First I cut all my wood to size, then built two frames. One for the base and one for the bench.


The base frame only had one center support since it didn’t have to hold much weight. The bench seat frame had two center supports at 2′ intervals.

I bought paint quality (almost smooth) plywood for the tops of the base and seat frames.

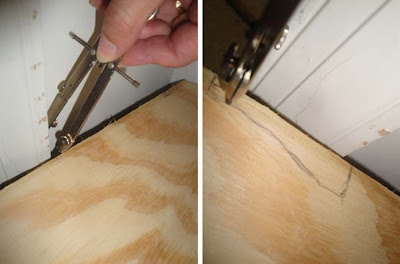
Here is a little trick I learned for scribing the profile of trim or other obstacles onto your board. In this instance, I used a compass and set the width to the same distance from the wall to the outside of my door casing. Then drew a line around the casing being careful to keep the compass perpendicular to the casing. Then you can cut out the profile with a jigsaw or coping hand saw.


See, perfect fit!


Next I built the second platform the same way (with the exception of the extra center supports.) I highly recommend priming as much of the wood as you can before nailing it into place. It is easier to prime wood on sawhorses.

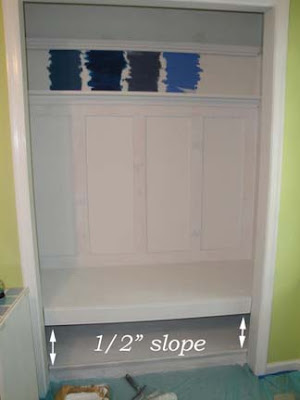
I pulled out my levels (both a carpenter’s level and laser level) and carefully leveled my bench platform before nailing it in. Then I used framing nails to nail the platform into the studs in the closet. (I promise to post about finding studs at a later date.)


Seriously, I really did level it! I even have the pictures to prove it! Because, at some point the right hand side of the bench must have shifted while I was nailing, which resulted in a slight slope. Shhhh, don’t tell anyone! My lesson learned is that next time I will either screw the frame in place to hold it or put a brace underneath to keep it from slipping.


Somewhere during the process, I cut the foam cushion for the bench seat. If you haven’t heard, the best way to cut foam is with an electric carving knife! (Huge thank you to my friend and neighbor Karen for the use of her 1970’s electric carving knife.)


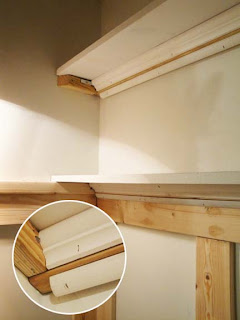
Next I installed all the moulding, wainscoting and trim. Did I mention that I bought all my trim and decorative moulding at the Habitat for Humanity ReStore? Super cheap at $.50 (yes, 50 cents!) per linear foot! My total for all the trim was $18, and I still have two 6 ft. pieces left.

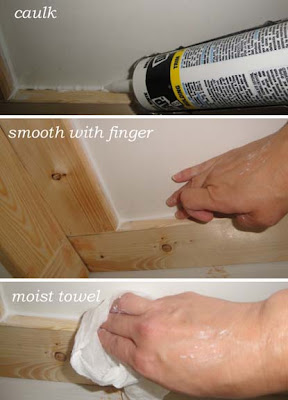
Before I could prime I had to caulk all the seams. Did you know that some of the moulding in your home, especially crown moulding, is usually made up of several different pieces and then caulked to hide the edges?


This is the Pretty Handy Girl’s tried-and-true caulking method:

  1. Squeeze out your bead of caulk. 
  2. Run your finger along the bead to smooth it (then wipe your finger off on a rag.)
  3. Follow up with a slightly moist paper towel for a super smooth finish!

Once the caulk dried, I primed all the wood and wainscoting.

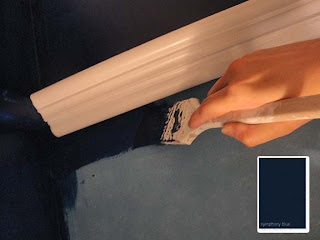
After trying some Benjamin Moore paint swatches, I settled on a deep navy blue called “Symphony Blue”. I knew I’d need to use some tinted primer before trying to paint such a dark color on the light walls. Unfortunately our Ace Hardware was out of stock. Luckily George, my friendly Ace Hardware paint consultant, told me how to mix my own.


Isn’t the marble effect pretty! I used 1 part paint to 3 parts primer and stirred it up really well.

Once everything is dry, the painting can begin. I always use two coats of paint. The only time I got away with one was by using Benjamin Moore Aura paint in our living room. But, I was going from a medium green to a slightly lighter green. Not a major change in color.


So, are you ready?? The drumroll please…

 Can’t you hear the Symphonic Chords playing?

The copper wall sconce was also from the Habitat for Humanity ReStore. I scored that gem for  only $5! It has a cord that I snaked around the moulding and then plugged into the outlet just outside the closet. A tutorial on re-wiring the copper sconce with a white cord and adding a switch is poster here.

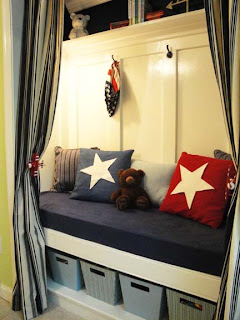
 Plenty of storage bins for all the toys a three year old can hoard.


Finally, a nook built for reading, sleepovers…


…or just hanging with big brother.

Isn’t it awesome?  I think it’s fantastic.  You did an amazing job Brittany!  Thanks so much for sharing your hard work.  The colors and organization is so cool, the wainscoting is gorgeous and I love that bench and those cute pillows!  Great way to take a closet and turn it into the coolest brother hang-out ever!
Pretty Handy Girl Blog

71 Toes ~ Home Tour

I recently was introduced to a new blog (thanks Kristy!) and not only am I excited to feature her beautiful home with gorgeous pictures, I admire her faith and strength.  Meet Shawni from 71 Toes.  You’ll want to take the time to browse her blog full of beautiful photography and great stories and to learn more about her and her amazing family but in the meantime, I’d love to show off her home and before and after projects.  Prepare to fall in love (of course with her home, but with her family as well!)  Here goes!


Family Room/Kitchen

Our family room/kitchen went from this:
to this:

…and the view coming from the other direction went from this:to this:
The dining nook went from this:
to this:(For more about that map, click here.)

And the family room took a lot of different looks before we really decided what we wanted. It went from this:

to this:
to this:
and finally to this:
I had some of my favorite places printed up on canvases to add some color:
(The top one is Wellesley College, middle is Bear Lake, and the last one is Utah.)

And you can read about the saga of making our family motto here.
Anyway, it’s finally done, and we love how bright and light it feels.

Kitchen

So, here’s the kitchen for now:Oh my word I love white cabinets.

Especially when they used to look like this: Room Change
(More to come but here’s a sneak peek):

It’s taken us a while to transform this:…into this:
 
Entryway
So, our entry way started like this:

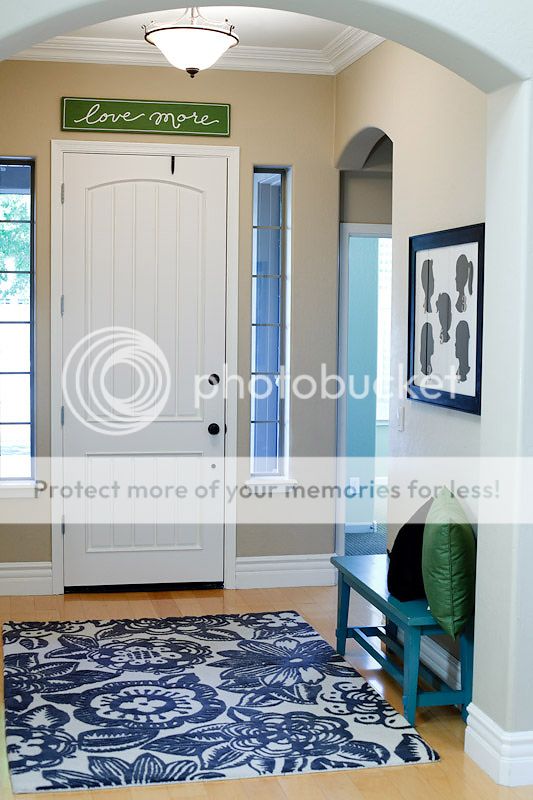
Then we painted the door almost black way back when (this is the only picture I have for some reason):The “Love More” is just something I put up there because it has some special meaning in our family…and who doesn’t need a little reminder to “love more” once in a while?

After our “spruce-up” we ended up with this (although that archway is NOT blue…not sure why it looks like that):

And here it is with a little of the dining room in there too…before I finished those window pane thingys:
My favorite part? (Aside from the fact that it’s bright and light and has that rug that I love sitting there for me to walk by all day long):

This thing:
More details on the DIY art here!
Dining Room
This was our dining room a long time ago:
It held no furniture for YEARS (but it was a great dance/gymnastics room).

Then we finally filled it up:
And spruced it up a little bit with this molding:
Here is the finished product from one angle:

And here it is from the other direction:
(This is where we have Sunday dinner.)

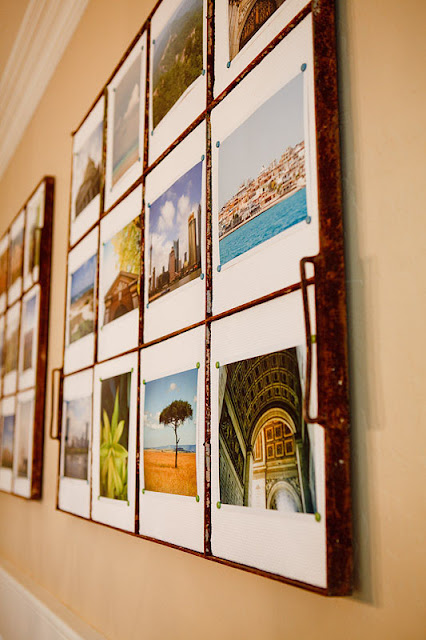
That wall over yonder is my favorite part. Denise saw these old, rusty window panes at this antique shop and told me I needed them. She has vision. I do not. (I love her.)

Dave’s comment when he saw those heavy metal things was that we needed to make sure we were all caught up with our tetanus shots.

But I LOVE how they turned out.

Denise had the idea to put a bunch of dining stuff in each frame, but I could never find enough stuff, so I got foam core board cut to fit in each frame, covered each one with white coarse linen, and stuck in pictures of places we’ve been (you know how I salivate over traveling the world). We like to talk about those places over Sunday dinner. And it means something to all of us.

Her “sprucing up” journey began HERE.

Before

After

Shawni – thank you!  You and your family are such an inspiration.  I don’t know where you find the time to fit in DIY or “sprucing up”! Thank you for showing off your gorgeous home and style and sharing your beautiful spirit through your inspiring blog and story.  
More awesome posts by 71 Toes that you should check out:
Walls 

The Inspiration behind 71 Toes ~ here.

 theilovelucyproject

Bit of a Home Tour at Sixty-Fifth Avenue

Looking for some inspiration to motivate you to dive into your next DIY home project? Londen from Sixty-Fifth Avenue submitted her before and after living room and play room. Both are a-mazing!

Her Pottery Barn inspired playroom is a near twin. She did a fantastic job!

Pottery Barn Kids Playroom Remake

We were starting to be taken over by toys in the living room so a playroom was definitely in order. After looking for inspiration for the design, I found one in the Pottery Barn Kids catalog. Forget inspiration at this point, I loved everything about it and knew I wanted to recreate it but on a budget.
This was my inspiration picture….. I mean picture I wanted to copy.

And this was the small room I had to work with.

I was not looking forward to painting over those dark walls. I read that the Aura paint by Benjamin Moore would be perfect for this project and it was. It covered the dark paint with 2 coats and no primer! It was awesome!

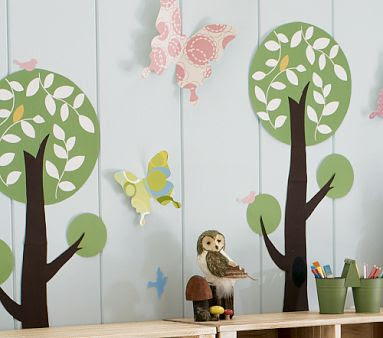
Next I commissioned my sweet husband to paint the trees and a few birds. I showed him this picture and he went to work.

Pottery barn was charging $100.00 for one decal!

My handy Dad built a couple of bookcases for the room. This was his first time building furniture and they turned out great! These were a perfect first project because I was painting them. I only needed three tubes of caulk! Just kidding, only two! Love ya Dad!

There is a closet on the side wall so the bookshelves are not centered.

This dream house lived in the playroom until Santa brought the little one her very own train table. She is Thomas the trains #1 fan for over 2 years running. My dad to the rescue made the table.

On the other wall I made this butterfly art with a punch and a bunch of old magazines.

Not very easy to photograph.
WOW! Isn’t it amazing? The wall mural is nearly exact and so darling. My favorite part is the DIY butterfly art – gorgeous job, Londen!

Her living room is beautiful too!
Check it out:

Living room before and after

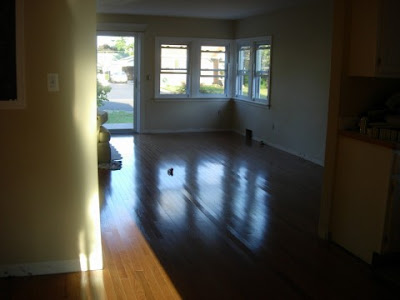
Here are a few before pictures looking from the kitchen into the living room. When we bought the house it had pink carpet, pink walls and a small doorway between the kitchen and living room. Two ceiling fans were practically on your head and ugly metal awnings on the windows.
About an hour after we got the keys the first thing to do was rip those awnings down! That weekend we opened up the little doorway.

Neutral carpet was installed until we were able to afford hardwood floors.
You can read about that here.

We scored the new wood front door for $100.00 because it was a canceled order.
The stereo speakers are hiding under the two skirted end tables.

This dresser is one of my favorite pieces of furniture. The mirror I found at the flea market in Paris and carried it all the way back to our hotel in the rain. I fell in love with a chandelier for my dining room, but passed it up because I didn’t do my research about shipping things home. I regret it all the time, it was so cool!
Awesome, right?
Thanks so much for sharing, Londen!
I LOVE both transformations!